Statenjacht 1678-Kolderstok 1:50

Oh my, it's almost been a year since that black day in the shipyard when I stopped working on the Statenjacht so I think it's time to continue with the build.
Trying to remember where I was a year ago on the build was interesting. (Especially since I sometimes can't remember what I had for lunch the previous day)
Oh yes, now I remember, I was working on some of the fiddly parts. :confused:
As you well know the Dutch liked to embellish/beautify their ships with ornamentation and the Statenjacht certainly falls into that category. I guess that's one of the reasons I chose this ship.
I have Pietsan's build log on my computer and refer to it quite often. One of the items I'm working on Piet lists as a growl or growler. Not sure if that is the proper spelling so maybe Heinrich can enlighten me as to the correct name.

This is from Piet's log and shows the location.
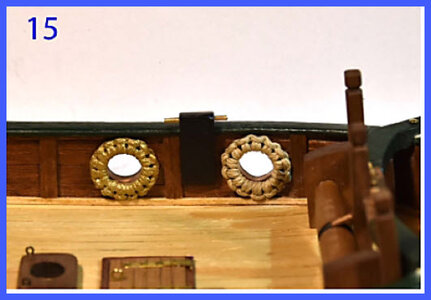
01_Piets (2).jpg

The next step was to attempt to duplicate these. Thankfully Piet has a very comprehensive set of instructions on how to construct them.

This picture is just one of 15 showing how. It's basically a series of half hitches around a circular ring which
in this case, is a rubber O-ring of the appropriate size to match the hole in the resin piece.
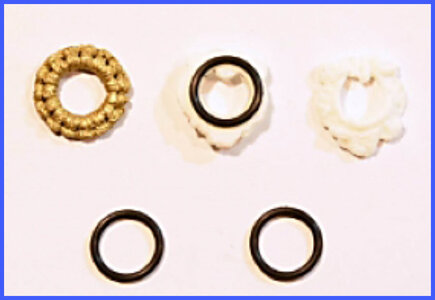
02_Piets w_rings.jpg


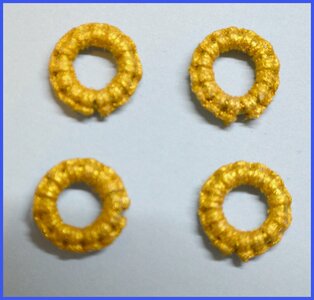
This is my "Practice" piece using some waxed thread around a steel ring and my first attempt at scale.
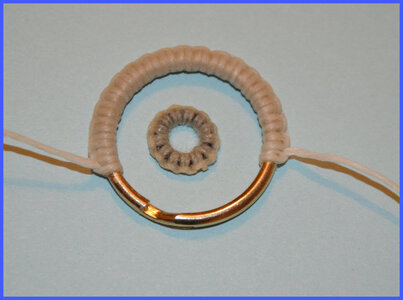
03_Test piece.jpg

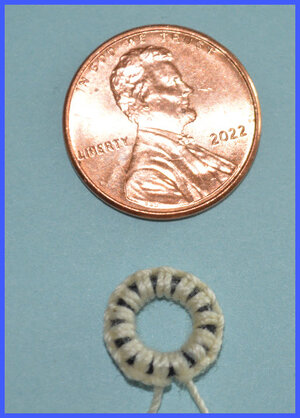
My second attempt using the rubber O-ring. Other than my fingers being too large it isn't that difficult once you get into some sort
of rhythm. I just have to remember to alternate between one pass up the rabbit hole and the next pass down the rabbit hole. :rolleyes:

I'll coat with
diluted glue, snip off the ends and paint gold. Only 3 more to go.
Without Piets log I would
certainly be at a loss on how to make these.
04_2nd Attempt.jpg
 
That is great work, Ron! (In the Historische Modelbouw section, Piet also has a thread called "Tips en Weetjes" which offer inavluable advice on a variety of things).

Once you have painted those rings gold, it will look like a million gulden!
 
Excellent work, Ron! To me those wreaths are beyond "fiddly" so I would be most interested to see what you call "more fiddly"!
 
Excellent work, Ron! To me those wreaths are beyond "fiddly" so I would be most interested to see what you call "more fiddly"!
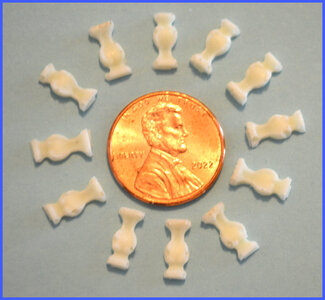
These are the resin cast pieces supplied with the kit to form the balusters supporting of some of the deck railings.
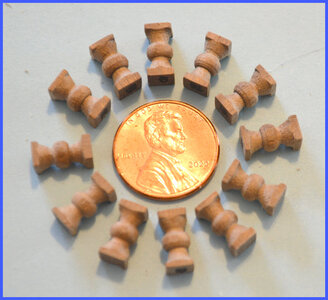
Not too happy with the quality of these (sorry Hans) :( so I may grind a tool bit to shape and turn these from walnut. (Maybe)

Now if you want my Idea of real fiddly parts one has to just look at the San Bartolommeo kit which several members are doing a fantastic job constructing IMHO

MORE FIDDLY ;)
Fiddly.jpg
 
Hi Ron. I will probably be shot for this, but my jury has not yet reached a verdict about the SB. Somehow the design seems too restrictive in the way that the model goes together for my liking.
 
Hi Ron. I will probably be shot for this, but my jury has not yet reached a verdict about the SB. Somehow the design seems too restrictive in the way that the model goes together for my liking.

I’ll probably join you on the wall.
When I first saw the SB kit and the myriad of parts associated with it and its construction technique I knew it was well beyond my skill set.
I admire those like Jan who have taken on the challenge.
 
I’ll probably join you on the wall.
When I first saw the SB kit and the myriad of parts associated with it and its construction technique I knew it was well beyond my skill set.
I admire those like Jan who have taken on the challenge.
Jan is doing a fine job indeed!
 
I’ll probably join you on the wall.
When I first saw the SB kit and the myriad of parts associated with it and its construction technique I knew it was well beyond my skill set.
I admire those like Jan who have taken on the challenge.
Jan is doing a fine job indeed!
Aw, you guys make me blush. I'm just bumbling along, a little bit here and a little bit there.

Jan
 
These are the resin cast pieces supplied with the kit to form the balusters supporting of some of the deck railings.
Not too happy with the quality of these (sorry Hans) :( so I may grind a tool bit to shape and turn these from walnut. (Maybe)

Now if you want my Idea of real fiddly parts one has to just look at the San Bartolommeo kit which several members are doing a fantastic job constructing IMHO

MORE FIDDLY ;)
View attachment 387855
Good morning Ron. Your “growlers look awesome. Cheers Grant
 
No new pictures to post as yet however I have been busy prepping several of the more fiddly parts for assembly.
It seems I’ve taken a page from Grant and have many things going at once. What fun!

I have a slight bow in the mainmast dowel which hopefully I can straighten tonight. Difficult to taper when it flops around as it’s rotating.

Thankfully I have Pietsan’s log to go by as the pictures supplied in the kit don’t show a lot of the detail that I’m currently working on. I had one of those moments today. I have Piets log up on my desktop and finally downloaded it to my iPad so it is close at hand instead of walking to my office area for viewing. (Although I can use the exercise) It will give my laser printer a rest from printing out reams of pictures. The only downside is my desktop translates to English the iPad doesn’t (It will but it’s cumbersome) As they say, a picture is worth a thousand words.

Hopefully I’ll have pictures to post soon.
 
It's gr
No new pictures to post as yet however I have been busy prepping several of the more fiddly parts for assembly.
It seems I’ve taken a page from Grant and have many things going at once. What fun!

I have a slight bow in the mainmast dowel which hopefully I can straighten tonight. Difficult to taper when it flops around as it’s rotating.

Thankfully I have Pietsan’s log to go by as the pictures supplied in the kit don’t show a lot of the detail that I’m currently working on. I had one of those moments today. I have Piets log up on my desktop and finally downloaded it to my iPad so it is close at hand instead of walking to my office area for viewing. (Although I can use the exercise) It will give my laser printer a rest from printing out reams of pictures. The only downside is my desktop translates to English the iPad doesn’t (It will but it’s cumbersome) As they say, a picture is worth a thousand words.

Hopefully I’ll have pictures to post soon.
It's great to see you hard at work on the Statenjacht. That is one of the, if not the most beautiful of all Kolderstok's models.
 
Good morning Ron. ….that it is… :D.
I’m not sure if it has been Heinrich influence ;), but there are a couple of Dutch ship builds going on at the moment which is awesome. Cheers Grant
Originally I had planned to build the WB and can not say Heinrich didn’t have some influence on my decision. We had some friendly banter going on between us regarding Swan or no Swan :)
I then discovered the Statenjacht and really fell for the ornamentation on the State Yacht. I’ve recently returned to the project after a year off.
 
This is incredibly good work, Ron - I know exactly how small those little pedestals are. I am sure that this will enhance the looks of the Statenjacht accordingly; you can be very happy with those!
 
Ron, the balusters are a huge improvement over the resin ones supplied with the kit. What kind of mini lathe do you use? Nicely done, Magic Mike
 
Back
Top