Statenjacht 1678-Kolderstok 1:50

Joined
Jul 8, 2018
Messages
885
Points
403

Time to reopen the doors to the shipyard and get started with a build log.
I originally planned on the Willem Barentsz as my next build after the Speeljacht and I do have the kit on the shelf.
What changed my mind to go with the Statenjacht were a few things.

(1) I really like the lines of the ship
(2) Single main mast as opposed to the three masted Barrentsz means less rigging to deal with. Hats off to you first rate builders of First Rates.
(3) Probably the biggest reason is that I really like the “luxury” of the state vessel with all its ornamentation, lower deck layout and furnishings. How can you go wrong with a ship with a fireplace?
(4) I’m really not into multideck vessels with dozens of cannons. Again, hats off to those that do.

That’s the great thing about this hobby. There is something for everyone.

01_dry fit bulkheads.JPG
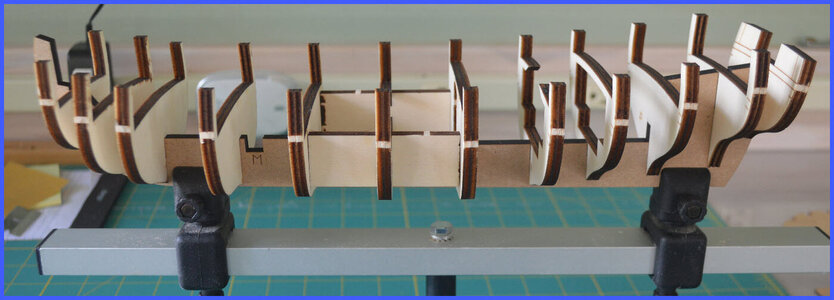
Dry fit of the framework. 6mm MDF False Keel with 6mm plywood Bulkheads. Everything was right & tight. Something I've come to expect with the Kolderstok kits. No sanding/filing required.

03_Never enough clamps.JPG
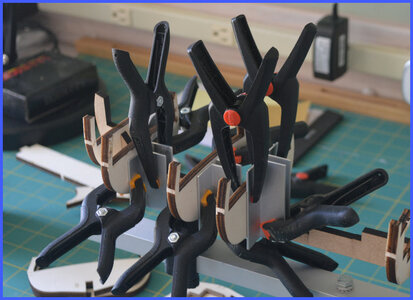
As every builder knows, you never have enough clamps. I use pieces of aluminum angle for squaring as opposed to Lego blocks.

04_Squaring Fixture.jpg

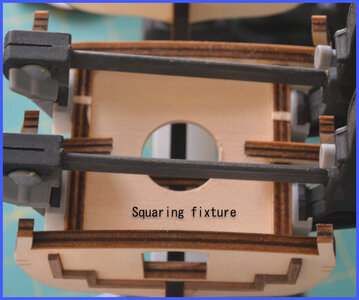
3mm lite ply fixture to keep everything nice and square. (No not included in kit)

I doubt if I'll post a step by step build, rather try to hit the main parts of the construction.
Any questions, just ask.
 
Dear Ron - I am so happy to see that you have started a build log of the Statenjacht. I agree with you on all the points you have mentioned, although lately I have taken quite a liking to one of those multi-deck, 100+-gun, fictional jobbies - must be senility setting in. The Statenjacht is a beautiful ship and I will be in the front row, Seat #1 to follow along. I wish you everything of the best with the build!
 
Time to reopen the doors to the shipyard and get started with a build log.
I originally planned on the Willem Barentsz as my next build after the Speeljacht and I do have the kit on the shelf.
What changed my mind to go with the Statenjacht were a few things.


(1) I really like the lines of the ship
(2) Single main mast as opposed to the three masted Barrentsz means less rigging to deal with. Hats off to you first rate builders of First Rates.
(3) Probably the biggest reason is that I really like the “luxury” of the state vessel with all its ornamentation, lower deck layout and furnishings. How can you go wrong with a ship with a fireplace?
(4) I’m really not into multideck vessels with dozens of cannons. Again, hats off to those that do.

That’s the great thing about this hobby. There is something for everyone.


View attachment 311780
Dry fit of the framework. 6mm MDF False Keel with 6mm plywood Bulkheads. Everything was right & tight. Something I've come to expect with the Kolderstok kits. No sanding/filing required.


View attachment 311781
As every builder knows, you never have enough clamps. I use pieces of aluminum angle for squaring as opposed to Lego blocks.


View attachment 311782

3mm lite ply fixture to keep everything nice and square. (No not included in kit)

I doubt if I'll post a step by step build, rather try to hit the main parts of the construction.
Any questions, just ask.
Good Morning Ron. Nice! Looking forward to your build. Cheers Grant
 
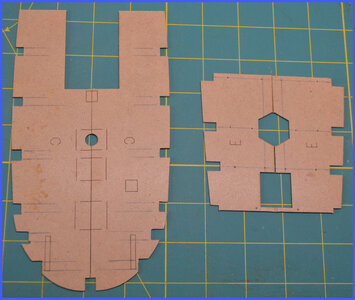
These are the sub decks as supplied in the kit. 1.25mm of pressed material maybe MDF. what I don't like is the split down the middle which I am sure is there to aide in inserting between all the uprights. Being split in the center leaves a high spot at the crown to deal with when gluing in place.
21_kit supplied sub decks.jpg
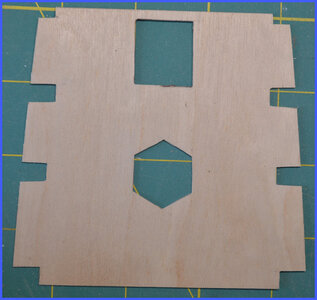
I cut all new sub-decks from 1mm aircraft plywood and insert them as a whole giving a nice even crown for planking. If one pays attention to the grain of the wood, it is quite easy to gently squeeze the sides and slightly bow the piece as it is inserted. The wood has three ply's with two ply's running in the same direction which makes bending quite easy.


12_Ply sub deck.jpg
One of the plywood sub-decks


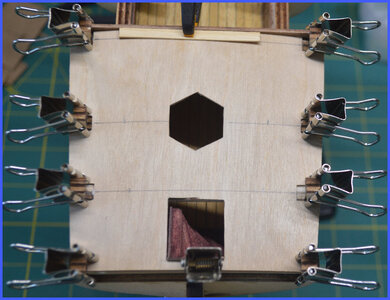
13_Sub deck glued & clamped.jpg
One sub-deck glued and clamped in place


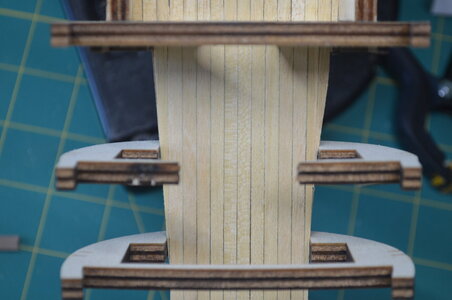
15_Sub decks horiz.jpg
I did place a few nails on this larger piece to keep it tight against the bulkheads for gluing. The lower deck has been planked using a soft pencil lead for "caulking".
All the decks will be planked as the lower deck was.
 
Are you using your super cutting tool? The cut edges on your deck look very clean and sharp.
Yup. But if you look close at the stairwell you can see where I slipped off the straightedge. At least it will be covered with the deck planking
 
Great work on the decks Ron. But I would have liked to have seen what you did with the first deck planking as well as your staircase assembly. The visual effect of that looks great already and will look even better when the top level planking is done.
 
Great work on the decks Ron. But I would have liked to have seen what you did with the first deck planking as well as your staircase assembly. The visual effect of that looks great already and will look even better when the top level planking is done.
Sorry H. I posted out of sequence and will try to show the interior shots later today.
 
Sorry guys I forgot the interior shots prior to covering with decking :(05_lower deck planking.JPG
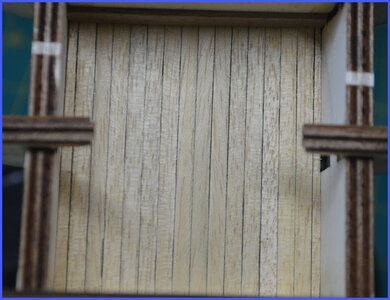
Partial lower decking. .4 x 7 mm Abachi typical of all deck planking. Used soft graphite lead for "caulking"

06_planking cont'd.JPG

Continued from previous shot

07_Lower decks_benches.jpg
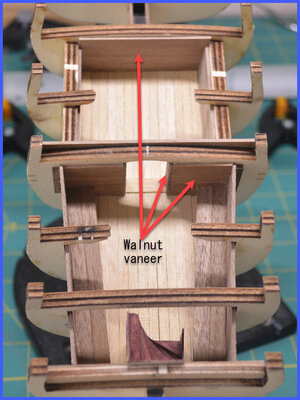
Interior walls are walnut as is the door jam. Couldn't just leave the door jamb showing plywood ;)

08_Lower deck horiz.jpg
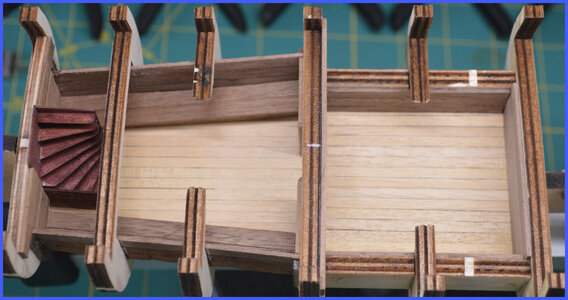
lower deck view including staircase and benches

11_Cushioned benches.jpg
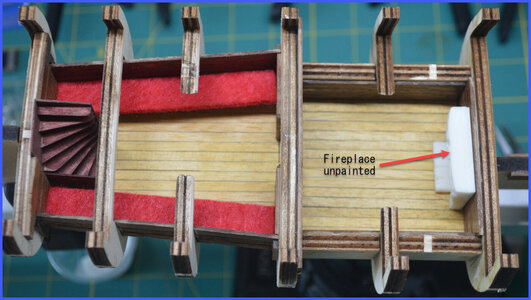
Benches covered with felt and location of fireplace

I did coat the interior with DO which really enhanced the walnut. The decking was also coated however in real life it isn't as yellow as shown in the photo. I guess I need Heinrich's Hasselblad to obtain true colors


20_Fireplace.jpg

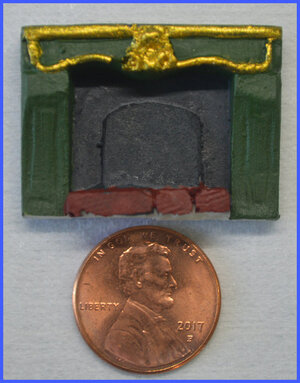
Painted fireplace prior to installation.

Unfortunately, most of the interior will not be seen when all the decks have been installed unless with a borescope. :rolleyes:
The deckhouse is made to be removable for a look see underneath if I choose to make it so.
 
Excellent work Ron for a very neat effect. The bench colors look royal indeed and you have nailed the staircase. I had the same issue that once the deck planking had been treated with oil, they tend to show "yellowish" on pictures. I think the Abachi absorbs the really well and that changes the color. But be that as it may, the build looks superb and I can see that you are enjoying it!
 
Sorry guys I forgot the interior shots prior to covering with decking :(View attachment 312046
Partial lower decking. .4 x 7 mm Abachi typical of all deck planking. Used soft graphite lead for "caulking"

View attachment 312047

Continued from previous shot

View attachment 312048
Interior walls are walnut as is the door jam. Couldn't just leave the door jamb showing plywood ;)

View attachment 312049
lower deck view including staircase and benches

View attachment 312050
Benches covered with felt and location of fireplace

I did coat the interior with DO which really enhanced the walnut. The decking was also coated however in real life it isn't as yellow as shown in the photo. I guess I need Heinrich's Hasselblad to obtain true colors


View attachment 312051

Painted fireplace prior to installation.

Unfortunately, most of the interior will not be seen when all the decks have been installed unless with a borescope. :rolleyes:
The deckhouse is made to be removable for a look see underneath if I choose to make it so.
Good evening Ron. You have nailed it. Lovely. Cheers Grant
 
Thanks Paul. Now if I could only spell veneer :)
Speleen is overwrated.

Kids don't even learn to spell nowadays anyway. As long as the teacher can figure out what is being said all is right with the world. Wouldn't want to crush their tender souls by telling them they did something wrong. But I digress (son of an English teacher by the way).
 
Back
Top