Nikitin San Bartolome 1584 A.D. (Kit #35)

Morning Jan,
Looks as though I have a lot of catching up to do on your build.
From your post yesterday I see you're enjoying Florida weather ;)
I think when I was following your log you were shoveling snow.
Hi Ron, glad to see your post. So far it’s been a crazy summer, more rain than Sun and the days with Sun have set a few temperature records. Our coastal area has had abnormal high tides while inland the DOT is busy repairing roads due to flash flooding. Some areas had downpours of 3-4 inches per hour with back to back Thunder storms.

Jan
 
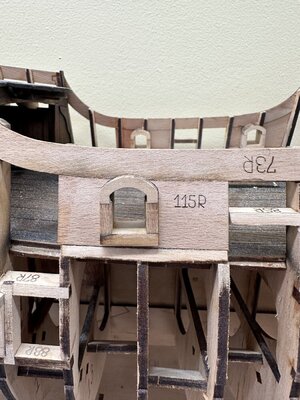
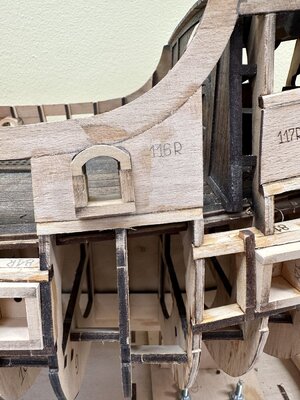
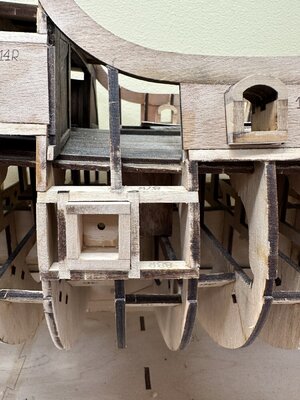
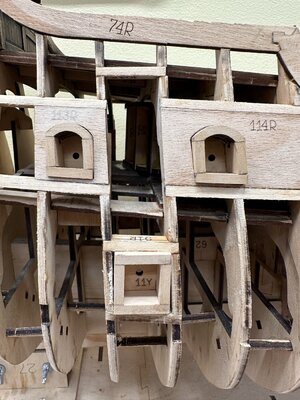
I did mention earlier that I had closed in the top of the hull. But I glossed over the process I went through.

There are three planks needed for this area, #’s 36, 37 and 38. Following the video, #38 is placed first to cover the openings for the beams. Then plank #36 is placed just above the openings for the Gallery windows. Technically that leaves an opening for plank #37, which needs to be “adjusted “ to fit the into the opening.

So it was fit, file, sand, fit, file, sand and press the plank in place. :eek:Ro-oH, the Bumbler adjusted the Port side #37 plank to fit into the Starboard opening.:eek: “RATS”:mad: Hmm, there has to to be a solution.

598FFF21-25B4-48A4-A2A4-6C48D264A2B7.jpeg


2AEBF172-1B2F-46FE-862F-7093C570725C.jpeg

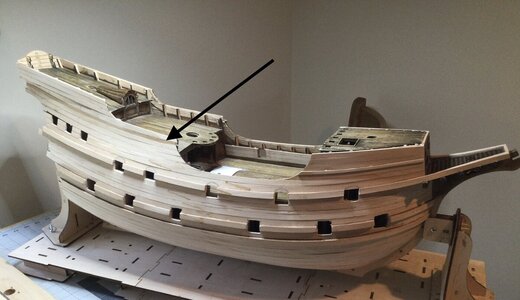
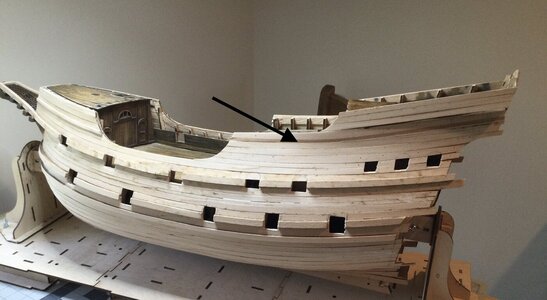
The solution. A couple of left over 3/32 X 3/32 inch Mahogany strips glued together fit the gap nicely. (Black Arrow).


Jan
 
Last edited:
I did mention earlier that I had closed in the top of the hull. But I glossed over the process I went through.

There are three planks needed for this area, #’s 36, 37 and 38. Following the video, #38 is placed first to cover the openings for the beams. Then plank #36 is placed just above the openings for the Gallery windows. Technically that leaves an opening for plank #37, which needs to be “adjusted “ to fit the into the opening.

So it was fit, file, sand, fit, file, sand and press the plank in place. :eek:Ro-oH, the Bumbler adjusted the Port side #37 plank to fit into the Starboard opening.:eek: “RATS”:mad: Hmm, there has to to be a solution.

View attachment 385818


View attachment 385819

The solution. A couple of left over 1/4 X 1/4 inch Mahogany strips glued together fit the gap nicely. (Black Arrow).


Jan
Good morning Jan. There is always a solution......Lovely pictures of your galleon. Cheers Grant
 
I did mention earlier that I had closed in the top of the hull. But I glossed over the process I went through.

There are three planks needed for this area, #’s 36, 37 and 38. Following the video, #38 is placed first to cover the openings for the beams. Then plank #36 is placed just above the openings for the Gallery windows. Technically that leaves an opening for plank #37, which needs to be “adjusted “ to fit the into the opening.

So it was fit, file, sand, fit, file, sand and press the plank in place. :eek:Ro-oH, the Bumbler adjusted the Port side #37 plank to fit into the Starboard opening.:eek: “RATS”:mad: Hmm, there has to to be a solution.

View attachment 385818


View attachment 385819

The solution. A couple of left over 1/4 X 1/4 inch Mahogany strips glued together fit the gap nicely. (Black Arrow).


Jan
Hi, did you actually add a strip shaped according to the space? Strange, it was enough for me to simply shape the strip 33 and they all went wonderfully
 
Hi, did you actually add a strip shaped according to the space? Strange, it was enough for me to simply shape the strip 33 and they all went wonderfully
The space I had to fill was half the width of the plank provided for that area. I tried to pare/whittle/cut/sand/file the plank down to fit. I seem to be consistent, I managed to have the same error on both sides.

Jan
 
Dear Jan. Obviously, I spent some time on your log and had a lot of catching up to do. I think this kit is far more difficult than what first appearances may suggest at first. The construction is very modular and whilst that may appear relatively easy at first, it can become a real challenge when the actual build deviates just in the slightest from the original. I still think a lot of model makers make up a kit and write the instructions after the completion of a test/pilot model. That would be fine if the company would then build a second model at the hand of their own instructions, but, somehow, I do not think many do. I for one would be very cautious to attempt a build a like this one - I much prefer a freer style of building which is not as prescriptive in the instructions.

Having said that, we all know that challenges and redoes are an integral part of the build process for us mortal souls. Therefore, it is important not to get caught up in one challenging part, but to view the build as a whole. Judging by the last pictures of the overall build so far, I would be very happy if my SB turned out the way yours did. I have no doubt that this is some of your best work ever - particularly if the degree of difficulty of the build is factored in.

You can be mighty proud of what you have done so far, my friend!
 
Hi Heinrich. It’s great to have you back. Yup, you are correct. The SB kit is definitely a challenge. I’ve managed to find workarounds to numerous build steps that for me just didn’t work the first time around. But each of those was a learning experience and there is still a long-long way to go. One of my biggest challenges is painting. I’ve not yet mastered the air brush technique so as to get the same ”shades” on the decks, bulkheads, etc. Some pieces have been redone so many times they at the fragile point. The learning curve is steep, I spend a lot of time studying the build plans. The You Tube build videos are a big help. But for the most part it’s dry fit, sand, dry fit, sand - repeat. Yup, still a “Novice” but never to old to learn something new.

Jan
 
A keen observation here @Heinrich. I wasn't sure what I thought about these amazing kits from Pavel - you have me thinking now...
Paul, I learnt this lesson from the Falconet Leudo build. It is great when things go according to plan, but oh boy, if there is the slightest deviation, you are in trouble!
 
Hi Heinrich. It’s great to have you back. Yup, you are correct. The SB kit is definitely a challenge. I’ve managed to find workarounds to numerous build steps that for me just didn’t work the first time around. But each of those was a learning experience and there is still a long-long way to go. One of my biggest challenges is painting. I’ve not yet mastered the air brush technique so as to get the same ”shades” on the decks, bulkheads, etc. Some pieces have been redone so many times they at the fragile point. The learning curve is steep, I spend a lot of time studying the build plans. The You Tube build videos are a big help. But for the most part it’s dry fit, sand, dry fit, sand - repeat. Yup, still a “Novice” but never to old to learn something new.

Jan
Jan your build is coming along great. I hope mine comes out as good. A little nervous about fairing the hull. A lot of transitions.
 
Jan your build is coming along great. I hope mine comes out as good. A little nervous about fairing the hull. A lot of transitions.
Thanks for the compliment. Fairing the hull makes a lot of sanding dust. Looking at your frames I think you have done a great job getting them prepared for fairing. The only problem area I found was at the upper Stern. There is a more than slight indentation or inward curve in the area of the Gallery windows. That took a bit of work to get into the right shape. Your PVC pipe sander will come in handy fo that area. Wear a mask, you're going to make a LOT of fine dust.

Jan
Thanks for the tip. Looks like a job for doing in my wood shop with a dust extractor.
 
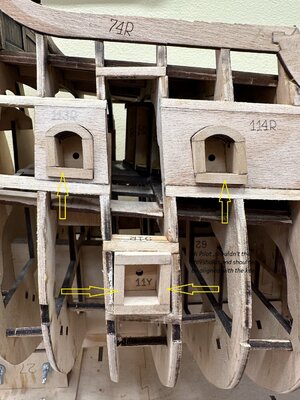
That was much more difficult and time consuming than I thought. But finally got the gun ports done and fitted. What is everyone going to do for the false ports? My idea was to paint the back black and dye a finish the sides like the rest of the ship.IMG_7057.jpegIMG_7058.jpegIMG_7059.jpegIMG_7060.jpegIMG_7061.jpeg
 
Back
Top