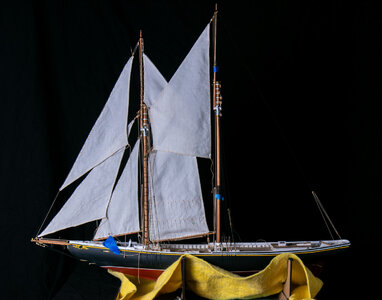
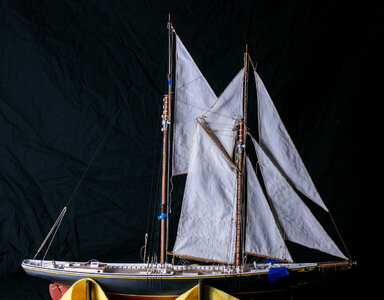
Good morning Jeff. Nice! I have never done sails and this is my fear factor no doubt. Way to go. Cheers GrantSails! I have been slowly working on the sails for the Bluenose. I first made patterns on paper from the plans. I found that by using highlighters of different colors on the plans to outline each sail helped to separate the shape of the sails. There is a lot of overlap for the sails, and they are difficult to visualize without some sort of visual separation. Next, I laid the sails onto the supplied material and marked them with a pencil as well as the seam lines. I then drew in the fold over areas (3/32" / 2.4mm) for the edges.
View attachment 385054
I used the Admiral's sewing machine (about 45 years old but it still works great) to sew the seam lines. Finally, I cut out the individual sail with a material cutter wheel. Using fabric glue I folded over the edges twice and sewed the hem of the sails.
View attachment 385055
I used the fabric glue again to glue on the bolt ropes and then hand sewed them to the sail hem. I am doing this job one sail at a time since it is boring and hard on the hands. Once the bolt rope is on, I mounted the completed sail to the ship and did the rigging for the sail. The rigging is installed but not fastened down permanently in case I need to tighten or loosen something. Here is the Jumbo Jib installed.
View attachment 385056View attachment 385057
I have also completed the jib and the balloon job as well.
View attachment 385052View attachment 385053
Even though it is not technically correct, I decided to take Builder's License and have the sails basically in line with the hull. I think it will display better this way.
You are using an out of date browser. It may not display this or other websites correctly.
You should upgrade or use an alternative browser.
You should upgrade or use an alternative browser.
Bluenose - Model Shipways MS2130 - 1/64 - By JeffT [COMPLETED BUILD]
Nice to see your approach and proces of making the sails, Jeff. They are looking very nice and the 3 in the front starts to gives your BN ‘body’.Sails! I have been slowly working on the sails for the Bluenose. I first made patterns on paper from the plans. I found that by using highlighters of different colors on the plans to outline each sail helped to separate the shape of the sails. There is a lot of overlap for the sails, and they are difficult to visualize without some sort of visual separation. Next, I laid the sails onto the supplied material and marked them with a pencil as well as the seam lines. I then drew in the fold over areas (3/32" / 2.4mm) for the edges.
View attachment 385054
I used the Admiral's sewing machine (about 45 years old but it still works great) to sew the seam lines. Finally, I cut out the individual sail with a material cutter wheel. Using fabric glue I folded over the edges twice and sewed the hem of the sails.
View attachment 385055
I used the fabric glue again to glue on the bolt ropes and then hand sewed them to the sail hem. I am doing this job one sail at a time since it is boring and hard on the hands. Once the bolt rope is on, I mounted the completed sail to the ship and did the rigging for the sail. The rigging is installed but not fastened down permanently in case I need to tighten or loosen something. Here is the Jumbo Jib installed.
View attachment 385056View attachment 385057
I have also completed the jib and the balloon job as well.
View attachment 385052View attachment 385053
Even though it is not technically correct, I decided to take Builder's License and have the sails basically in line with the hull. I think it will display better this way.
Regards, Peter
The sails are looking very good - very good appearance 
I like your sails, Jeff!
Thanks, Vic, Grant, Peter and Uwe. Very time-consuming work. I figure the mainsail will take 2 days of build time to just sew on the bolt rope.
I have not added the 2 gaffs nor the main boom to the ship yet. I will attach them to the sail first and then to the mast. I am going to look into whether I can safely remove the fore boom as well. For future builders, you may want to consider not mounting the booms and gaffs until they have been attached to the masts. The jumbo jib boom was difficult to get attached to the bottom of the jumbo jib while on the ship.
Marking of the sail panel seams: I used a washable fabric marker to draw in the lines. After sewing the seams, I washed out the marker with plain water, and iron the material before starting on the edges of the sail. This is the first time I used the washable marker and highly recommend using these markers. The ones I have are supposed to disappear over time by exposure to air, but an ongoing test shows that after 2 weeks, the line have not faded. It is possible that they might fade under high humidity conditions. I think I'll cut my test strip in half and put one piece in the garage where the humidity is high currently. 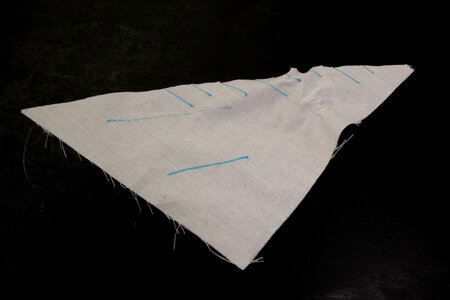

Kurt Konrath
Kurt Konrath
Having done some small boat sailing the angle of sails varies due to wind and direction, so at some point in time the angle you have may be correct.View attachment 385053
Even though it is not technically correct, I decided to take Builder's License and have the sails basically in line with the hull. I think it will display better this way.
True, but it is rare to have then in line with the hull. I guess they would be fairly close to the mid-line when sailing as close up into the wind as possible.Having done some small boat sailing the angle of sails varies due to wind and direction, so at some point in time the angle you have may be correct.
- Joined
- Apr 8, 2023
- Messages
- 185
- Points
- 103

Keep it up Jeff. The sails are a ways off for me, but I’m already nervous about them. Getting the details of how you do it continue to help. Looks beautifulSails! I have been slowly working on the sails for the Bluenose. I first made patterns on paper from the plans. I found that by using highlighters of different colors on the plans to outline each sail helped to separate the shape of the sails. There is a lot of overlap for the sails, and they are difficult to visualize without some sort of visual separation. Next, I laid the sails onto the supplied material and marked them with a pencil as well as the seam lines. I then drew in the fold over areas (3/32" / 2.4mm) for the edges.
View attachment 385054
I used the Admiral's sewing machine (about 45 years old but it still works great) to sew the seam lines. Finally, I cut out the individual sail with a material cutter wheel. Using fabric glue I folded over the edges twice and sewed the hem of the sails.
View attachment 385055
I used the fabric glue again to glue on the bolt ropes and then hand sewed them to the sail hem. I am doing this job one sail at a time since it is boring and hard on the hands. Once the bolt rope is on, I mounted the completed sail to the ship and did the rigging for the sail. The rigging is installed but not fastened down permanently in case I need to tighten or loosen something. Here is the Jumbo Jib installed.
View attachment 385056View attachment 385057
I have also completed the jib and the balloon job as well.
View attachment 385052View attachment 385053
Even though it is not technically correct, I decided to take Builder's License and have the sails basically in line with the hull. I think it will display better this way.
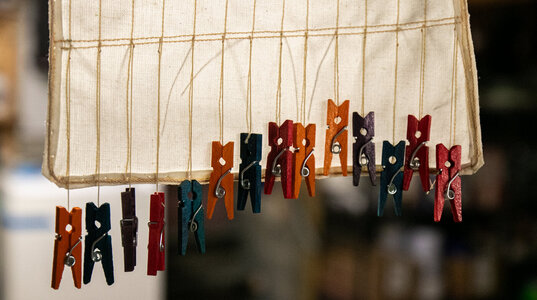
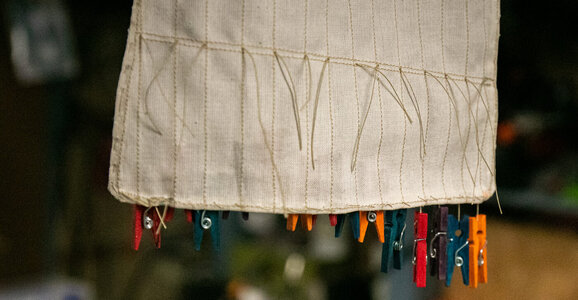
Still working (slowly) on my sails. I added the reef ropes to the foresail. I decided not to sew on a separate reef band, but I simulated one by running 2 seams across the sail. Reef ropes were added from both sides and weight added to hold them vertically. I coated each with diluted white glue and allowed them to dry with the wooden clips attached. One dry I cut the ropes to a consistent length.
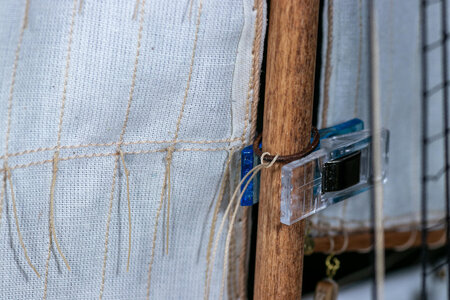
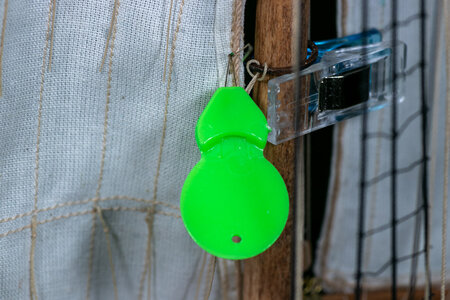
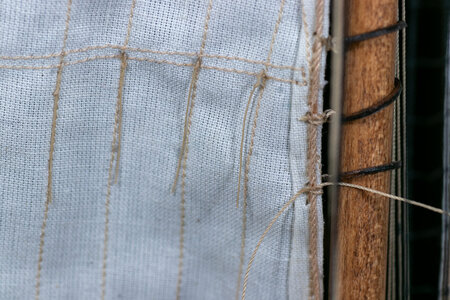
The foresail was tied to the mast hoops by tying a girth hitch to the mast hoop and then passing the 2 ends of the line through opposite sides of the sail using 2 needle threaders to make the process fairly easy. A simple overhand knot with a drop of CA completed the process.
The foresail was attached to the fore boom and the rigging attached. I am holding off on the balloon jib sheets (as well as some of the sails yet to be added) until the end of rigging and sails since they will get in the way of working on running much of the other rigging.


The foresail was tied to the mast hoops by tying a girth hitch to the mast hoop and then passing the 2 ends of the line through opposite sides of the sail using 2 needle threaders to make the process fairly easy. A simple overhand knot with a drop of CA completed the process.


The foresail was attached to the fore boom and the rigging attached. I am holding off on the balloon jib sheets (as well as some of the sails yet to be added) until the end of rigging and sails since they will get in the way of working on running much of the other rigging.

Last edited:
Looking good Jeff!
Jeff, your sails look great! I especially like the fact that your mast hoops are scale appropriate - many are not. Beautiful work!Still working (slowly) on my sails. I added the reef ropes to the foresail. I decided not to sew on a separate reef band, but I simulated one by running 2 seams across the sail. Reef ropes were added from both sides and weight added to hold them vertically. I coated each with diluted white glue and allowed them to dry with the wooden clips attached. One dry I cut the ropes to a consistent length.
View attachment 387060View attachment 387061
The foresail was tied to the mast hoops by tying a girth hitch to the mast hoop and then passing the 2 ends of the line through opposite sides of the sail using 2 needle threaders to make the process fairly easy. A simple overhand knot with a drop of CA completed the process.
View attachment 387066View attachment 387067View attachment 387068View attachment 387069View attachment 387070
The foresail was attached to the fore boom and the rigging attached. I am holding off on the balloon jib sheets (as well as some of the sails yet to be added) until the end of rigging and sails since they will get in the way of working on running much of the other rigging.
View attachment 387071
It’s going to look impressive, Jeff. With nicely made sails and complex rigging.Still working (slowly) on my sails. I added the reef ropes to the foresail. I decided not to sew on a separate reef band, but I simulated one by running 2 seams across the sail. Reef ropes were added from both sides and weight added to hold them vertically. I coated each with diluted white glue and allowed them to dry with the wooden clips attached. One dry I cut the ropes to a consistent length.
View attachment 387060View attachment 387061
The foresail was tied to the mast hoops by tying a girth hitch to the mast hoop and then passing the 2 ends of the line through opposite sides of the sail using 2 needle threaders to make the process fairly easy. A simple overhand knot with a drop of CA completed the process.
View attachment 387066View attachment 387067View attachment 387068View attachment 387069View attachment 387070
The foresail was attached to the fore boom and the rigging attached. I am holding off on the balloon jib sheets (as well as some of the sails yet to be added) until the end of rigging and sails since they will get in the way of working on running much of the other rigging.
View attachment 387071
Regards, Peter
I cannot take credit for the mast hoops being scale appropriate. They are laser cut pieces from the kit. The hoops on the upper masts are likely a bit oversized.Jeff, your sails look great! I especially like the fact that your mast hoops are scale appropriate - many are not. Beautiful work!
Looks good, Jeff. Do you think the reefers should hang vertically instead of parallel with the sail sections to follow gravity? Would that even look okay?
The reef ropes should follow gravity. I'll have to look at them more closely. The main sail seams are more diagonal relative to the mast and I just started on them, (hopefully) having them fall in line with gravity and not the seams.Looks good, Jeff. Do you think the reefers should hang vertically instead of parallel with the sail sections to follow gravity? Would that even look okay?
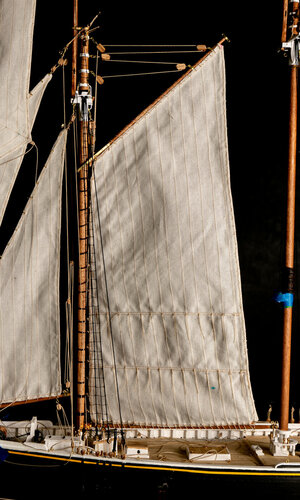
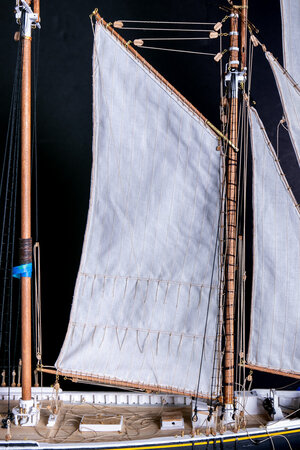
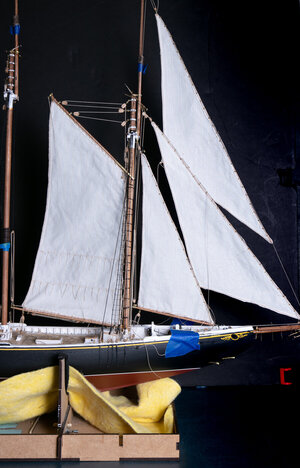
That looks impressive, Jeff. Looking forward to the pictures of your rigging details.Foremast sails are on and most of the rigging is in place.
I am almost done with the main sail and will follow up with pictures soon.
View attachment 388696View attachment 388697
Regards, Peter
Good evening. Wonderful. Looking good. Cheers GrantForemast sails are on and most of the rigging is in place.
I am almost done with the main sail and will follow up with pictures soon.
View attachment 388696View attachment 388697
Once I get the rigging mostly finished I will take some more detailed pictures.That looks impressive, Jeff. Looking forward to the pictures of your rigging details.
Regards, Peter
Any suggestions on the best way to add rope coils would be helpful. I have not found a way that I truly like on my other models.
Thanks, Grant. The addition of the sails really makes this particular model.Good evening. Wonderful. Looking good. Cheers Grant


