La Toulonnaise 1823 - French schooner - Billing Boats 1:50

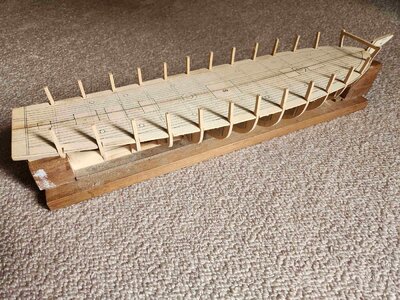
My wife bought me this Billing Boats model (with fittings) in 1979 for my 30th birthday (we were then living in Phoenix, Arizona). Probably because I was born in Toulon… I built the hull but then had to stop because of family, children, work, , etc. Then came the COVID and the lockdown and I started working on it again (40 years later!). After staying for so long in cellars or garages the hull is slightly warped and the rudder has disappeared…

Unfortunately, my wife has been fatally sick for a year (she died last September) and I had to stop again.

Now I am back to it. It is a nice model. I found the original plans not detailed enough and inaccurate, and I recently bought the plans, booklet and pictures of the ship published by the French “Association des Amis du Musée National de la Marine” (Association of the friends of the national maritime museum) https://boutique.aamm.fr/monographies?page=3.

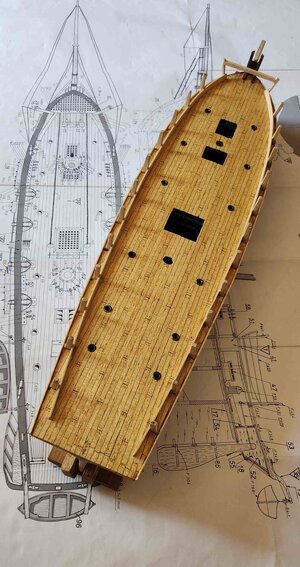
Quite a different view from the Billing Boats model (and from the actual model in the Maritime Museum in Toulon!). So, I must juggle between both plans – I must admit the AAMM rigging seems better to me: no deadeyes but “turnbuckles”.

I had to search the internet to find and buy some extra or missing elements (i.e. double blocks in Britany, eye bolts in Australia!).

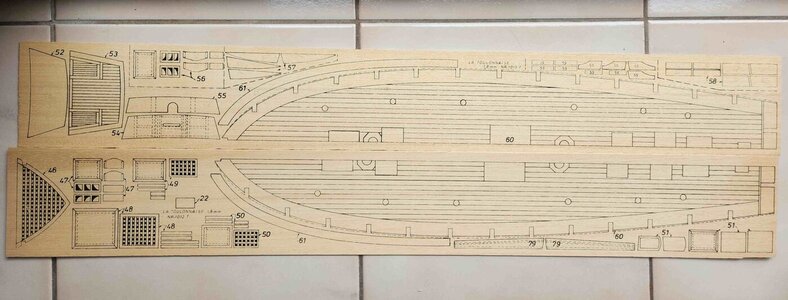
If you have time, you can improve it by adding nice details, e.g. I planked the desk instead of using the printed sheet, added some details to the guns, made proper gratings, etc.

Important as the wood is probably very dry: glue the wood sheets to paper before cutting them (then remove glue and paper).

Enjoy!

View attachment 383990

View attachment 383991

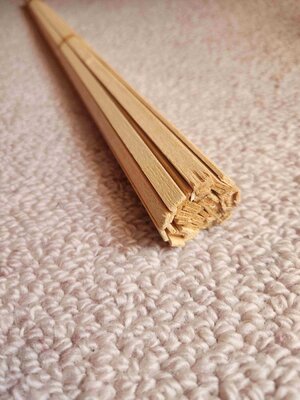
View attachment 383992

View attachment 383993
Dear Maxi, I don't know how I missed it, or that it failed to register upon my first (probably cursory) reading of your post. Please forgive my insensitivity. I cannot adequately express the dismay I feel for you upon losing your wife after a long illness. The suffering under those circumstances is inexpressible (having had a similar experience at a young age).
This post is particularly poignant given the history of your model having been a gift from your wife to begin with.
The pictures of your model in progress reveal that she is turning out beautifully. It will be quite a testament to your wife when finished.

Sincerely, Pete
 
The redo hull has made progress and much happier with how everything has lined up this time.

La Toulonnaise Hull.jpg

Getting close to planking time, the instructions don't specify that it should be double planked but as I have a bunch of .5mm strips included I plan to use these for the deck and try my first attempt at single planking.

In general with these instructions I find it difficult to work out how a lot of it actually goes together, might be making it up as I go.
 
The redo hull has made progress and much happier with how everything has lined up this time.

View attachment 402402

Getting close to planking time, the instructions don't specify that it should be double planked but as I have a bunch of .5mm strips included I plan to use these for the deck and try my first attempt at single planking.

In general with these instructions I find it difficult to work out how a lot of it actually goes together, might be making it up as I go.
Hi Richie,

Of course I have very limited experience - but I don't think 0.5 mm thick strips will work for a single planked hull. I would think you would need something more substantial...
 
Greetings, Richie
I am in synch with Paul, the thickness (if I understand it correctly 0.5mm) will be too weak for a single-planked hull. Even if you double the bulkheads. However, if you fill the spaces between the bulkheads with balsa or other wood, even the foam used for signs, then, use 0.5mm should be sufficient.
 
Gents, @dockattner & @Jimsky thank you for your replies.

Ok perhaps my original post wasn't clear so let's try again.

Supplied in the kit were many strips of 1.8x7mm so these will be used for first layer of planking on the hull.

Also supplied in the kit were were half as many .5x5mm strips which I will use as planking on top of the plywood deck(not the hull).

My original query as it's not mentioned in the instructions was would those strips meant to be for the second layer of hull planking, but as there wont be enough to cover the hull I am going to use them on the plywood deck so it covers the printed etching.

deck sheets.jpg

Hopefully this allays concerns of using .5mm strips as a first layer of hull planking which I wouldn't do, instead 1 layer of 1.8x7mm will be used.

Paul I ignored your limited experience comment :), I know what you can do and value any input you may have.
 
Well, if you were to paint it then a second planking doesn't make a lot of sense unless you need it for smoothness. If you will leave a wood finish, then the species of wood might matter making a veneer worth considering (what is the 1.8 made of?).

I'm not sure paint covers up a poor planking job, rather, it just highlights it...
Ok fair point guess I hadn't though that that one through yet, lucky I have you on my team. :)

I don't know what the 1.8 is made of but as the kit is old the wood is very dry and brittle so I may need to purchase a second layer of nice new veneer.

Planking.jpg
 
Ok fair point guess I hadn't though that that one through yet, lucky I have you on my team. :)

I don't know what the 1.8 is made of but as the kit is old the wood is very dry and brittle so I may need to purchase a second layer of nice new veneer.

View attachment 402642
Umm. That wood is garbage. You might be able to paint it, but it will look rough. If resources were unlimited, I would veneer that (second planking) or find a better wood species for a single layer.

Or adjust your goals for the ship in terms of how fine you want it to be... (NOTE: I don't mean in any way to impose my goals on a build to your goals...)
 
Hmm, yes everything I handle seems to break but as the kit was a gift as long as it was going to be built I accepted the challenge not knowing anything about it beforehand.

It's already proving a tough build for me so I have realigned my goals that it wont be a masterpiece and I wont be throwing unlimited resources at it.

This kit didn't come with any fittings as Billings decided it was a good idea to make that a separate kit to purchase, therefore there is already additional cost to complete the build.
Good morning Richie. The good old cost vs return principle. If we spend plenty dollars on workshop tools (milling machines etc), add expensive exotic wood, blocks rope etc kits can be transformed into something spectacular…..or we can take our xacto knife, some sandpaper, have loads of fun and build a beautiful kit model. Half the fun is scratching for left over wood, trying to manufacture hooks etc from wire…..Enough blah blah. I would get some veneer for a second layer tho - that’s just me. Cheers Grant
 
Good morning Richie. The good old cost vs return principle. If we spend plenty dollars on workshop tools (milling machines etc), add expensive exotic wood, blocks rope etc kits can be transformed into something spectacular…..or we can take our xacto knife, some sandpaper, have loads of fun and build a beautiful kit model. Half the fun is scratching for left over wood, trying to manufacture hooks etc from wire…..Enough blah blah. I would get some veneer for a second layer tho - that’s just me. Cheers Grant
Yes we could spend a lot on stuff and if the skill allows create something magnificent, unfortunately I posses neither so I sit in the second camp, in fact I am working on the rumpus room floor or kitchen table with basic hand tools, understanding wife.:cool:

I agree with you about the veneer, it's a big chunk of the ship so probably worth some expense to make it look half decent.
Cheers
Richie
 
Dear Maxi, I don't know how I missed it, or that it failed to register upon my first (probably cursory) reading of your post. Please forgive my insensitivity. I cannot adequately express the dismay I feel for you upon losing your wife after a long illness. The suffering under those circumstances is inexpressible (having had a similar experience at a young age).
This post is particularly poignant given the history of your model having been a gift from your wife to begin with.
The pictures of your model in progress reveal that she is turning out beautifully. It will be quite a testament to your wife when finished.

Sincerely, Pete
 
Thanks very much for the sentiments. I should post some photos soon to show the progress (and also the difficulties with conflicting designs between the Billing Boats plan and the AMM one).
All the best,
Maxime
 
Hmm, it's been a while since I last posted an update, perhaps intimidated by many of the fine builders showing their work on the same forum as I dare to show this.
Having a bit of a love hate relationship with the materials and my skills but some progress has been made.
Trying to figure out this kit is a challange for me, the 1-1 plans and a booklet with a few line drawings don't give me much help.

Here is the hull now with a planked deck in place, I used the supplied strips and after a finishing coat it highlights a mottled look, guess it's growing on me.

Deck.jpg


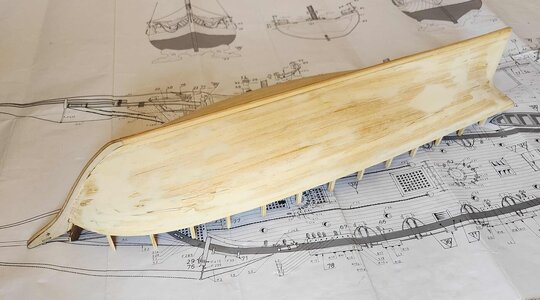
The hull has been planked with a first layer, not pretty at the moment but hopefully the second layer hides all my sins.

Hull.jpg


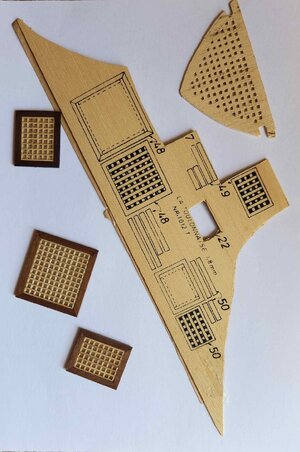
To mix things up a bit I did some work on the grating, the parts supplied have the whole thing made out of plywood sheets, even for me that wasn't going to cut it.
So in line with my low budget for this build I have used leftover parts from the Revenge to construct new grating, at least it's an improvment on the kit parts.
I did a test with the plywood bow piece but it's not good so it will also get a makeover.

Gratings.jpg


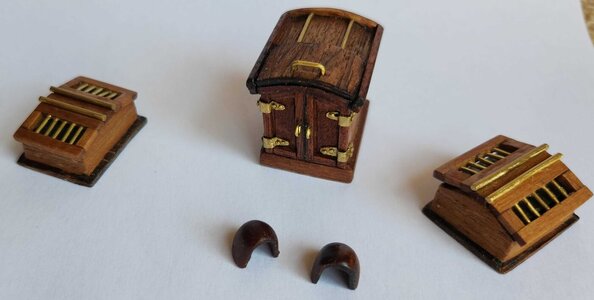
And finally some deck furniture has been constructed, the supplied basic plywood sheet that just made flat boxes so I tried to improve on that using any leftover materials I had to spare.

Furniture.jpg
 
Back
Top