La Toulonnaise 1823 - French schooner - Billing Boats 1:50

Well I did start it but have now dismantled it all again after seeing the precision @Dean62 went to I decided mine wasn't good enough trying to correct the warped wood after assembly, now trying to straighten everything before assembly, there was some damage to the pieces where they were glued but all correctable I think.

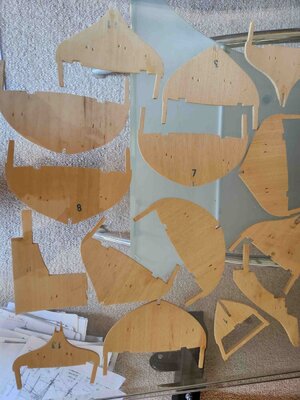
The straightening is proving tricky though, tried wetting then put between some glass which is the flattest large surface I have, of course it's not drying very well and after I leave the glass off the top the pieces start bowing again.

Perhaps there is a better technique with limited resources.

Parts.jpg
Not obvious in the picture but a thick piece of glass is on top of the parts on a glass table.
 
Unfortunately wood has a memory and the warp will re-assert itself no matter what you do. The only remedy I can think of is to glue stiff battens across the grain of the original bulkheads to keep them flat and trace them off onto birch model maker's ply wood of the same thickness as the original bulkheads and make new copies. If you have access to a laser cutting device, make a zip file from the patterns and cut them out that way, that, of coarse, is ideal. ( Blue jacket Ship crafters provides this service. Contact them as to how to proceed ). Failing that you can use a Jeweler's saw with a medium fine blade, or a scroll saw, ( I like the jeweler's saw myself for its fine control.) You will need the saw frame, blades, bench V block and clamp (sold together) . Get a good saw frame that is easiest to secure and adjust the tension on the blade. You can get everything you need from Micro Mark. Wax the blade occasionally as you proceed by running it through an old candle stick to prevent its binding in the saw kerf and and breaking. Always cut to the OUTSIDE OF THE LINE! and trim to size with fine modeler's files (the diamond ones are nice). be sure to keep the edges square. You can cut out the openings inside the bulkhead by drilling a small hole inside the portion to be cut out. Insert the blade through that and secure the blade to the frame. I t is a little fiddley, but with a little practice it becomes easier.
Never eradicate the trace line. Find the half life of the distance up to it .I am sure there are instructions and/or a You Tube video on line somewhere.
I know this sounds arduous and slow as snake $#!+ and it is. The use of a jeweler's saw requires a little practice, but is a rewarding technique to master and have in your skill set and improves in speed and efficiency over time. Again, if you can gain access to it, the Laser option is easiest and most efficient.

Best of success in resolving your issue. ;) Thumbsup, Pete
'
 
Excellent thank you for the reply, I don't have any of the tools or access to special equipment and truth be know the fine skills either.
However bracing the bulkheads may be enough so let me look into that option first, don't know why I didn't think of that myself, just needed someone smarter than me to point out the obvious.:)
 
Not smarter. Sounds like I've probably had more opportunity to be confronted with these problems. The more models you make(and restore) the more problems to untangle. Necessity, after all, being the mother....;)
maybe the stiffening battens are all you'll need.:D

Pete
 
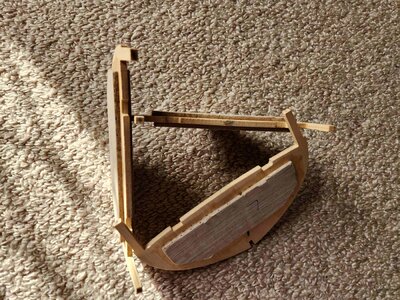
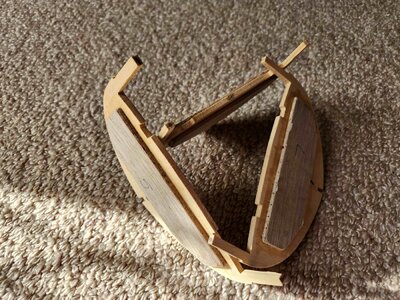
I cut out some plywood braces, glued 1 each side with wood glue and clamped them overnight.
Pretty happy so far, they now have a more solid feel and look nice an straight instead of the bowing I was getting.

Bulkheads.jpgBulkheads2.jpg

It will add a bit of weight to the ship and hopefully nothing comes back to bite me later in the build with this extra material.
Making all new bulkheads was probably going to be a step to far for me, I know all the scratch builders are going you wuss.
 
And so it begins, I plan to make a few notes as the build progresses.

My idea with this build was to keep it fairly simple and not get to stressed about the finer details or if things go wrong, after all it's a hobby and should be fun to do.

A previous owner did make a start cutting out a few pieces but nothing had been glued yet.
I did an inventory which proved difficult to match everything so it still left a few question marks, a few small parts were missing which I could make and one part that was already cut out and broken, although still not sure what the roll of copper strip is for.

The pre-drawn sheets of wood are very dry and somewhat brittle, there is a technique mentioned in the instructions to glue some thin paper to the back of the wood before cutting the parts out which I did and worked pretty well.
There are no laser cut parts here it's all cut out manually and some of the wood was slightly warped as well.

View attachment 383129


There are no images of the wood sheets in the instructions so before cutting parts out I took photos.

View attachment 383131

I made a base to mount the initial skeleton and with a bit of shaping to make parts fit I started to assemble it.

View attachment 383130

Now I made it this far and realised some things weren't quite lining up.

View attachment 383132

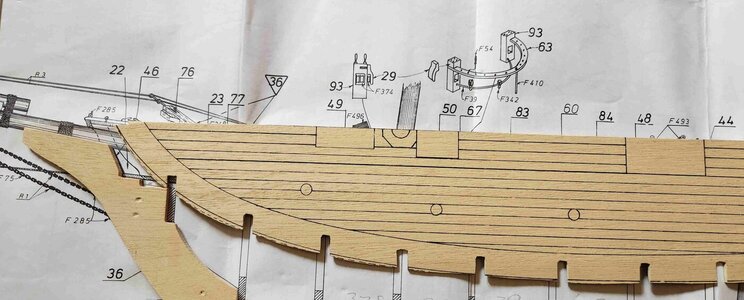
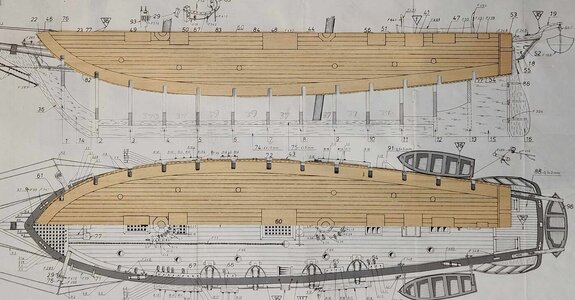
I decided to cut out the decks and laid them on the plans and low and behold they don't match, I assume the plans would be a 1:1 so either something shrunk or something expanded.
I will need to realign things as I go to make everything fit, at least now I am aware of it I can plan ahead.
Note the ruler at the bottom, it's going to be a big ship when completed.

View attachment 383133
Good morning Richie. I will pull a chair here. Cheers Grant
 
Occam's Razor: "The simplest solution to a problem is most probably the right solution."
Looks great and a whole lot easier than cutting them all out over again in birch ply! Glad to see it work out for you!:)

Pete
 
It's always a bonus to find a problem early on and I think your solution is viable. Don't tell anyone, but on one of my past builds it was a real pain to get some fiddly frames square, but some Lego blocks glued in solved the situation. Improvise, adapt, overcome; and sometimes cheat.
 
It's always a bonus to find a problem early on and I think your solution is viable. Don't tell anyone, but on one of my past builds it was a real pain to get some fiddly frames square, but some Lego blocks glued in solved the situation. Improvise, adapt, overcome; and sometimes cheat.
Thank you Graham, noted. :)

Yes I knew about Lego blocks from somewhere and have considered buying some but this one in particular case it's going to be an issue with the small keel piece and tiny slots in the bulkheads allowing a lot of play, there will be no where to permanently fix squaring blocks.
 
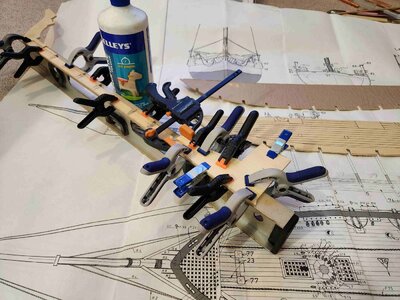
Take 2 in assembling the keel.

Keel.jpg
Can you have too many clamps.


Keel Stand.jpg
My stand in attempt to keep it all square for the bulkheads.
The small pieces left along the top of the main keel were cut to size as per the plans but will need to be sliced and diced on the rebuild.


Deck Issue.jpg

Now back to where my problems all started.
In round one I assembled the keel and bulkheads following the plans which I thought were 1 to 1.
After the initial keel and bulkhead assembly I cut the deck out from the sheet including where the notches were marked and wadda you know it doesn't fit.
After some creative forming I managed to make it fit but after several days looking at it I wasn't happy to carry on with it like that.
You can see my issue when laying the deck over top of the plans there is a big discrepancy in lining up the original bulkhead positions which extends more to the stern.
I think the easier solution is to line up the bulkheads in new positions that line up with the deck slots so that's what I am going to do, I may need to make a few allowances elsewhere but hopefully once the hull is assembled the rest will all fall into place.
Boy so much for a nice easy build, this one is really testing my redo's.
 
Last edited:
Take 2 in assembling the keel.

View attachment 386361
Can you have too many clamps.


View attachment 386362
My stand in attempt to keep it all square for the bulkheads.
The small pieces left along the top of the main keel were cut to size as per the plans but will need to be sliced and diced on the rebuild.


View attachment 386370

Now back to where my problems all started.
In round one I assembled the keel and bulkheads following the plans which I thought were 1 to 1.
After the initial keel and bulkhead assembly I cut the deck from the sheet and what do you know it didn't fit.
After some creative forming I managed to make it fit but after several days looking at it I wasn't happy to carry on with it like that.
You can see my issue when laying the deck over top of the plans there is a big discrepancy in lining up the original bulkhead positions which extends more to the stern.
I think the easier solution is to line up the bulkheads in new positions that line up with the deck slots so that's what I am going to do, I may need to make a few allowances elsewhere but hopefully once the hull is assembled the rest will all fall into place.
Boy so much for a nice easy build, this one is really testing my redo's.
Good morning Richie. This hobby certainly gives us a challenge or two. For some reason I can’t see your photos in the last post. I am always concerned about repositioning the bulkheads as this will change the hull shape. If the deck is going to be planked would it not be more prudent to recut the deck slots to fit the bulkheads? Apologies with me not seeing the photos I may be talking gibberish here. Cheers Grant
 
Good morning Richie. This hobby certainly gives us a challenge or two. For some reason I can’t see your photos in the last post. I am always concerned about repositioning the bulkheads as this will change the hull shape. If the deck is going to be planked would it not be more prudent to recut the deck slots to fit the bulkheads? Apologies with me not seeing the photos I may be talking gibberish here. Cheers Grant
Hi Grant,

Sorry yes my fault, they are now attached.
I had considered your suggestion, if it's actually going in the water hull shape may be more critical but this ship definitely wont be.
Also which one is more correct in the plans the deck or the keel , I swear it looks like they are drawn to a slightly different scale.
I have already started down that road but will have another look, everywhere I check on the plans nothing quite fits so this build may be full of compromises, or maybe it's just me.
Cheers.
 
Hi Richie. It's great to see you at the bench with what looks like it is shaping up to be a challenging build. The only consolation from my side is that a non-straightforward build that pushes us out of our comfort zone, is the type of build that teaches us the most. The second advantage is the sense of accomplishment one feels after completing a challenging task successfully. The best of the luck with the rest of the build - I will follow along, for sure.
 
Hi Richie. It's great to see you at the bench with what looks like it is shaping up to be a challenging build. The only consolation from my side is that a non-straightforward build that pushes us out of our comfort zone, is the type of build that teaches us the most. The second advantage is the sense of accomplishment one feels after completing a challenging task successfully. The best of the luck with the rest of the build - I will follow along, for sure.
Thank you for the encouragement Heinrich, yes I am sure there will be a few challenges and welcome along.
 
A small update with my jigsaw puzzle.
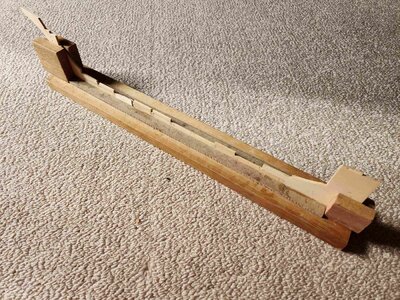
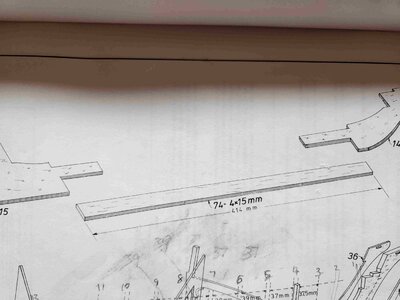
The instruction manual shows the keel should be 414 mm but the scale plan measures 411mm, the juggle continues one bulkhead at a time.:)

Keel (2).jpg


And just to clarify an earlier image showing the wooden deck doesn't match the plans, I plan to lay planks on the deck and not use the printed lines.

Deck Plan.jpg
 
One just wonders why there is such a discrepancy between the plans and the actual deck. Again, I wonder if companies ever construct a test model according to their own plans/instructions.
 
One just wonders why there is such a discrepancy between the plans and the actual deck. Again, I wonder if companies ever construct a test model according to their own plans/instructions.
True but I guess being an old kit this one was never going to be perfect.
One thing I have learnt right now I can't see myself as a scratch builder, my skills wouldn't cut it (pun intended ;)).
 
Back
Top