HAPPY BIRTHDAY ENJOY THE BUILDE. GOD BLESS STAY SAFE YOU AND YOURS DON
You are using an out of date browser. It may not display this or other websites correctly.
You should upgrade or use an alternative browser.
You should upgrade or use an alternative browser.
La Belle 1682 1/48 Kit CAF par Cathber
Hallo Cathber
First glue all pairs of frames together, then carefully shape them according to the lasered sanding lines. This is inside and outside of each double frame. Try it first with frames 4 and 24. This way you will get a feeling for the work and also see if the frame dits into the mold (berth, jig). Final sanding of the entire frames is not carried out until the hull has been reinforced with auxiliary planks. Have a look in the Ancre-book of La Belle, page 110, top photo. Here, nothing is damaged during sanding.
Best regards
Thomas
Last edited:
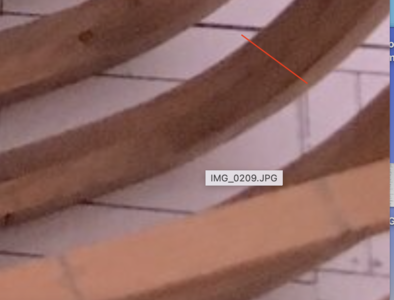
Bonjour, je me pose une question concernant les cadres. Ceux si sont constitués de 2 poutres qui sont dans notre construction collées mais pour des raisons esthétiques ne faut-il pas insérer des clous en laiton comme on le voit sur plusieurs constructions ?
J'ai consulté plusieurs journaux de 'La Belle' mais on ne voit pas très bien.
De plus les plan de la monographie de Boudriot ne les indique pas.
Hello, I have a question regarding frames. These are made up of 2 beams which are glued in our construction but for aesthetic reasons shouldn't we insert brass nails as we see on several constructions?
I consulted several newspapers from 'La Belle' but we can't see very well.
Furthermore, the plan of Boudriot's monograph does not indicate them.

Last edited by a moderator:
A short explanation:
The La Belle was one of the first monographs which were made by Jean Boudriot, so partly maybe not in the detail we used to in the meantime.
Also a priciple by ancre publications is the fact, that some structural elements are well and detailed described in his four books describing the french 74-gunner.
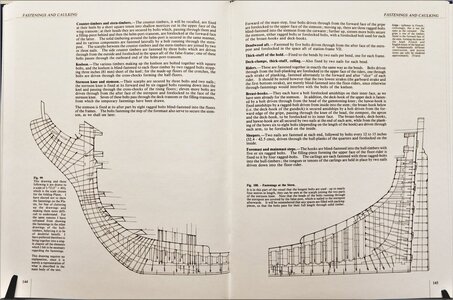
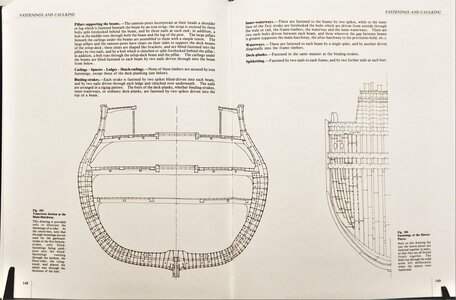
excerpt from the Boudriot 74-gun ship showing the bolts of a french vessel
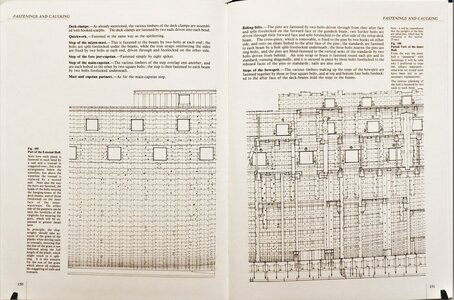
To your question:
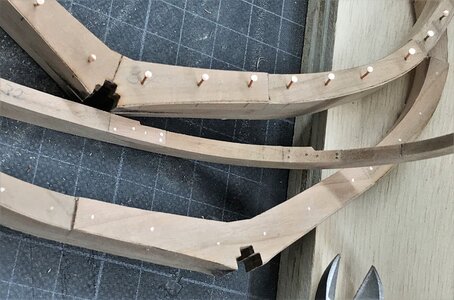
you are correct, the elements of a double frame, like floor timber, futtocks and top timber were bolted together, so you can add these bolts, when you like to have this detail. Be only aware, that most of the bolts-heads will be not visible afterwards
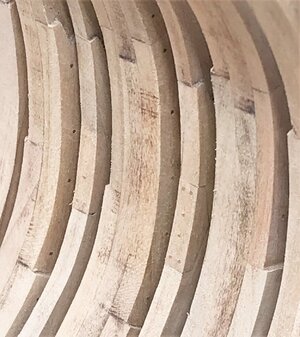
Here as an example the bolting made for my HMS Granado (complete hull)
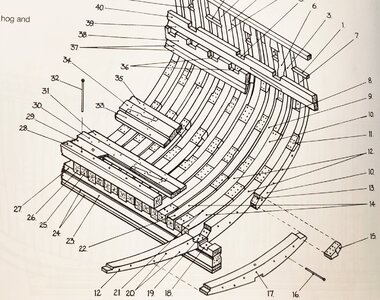
This is an excerpt from (I think Goodwins book) showing the frame structure of a british ship with the bolts
Be aware, that french ships had not these chocks shown with #15 in the sketch
The La Belle was one of the first monographs which were made by Jean Boudriot, so partly maybe not in the detail we used to in the meantime.
Also a priciple by ancre publications is the fact, that some structural elements are well and detailed described in his four books describing the french 74-gunner.
excerpt from the Boudriot 74-gun ship showing the bolts of a french vessel


To your question:
you are correct, the elements of a double frame, like floor timber, futtocks and top timber were bolted together, so you can add these bolts, when you like to have this detail. Be only aware, that most of the bolts-heads will be not visible afterwards
Here as an example the bolting made for my HMS Granado (complete hull)


This is an excerpt from (I think Goodwins book) showing the frame structure of a british ship with the bolts
Be aware, that french ships had not these chocks shown with #15 in the sketch

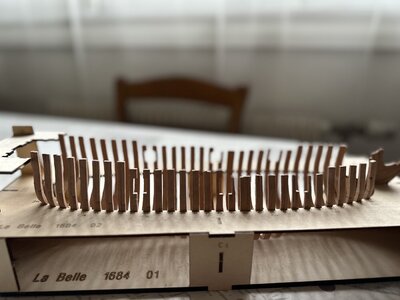
Bonjour, poursuite de la construction des cadres. Ils sont juste posés dans le gabarit. Il reste beaucoup, beaucoup de ponçage à faire.
ça commence à ressembler à une coque.
Pour mon premier modèle je n'ai pas eu pour l'instant de difficultés particulières. Une ou deux casses de pièces cassées que j'ai recollées.
google translation:
Hello, continuing to build the frames. They are just placed in the template. There is still lots and lots of sanding to do.
It's starting to look like a shell.
For my first model I have not had any particular difficulties so far. One or two broken parts that I glued back together.
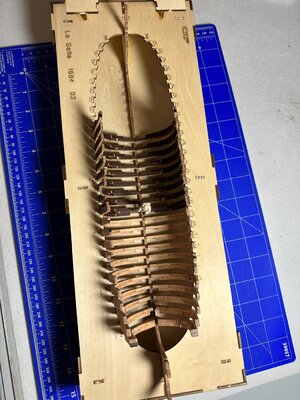
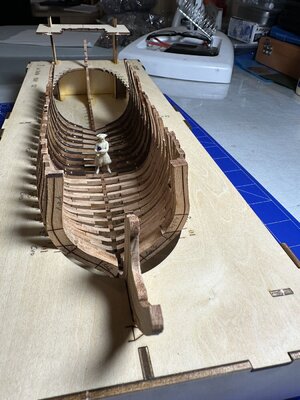
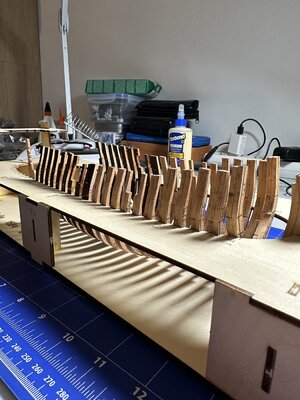


Last edited by a moderator:
Good work - you are on a good way
Pour info, je vais essayer de changer ma technique pour constituer les membres.
1 - je coupe chaque partie d'un couple des cadres
2 - j'enlève par ponçage le charbon de chaque élément (uniquement le charbon).
3 - je reconstitue le couple par collage suivant la technique de Uwek. Je trouve que le fait d'enlever le charbon avant le montage permet de mieux positionner chaque élément sur le dessin.
4 - j'affine par léger ponçage sa position dans le gabarit suivant le marquage laser.
Avantage: le fait qu'il n'y a plus de charbon pour le ponçage final est plus facile.
Inconvénient: le couple passe 2 fois entre mes mains pour le ponçage (avant reconstitution et après constitution du couple).
Ce n'est bien sur qu'un avis personnel.
google translation:
FYI, I'm going to try to change my technique for building the limbs.
1 - I cut each part of a couple of frames
2 - I remove the carbon from each element by sanding (only the carbon).
3 - I reconstruct the couple by collage using the Uwek technique. I find that removing the carbon before assembly allows each element to be better positioned on the drawing.
4 - I refine its position in the template by light sanding following the laser marking.
Advantage: the fact that there is no longer any carbon for the final sanding is easier.
Disadvantage: the couple passes through my hands twice for sanding (before reconstitution and after constitution of the couple).
This is of course just a personal opinion.
Last edited by a moderator:
- Joined
- Jan 30, 2023
- Messages
- 250
- Points
- 158

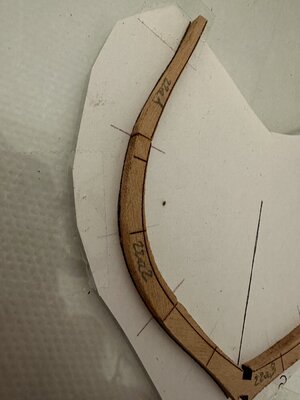
Can you describe in more detail what this technique is, or in which section I can find it on the forum?3 - I reconstruct the couple by collage using the Uwek technique.
1 - faire une copie du couple
2 - la scotcher sur une plaque en verre pour assurer la planéité
3 - je colle la base d'un couple avec du fixo gum pour être bien sur de bien positionner les éléments du couple
4 - je colle les éléments de couple entre eux.
1 - make a copy of the couple
2 - tape it to a glass plate to ensure flatness
3 - I glue the base of a couple with fixo gum to be sure to correctly position the elements of the couple
4 - I glue the couple elements together.
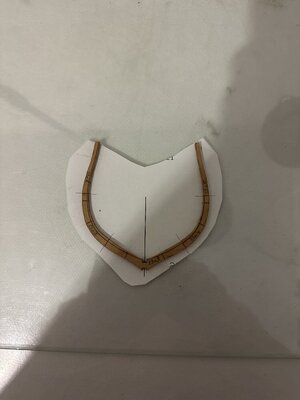


Last edited by a moderator:
- Joined
- Feb 19, 2023
- Messages
- 162
- Points
- 103

С днём рождения поздравляю! С наилучшими пожеланиями!Poursuite de la Construction для изготовления премьер-пар.
Используйте метод Увека в Гранадо.
1 - Я скопировал пару фабрик, которые нанесли скотч на зеленую пластинку, чтобы гарантировать плоскость поверхности
2 - Я собрал дю Fixo, наклеив основу для пары и ванную комнату, после того, как увидел следы пятен на кусочках, и восстановил мою пару и проверил, что такое хорошее положение.
Премьера уже прошла. Несколько мелких ударов по регулировке и положение пары в размерах.
View attachment 406528
View attachment 406529
Happy birthday! Best wishes!
Last edited by a moderator:
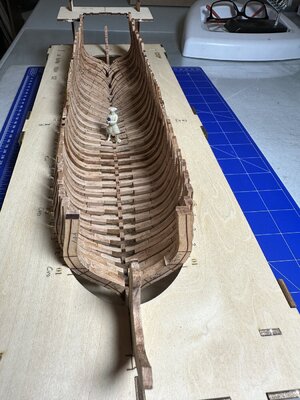
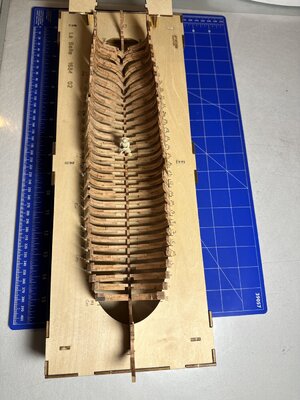
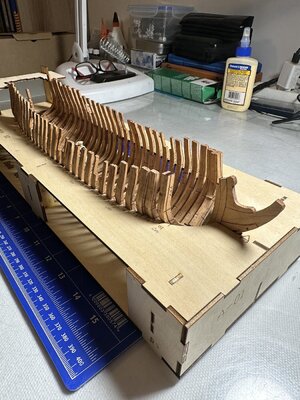
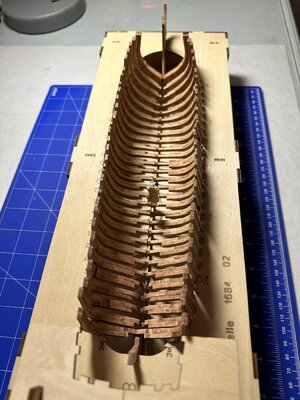
Je viens de construire les 29 couples. Il ne reste qu'a les poncer suivant les traces 'laser'. Cela signifie beaucoup de ponçage et d'ajustement.
Suivant les infos du forum, je vais les poncer grossièrement à la Dremel et finir à la lime pour assurer les ajustement.
Je suis impressionné par l'état de surface des membrures de certains modèles. Je pense que cela vient de la qualité du bois (le meilleur est le poirier car un grain trés fin), et que je ne pourrai pas obtenir un tel état car les membrures de 'La Belle' sont en cerisier, qui est un bois qui est plus fibreux.
Je ne suis pas sur de mettre des clous dans les membrures car après ponçage il ne restera certainement pas beaucoup de matière. Je ferai des essai sur des chutes.
google translation:
I just built the 29 couples. All that remains is to sand them following the 'laser' marks. This means a lot of sanding and adjusting.
Following the information from the forum, I will roughly sand them with a Dremel and finish with a file to ensure the fit.
I am impressed by the surface condition of the frames of certain models. I think that this comes from the quality of the wood (the best is pear wood because it has a very fine grain), and that I will not be able to obtain such a condition because the frames of 'La Belle' are made of cherry, which is a wood that is more fibrous.
I'm not sure about putting nails in the frames because after sanding there certainly won't be much material left. I will do some testing on scraps.


Last edited by a moderator:
A first important step is done with teh frames prepared - well done
You will see, that also Cherry wood can look extremely good - my Salandre was also Cherry wood - so often a question of smoothly sanding
You will see, that also Cherry wood can look extremely good - my Salandre was also Cherry wood - so often a question of smoothly sanding
Merci pour votre réponse.
Je commence à réfléchir sur le type de vernis ou d'huile que je vais mettre sur ma 'Belle'.
Je parcours le forum pour prendre des idées. Qu'avez vous utilisé pour votre 'Salamandre' ?
Thank you for your reply.
I'm starting to think about what type of varnish or oil I'm going to put on my 'Belle'.
I'm browsing the forum to get some ideas. What did you use for your 'Salamander'?
My Slamandre is still only prepares as sanded hull, but still without any wood treatmentMerci pour votre réponse.
Je commence à réfléchir sur le type de vernis ou d'huile que je vais mettre sur ma 'Belle'.
Je parcours le forum pour prendre des idées. Qu'avez vous utilisé pour votre 'Salamandre' ?
Thank you for your reply.
I'm starting to think about what type of varnish or oil I'm going to put on my 'Belle'.
I'm browsing the forum to get some ideas. What did you use for your 'Salamander'?
for my latest models I used CLOU - primer (and no oil)
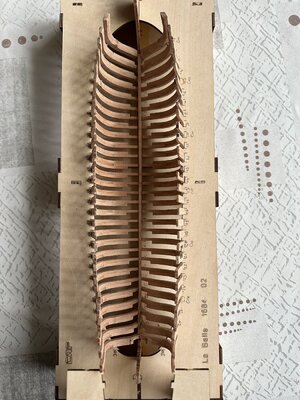
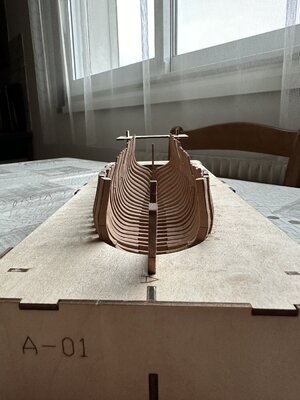
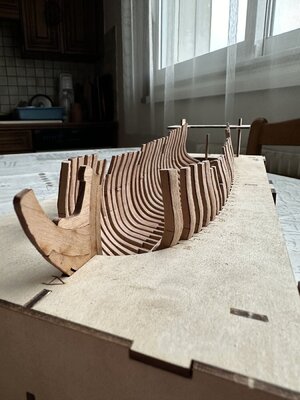
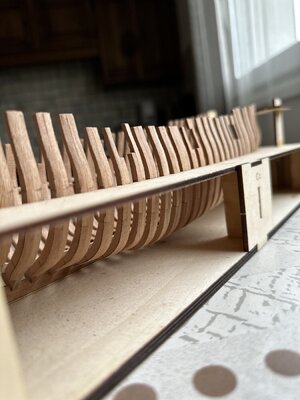
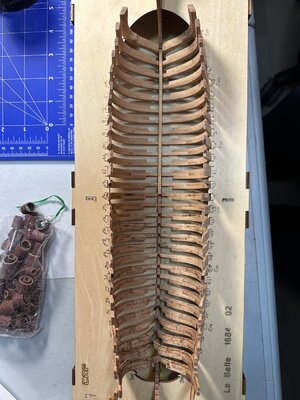
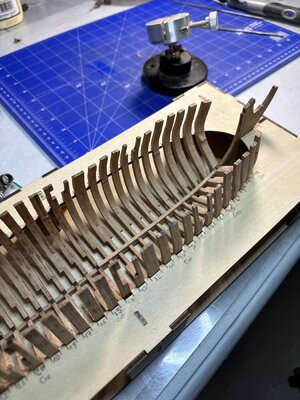
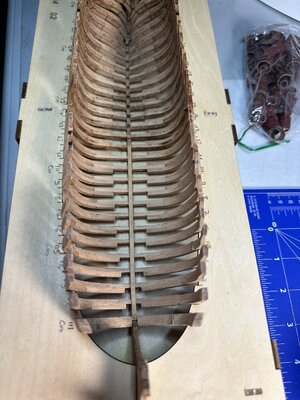
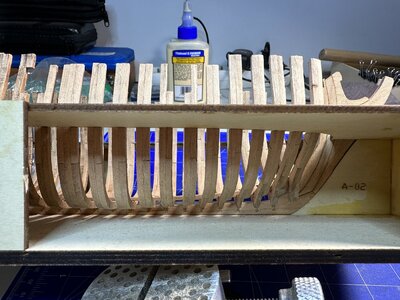
Poursuite de la construction des couples. J'ai poncé les couples 1 à 12 dans leur forme presque finale et positionné la carlingue. Rien n'est collé.
Question technique: est ce que je dois laisser un peu de matière pour le ponçage final lorsque toute la coque sera assemblée ? quelle épaisseur ?
Continuation of the construction of the couples. I sanded couples 1-12 to their near final shape and positioned the cabin. Nothing is stuck.
Technical question: should I leave some material for final sanding when the whole hull is assembled? what thickness?


Last edited by a moderator:
Pour info, pour mon ponçage j'utilise principalement la Dremel Stylo (modèle 2050) avec des disques de ponçages de différentes grosseurs et quelques limes aiguilles. Cette Dremel est intéressante car on peut faire varier la vitesse de rotation et elle tient bien dans une main car trés légère.
FYI, for my sanding I mainly use the Dremel Stylo (model 2050) with sanding discs of different sizes and a few needle files. This Dremel is interesting because you can vary the rotation speed and it fits well in one hand because it is very light.
FYI, for my sanding I mainly use the Dremel Stylo (model 2050) with sanding discs of different sizes and a few needle files. This Dremel is interesting because you can vary the rotation speed and it fits well in one hand because it is very light.
Last edited by a moderator:
I would keep 0,5 to 1,0 mm either on the outside and inside for the final sanding


