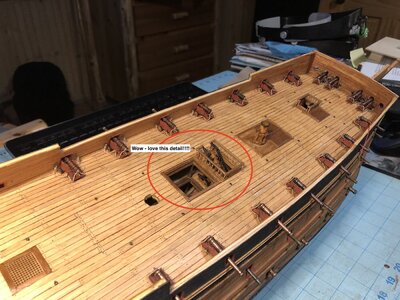
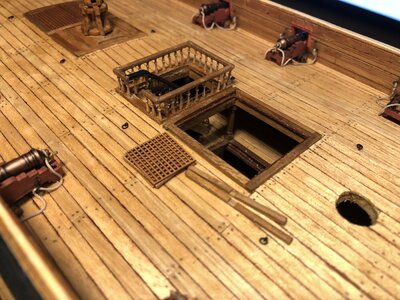
Using the thinnest thread I have.Kurt, I guess I didn't realize how tiny those guns actually are until I looked at one of them next to a penny. So what will you use for gun tackle rope? I wound up using sewing thread on my SR just to be able to get it through 3 mm blocks. Probably to thin according to scale.
You are using an out of date browser. It may not display this or other websites correctly.
You should upgrade or use an alternative browser.
You should upgrade or use an alternative browser.
HMS Sovereign of the Seas - Bashing DeAgostini Beyond Believable Boundaries
- Thread starter DARIVS ARCHITECTVS
- Start date
- Watchers 84
I wasn't planning on it, oldflyer, because I need an opening to insert the borescope into. From the main hatch, you can look at two levels below the weather deck. I could make a removable set of gratings or just leave the grates on the deck next to the open hatch. What do you think?Kurt, Over the top PERFECT PS: you are hereby forbidden to cover with grating
View attachment 351815
My vote....just leave the grates on the deck next to the open hatch. What do you think?
...a removable hatch next to the coamings would be my vote as well!
Slow tedious work making gun tackles and installing them continues. I used the remaining gun tackles which have 2mm blocks on the bow chase fortified culverin drakes. I'm saving the remaining 1.5mm blocks I have to make gun tackles for those guns visible on the weather decks at the waist, forecastle, and halfdeck. Guns inside the forecastle and under the halfdeck will get tackles made with 2mm blocks. I may not have enough 1.5mm blocks to make tackles from.
Here is the process of installing the gun tackles. There are two ways of roving the gun tackles, left and right, and they are rove such that the fall always exits the double block from the sheave outboard of the gun carriage on each side. I am not sure if this was done on all naval carriages, but it seems the neatest way to prevent tangles in the gun tackle falls. The gun tackle is hooked to the carriage first, and then to the eyebolt on the bulwark using tweezers and while wearing a 4x magnification headset. You will notice my close-up pictures use the iPhone are getting better, because I'm learning!
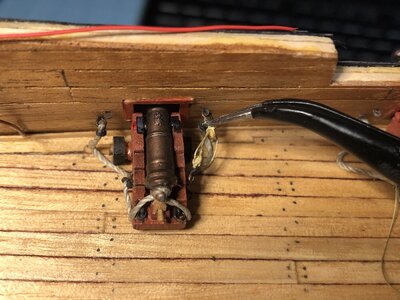
Tackle hooked in place
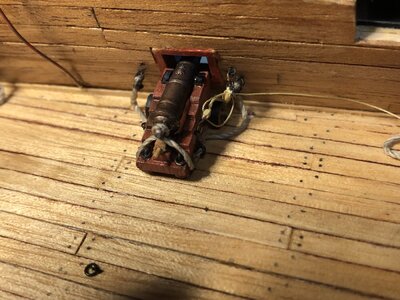
Carefully tighten the tackle by drawing the fall through the blocks, gripping the line from each pass to draw it taut. If you just draw the bitter end of the fall, you will bend or break the hooks.
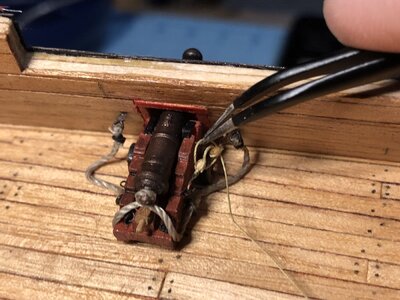
The fall is now taut. Use a black Sharpie marker to color exposed copper on the hooks and eyes if the black has been worn off.
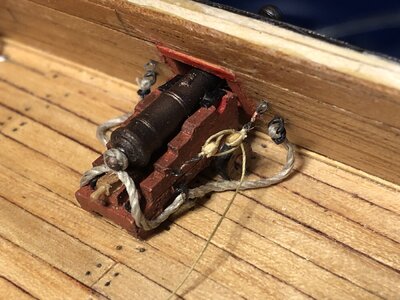
Apply some PVA along the bottom of the fall with a stick and cut the fall to length, ending about 5mm behind the carriage.
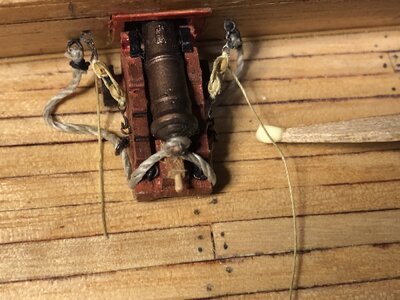
Both falls are glued to the deck, as is the breeching line in certain spots in order to hole the line draped in a realistic fashion.
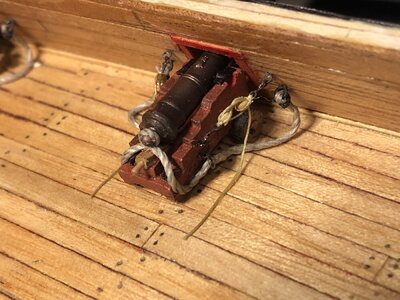
Wrap the left over line you cut off of the gun tackle, about 12cm long, around the rubberized handle of a diamond needle file, after first tying the thread to the file handle with only one turn of an overhand knot. Keep the tthread wet with glue as you wrap all the remaining line around the handle.
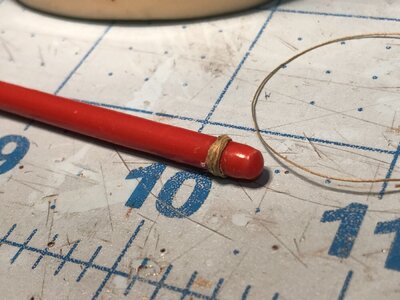
With the glue on the coil still tacky, use the tweezers to carefully slide the coil off the handle and press the entire coil flat.

Glue the coils over the bitter ends of the gun tackle falls. This gives the appearance of the gun tackle fall and coiler as being one continuous length of rope.
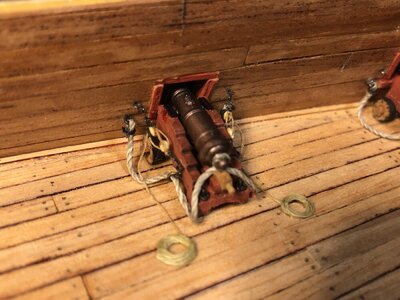
Here are the complete bow chase fortified culverin drakes. These will not be visible without a borescope, but I know they're there, and that's what counts.
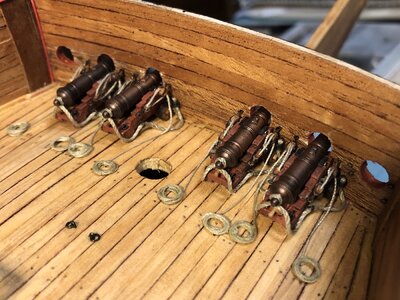
Here is the process of installing the gun tackles. There are two ways of roving the gun tackles, left and right, and they are rove such that the fall always exits the double block from the sheave outboard of the gun carriage on each side. I am not sure if this was done on all naval carriages, but it seems the neatest way to prevent tangles in the gun tackle falls. The gun tackle is hooked to the carriage first, and then to the eyebolt on the bulwark using tweezers and while wearing a 4x magnification headset. You will notice my close-up pictures use the iPhone are getting better, because I'm learning!

Tackle hooked in place

Carefully tighten the tackle by drawing the fall through the blocks, gripping the line from each pass to draw it taut. If you just draw the bitter end of the fall, you will bend or break the hooks.

The fall is now taut. Use a black Sharpie marker to color exposed copper on the hooks and eyes if the black has been worn off.

Apply some PVA along the bottom of the fall with a stick and cut the fall to length, ending about 5mm behind the carriage.

Both falls are glued to the deck, as is the breeching line in certain spots in order to hole the line draped in a realistic fashion.

Wrap the left over line you cut off of the gun tackle, about 12cm long, around the rubberized handle of a diamond needle file, after first tying the thread to the file handle with only one turn of an overhand knot. Keep the tthread wet with glue as you wrap all the remaining line around the handle.

With the glue on the coil still tacky, use the tweezers to carefully slide the coil off the handle and press the entire coil flat.

Glue the coils over the bitter ends of the gun tackle falls. This gives the appearance of the gun tackle fall and coiler as being one continuous length of rope.

Here are the complete bow chase fortified culverin drakes. These will not be visible without a borescope, but I know they're there, and that's what counts.


Last edited:
Captain’s choice. Which way are you leaning? You tend to have excellent judgment on building ship models. (Reference the grates)
Impressive gun rigging.
I glued the grating sections and crossbeams for them to the deck, or else I would lose them. As often happens, parts fall into the open hatch and go *tinkle tinkle* down into the orlop deck. I'm in the habit of picking up the entire model, holding it upside down, and shaking out the loose parts to get them back. So, gluing the grates to the deck will make sure they don't get lost. You run into interesting issues like this while making models.Captain’s choice. Which way are you leaning? You tend to have excellent judgment on building ship models. (Reference the grates)
Been there. Hated it. I've seen some guys put painter's tape over the openings...picking up the entire model, holding it upside down, and shaking out the loose parts to get them back
Too lazy for that.Been there. Hated it. I've seen some guys put painter's tape over the openings...
Patience, dnalley.... patience. . .Where are the hammocks for the crew? Where are the ram rods, powder barrels and cannon balls? Shouldn't there be some trash from scuzzy old sailors? If I could even come close to your build, I would be happy.
Good morning Kurt. Man that thread from Syren is brilliant. . Makes a massive difference to already fantastic cannons. Kudos - the detail while driving you mad is making this ship. Cheers GrantThanks to EVERYONE for their generous comments, even Vic, who is encouraging me to add even more detail, probably because he's curious if there's a threshold beyond which I'll experience a mental breakdown.Thanks for the challenge, Vic. It only makes the model better. Also thanks to the lurkers, who never make comments in this build log but read along (is you have any ideas or advice, SAY something).
The bow chase fortified culverin drakes were installed. All of these lighter guns will have half trucks with a few exceptions.
View attachment 351712
For the broadside guns visible in the waist, the line used for the breeching lines were replaced with line supplied by Syren Shipyard. This is a huge improvement over the leftover Corel line I had been using up to this point.
View attachment 351713
The first few demi-culverin drakes were installed on the upper deck broadsides.
View attachment 351714
Here is a close-up of one of them.
View attachment 351715
The waist demi-culverin drakes look nice, especially considering how small they are. The real challenge will be making the gun tackles as usual.
View attachment 351716
Here are the guns installed so far.
View attachment 351717
Progress so far
View attachment 351718
View attachment 351719
View attachment 351720
- Joined
- Nov 6, 2022
- Messages
- 198
- Points
- 88

Gotta love it!!!!Patience, dnalley.... patience. . .
I've had that happen with cannons. I lost one permanently.I glued the grating sections and crossbeams for them to the deck, or else I would lose them. As often happens, parts fall into the open hatch and go *tinkle tinkle* down into the orlop deck. I'm in the habit of picking up the entire model, holding it upside down, and shaking out the loose parts to get them back. So, gluing the grates to the deck will make sure they don't get lost. You run into interesting issues like this while making models.
How did you replace it?I've had that happen with cannons. I lost one permanently.
BTW 17th century ships didn't use their hammocks on deck as musket ball stoppers like 19th century ships did. The hammocks stayed below decks.Gotta love it!!!!
- Joined
- Nov 6, 2022
- Messages
- 198
- Points
- 88

Fine, they might open Sturgeon again, see if I can catch a legal one. Always catch the guys just a little too big. Three inches over 50 inches. It is OK cause salmon are right around the corner.Patience, dnalley.... patience. . .


