HMS Fly Build (Amati) 1:64 by Nomad

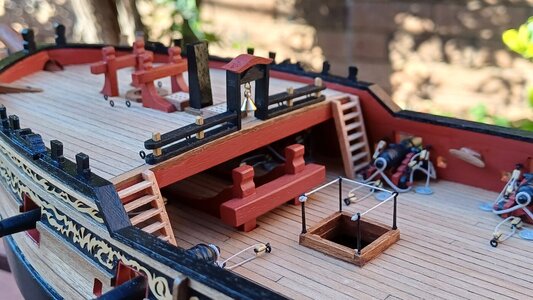
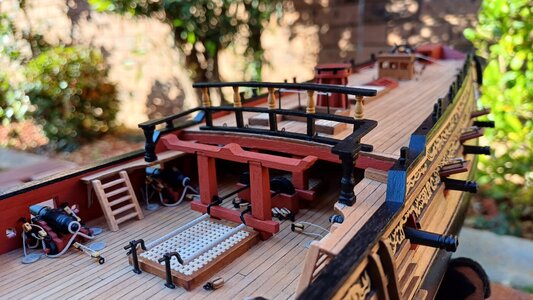
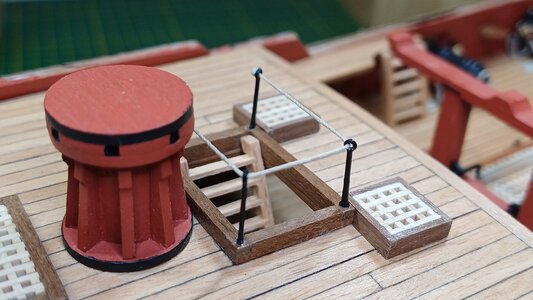
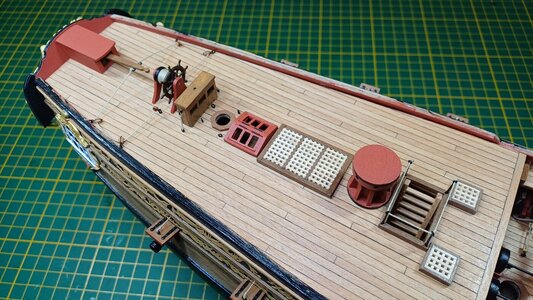
All of the quarterdeck's significant furnishings are now in place. The upper capstan fitted snugly on its counterpart below and the hatchway received the appropriate rope and stanchion trimmings. It is worth noting that the ladder will interfere with the hatch on the deck below. I had warning of this and made adjustments to both ladder and the hatch width (below) to compensate.
1025_20231113_hms_fly.jpg

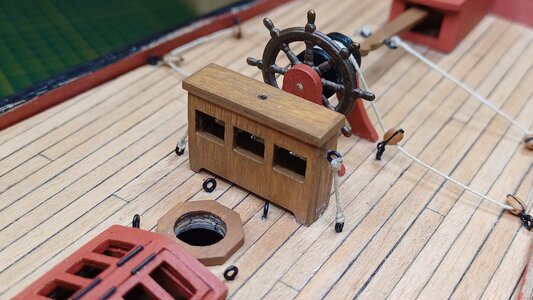
The binnacle is secured to the deck by ropes and eyebolts on either side. This is not according to kit specification but I had seen it done on other Fly and Pegasus builds and liked the logic behind it.
1030_20231113_hms_fly.jpg

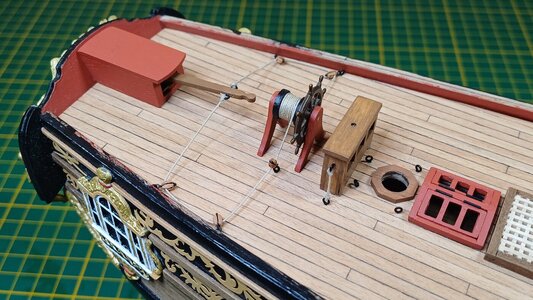
The ship's wheel configuration consists of the wheel assembly, tiller and housing, and rigging that binds the two together. Once the wheel and tiller are secured on deck, rope is bound to the rotating barrel of the wheel assembly and fed through blocks on either side of the deck to the tiller handle. I was happy to discover that the rudder swung in the correct direction when the wheel was turned :)
1035_20231113_hms_fly.jpg

Overall view of the quarterdeck so far...
1040_20231113_hms_fly.jpg

Thanks for checking in :)

Mark
 
Last edited:
All of the quarterdeck's significant furnishings are now in place. The upper capstan fitted snugly on its counterpart below and the hatchway received the appropriate rope and stanchion trimmings. It is worth noting that the ladder will interfere with the hatch on the deck below. I had warning of this and made adjustments to both ladder and the hatch width (below) to compensate.

View attachment 406680

The binnacle is secured to the deck by ropes and eyebolts on either side. This is not according to kit specification but I had seen it done on other Fly and Pegasus builds and liked the logic behind it.

View attachment 406681

The ship's wheel configuration consists of the wheel assembly, tiller and housing, and rigging that binds the two together. Once the wheel and tiller are secured on deck, rope is bound to the rotating barrel of the wheel assembly and fed through blocks on either side of the deck to the tiller handle. I was happy to discover that the rudder swung in the correct direction when the wheel was turned :)

View attachment 406684

Overall view of the quarterdeck so far...

View attachment 406685

Thanks for checking in :)

Mark
Good morning Mark. Coming together very neatly and concisely. Mooi! Cheers Grant
 
All of the quarterdeck's significant furnishings are now in place. The upper capstan fitted snugly on its counterpart below and the hatchway received the appropriate rope and stanchion trimmings. It is worth noting that the ladder will interfere with the hatch on the deck below. I had warning of this and made adjustments to both ladder and the hatch width (below) to compensate.

View attachment 406680

The binnacle is secured to the deck by ropes and eyebolts on either side. This is not according to kit specification but I had seen it done on other Fly and Pegasus builds and liked the logic behind it.

View attachment 406681

The ship's wheel configuration consists of the wheel assembly, tiller and housing, and rigging that binds the two together. Once the wheel and tiller are secured on deck, rope is bound to the rotating barrel of the wheel assembly and fed through blocks on either side of the deck to the tiller handle. I was happy to discover that the rudder swung in the correct direction when the wheel was turned :)

View attachment 406684

Overall view of the quarterdeck so far...

View attachment 406685

Thanks for checking in :)

Mark
The aft deck has some nice attributes, Marc. I like the wheel and tiller construction with the guided rope.
Regards, Peter
 
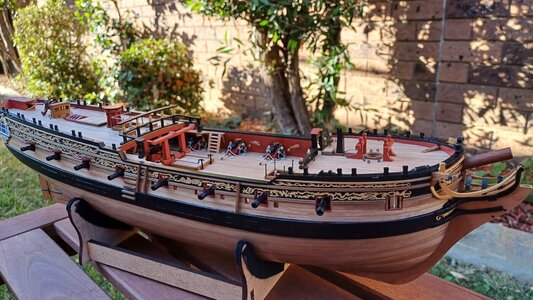
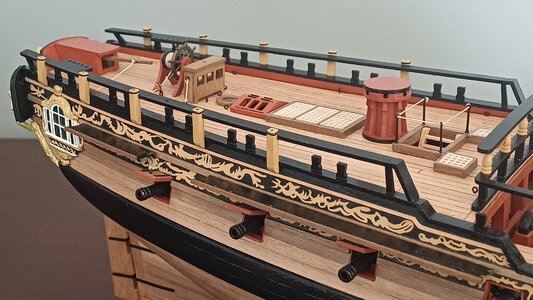
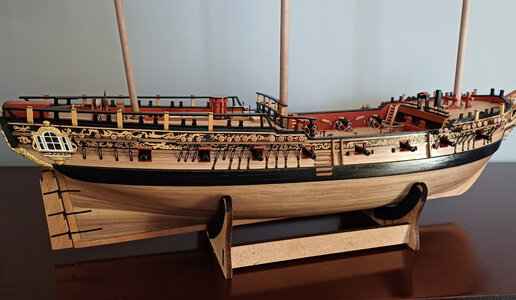
The installation of the plank-sheers, capping rails and timberheads along the perimeter of the bulwarks finally put an end to the ugly unfinished top edges of the vessel. The ladders between the gun deck and forecastle proved a very tight fit indeed and I would not want to be one of the unlucky gun crew trying to run gun #2 in and out with those ladders in the way. The forecastle rail and belfry assembly added a degree of elegance to the forecastle deck, although it took a bit of careful bending and manoeuvring to get the rails to follow the camber of the deck while keeping the belfry posts in an upright position.

1045_20231128_hms_fly.jpg

The quarterdeck rail assembly was a similar fit to the forecastle rails, with handrails extending from the middle rail to newel posts fixed to the quarter gangway. The kit's newel posts are a bit chunky and actually broader than the width of the handrail and I took the liberty of widening the handrail ends to compensate.

1050_20231128_hms_fly.jpg

The instructions called for a host of eyebolts to be inserted at various points around the forecastle and quarterdeck, presumably for rigging purposes. These have been inserted loosely at this stage so that they can be easily removed to add blocks or whatever is required of them later on.

1055_20231128_hms_fly.jpg

All these additional fittings are fine and well but there are now a number of very potential snag-magnet points around the ship, and I'd put good money on me knocking one or two under-deck cannons off their carriages and spending days trying to re-house them where I no longer have access :oops:

Thanks for checking in...
Mark
 
Hi Mark,

trying to catch up with a few builds. You have certainly progressed with Fly. The fitting out of the decks looks excellent and well detailed. Very nice job on the rails it is really difficult to get the cambers correct and the posts upright without leaving a gap showing. Particularly like the wheel and rudder ropes. If you want to glaze the skylights on a future model you can cut the clear window from a packaging box and glue it on the underside of the frame with a drop of araldite (don't use CA because it fogs the plastic), I did that on the Lilla Dan and they look fine.

Look forward to seeing the masts stepped which shouldn't be too far away in the future at the rate your progressing.

I've only just managed to restart the C-S after a bit of a hiatus, so lots of work to be done over the winter to catch up.
Hi Dom, thanks for checking in and the feedback. Yes I chickened out of the glazed-skylight concept, not trusting my ability as usual, but I will certainly carry your suggestion forward for my next build. I think I am getting closer to completing the hull and all the deck fittings now, taking my time of course, consciously delaying the inevitable decent into that confusing mass of ropes and blocks otherwise known as rigging. Gives me the shivers just looking at it :oops:

Looking forward to your next update of the CS...
 
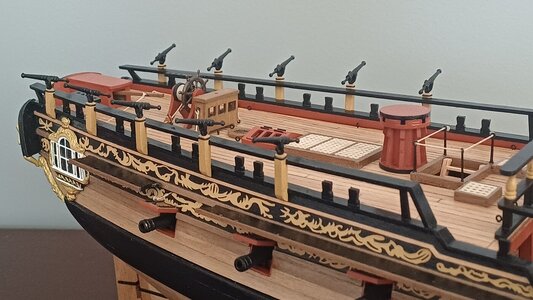
The upper quarterdeck rails run the full length of the quarterdeck at a gentle but ever-increasing angle to the capping rails below. They are supported by a host of swivel gun posts and each have a belaying pin-rack installed aft. The drift rail on the hull exterior forms a baseline for all the swivel gun posts, which are in turn notched to accommodate the upper quarterdeck rails. Getting the drift rail positioned properly goes a long way to ensuring the accurate alignment of the upper rails.

1060_20231221_hms_fly.jpg

The swivel guns are blackened and inserted into receiving holes drilled into the top of each swivel gun post. They are only dry fitted at this stage. Sixteen swivel guns adds another sixteen snag-magnet opportunities to the hull, so they will be removed and re-installed in the posts at a later stage.

1065_20231221_hms_fly.jpg

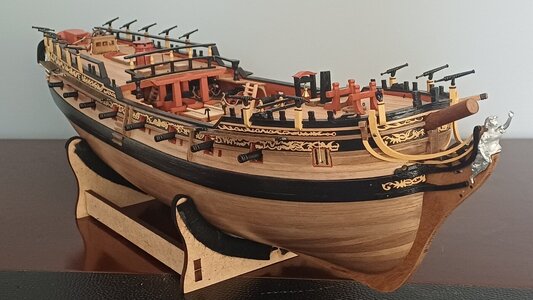
The ship is fitted with enough armoury to fight a battle, if only she could sail! Next up will be the channels, chainplates and deadeyes in preparation for the rigging that is to come.

1070_20231221_hms_fly.jpg

Thanks for checking in :)

Mark
 
Last edited:
The upper quarterdeck rails run the full length of the quarterdeck at a gentle but ever-increasing angle to the capping rails below. They are supported by a host of swivel gun posts and each have a belaying pin-rack installed aft. The drift rail on the hull exterior forms a baseline for all the swivel gun posts, which are in turn notched to accommodate the upper quarterdeck rails. Getting the drift rail positioned properly goes a long way to ensuring the accurate alignment of the upper rails.

View attachment 415411

The swivel guns are blackened and inserted into receiving holes drilled into the top of each swivel gun post. They are only dry fitted at this stage. Sixteen swivel guns adds another sixteen snag-magnet opportunities to the hull, so they will be removed and re-installed in the posts at a later stage.

View attachment 415412

The ship is fitted with enough armoury to fight a battle, if only she could sail! Next up will be the channels, chainplates and dead eyes in preparation for the rigging that is to come.

View attachment 415413

Thanks for checking in :)

Mark
Cannot be much better -WELL DONE MATE - this coming from an OLD HAND
 
The upper quarterdeck rails run the full length of the quarterdeck at a gentle but ever-increasing angle to the capping rails below. They are supported by a host of swivel gun posts and each have a belaying pin-rack installed aft. The drift rail on the hull exterior forms a baseline for all the swivel gun posts, which are in turn notched to accommodate the upper quarterdeck rails. Getting the drift rail positioned properly goes a long way to ensuring the accurate alignment of the upper rails.

View attachment 415411

The swivel guns are blackened and inserted into receiving holes drilled into the top of each swivel gun post. They are only dry fitted at this stage. Sixteen swivel guns adds another sixteen snag-magnet opportunities to the hull, so they will be removed and re-installed in the posts at a later stage.

View attachment 415412

The ship is fitted with enough armoury to fight a battle, if only she could sail! Next up will be the channels, chainplates and dead eyes in preparation for the rigging that is to come.

View attachment 415413

Thanks for checking in :)

Mark
Good morning Mark. This is brilliant. Love the bowsprit ROTF . Cheers Grant
 
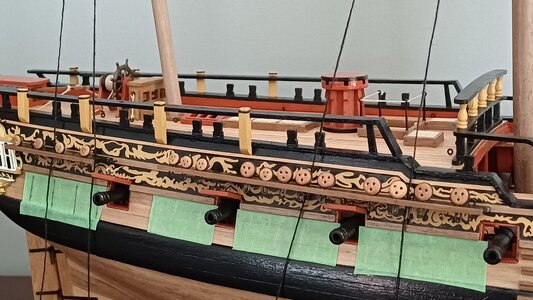
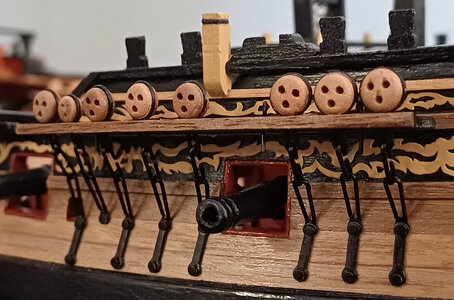
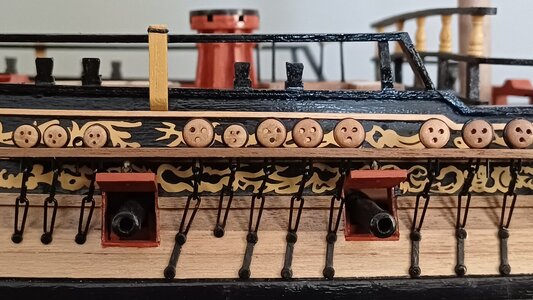
Channels, chainplates and deadeyes. The sets of channels are painted dull black and attached to the sheer rails on either side with headless nails and glue. Strips of natural walnut are used to trim each channel edge and effectively seal the openings that will accommodate the deadeyes. The three masts are stepped temporarily and rope threads from the topmasts are used to emulate the shroud lines and determine the angle with which to attach the chainplates to the hull below.

1075_20240110_hms_fly.jpg

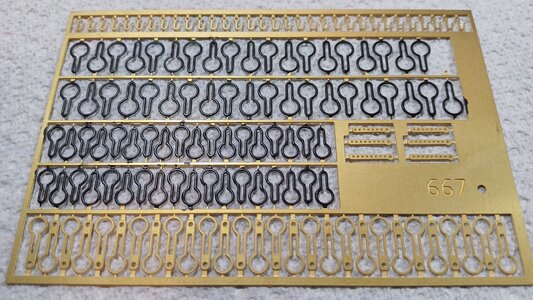
Amati provides a very nice set of brass links with which to assemble the chainplates and the upgrade kit also came with improved strops for the deadeyes. Blackening all the brass bits isn't much fun at the best of times but I did at least heed the kit's inspired advice to blacken them in place in the template rather than remove and paint them all individually.

1080_20240110_hms_fly.jpg

The kit-supplied 5mm deadeyes seemed far too big for this assembly and I used 5mm deadeyes that I had purchased from Dry Dock previously instead. These looked a lot better and, interestingly, were a far better fit for the strops supplied in the upgrade kit. The smaller, 3mm deadeyes and strops supplied in the kit were just fine.

1085_20240110_hms_fly.jpg

As mentioned earlier, the Amati's chainplate links are well designed and fit very snugly together. For instance, the ends of the preventer plate and loop link that receive the upper bolt are both recessed to make the connection seamless and flush with the hull. However, care must be taken to position the channels accurately; some of the chainplates came perilously close to gunports, row ports and port lids :oops:

1090_20240110_hms_fly.jpg

It is yet to be seen whether the angle of each chainplate will match the eventual angle of the corresponding shroud line. Holding thumbs on that one. All in all, the channel and chainplate installation was a fun exercise. The only issue was making sure that the preventer plate bolts do not interfere with anything inside the hull. Some of the bolts came very, very close to the gun-rigging ring bolts on the hull interior. A miss, however, was as good as a mile :)

1095_20240110_hms_fly.jpg

Thanks for checking in Thumbsup

Mark
 
Last edited:
Back
Top