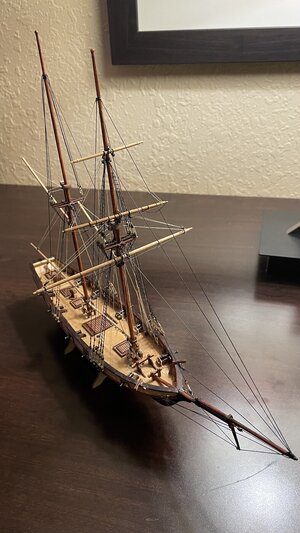
okayI agree with Doc ! Beautiful !
By the way Kurt, you need to update your forums signature to add this build (and with the results you have, you absolutely need to) !
Jeff
You are using an out of date browser. It may not display this or other websites correctly.
You should upgrade or use an alternative browser.
You should upgrade or use an alternative browser.
Cheap Chinese Halcon speed build [COMPLETED BUILD]
- Thread starter DARIVS ARCHITECTVS
- Start date
- Watchers 45
-
- Tags
- completed build halcon
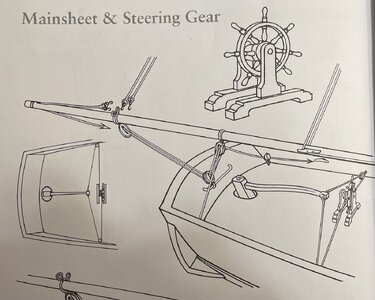
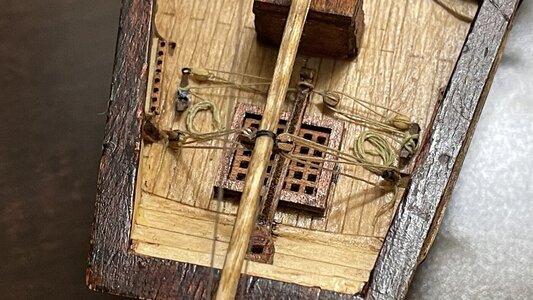
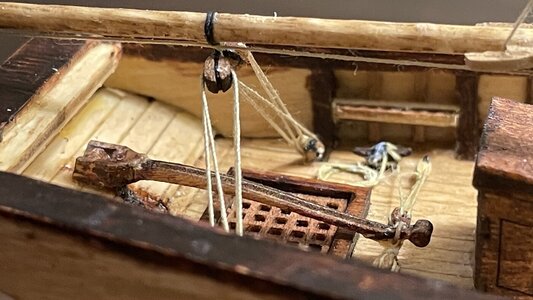
Yes. When the boat is on a steady course, weather permitting, you can lash the tackle which is taut to the cleat and ride in comfort. If you need to make slight adjustments, you can throw a half bend around the cleat on the taut side and ease or draw the fall.
Ah, auto-pilot

Great work Kurt.
I just wanted to build a little boat... not start a revolution!In my opinion, this build has redefined model shipbuilding - certainly the way I think about things! As a showcase for his talent, Kurt won't find any better - love it!
 It didn't seem to be anything different that the average scratch build, with a head start on the main parts. I'm surprised this little build made such an impression, and am really glad you guys liked it.
Last edited:
Ha! My order of the same 6mm Dry-Dock Models pins arrived two days ago. And they look SWEET! But also, very much a shiny brass and not looking like wood at all. But then again, the Brass Darkening Solution has also arrived. And so, I plan to play with both of those soon. I'll post results, of course.I got some new brass belaying pins from Dry-Dock Models and Parts the other day. Let’s compare them to the others in my parts box.
View attachment 431556
From left to right:
1) pin from La Couronne kit from Corel, totally unusable if you want the proportions to be correct.
2) brass 6mm pin from Dry-Dock Models
3-5) Falkonet wooden pins, 8mm, 9mm, & 11mm. Note that the 9mm pins are noticeably thinner than the 8mm pins.
The 6mm pins are the smallest and also have correct shape. Plus, they are stronger. Since all belaying pins on models are usually too large for scale, using the smallest pins you can find and work comfortably with is desirable.
My guess is that the new oxide will "antique" the brass quite well. Which will be darker than the wood they should have been made out of. But it also may add a neat style aspect. We'll see.
BEAUTIFUL boat, btw.
M.
Aren’t those little pins cool, though?!Ha! My order of the same 6mm Dry-Dock Models pins arrived two days ago. And they look SWEET! But also, very much a shiny brass and not looking like wood at all. But then again, the Brass Darkening Solution has also arrived. And so, I plan to play with both of those soon. I'll post results, of course.
My guess is that the new oxide will "antique" the brass quite well. Which will be darker than the wood they should have been made out of. But it also may add a neat style aspect. We'll see.
BEAUTIFUL boat, btw.
M.
Day 44
The outhaul for the fore boom was rigged. It’s getting harder to reach in there with fat fingers, guys…
This tiny double chick I gnawed out a scrap stick of cherry wood was a real pain to glue onto the bottom of the fore boom without a magnifying headset.
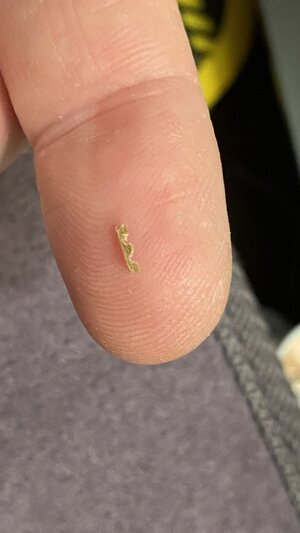
Hey. I got it!
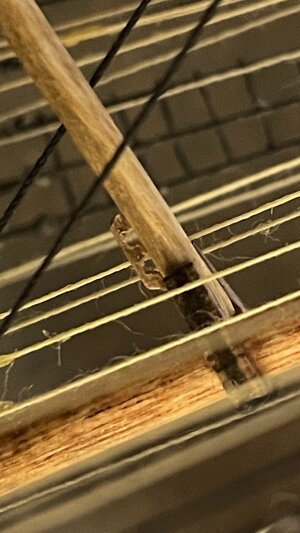
The outhaul is done.
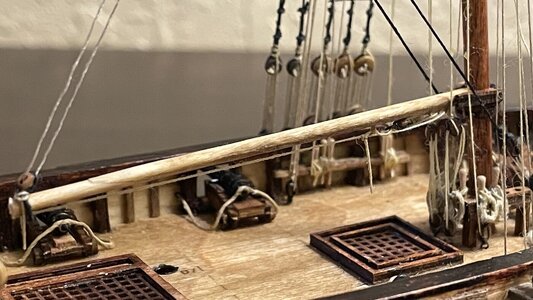
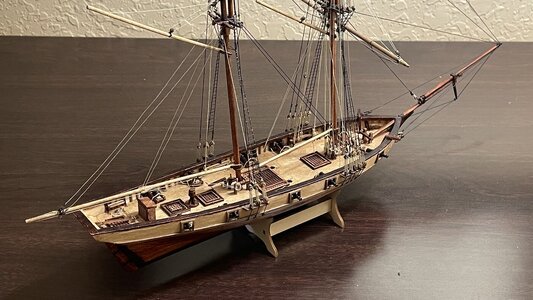
Hmmm… what do do next…?
The outhaul for the fore boom was rigged. It’s getting harder to reach in there with fat fingers, guys…
This tiny double chick I gnawed out a scrap stick of cherry wood was a real pain to glue onto the bottom of the fore boom without a magnifying headset.

Hey. I got it!

The outhaul is done.

Hmmm… what do do next…?

Last edited:
Sooo cool! I would like to know what type of mini-lathe and what RPM they had to run up to to turn such small pieces as precise as these are. Miniature machine tools fascinate me.Aren’t those little pins cool, though?!
Your Build looks great!
Nude and cleaned with denatured alcohol:Sooo cool! I would like to know what type of mini-lathe and what RPM they had to run up to to turn such small pieces as precise as these are. Miniature machine tools fascinate me.
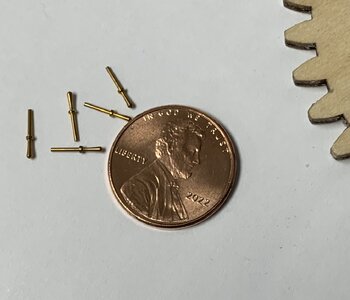
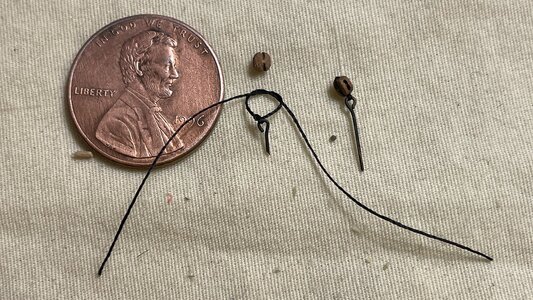
60 seconds on four pins in 100% Brass Darkening Solution. The penny then went in for 120 seconds because it did not darken evenly. It started at the edges and then moved towards the center. I probably should have washed it with soap before the alcohol rinse.
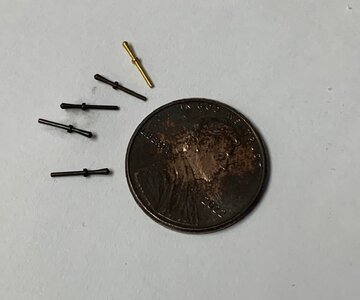
And after rubs with a paper towel. Looks like shinny dark brass, but I think I like it. It might look cool on my build.
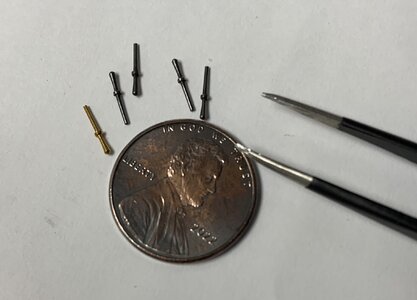
M.
Kurt, what do you use for a camera? You get some really wonderful quality photos !Day 44
The outhaul for the fore boom was rigged. It’s getting harder to reach in there with fat fingers, guys…
This tiny double chick I gnawed out a scrap stick of cherry wood was a real pain to glue onto the bottom of the fore boom without a magnifying headset.
View attachment 431850
Hey. I got it!
View attachment 431851
The outhaul is done.
View attachment 431852
Hmmm… what do do next…?
View attachment 431853
I just use an Apple iPhone 12. If you zoom in to 2x or 3x, then move the camera to a desirable distance from the model, you get even focus across the image from left to right and the camera has a better time determining and holding focus. The detail you get is surprising. All the hated fuzzies make themselves apparent.Kurt, what do you use for a camera? You get some really wonderful quality photos !
Greaat work on that little ship Kurt
Right. So I'm trying to psych up to begin the stays. And I looked back on this thread to where you did the deadeyes. And there was some "hand waving" or explanations that were not as explicit as I guess I might need. I saw how you secured the lower deadeye. But next the upper is shown as rigged up to the mast. How did you get from the lower to the upper plus the mast and keep them all in line (let alone do any of that)?
I built a deadeye jig to hold the two blocks at the same distance while roping them together. But that is definitely not how you work. Can you describe how you work from the lower deadeye to the upper and then mast stay for me?
M.
I built a deadeye jig to hold the two blocks at the same distance while roping them together. But that is definitely not how you work. Can you describe how you work from the lower deadeye to the upper and then mast stay for me?
M.
Tying the stays and keeping them with even intention, such that none of them are slack is always tricky. On this model, simple overhead knots, secure the lower end of the fore stays to the jib. The tension of each line is adjusted before the knots are cinched tight and secured with glue. It’s all about keeping the lines carefully balanced in tension and requires adjustments and patience.Right. So I'm trying to psych up to begin the stays. And I looked back on this thread to where you did the deadeyes. And there was some "hand waving" or explanations that were not as explicit as I guess I might need. I saw how you secured the lower deadeye. But next the upper is shown as rigged up to the mast. How did you get from the lower to the upper plus the mast and keep them all in line (let alone do any of that)?
I built a deadeye jig to hold the two blocks at the same distance while roping them together. But that is definitely not how you work. Can you describe how you work from the lower deadeye to the upper and then mast stay for me?
M.
Once the lower dead eyes are secure on the channels, I tie each day with a loop around the mast head. Taking a stay in one hand, I tied and overhead not loosely around the upper dead eye. Holding the upper dead eye above lower dead eye, I gauge the distance and adjust the overhand, not until the dead is roughly at the height you want to be 1/16 to an eighth of an inch shorter to count for stretching of the shroud on a large model. Once it’s slashed to the lower dead eye. There were no measurements, because I was using experience gain from previous models to make them consistent by judging the amount of stretch in each shroud. On a model of the small, making the dead eyes very close to their desired position is necessary, because the short shrouds don’t stretch as far as with a larger model. The tension in this model is not perfectly even, as you would expect, but each has appropriately placed the same.
When the upper dead eye is in position, the overhead not is tightened, and the height checked one final time before glue, is applied to the thread surrounding the dead eye, locking it in place. The bitter end of the shroud is then lead upwards and seized to the standing part as you normally would. Shrouds are always rigged in pairs, starting with one side, then the other, and alternating back-and-forth to maintain even tension on the mast head from port to starboard. The tension on each shroud is not great at all, being just enough to keep the thread taut, and enough, such that, if the thread stretches a bit over time, it will not go slack.
The dead eye spacing tool you mentioned could not be used on dead eyes a small as 3 mm. So, I rigged the shrouds without the tool, and tightened the lanyards between the dead eyes only as much as required to make the upper dead eyes, even with the lower ones, the flexibility in the shrouds provides enough leeway to allow you to adjust the height of the upper dead eye, and still maintain some tension if you tied the upper dead eye approximately at the correct position.
I can go into more detail if you provide some specific questions. Or, you can look at my build log for La Couronne and see how they were done on that previous model.
Last edited:
Day 46
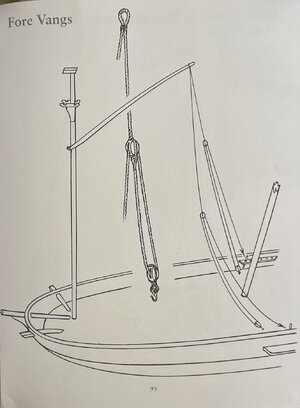
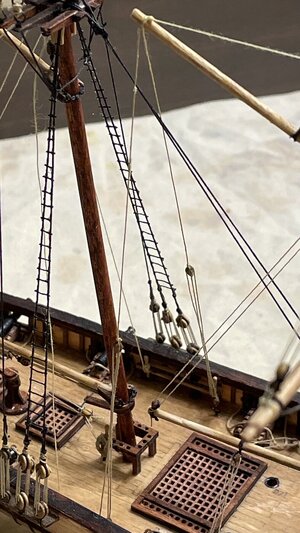
Guess what, guys! I remembered to bring the magnifying headset this time! Life just got so much easier. The main gaff vang lines were rigged.
First some tiny 2mm blocks need to be stropped to the vang lines and a couple cleats were fashioned from sticks of cherry wood to serve as belaying points.
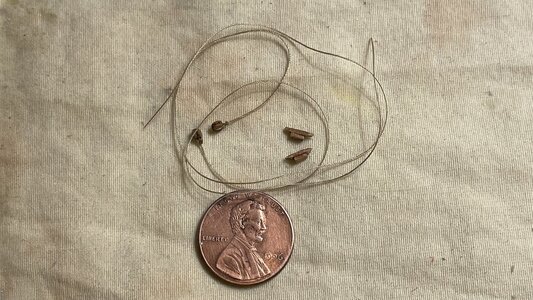
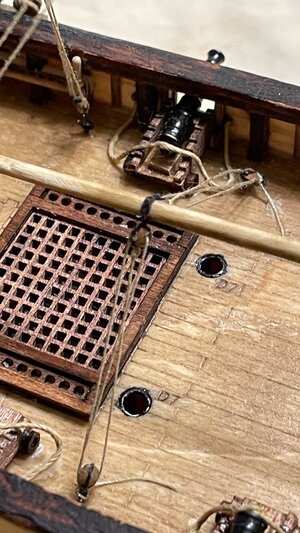
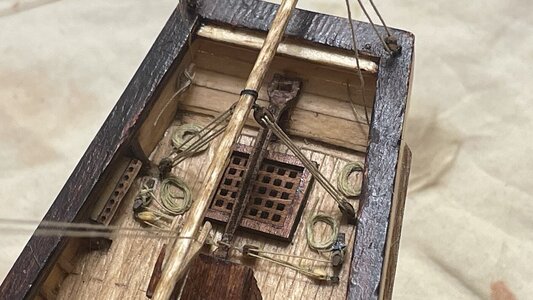
Two more blocks were stropped to eyebolts. Holes in the stern railing at the corners were drilled by hand. And the end of the fall lines for each tackle were tied to the cleats after estimating how long the lines in the tackle should be. The rigging arrangement was taken from Lennarth Petersson’s book like previous lines. An overhead not is tied around the eyebolt, then the bitter end of the thread are used to tie another overhand not around the block. The thread is secured with CA glue and remainder is trimmed off.
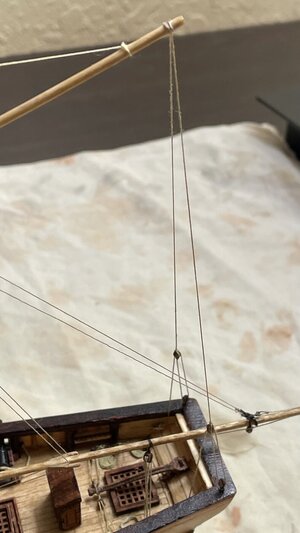
After the cleats were glued to the bulwarks with CA glue, the upper ends of the vang lines were secured to the gaff overhead, tensioning the tackles. The estimates of how long the falls needed to be came out pretty close, with the upper blocks of the tackles being at approximately the same height. These lines are complete.
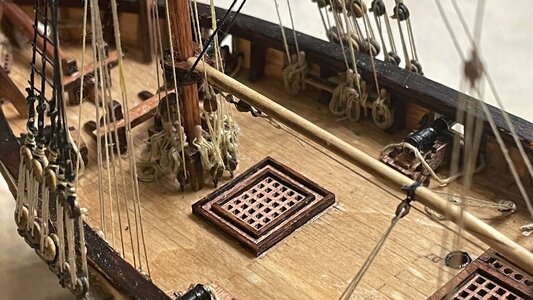
Next, rope hanks were made, and carefully hung on the belaying pins around the bulwark.
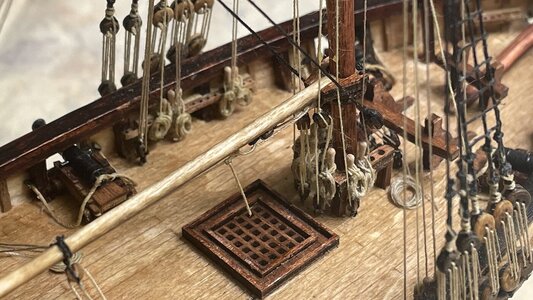
A few more rope coils were also added to the deck.
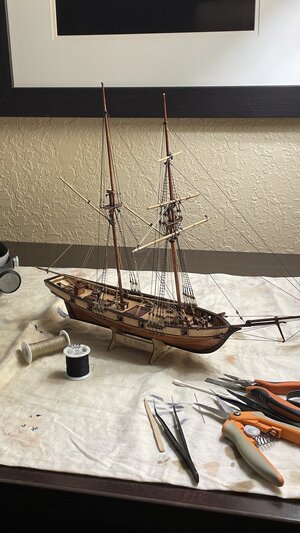
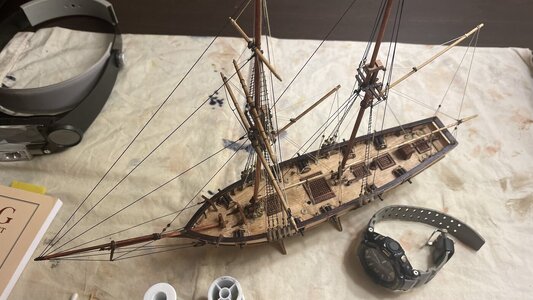
Progress so far.
Guess what, guys! I remembered to bring the magnifying headset this time! Life just got so much easier. The main gaff vang lines were rigged.
First some tiny 2mm blocks need to be stropped to the vang lines and a couple cleats were fashioned from sticks of cherry wood to serve as belaying points.

Two more blocks were stropped to eyebolts. Holes in the stern railing at the corners were drilled by hand. And the end of the fall lines for each tackle were tied to the cleats after estimating how long the lines in the tackle should be. The rigging arrangement was taken from Lennarth Petersson’s book like previous lines. An overhead not is tied around the eyebolt, then the bitter end of the thread are used to tie another overhand not around the block. The thread is secured with CA glue and remainder is trimmed off.

After the cleats were glued to the bulwarks with CA glue, the upper ends of the vang lines were secured to the gaff overhead, tensioning the tackles. The estimates of how long the falls needed to be came out pretty close, with the upper blocks of the tackles being at approximately the same height. These lines are complete.

Next, rope hanks were made, and carefully hung on the belaying pins around the bulwark.


A few more rope coils were also added to the deck.

Progress so far.

Last edited:
Hi, Great work, I keep looking at the build and hope I can achieve even a bit of that kind of result. If I may ask a question, how do you get that weathered look on the rails? I am building my first kit of this kind and I guess my question shows it. ThanksDay 46
Guess what, guys! I remembered to bring the magnifying headset this time! Life just got so much easier. The main gaff vang lines were rigged.
First some tiny 2mm blocks need to be stropped to the vang lines and a couple cleats were fashioned from sticks of cherry wood to serve as belaying points.
View attachment 433652
Two more blocks were stropped to eyebolts. Holes in the stern railing at the corners were drilled by hand. And the end of the fall lines for each tackle were tied to the cleats after estimating how long the lines in the tackle should be. The rigging arrangement was taken from Lennarth Petersson’s book like previous lines. An overhead not is tied around the eyebolt, then the bitter end of the thread are used to tie another overhand not around the block. The thread is secured with CA glue and remainder is trimmed off.
View attachment 433653
After the cleats were glued to the bulwarks with CA glue, the upper ends of the vang lines were secured to the gaff overhead, tensioning the tackles. The estimates of how long the falls needed to be came out pretty close, with the upper blocks of the tackles being at approximately the same height. These lines are complete.
View attachment 433654
Next, rope hanks were made, and carefully hung on the belaying pins around the bulwark.
View attachment 433655
View attachment 433656
A few more rope coils were also added to the deck.
View attachment 433657
Progress so far.
View attachment 433658
Purely by accident. I suck at wood finishing. Basswood takes stain poorly and has no grain contrast. The railings were stained with a few coats of Black Walnut Danish Oil, then spray varnished with Krylon semi gloss clearcote. No rocket science here. Handling of the model also tended to wear the edges of the railings a bit, making them lighter in color. I don't suggest you drag the model behind the pickup truck for 20 miles, but it will get some wear just from handling as you build the rigging, and the finish on my model was not that hard because it took so many coats of Danish oil to get the railing so dark. At least they offer contrast to the hull. If the model had decent hardwoods like cherry or beech wood, it would appear much better, and their would be grain to show, instead of relying on streaks in the stain finish to provide detail. However, since the boat is so small, all the details in the rigging draw you eye away from the wood quality.Hi, Great work, I keep looking at the build and hope I can achieve even a bit of that kind of result. If I may ask a question, how do you get that weathered look on the rails? I am building my first kit of this kind and I guess my question shows it. Thanks
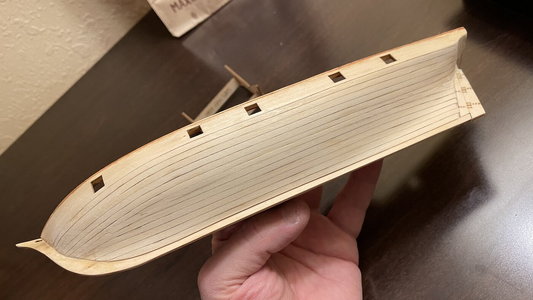
If I had to do it all over again, I would leave the hull like you see below, and paint the bottom very lightly with an airbrush, letting the planking lines show through the paint. Glue also prevented proper staining and required scraping to remove in order to eliminate light spots at the glue joints.
Last edited:


