Cazador Xebec 1750 - OcCre - scale 1:60 [COMPLETED BUILD]

The final chapter....

Hello everybody,

As you can see this will be the last building chapter of this model. She is finished! It has been a journey and the end is a bit bittersweet. Sure I'm proud I finished this model and the way it came out, but on the other hand it was a real joy to work on her and by finishing the build, this stops...
However, it's not entirely finished, I still need to make a presentable stand and a complete photoshoot has to be done as well. This is for later...
For now let me take you on the final steps of the build of the mizzenmast, sail and rigging.

After sewing on the boltrope, I attached the sail to her yard. While under tension, I used boiled potato starch on the cloth and some sugar in a plastic bag to bring the sail to shape. It takes about 12-24 hours to dry and then the sail holds it's final shape.

photo 586146


photo 586147


To hoist the yard, I needed to fabricate the ramshead blocks. In this case this was not an easy job to do. On this scale 1:60, they are really, really small and I wanted to make these blocks the same as the others. So with working sheeves and all......
The upper block is 2mm in width, with sheeves of 2mm in diameter and 0,5mm thick. Again the process is similair as the other blocks and are made out of laminated 0.5mm veneer strips.

photo 586138


photo 586137


When a knife is sharp enough, slices can be cut of the upper block to get to the right size.

photo 586140


photo 586141


I somehow lost the photo of the final product, ah well....they are the same as the others but smaller. Here you see them installed on the ship.

photo 586142


While working on the ship all kinds of hazards and dangers came up her path. In this case a big black and white one who seems to love attention and playing with scale ropes..... No worries, we are good friends and we have a very good mutual understanding. Touching the ship shortens lifes rapidly....

photo 586148


photo 586136


photo 586134


photo 586139


Some kitparts are not needed anymore and are thrown into the bin....

photo 586135


Back on rigging....The principle of the mizzenyard / sail is the same as the two others, however the masthead contains only two sheeves instead of four. Both are used to hoist the yard. Also the parrel is different and much easier constructed. In this case only the trunks (beads) are used. The end of the parrel is tied off beneath the mast foot.

photo 586151


photo 586149


photo 586144


photo 586145


photo 586143


photo 586150


And then the end result. So a final photoshoot will occur soon, but in the mean time this is how she looks!

photo 586152


photo 586153


photo 586154


I have tried to push my limits with the construction of this ship and can say that I succeeded. Pretty much everything about the kit has been changed and I can easily estimate a little over 2500 hours of work that went into this model. Not all hours are construction hours. I suspect I've spent over 250 hours of research and study just trying to figure out specifics about this type of ship. Unfortunately, generalities are known, but the details are missing from these types of ships and there is also very little documentation to be found. Everything is made by hand, the carvings of course gives an extra special character to this ship. The sails and rigging are fully in accordance with a famous French Xebec from the 18th century called Le Requin, the museum model Singe of 1762. https://en.wikipedia.org/wiki/French_xebec_Singe_(1762)

I am also very happy and blessed with you guys as followers who have accompanied and assisted me on this adventure. Thank you so much for the interest, reactions, likes, loves and especially support. My gratitude to you all is not easily expressed in words but I wish I meet you guys all one day in person and shake your hand and have a chat about this great hobby of ours. Thank you!!!

I hope you will follow me again on the next journey. I have already done a lot of research for this model and that project will also be quite a challenge.

The next update will be a photoshoot with a lot of pictures....

The end.

Peter
Good evening Peter. Brilliant! Building the same kit I am aware of the amount of scratch work, changes and in some aspects complete redesign (especially the rigging) you have done to build the best “Cazador “ Xebec I have seen. All the woodwork involved in redoing most of the kit parts and making those main blocks, sheaves etc is massive and masterfully executed. And as for your carving…..well it is there for us all to marvel over. Bravo. You have skills. A Xebec to be proudly displayed Peter.
Cheers Grant
 
It's kind of dangerous on this website to declare a build is exceptionally well-crafted, unique, beautiful or realistic or.... because there are way too many great modelers who might take offense at such stout declaration, but for this beautiful example I'm willing to take the risk. This model is exquisite in all its details, nothing was apparently taken for granted and it shows. My heartfelt congratulations with completing this masterpiece!
 
Dear Peter! I can only echo the sentiments of my fellow SOS members. You have built an extraordinary Xebec with so many of your own touches, that it can truly be called a unique build. I loved to follow your thought process during the build, your explanations and of course the way in which you went about effecting all these scratch-built items. Bravo on a brilliant Xebec!
 
Good evening Peter. Brilliant! Building the same kit I am aware of the amount of scratch work, changes and in some aspects complete redesign (especially the rigging) you have done to build the best “Cazador “ Xebec I have seen. All the woodwork involved in redoing most of the kit parts and making those main blocks, sheaves etc is massive and masterfully executed. And as for your carving…..well it is there for us all to marvel over. Bravo. You have skills. A Xebec to be proudly displayed Peter.
Cheers Grant
Your Xebec will be even better and hopefully my log will be an inspiration as well to improve on. You are already on your way!
Thank you for all the nice comments and ask me anything during your build of Cazador. Thanks my friend!!!

It's kind of dangerous on this website to declare a build is exceptionally well-crafted, unique, beautiful or realistic or.... because there are way too many great modelers who might take offense at such stout declaration, but for this beautiful example I'm willing to take the risk. This model is exquisite in all its details, nothing was apparently taken for granted and it shows. My heartfelt congratulations with completing this masterpiece!
Reading the first line brought a smile and a laugh on my face, the humour you and other have is unique to this forum and makes it a great place to be. Thank you Johan for your kind words and support! Appreciated very much and I will see you in Amsterdam.

Bravo Peter! She's an exquisite beauty. what a treat it has been following you on this journey. Looking forward to your final photo shoot and your next build.
Hi Daniël, I'm always happy to receive a reply from you. Thank you for your kind words allong the way and now at the "end" of the build. Some small things left and then I will start a new log and new adventure!

What a beautiful ship you have built!!
Gracias Lorenzo, Thank you for your reply. This ship is a homage to your country really, especially the endangered Imperial Eagle. Therefor this ships name will be El Aguila instead of Cazador!

Dear Peter! I can only echo the sentiments of my fellow SOS members. You have built an extraordinary Xebec with so many of your own touches, that it can truly be called a unique build. I loved to follow your thought process during the build, your explanations and of course the way in which you went about effecting all these scratch-built items. Bravo on a brilliant Xebec!
Dear Heinrich, thank you again and again for your assistance, help and kind words during this build. Your quest / endeavour on Mercury and the WB will be a success I'm sure. Thanks for your kind words!

Peter
 
Making the stand

Hi guys,

Although the ship is finished I still have to do a few things before I can call this project a success. First of the things I have to do is to make a proper stand.
There are many great examples to find on the web, but I like a "simple" but elegant one. This will be a baseplate with two pedestals on it however in the near future I need to make a proper dustfree case. Dust is the enemy of all wooden models. Dust attract moist and hold most and this doesn't goes well with your model. So, do not worry, I will make a case, but that's for later.

For now I start with the construction of both pedestals. I decided to make it all out of American or Black Walnut. I have a few boards on stock and it resembles the wood I used for the ship. So both the stand and the ship should complement each other, although that's the idea.
I used my tablesaw to saw a piece of 25x25x100mm. I will use a lathe to get it from square to a round shape. I never used a lathe before and purchased the cheapest one from Proxxon I could find. It's just a test if the machine and I can become friends....some machines will be your enemy forever....

photo 586208


photo 586210


photo 586209


With a pencil it's fairly simple to draw a couple of lines. With some wood gauges I shaped the pedestals.

photo 586211


photo 586212


photo 586213


photo 586214


Still need to make the slots to hold the keel of the ship. I cut these 90 degrees from the direction of the grain of the wood for strength.

photo 586215


I know you probably can purchase these pedestals and perhaps even better ones or brass ones than I just made. For fun I tried the make these things myself and I liked the lathework!

For the baseplate I used a very nice piece of solid walnut. However, the board I had was to thin to use, so I cut it into half and glued both pieces together with carpenters glue. I let the glued board cook overnight and the next day cleaned it all up on my table saw. I used a router to make a nice profile on the edge of the board. On the picture below I marked the glued edge between both boards. You can hardly see it.

photo 586216


photo 586217


A dryfit of the pedestals on the board.

photo 586218


After some measurements I glue both pedestals to the board. I also used a drill bit to drill a hole through the middle of both pedestals and the board to hold a bolt. When the ship is placed on the board, I use a bold / screw to fasten the ship to the stand. This also worked out perfectly.

photo 586219


The marriage between the stand and the ship. I must say....the both complement each other and it worked out perfectly.

photo 586220


photo 586221


The nameplate and the photoshoot is all that is left to do.....

See you soon,
Peter
 
Wow Pter,

I had some catching up to do on your blog after the holidays but bang she is finished.
You can be the proud owner of a one of a kind Chebec, a jewel in every living room and a piece of art.
I admire your eye for detail and look forward to your next one.
We will meet in Amsterdam for sure.
 
Making the stand

Hi guys,

Although the ship is finished I still have to do a few things before I can call this project a success. First of the things I have to do is to make a proper stand.
There are many great examples to find on the web, but I like a "simple" but elegant one. This will be a baseplate with two pedestals on it however in the near future I need to make a proper dustfree case. Dust is the enemy of all wooden models. Dust attract moist and hold most and this doesn't goes well with your model. So, do not worry, I will make a case, but that's for later.

For now I start with the construction of both pedestals. I decided to make it all out of American or Black Walnut. I have a few boards on stock and it resembles the wood I used for the ship. So both the stand and the ship should complement each other, although that's the idea.
I used my tablesaw to saw a piece of 25x25x100mm. I will use a lathe to get it from square to a round shape. I never used a lathe before and purchased the cheapest one from Proxxon I could find. It's just a test if the machine and I can become friends....some machines will be your enemy forever....

photo 586208


photo 586210


photo 586209


With a pencil it's fairly simple to draw a couple of lines. With some wood gauges I shaped the pedestals.

photo 586211


photo 586212


photo 586213


photo 586214


Still need to make the slots to hold the keel of the ship. I cut these 90 degrees from the direction of the grain of the wood for strength.

photo 586215


I know you probably can purchase these pedestals and perhaps even better ones or brass ones than I just made. For fun I tried the make these things myself and I liked the lathework!

For the baseplate I used a very nice piece of solid walnut. However, the board I had was to thin to use, so I cut it into half and glued both pieces together with carpenters glue. I let the glued board cook overnight and the next day cleaned it all up on my table saw. I used a router to make a nice profile on the edge of the board. On the picture below I marked the glued edge between both boards. You can hardly see it.

photo 586216


photo 586217


A dryfit of the pedestals on the board.

photo 586218


After some measurements I glue both pedestals to the board. I also used a drill bit to drill a hole through the middle of both pedestals and the board to hold a bolt. When the ship is placed on the board, I use a bold / screw to fasten the ship to the stand. This also worked out perfectly.

photo 586219


The marriage between the stand and the ship. I must say....the both complement each other and it worked out perfectly.

photo 586220


photo 586221


The nameplate and the photoshoot is all that is left to do.....

See you soon,
Peter
Good morning Peter. I agree with you, it is A worthy stand which compliments your Xebec. Simple and beautifully made. Cheers Grant
 
Making the stand

Hi guys,

Although the ship is finished I still have to do a few things before I can call this project a success. First of the things I have to do is to make a proper stand.
There are many great examples to find on the web, but I like a "simple" but elegant one. This will be a baseplate with two pedestals on it however in the near future I need to make a proper dustfree case. Dust is the enemy of all wooden models. Dust attract moist and hold most and this doesn't goes well with your model. So, do not worry, I will make a case, but that's for later.

For now I start with the construction of both pedestals. I decided to make it all out of American or Black Walnut. I have a few boards on stock and it resembles the wood I used for the ship. So both the stand and the ship should complement each other, although that's the idea.
I used my tablesaw to saw a piece of 25x25x100mm. I will use a lathe to get it from square to a round shape. I never used a lathe before and purchased the cheapest one from Proxxon I could find. It's just a test if the machine and I can become friends....some machines will be your enemy forever....

photo 586208


photo 586210


photo 586209


With a pencil it's fairly simple to draw a couple of lines. With some wood gauges I shaped the pedestals.

photo 586211


photo 586212


photo 586213


photo 586214


Still need to make the slots to hold the keel of the ship. I cut these 90 degrees from the direction of the grain of the wood for strength.

photo 586215


I know you probably can purchase these pedestals and perhaps even better ones or brass ones than I just made. For fun I tried the make these things myself and I liked the lathework!

For the baseplate I used a very nice piece of solid walnut. However, the board I had was to thin to use, so I cut it into half and glued both pieces together with carpenters glue. I let the glued board cook overnight and the next day cleaned it all up on my table saw. I used a router to make a nice profile on the edge of the board. On the picture below I marked the glued edge between both boards. You can hardly see it.

photo 586216


photo 586217


A dryfit of the pedestals on the board.

photo 586218


After some measurements I glue both pedestals to the board. I also used a drill bit to drill a hole through the middle of both pedestals and the board to hold a bolt. When the ship is placed on the board, I use a bold / screw to fasten the ship to the stand. This also worked out perfectly.

photo 586219


The marriage between the stand and the ship. I must say....the both complement each other and it worked out perfectly.

photo 586220


photo 586221


The nameplate and the photoshoot is all that is left to do.....

See you soon,
Peter
I am a big fan of walnut and you have chosen a superb piece for a display board.
 
Wow Pter,

I had some catching up to do on your blog after the holidays but bang she is finished.
You can be the proud owner of a one of a kind Chebec, a jewel in every living room and a piece of art.
I admire your eye for detail and look forward to your next one.
We will meet in Amsterdam for sure.
Welcome back Maarten and thank you! I'm looking forward to our meeting in Amsterdam!

Good morning Peter. I agree with you, it is A worthy stand which compliments your Xebec. Simple and beautifully made. Cheers Grant
Thanks Grant, the woodgrain and pattern almost looks like a waves on a calm sea. :)
I am a big fan of walnut and you have chosen a superb piece for a display board.
Thanks Daniel, I agree and couldn't resist using it! :p
 
Making the stand

Hi guys,

Although the ship is finished I still have to do a few things before I can call this project a success. First of the things I have to do is to make a proper stand.
There are many great examples to find on the web, but I like a "simple" but elegant one. This will be a baseplate with two pedestals on it however in the near future I need to make a proper dustfree case. Dust is the enemy of all wooden models. Dust attract moist and hold most and this doesn't goes well with your model. So, do not worry, I will make a case, but that's for later.

For now I start with the construction of both pedestals. I decided to make it all out of American or Black Walnut. I have a few boards on stock and it resembles the wood I used for the ship. So both the stand and the ship should complement each other, although that's the idea.
I used my tablesaw to saw a piece of 25x25x100mm. I will use a lathe to get it from square to a round shape. I never used a lathe before and purchased the cheapest one from Proxxon I could find. It's just a test if the machine and I can become friends....some machines will be your enemy forever....

photo 586208


photo 586210


photo 586209


With a pencil it's fairly simple to draw a couple of lines. With some wood gauges I shaped the pedestals.

photo 586211


photo 586212


photo 586213


photo 586214


Still need to make the slots to hold the keel of the ship. I cut these 90 degrees from the direction of the grain of the wood for strength.

photo 586215


I know you probably can purchase these pedestals and perhaps even better ones or brass ones than I just made. For fun I tried the make these things myself and I liked the lathework!

For the baseplate I used a very nice piece of solid walnut. However, the board I had was to thin to use, so I cut it into half and glued both pieces together with carpenters glue. I let the glued board cook overnight and the next day cleaned it all up on my table saw. I used a router to make a nice profile on the edge of the board. On the picture below I marked the glued edge between both boards. You can hardly see it.

photo 586216


photo 586217


A dryfit of the pedestals on the board.

photo 586218


After some measurements I glue both pedestals to the board. I also used a drill bit to drill a hole through the middle of both pedestals and the board to hold a bolt. When the ship is placed on the board, I use a bold / screw to fasten the ship to the stand. This also worked out perfectly.

photo 586219


The marriage between the stand and the ship. I must say....the both complement each other and it worked out perfectly.

photo 586220


photo 586221


The nameplate and the photoshoot is all that is left to do.....

See you soon,
Peter
Perhaps that why they called it a stand: you model is now standing very generous in your living. Well done, Peter.
 
Hello friends,

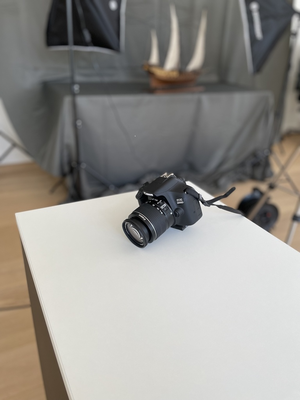
Today I post the final and promissed update. It's the photoshoot and the nameplate that's been made.
Well here we go and sit down for a lot of pictures and I hope you like them....

Regards,
Peter


photo 586850


En dan de eindfoto's...

photo 586733


photo 586735


photo 586734


photo 586736


photo 586737


photo 586738


photo 586739


photo 586740


photo 586741


photo 586742


photo 586743


photo 586745


photo 586744


photo 586746


photo 586747


photo 586748


photo 586749


photo 586750


photo 586751


photo 586752


photo 586754


photo 586753


photo 586755


photo 586757
 
Back
Top