Belle Poule 1780 by Donnie

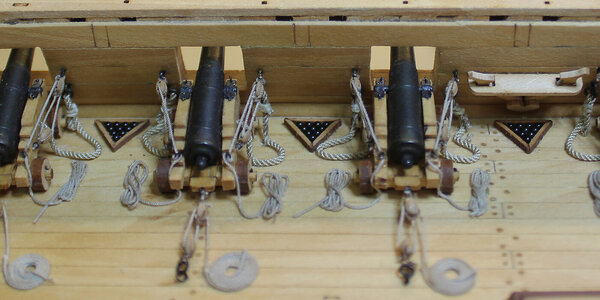
Спасибо вам всем за добрые слова. Я наконец-то закончил сматывать веревки. Оглядываясь назад (как, я думаю, и все мы), я жалею, что не сделал катушки и оснастку в одну линию. Начиная с катушек и одной непрерывной линии, переходите к блокам. Я думаю, это выглядело бы лучше, чем сращивание линий. Я сделал все возможное, чтобы скрыть сращивания, но это то, что есть. В комплект входили хромированные пушечные ядра, которые я не хочу использовать, поэтому я заказал несколько у M.E. и добавлю это. Когда это будет сделано, будут установлены верхние балки. Верхние балки уже сделаны.


View attachment 358391
все хорошо. но одна деталь меня смущает.скажите, колеса для лафетов были разного диаметра?если да, то вы ошиблись.спереди должен стоять больший диметр. так выравнивается наклон палубы.и тогда ваши стволы смотрят вверх.пожалуйста, объясните.

Everything is fine. but one detail confuses me. Tell me, did the wheels for the gun carriages have different diameters? If so, then you were mistaken. There should be a larger diameter in front. this equalizes the slope of the deck. and then your trunks point up. please explain.
 
все хорошо. но одна деталь меня смущает.скажите, колеса для лафетов были разного диаметра?если да, то вы ошиблись.спереди должен стоять больший диметр. так выравнивается наклон палубы.и тогда ваши стволы смотрят вверх.пожалуйста, объясните.
На лафетах алрилерри фрегата Ля Бэлле Поуле, как на большинстве Французких кораблей, траки (колеса) были одного диаметра. Угол наклона ствола регулировался посредством клина.

Most of the French naval guns, including the LaBelle Poulle, have tracks of the same sizes. When the cru aimed the gun, they use Quoin\wadge to lock the barrel in position.
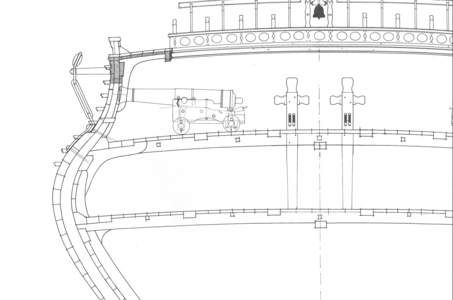
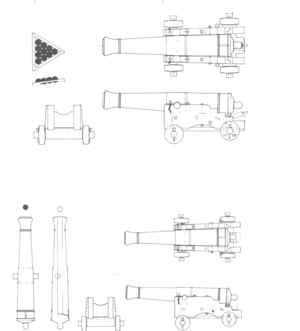
Below are LaBelle Poulle's plans made by J.Boudriot

1676926687684.png

1676926847568.png
 
вот так это выглядит на фото.обман зрения.удачи в дальнейшем строительстве.

this is how it looks in the photo. optical illusion. good luck in further construction.
 
Finally got the Cannon Balls from Model Expo. Really nice too. 1.5mm in size.

Now, I can start on the Upper Deck Binding Strakes.

deck-items64-final-03.jpg


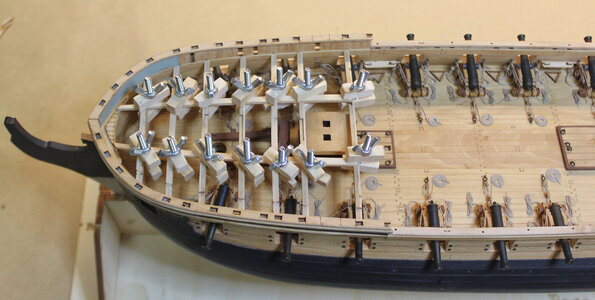
Yes, I know - a lot of clamps

upper-deck-framing-03.jpg


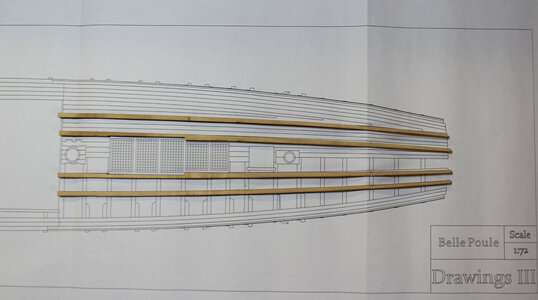
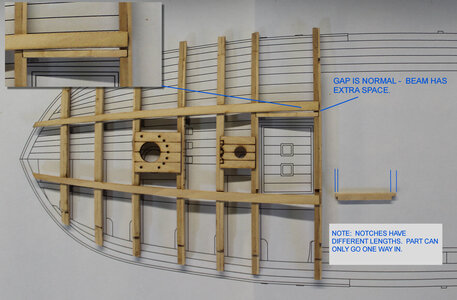
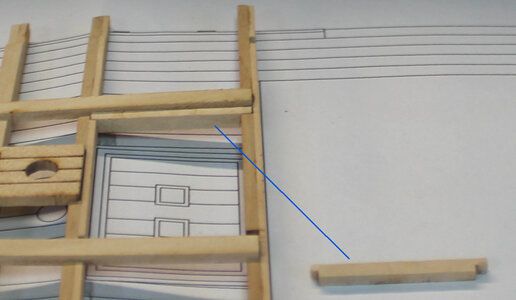
A layout of the aft Binding Strakes

upper-deck-framing-02.jpg
 
Kurt,
I made those. They also have another 'part' to them that I used in my hull planking. Very easy to make. It's just 1/4 inch or 6.25mm square basswood from hobby lobby - I can't remember the size of the machine screw. The screw head is glued onto one end to keep it stationary. They are about 3/4" (18mm) long each.
I guess the concept could be taken further (of which I am now thinking) that the clamps could be perhaps an inch long or more with two screws (one on each end) this would be good for clamping uneven parts that need to be glued together. Humm - maybe I need to make some like that.
 
Donnie,

Your carriages, rigging, along with all of their hardware details are brilliant - stunning work indeed!!
 
Thank you kindly to all. It is much appreciated.

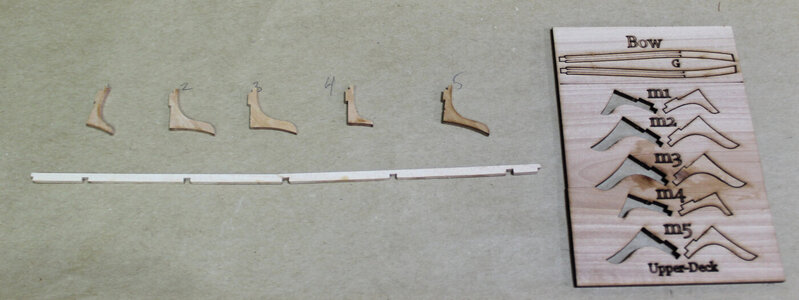
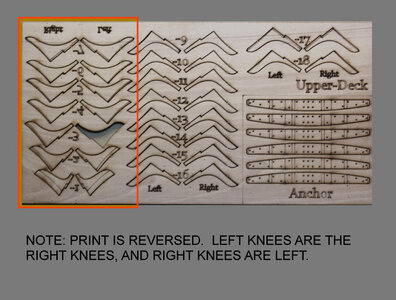
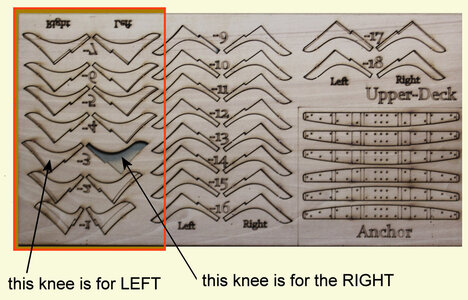
This first image reveals that these parts are VERY fragile and the Knees are from a very thick board. It is easy to break. The long Binding Strake is also very fragile and a lot of care is needed. I just barely broke one in half, but it was not a total break.


Warning: these parts are fragile.
upper-deck-framing-05.jpg


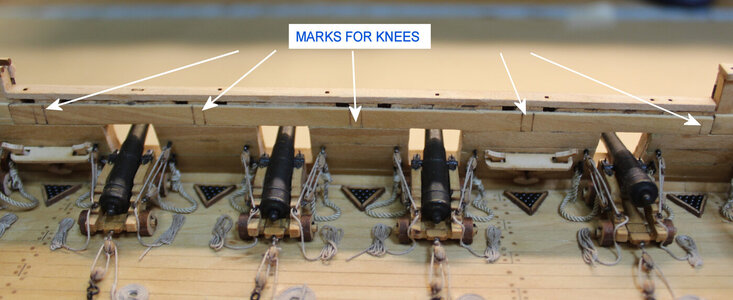
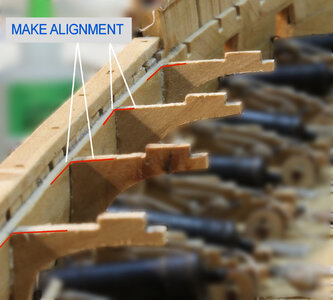
The upper rail on the inside has the correct marks for the alignment of the Knees.

upper-deck-framing-04.jpg


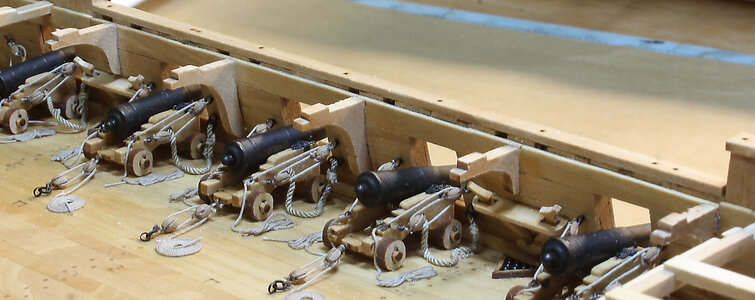
All knees are installed with a mix of white and CA glue.

upper-deck-framing-06.jpg


And the remaining. The rail (Binding Strake has not been glued in yet).

upper-deck-framing-07.jpg


upper-deck-framing-08.jpg


upper-deck-framing-09.jpg


upper-deck-framing-10.jpg


It looks beautifull Donnie. What a build you are showing here. Great work! Thumbs-Up

Peter
 
I made the upper Binding Strakes as a whole removable. I want to make sure I have all things checked before the final gluing of the structure to the inner rails.

EDIT: I HIGHLY SUGGEST NOT GLUING IN THIS STRUCTURE YET. THERE ARE ABOUT 10 KNEES THAT WILL HAVE THE CANNON RING BOLTS ADDED TO THEM.
IF THIS STRUCTURE IS GLUED IN, THEN IT MIGHT POSE A HARDSHIP TO INSTALL THOSE KNEES AS YOU WILL HAVE TO PREP / DRILL HOLES IN THE KNEES FOR THE CANNON EYE BOLTS !!!


upper-deck-framing-12.jpg


As per instructions. Make sure that the M1 - M5 knees (tops) are flush with the rails.

upper-deck-framing-11.jpg
 
Last edited:
Back
Top