Amerigo Vespucci Mantua/Panart 1:84

Thanks guys.
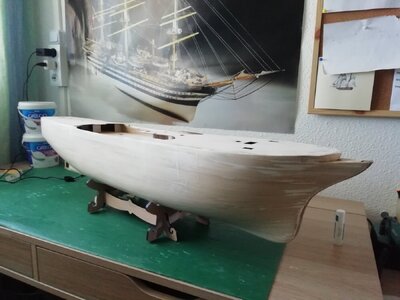
Now completed the sanding/filling/sanding.
Next step is to cover the hull with "modelspan paper" applied with dope. The paper was supplied with the kit and I have bought some dope. I have never used these materials before and the only examples I have found on YouTube are for aero modules where it's stretched over a frame like a drum.
Anyone out there with experience who can help me out with tips/advice? View attachment 410458
Hello Barcomad
I did not use the modelspan paper provided in the kit
I did not feel it as necessary
 
Hello Barcomad
I did not use the modelspan paper provided in the kit
I did not feel it as necessary
I think the theory is that with such a large expanse of wood, variations in temperature and humidity could cause some cracking or "crazing" of the paint.
I am going to give it a try and hope that I don´t ruin the finish of the hull.
 
I got the model span paper on without too much difficulty and applied umpteen coats of Ezidope, sanded, sanded and sanded with 180 and 240 grit between every 3rd coat and finished off with a light once over with 400 grit after the last coat.
Now ready for primer but first I have to make a spray booth. Hopefully I'll be finished instruction book one by Monday. IMG_20231216_121908.jpg
 
I got the model span paper on without too much difficulty and applied umpteen coats of Ezidope, sanded, sanded and sanded with 180 and 240 grit between every 3rd coat and finished off with a light once over with 400 grit after the last coat.
Now ready for primer but first I have to make a spray booth. Hopefully I'll be finished instruction book one by Monday. View attachment 414318
Hi Barcomad
Looks really good
 
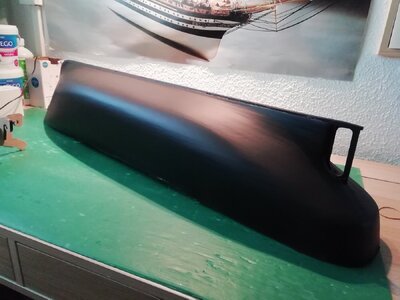
First coat primer (air brushed).
I a bit concerned that despite all the sanding and coats of dope that some of the ridges of planking show. I'm hoping that the remaining sanding and coats of primer and paint will cover and it will look like a steel hull but I'm beginning to have doubts.
Any suggestions or comments? IMG_20231217_164935.jpg
 
Very good painting - your preparation works were very good - very smooth surface
Very good work :cool:
 
Any suggestions or comments?
It looks great, if you wish to make it smoother (like steel) use more wood putty, then sand and respray primer. Use wet\dry sandpaper with fine grits like 800 or 1000. Also, try steelwool.
 
First coat primer (air brushed).
I a bit concerned that despite all the sanding and coats of dope that some of the ridges of planking show. I'm hoping that the remaining sanding and coats of primer and paint will cover and it will look like a steel hull but I'm beginning to have doubts.
Any suggestions or comments? View attachment 414556
Good morning. Awesome work. You and Gilbert are building one of my favorite ships. Cheers Grant
 
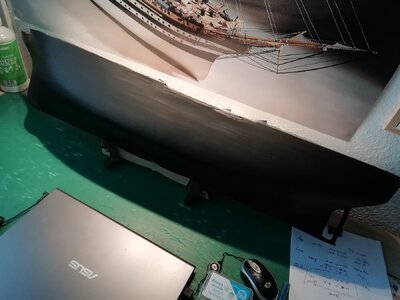
Still not happy with the edges of some planks protruding a smidgin so I experimented on the worst parts of the hull. I tried undiluted ezidope, more primer coats and filler and sanding as advised by Jimsky. The latter method produces the best results so I know what I will be doing between now and Christmas: sanding, filling, sanding ad infinitum!
 
So I sanded and filled and applied more Ezidope and then put a coat of primer. Still not totally happy with the finish. I'll get another coat of primer on today if I don't run out of time preparing for my trip to Australia tomorrow.
A couple of weeks off visiting my son who will be 50 early January. Also the grand children whom I have not seen for over 5 years! Should get up to Queensland as well to visit my brother, also not seen for nearly 6 years. So no thoughts of the Amerigo Vespucci whilst away. I'll reassess the hull finish on my return mid January.IMG_20231228_151500.jpg
 
Have a nice trip to see your loved ones. Happy New Year! It is possible when you return the hull will have more time to dry, and you may have a different view.
 
So I sanded and filled and applied more Ezidope and then put a coat of primer. Still not totally happy with the finish. I'll get another coat of primer on today if I don't run out of time preparing for my trip to Australia tomorrow.
A couple of weeks off visiting my son who will be 50 early January. Also the grand children whom I have not seen for over 5 years! Should get up to Queensland as well to visit my brother, also not seen for nearly 6 years. So no thoughts of the Amerigo Vespucci whilst away. I'll reassess the hull finish on my return mid January.View attachment 416992
Have a nice trip
 
Thanks guys.
Back home now but my head is still somewhere over The Black Sea so back to hull preparation later in the week. It looks like some more sanding and primer is required though.
 
Back in the man cave with the AV.
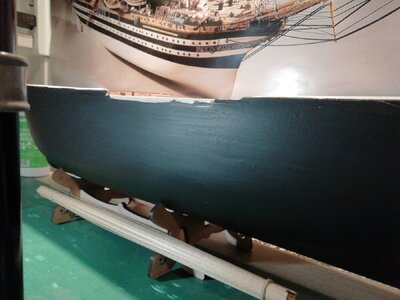
The hull is now smoothed and portioned to my satisfaction for now:-
1706118014094969128482974491922.jpg
So that is the ends of book 1 of the instructions. Now on to book 2 at last.
Deck planking.
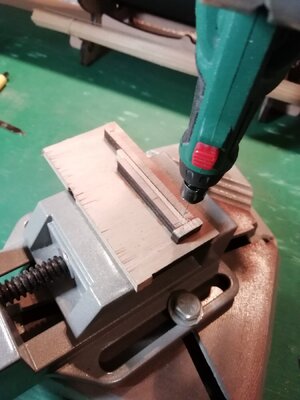
The instructions say to cut the planks 8 cm but the majority of those on the ship that I saw were 5 metres which scales to 6cm, so that is how I am cutting them. I have set a jig to drill the tree nails and that is where I am at right now.
IMG_20240124_182816.jpg
In reality the three decks have different planking patterns but I don't feel able to replicate that accurately so I will stick with the same pattern throughout.
It will be a while before I cut and drill all the planks needed so here goes...
 
Back in the man cave with the AV.
The hull is now smoothed and portioned to my satisfaction for now:-
View attachment 423463
So that is the ends of book 1 of the instructions. Now on to book 2 at last.
Deck planking.
The instructions say to cut the planks 8 cm but the majority of those on the ship that I saw were 5 metres which scales to 6cm, so that is how I am cutting them. I have set a jig to drill the tree nails and that is where I am at right now.
View attachment 423516
In reality the three decks have different planking patterns but I don't feel able to replicate that accurately so I will stick with the same pattern throughout.
It will be a while before I cut and drill all the planks needed so here goes...
love this idea.....thanks
 
Back in the man cave with the AV.
The hull is now smoothed and portioned to my satisfaction for now:-
View attachment 423463
So that is the ends of book 1 of the instructions. Now on to book 2 at last.
Deck planking.
The instructions say to cut the planks 8 cm but the majority of those on the ship that I saw were 5 metres which scales to 6cm, so that is how I am cutting them. I have set a jig to drill the tree nails and that is where I am at right now.
View attachment 423516
In reality the three decks have different planking patterns but I don't feel able to replicate that accurately so I will stick with the same pattern throughout.
It will be a while before I cut and drill all the planks needed so here goes...
.Hello Barcomad
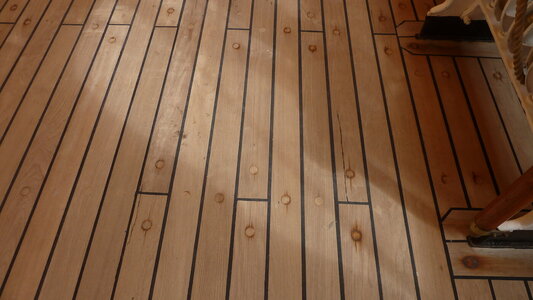
Looking at pictures from the AV deck, I believe there are no tree nails
 
.Hello Barcomad
Looking at pictures from the AV deck, I believe there are no tree nails
In a lot of cases the treenails are so well fitted so as to be almost invisible but they are there in most of the planks.
Where the is the standard planking pattern with 5 metre planks they are mostly spaced at 110 cm apart. I am not trying to follow that pattern exactly as it is a lot of work, doesn´t scale well and in any case will mostly be hidden by the deck furniture and fittings.P1020427.JPGP1020424.JPG
P1020459.JPG
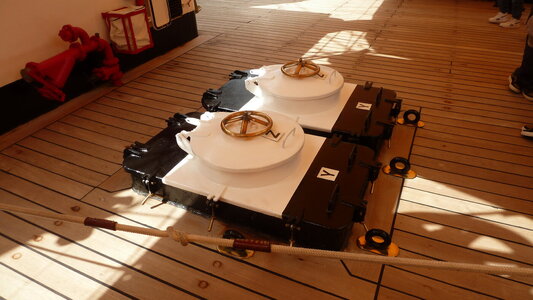
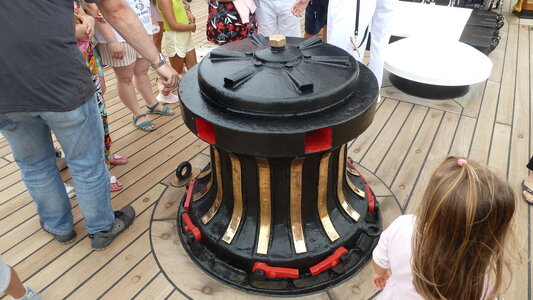
Notice how the decking is laid around deck fittings and hatches, impossible to replicate, at least I am not willing to try.
 
In a lot of cases the treenails are so well fitted so as to be almost invisible but they are there in most of the planks.
Where the is the standard planking pattern with 5 metre planks they are mostly spaced at 110 cm apart. I am not trying to follow that pattern exactly as it is a lot of work, doesn´t scale well and in any case will mostly be hidden by the deck furniture and fittings.View attachment 423819View attachment 423821
View attachment 423822
Notice how the decking is laid around deck fittings and hatches, impossible to replicate, at least I am not willing to try.
You are correct
My bad
 
Well, here goes...
With the help and advice of others on this forum I have bitten the bullet and ordered the Panart kit from a company on Ebay. My first Ebay order ever!
At 760€ it is a big step for me, albeit a good price for this model, but encouragement from Pauls Models on his log and from lady means that I am expecting delivery within the next two weeks.
So I have to start planning. First step is to move the man cave out of the cupboard and into the spare bedroom because at 1250mm the ship it would simply not fit my existing workspace.
Quite a step up from the Occre Endurance. Let's hope I'm equal to the task...
Hallo Clive alias @Barcomad
we wish you all the BEST and a HAPPY BIRTHDAY
Birthday-Cake
Enjoy your special day
 
Back
Top