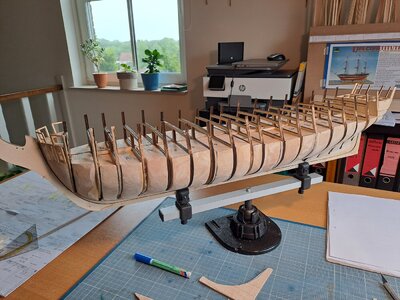
18 frames this should make planking runs nice and straight. No dips and valleys.
You are using an out of date browser. It may not display this or other websites correctly.
You should upgrade or use an alternative browser.
You should upgrade or use an alternative browser.
Marc, you're off to a great start. I've pulled up a chair - Have this Connie waiting her turn in the shipyard!
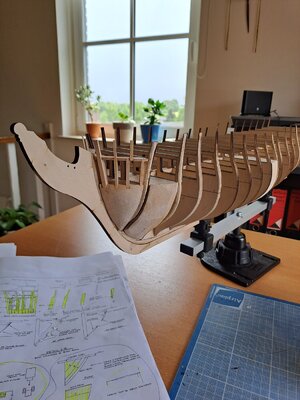
As it is today independence day in Belgium, I'have got some time to continue...
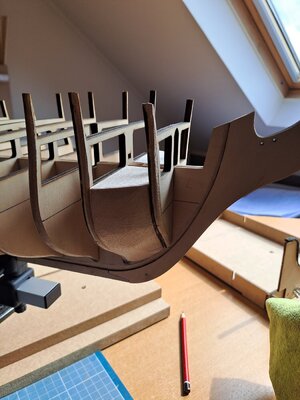
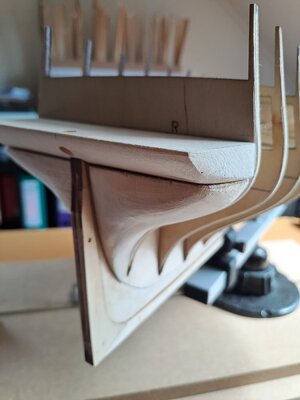
But, the stern fillers were much more time consuming then I thought....I started 3 times again and again....
And I hope Will with laugh with me: I glued finally the fillers in place in order to finish them later on during the planking....
Almost impossible to shape them without glueing them onto the Hull.
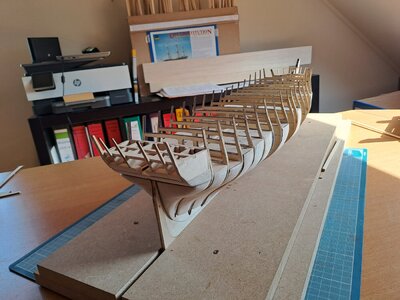
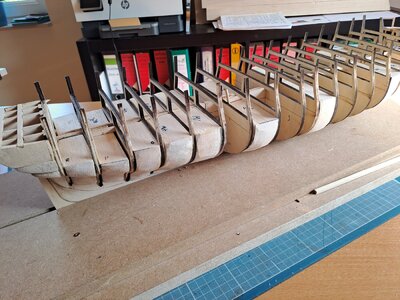
And, I started with placing the fillers between the Bulkheads....time consuming buth offers the advantage that I wil have more space to add glue for fixing the strips and also strengths the Hull...


Perseverance pays off with big dividends in the end. I always laugh at the end of a good job no matter how long it took.
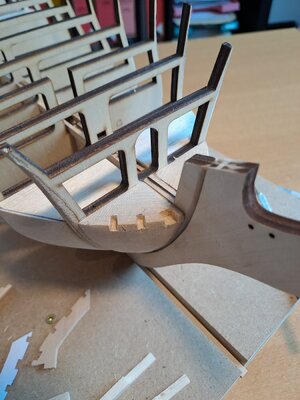
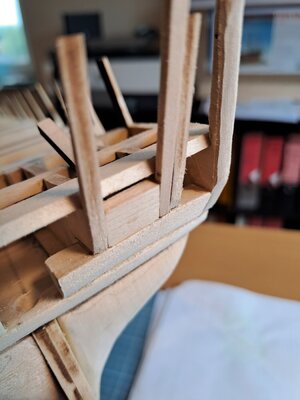
Bow framing and Bow rail
Wow, difficult and precision absolute necessary!!!!!
You have to make yourself the port frames, supports etc...
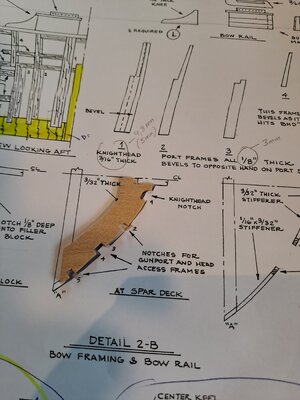
It is really necessary to respect the dimensions indicated on the plans. Take for example the part for the "knighthead, gunports and head access frames".
In the first attempt I had cut the notches for the port frames too deep: don't forget that this immediately affects the curvature of the hull planking....
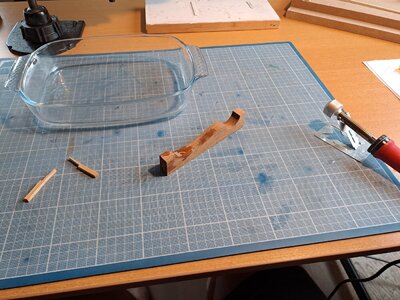
So I remade the bow rails three times and a good advice: put the cut out pieces on the plans : see photo bow-1!
It took me a whole day to install with the greatest precision I'm able to do.....


Looking good Marc. Remember now's the time to start using strips to determine fairing around the bow. Nice work on the notches.
Good afternoon Marc. All looking spot on. Cheers GrantBow framing and Bow rail
Wow, difficult and precision absolute necessary!!!!!
You have to make yourself the port frames, supports etc...
It is really necessary to respect the dimensions indicated on the plans. Take for example the part for the "knighthead, gunports and head access frames".
In the first attempt I had cut the notches for the port frames too deep: don't forget that this immediately affects the curvature of the hull planking....
So I remade the bow rails three times and a good advice: put the cut out pieces on the plans : see photo bow-1!
It took me a whole day to install with the greatest precision I'm able to do.....
View attachment 386408
View attachment 386409
View attachment 386410
View attachment 386411
View attachment 386412
thanks Marc,
Much appreciate the tips and explanations. I need to be persistent, patient and accepting of do-overs. I'm getting there. I guess it all comes with the territory for sure!
VR,
Much appreciate the tips and explanations. I need to be persistent, patient and accepting of do-overs. I'm getting there. I guess it all comes with the territory for sure!
VR,
Hi good job with the framing. I've just completed this part on my Constitution it's very challenging to get right, I'll post some photos soon.Bow framing and Bow rail
Wow, difficult and precision absolute necessary!!!!!
You have to make yourself the port frames, supports etc...
It is really necessary to respect the dimensions indicated on the plans. Take for example the part for the "knighthead, gunports and head access frames".
In the first attempt I had cut the notches for the port frames too deep: don't forget that this immediately affects the curvature of the hull planking....
So I remade the bow rails three times and a good advice: put the cut out pieces on the plans : see photo bow-1!
It took me a whole day to install with the greatest precision I'm able to do.....
View attachment 386408
View attachment 386409
View attachment 386410
View attachment 386411
View attachment 386412
Tony
There is something I have to tell you!
When I opened the kit I found that 2 plates were broken in the middle. I sent an email to Modelexpo and immediately received an answer that they send the replacements to Europe-Belgium, free of charge!
A few days ago I did indeed receive the 2 parts.
Well, I can only say great!
That's service!!!!!


I don't know if the companies here in Europe would do the same?
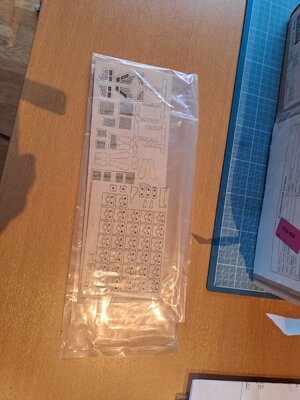
When I opened the kit I found that 2 plates were broken in the middle. I sent an email to Modelexpo and immediately received an answer that they send the replacements to Europe-Belgium, free of charge!
A few days ago I did indeed receive the 2 parts.
Well, I can only say great!
That's service!!!!!
I don't know if the companies here in Europe would do the same?

A forget to tell you the only problem I faced was the Belgian Customs.... They needed 22 Euros, for what? I had to pay this before receiving....


Another topic is struggled with:
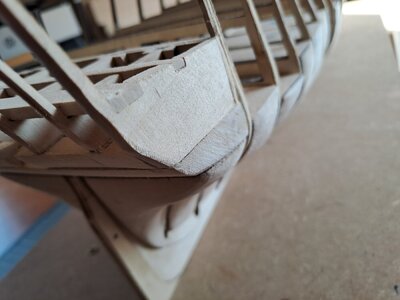
During the assembling of the stern, I noticed that the Stern FRAMES (Laser Cut) reached 1/8" above the SPAR DECK...
I thought a made a mistake, eg the dimension of the Counter Block wrong?
After carefully verifying: nothing wrong with the counter block....
I would like to give some advice from my own experience: take a look at Tony H's blog...
He had seen this and anticipated this with a brilliant idea! Great Tony!
So, I'm following Tony's idea: think out of the box.
So I modified the stern en made myself 2 blocks, inserted between the counter block and the stern frames:
2 blocks that fit under the stern, according to the same dimensions as the "Knuckles" of the stern frames:
2advantages :
more surface to apply glue when placing the planking
and immediately the lower part of the frames of the ports...
Good idea?
additionally I continue with fitting BALSA wood between the Bulkheads:
again more space for adding glue during the planking....
It offers also more rigide hull.
PS
Hope my English is ok....


I once ordered parts from South Africa and they sent them via air that changed planes in Dubai and their customs wanted $280.00 US to release the parts. I told them to keep them that's more than the cost.


Hi your progress is amazing it took me a week to sort out the stern framing, I like the idea of adding blocks between the frames but hove decided not to at the moment but I may add some later I'll decide when I come to fair the frames. Modelexpo has a good reputation for customer service it's good to see you got your parts OK.Another topic is struggled with:
During the assembling of the stern, I noticed that the Stern FRAMES (Laser Cut) reached 1/8" above the SPAR DECK...
I thought a made a mistake, eg the dimension of the Counter Block wrong?
After carefully verifying: nothing wrong with the counter block....
I would like to give some advice from my own experience: take a look at Tony H's blog...
He had seen this and anticipated this with a brilliant idea! Great Tony!
So, I'm following Tony's idea: think out of the box.
So I modified the stern en made myself 2 blocks, inserted between the counter block and the stern frames:
2 blocks that fit under the stern, according to the same dimensions as the "Knuckles" of the stern frames:
2advantages :
more surface to apply glue when placing the planking
and immediately the lower part of the frames of the ports...
Good idea?
additionally I continue with fitting BALSA wood between the Bulkheads:
again more space for adding glue during the planking....
It offers also more rigide hull.
PS
Hope my English is ok....
View attachment 386793
View attachment 386794
View attachment 386795
Tony.
PS
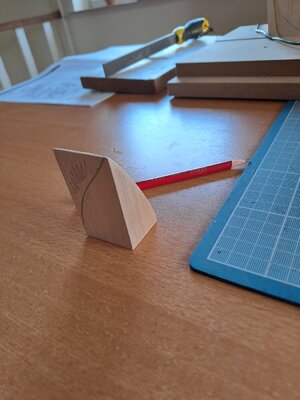
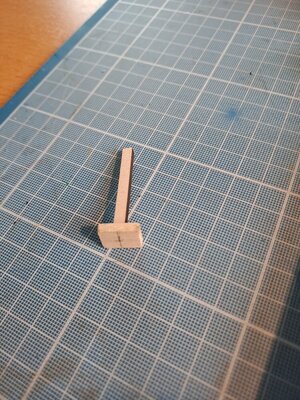
Do you know my secret tool?
As we have to provide a lot frames around ports etc....
It didn't seem accurate enough to me to provide each time the correct openings for the side ports...(0,55" x 0,43") to offer the exact opening for the laser cut ports.
so I carefully made a wooden port of 0.55 x 0.43", glued a stick to it and fit it in place and simply build the frame around it....see picture...
Accurate (fast) and I hope to be able to use it a lot...


This is really clean work! And I agree on the filler blocks.
Great idea with the gunport tool, I'll be using one when I do the main gunports. I made my stern port opening smaller than the drawing to give the lids more contact area (they will be closed).PS
Do you know my secret tool?
As we have to provide a lot frames around ports etc....
It didn't seem accurate enough to me to provide each time the correct openings for the side ports...(0,55" x 0,43") to offer the exact opening for the laser cut ports.
so I carefully made a wooden port of 0.55 x 0.43", glued a stick to it and fit it in place and simply build the frame around it....see picture...
Accurate (fast) and I hope to be able to use it a lot...
View attachment 386909
View attachment 386910
View attachment 386911
If I could install the filler blocks as quick as you did I wouldn't think twice about it well done it looks the way to go.
Tony
Fairings? Battens? can you pls elaborate? I'm a newby. Working on the masts of my first wood ship The Albatross from OcCreFirst thing mark the frames with the plans. But read the planking tutorial in #13 before doing any cutting. Second in my opinion I would build up the entire skeleton and then start very very very slowly with fairing any frames using battens after adding filling blocks.


