USS Constitution - Model Shipways

Hello Tony,

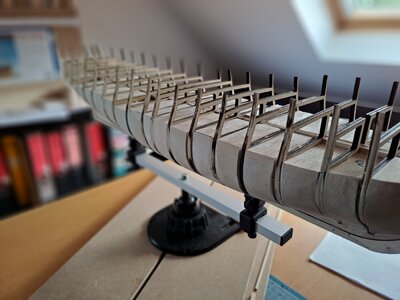
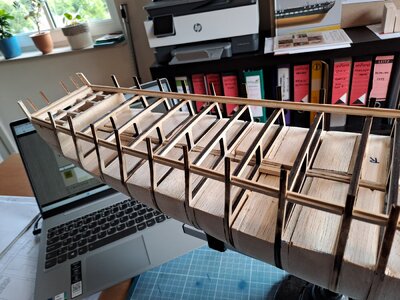
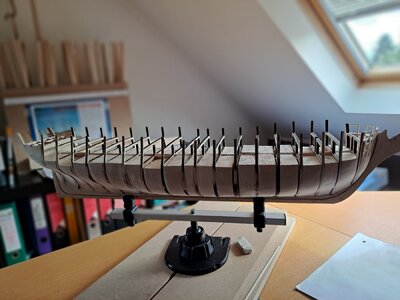
Below the finished Hull with the filler Bloks.... Sanding done for 99%....the rest when I start the planking.
It took me 2 Wooden planks : each L=40" W=4" en H=15/32"...
It took me +- 3days: matter of finding the right technique

- I prepared 12 bloks of 4" x 4" and 1,18" thick (which fits quasi direct between the Bulkheads)....
- Iden 8 x 3" x 3"
Then I fitted them between the Bulkheads and draw on both sides the outlines of the Bulkhead in front and than after..
And then a matter of a good saw and sanding....

PS
The only problem was my dear wife's reaction: she got angry because I was making so much dust that she sent me to the garden.... ;)
sanding result.jpg

sanding1.jpg

sanding2.jpg
 
Hello Tony,

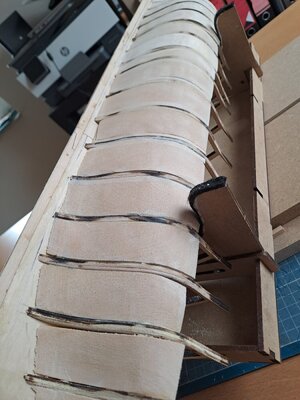
Below the finished Hull with the filler Bloks.... Sanding done for 99%....the rest when I start the planking.
It took me 2 Wooden planks : each L=40" W=4" en H=15/32"...
It took me +- 3days: matter of finding the right technique

- I prepared 12 bloks of 4" x 4" and 1,18" thick (which fits quasi direct between the Bulkheads)....
- Iden 8 x 3" x 3"
Then I fitted them between the Bulkheads and draw on both sides the outlines of the Bulkhead in front and than after..
And then a matter of a good saw and sanding....

PS
The only problem was my dear wife's reaction: she got angry because I was making so much dust that she sent me to the garden.... ;)
View attachment 387082

View attachment 387083

View attachment 387084
Looks great I'm thinking about doing that on mine. My problem is I don't know if there are any local suppliers of balsa wood here and ordering it online could take a long time.
 
The garden is sometimes the only place ..... looking good - a good basis
 
While I'm figuring out how to make the waterway strips, I decided to prepare the mast eg to make the pins in the mast to be able to place them later in the openings provided for this purpose in the Hull.
And I advise everyone to do it at this stage.
After all, the openings are still easily accessible and the dimensions probably do not correspond 100% to the plans (so some adjustments...)
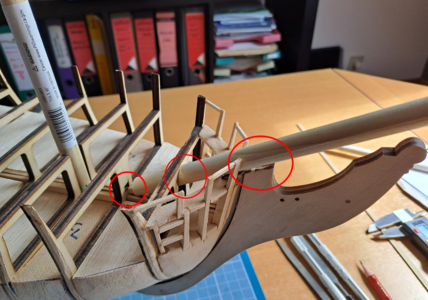
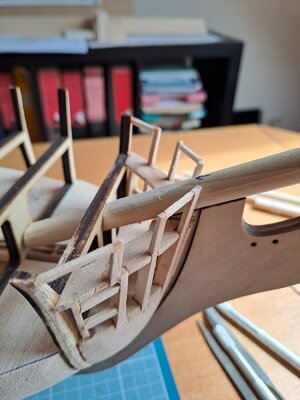
Take the bowsprit: am I glad I'm doing this now....After all, the bowsprit is 11/16" thick and won't fit at all without the necessary sanding...not possible after planking in my opinion....

no idea how the other colleagues solved this?!

1690638732957.png

bow1.jpg
 
While I'm figuring out how to make the waterway strips, I decided to prepare the mast eg to make the pins in the mast to be able to place them later in the openings provided for this purpose in the Hull.
And I advise everyone to do it at this stage.
After all, the openings are still easily accessible and the dimensions probably do not correspond 100% to the plans (so some adjustments...)
Take the bowsprit: am I glad I'm doing this now....After all, the bowsprit is 11/16" thick and won't fit at all without the necessary sanding...not possible after planking in my opinion....

no idea how the other colleagues solved this?!

View attachment 387236

View attachment 387237
I was looking at this the other day and noticed that the bowsprit is tapered front and back this should help get the angle right. At the moment I don't have an accurate way to measure the angle so I ordered a digital protractor which should arrive soon.
IMG_20230730_075747.jpg
Did you file the small square that fits into frame B?
Tony
 
The problem was indeed that I also had to sand the top of the bowsprit.
After all, the bowsprit was blocked by the opening in the bulkhead A...(photo, middle circle).

However, only providing the right angle as indicated in the drawings were not sufficient.
On the other hand, I also had to adjust the square a bit.

Marc
 
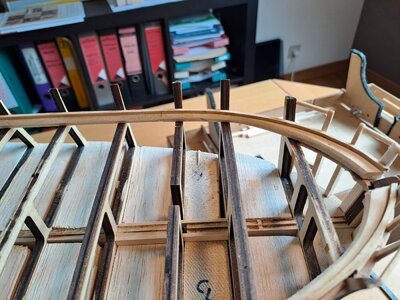
Waterway in place....
And inboard plank over gunport framing....

I would like to start the boxes for the dummy guns...
And I have an idea....

View attachment 387830

View attachment 387831
Great looking waterways, I have a question some of my bulkhead extensions vary in thickness, are quite flexible and don't line up well. Is yours the same? I wanted to plank these soon to strengthen them but I'll have to fix them up first.
Tony
 
It all starts with preparing the assembly.....
And, because during the construction of the previous models I was always looking for the right parts....I started with a box holding the wooden strips...
This will help!
Hallo Marc alias @HMSFly
we wish you all the Best and a HAPPY BIRTHDAY
Birthday-Cake
 
Looks great I'm thinking about doing that on mine. My problem is I don't know if there are any local suppliers of balsa wood here and ordering it online could take a long time.
I got mine from Amazon in pretty short order and pretty good quality. I don't know about how that works down under. Bass wood works well. Even superior to balsa, but takes more elbow grease. I think the results warrant it. The trick is to do as much of the shaping off the model as possible, so that once you glue the filler blocks in place it's all fine tuning the fairing after that.
Marc's results are looking splendid! It takes a long time and alot of muttering under your breath no matter how you do it. Patience is the most essential ingredient. Even when you're running on empty! :rolleyes:
 
Back
Top