Soleil Royal- Re-engineering Artesania Latina's New Kit by NMBROOK

I am having a break from Veneer for the time being as I have a potential issue that will get worse if I do not correct sooner rather than later.

There is a slight Asymetry in the topsides of the hull amidships.The hull will flex to the correct position but the more work I do on the rails etc, the stiffer it will become. I order to fix in the correct position I am going to instal the internal structure adjacent to the main mast.

As I touched on before, the mainmast needs to go in sooner rather than later as I have wiring that will be concealed for the lantern that sits at the rear of the top.

First job then is to build the main mast as I need to address the deck where it fits as there will be a boxwood insert that takes the mast and Elm pumps. My point of reference is the Saint Philippe Monograph rescaling to 1/65 from 1/36.Materials used are Boxwood and DIY store hardwood Dowel.

Order of construction is slightly different so I can cut a small slot with the Dremel to take the wires and this can be hidden with wood filler as this area will be fully painted. White for the mainmast, black for the top.

What is immediately apparent is this model will be huge when fully rigged and that the standard kit is way off from where the masting should be. When complete, the size will be near that of Caldercrafts Victory, remember though this is 1/65 vs 1/72.

Feeling quite proud, all the work shown below was completed in one day, yesterday. Lots more to do and I am tempted to build the complete mast and yards while I am focused and store everything for later, save the mainmast section.
Hello Nigel
Newbie question. If Saint Philippe is smaller vessel than Soleil Royal, don't you need masts from L'Ambitieux or the difference is too mall to consider?
Don't it need to be proporcionally bigger?

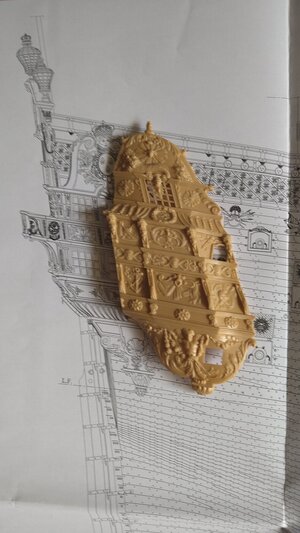
Heller's SR 1/100 gallery vs Saint Philippe's 1/72
DSC_0648.JPG
 
Very good question.

The dimensions of the masting has a direct relationship to the gun deck length, not number of guns. The gun deck of Saint Philippe is only slightly shorter than that of Soleil Royal so I am only doing minor tweaks to the dimensions.The diameters of SP masting actually works out the same as what records we have for SR
 
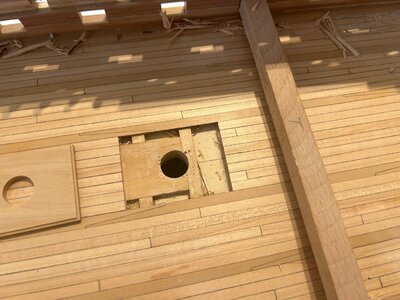
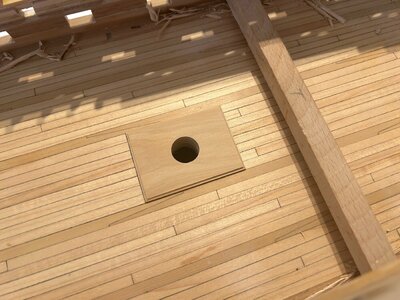
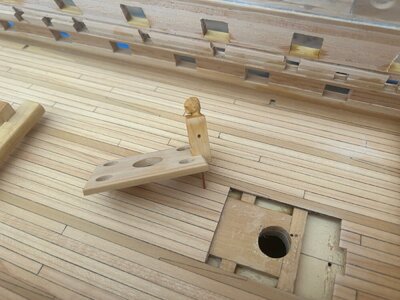
Next stage is to start digging the deck up around the mainmast. I have made a boxwood insert to replace the section I have removed. The insert is placed in position, it needs removing to angle bore the holes for the Elm pumps and also a notch to take the Knighthead with Turks head carving I made earlier.

In reality this piece would be several sections of timber but as the joins would be uncaulked they would disappear once all the fittings are added so for simplicity I left as one piece.

IMG_0956.jpgIMG_0957.jpg
 
The masting looks incredible. I’m curious about your process with these store-bought dowels. Do you taper on a mini-lathe, or are you sanding a taper in with two sanding paddles and the dowel chucked into a hand drill?

Also, are you applying the octagonal flats beneath the top, or hand-faceting from a much larger diameter of dowel than is needed below?

That is pretty remarkable output for a day!

Thanks Marc. The dowel is first put in my metal lathe and the rough diameters turned oversize. The outside diameter of the points of the hexagon are the same as the masts greatest diameter which is 15mm, also the Dowel diameter, which is handy . I made a paper wraparound for the circumference with eight divisions which I marked on the dowel then carved the facets. All tapering is done in the lathe but using sandpaper
 
I am having a break from Veneer for the time being as I have a potential issue that will get worse if I do not correct sooner rather than later.

There is a slight Asymetry in the topsides of the hull amidships.The hull will flex to the correct position but the more work I do on the rails etc, the stiffer it will become. I order to fix in the correct position I am going to instal the internal structure adjacent to the main mast.

As I touched on before, the mainmast needs to go in sooner rather than later as I have wiring that will be concealed for the lantern that sits at the rear of the top.

First job then is to build the main mast as I need to address the deck where it fits as there will be a boxwood insert that takes the mast and Elm pumps. My point of reference is the Saint Philippe Monograph rescaling to 1/65 from 1/36.Materials used are Boxwood and DIY store hardwood Dowel.

Order of construction is slightly different so I can cut a small slot with the Dremel to take the wires and this can be hidden with wood filler as this area will be fully painted. White for the mainmast, black for the top.

What is immediately apparent is this model will be huge when fully rigged and that the standard kit is way off from where the masting should be. When complete, the size will be near that of Caldercrafts Victory, remember though this is 1/65 vs 1/72.

Feeling quite proud, all the work shown below was completed in one day, yesterday. Lots more to do and I am tempted to build the complete mast and yards while I am focused and store everything for later, save the mainmast section.

View attachment 397787View attachment 397788View attachment 397789
Astonishing progress for one days workRedface.
And great result.
 
Thankyou Herman

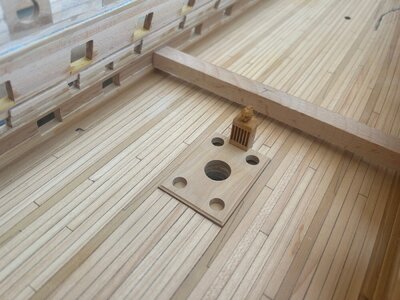
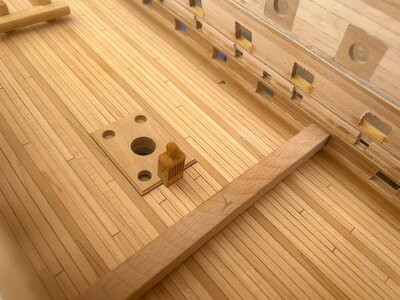
I drilled the holes for the pumps using an 8mm end mill cutter ( vastly superior to using twist drills), cut the notches to take the Knighthead and glued Knighthead to insert.

This little unit will have all the detail added before final fitting. Pumps, metalwork etc.

Thats it until next weekend, now it's roast dinner time:):)

IMG_0958.JPGIMG_0959.JPGIMG_0960.JPG
 
Thanks Guys

John

New job and permanent dayshift now, I have much more energy on a weekend so things will move along a little quicker;)
 
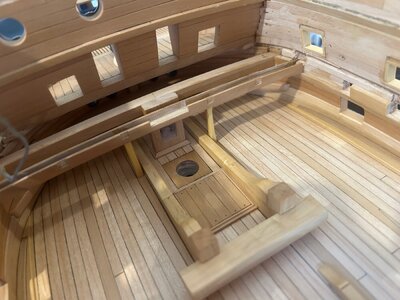
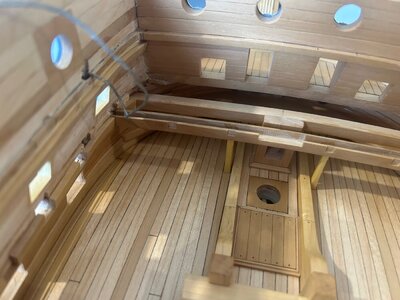
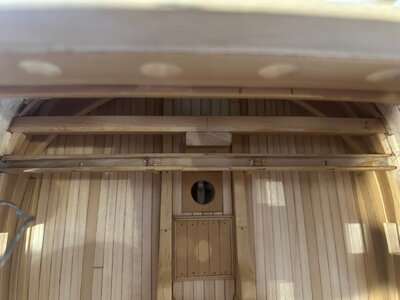
I had wanted to do as much messy work to the upper hull before fitting out the main gun deck but I need to brace the hull sides up before continuing on the top sides.

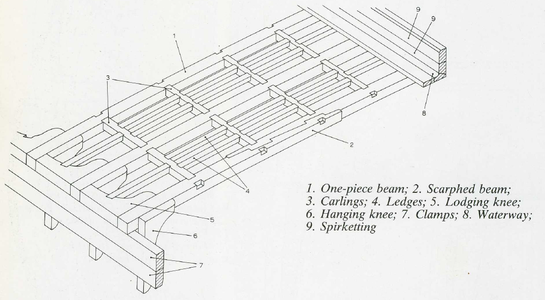
I am going to end up fitting the lot out so may as well start as I mean to go on.I am starting at the bow and working back. First beam to go in has some heavy internal milling, this is for the LED power feed wires which will form a continuous loop around each deck.This is important to prevent power drop despite the LEDs being in parallel. The support posts are fixed to the deck with 1.5 mm copper "dowels"and they protrude though square holes milled in the beams underside and epoxied inside the beam. Rebates have been milled to take the smaller beams running lengthways.I refrain from using nautical terminology as the deck structure is heavily stylised to allow better views of the interior where the deck planks are omitted. The two tiny slots in the beams base furthest out from centreline are to take the LED terminals of the scratch built lanterns.

IMG_0961.JPGIMG_0962.JPGIMG_0963.JPG
 
Back
Top