Santisima Trinidad - Occre Build Log [COMPLETED BUILD]

Re: OcCre Santisima Trinidad Build Log

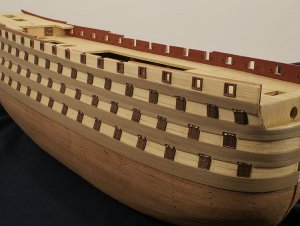
Well, after planking that heavy Sapelli, I guess everything else is fluff !!!

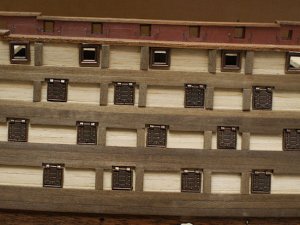
No, actually, this is kinda tedious, but not as bad as planking. I think this is a fun part here. Notching those out is not that too big of a deal. The only problem I ran into is the one notched port is takes the bend at the bluff bow - without breaking it.

I think I have six of these planks that have to be notched out. I have only done one side of the ship so far.

I still have not made a decision about those nails. I wish that I had not put those nails in the hull and used treenails.
 
Re: OcCre Santisima Trinidad Build Log

Finally got one side of the wales and rubbing strakes done. Now on to the other side!

hullforum09.jpg
 
Re: OcCre Santisima Trinidad Build Log

I have the lower hull "planking only" completed finally. However, I decided to add the nails, which I wish I had never done. The nails at the bow did not want to cooperate at all.

On the other side, I found the dull finish that I am looking for and it is a simple one. Olympic Satin Polyurethane.

I wish I had left the nails off - what was I thinking about. This is one example that it [nails] looked good starting out, but the completed [nails] are hideous in some areas. The issue at hand is consistency. I saw on another post where someone was using brass wire. Drilled the holes and inserted the brass wire and cut off flush. BUT, I did not see this until after I had gotten started. There were some nails that I had to remove and start over again.

My oh my what a mess. Some parts of the lower hull look really nice, while the bow - well - its horrible. Oh well, I must keep on going.
Let me say something about OcCre. I had to have a replacement Gun Port Frame and some hinges. I wrote to them, got a reply in about 2 days and got my hardware in less than two weeks. Fantastic service OcCre !!

Not only that they gave me a few more pieces.

Sigh ! those horrible nails.

Well, anyway, here is where I am right now. Where do I plan to go from here. Well, it is obvious there are a lot of things. The next on the list is adding the false keel and the stem and rudder. And then going on from there.
 
Re: OcCre Santisima Trinidad Build Log

Well, yes, I did use a nail punch to sink them just a hair - ARGGG - you know it like the more I tackled the problem, the worse it got. OK-OK Kip, I will shut up about the nails :-({|= LOL

The wood filler does sound tempting, however, I am really afraid that it will make it look like someone really screwed up and tried to cover it up :mozilla_sealed:
Hey, on top of that OcCre in the instructions said to grind them off flush<br/>

Donnie :woe
...at the end of a years work...
 
Re: OcCre Santisima Trinidad Build Log

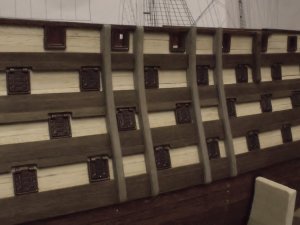
It has been a few weeks since I posted any info. I have been busy organizing and starting a Contributors Gallery, plus working on my own Trinidad. I have finally got all the Wales and Rubbing Strakes done on BOTH sides of the ship. All the Cannon Port lids, frames are done. I had to order some extra From OcCre and they were very good about sending more. It only took about 2 weeks. Their were several in the package that did not have a good mold, but things like that are expected. No worries with OcCre. I think they are an outstanding company to do business with.

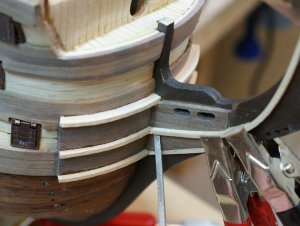
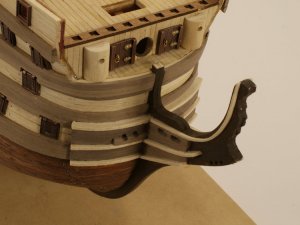
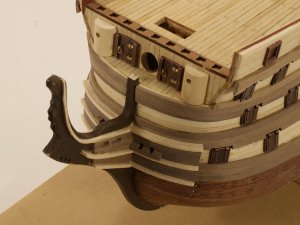
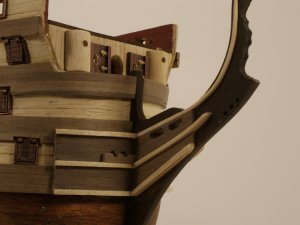
As you can see from the following images, I was able to mount the Stem and Stern Pieces along with the keel. These pieces have been stained with Model Expo American Walnut. I applied about three coats. I desired to have a heavy coating, but you can still see the grain of the wood.

The knighthead is not shown in these images, but I had to do some shaping to it so that the bowsprit would fit nicely. My desire for the gun port lids is to fashion a rope to the lid and bring that rope into the wales. The under lids will be painted a dark crimson as well.

Also from the images, you can see that I finally had to build a cradle for the ship, because now that the keel has been laid, the ship wants to sit a little sideways and is now difficult to work on satisfactory. The cradle is a working cradle and is obviously not what I plan to use as final mounting.

I guess there is little else to say, other than now that I look back from this point, I wish that I had used some balsa filler blocks, at least on the bow, where it is difficult. The Bluff Bow can be a difficult measure.

The nails are brass, and as I started out with installing the nails, I was pleased with it, however, now that the entire hull is completed with the nails, I have mixed feelings about it. I think that if I had to do that again, I would either leave the nails off or go with a treenail that is some similar color. The nails do not offer any scale application other than as someone said to assist the modeler and to give the ship some type of false sense of treenails I guess. All in all, I am satisfied with my build so far. It will not be long and I will be adding more details on the deck.

Thank you for your visits !

Donnie
 
Re: OcCre Santisima Trinidad Build Log

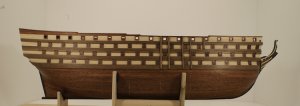
Well, I am finished with the hull. There was a lot of effort to do the planking, so I shall leave as is. Overall, I am happy with it.

Dan, thanks for pointing out the bow support. I need to put some support there too. I used a felt cloth that my wife had and just glued it to the edge of the support. All of the support is then glued using Titebond glue to a piece of MDF (medium Density Fiberboard). MDF is strong, and rarely warps unless it is exposed to direct weather.

Donnie
 
Re: OcCre Santisima Trinidad Build Log

Working on some stem details. I have found several interpretations on the stem pieces. Even the directions have a small amount of differences (like the box art compared to the directions and the plans) all offer a slightly different approach. I am just doing and kinda guessing as I go along.

hullforum14.jpg
 
Re: OcCre Santisima Trinidad Build Log

I must give credit to the friends and their vast knowledge of ships that I give credit to and following in their footsteps.
Completed the Stem details.

hullforum15.jpg

hullforum16.jpg

hullforum17.jpg
 
Re: OcCre Santisima Trinidad Build Log

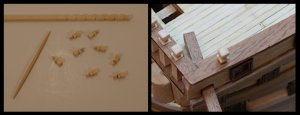
Starting to make up the Bow Samson Post. My wife says that this is too tedious. I told her - it is all tedious. There isn't anything that I can think of that is particular straight forward. These post were made out of a strip of 5x5mm Ramin. It isn't so much that it is tedious, it is the fact, that you can over file or over cut so easy.
 
Re: OcCre Santisima Trinidad Build Log

I usually make two per evening as I have just started. On something like this, I have learned not to push myself. Besides, it give me something to look forward to when I get home.
I don't have any special equipment on this. I only had an exacto knife and a file. I also used a pair of calipers to keep them "within reason" the same shape and size. I am lazy - I did not feel like building a jig for these.

There is (in my opinion) a "law of diminishing returns" on things like this. I can spend more time building a jig to make these more perfect, or just do it by hand.
 
Re: OcCre Santisima Trinidad Build Log

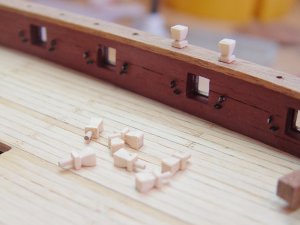
Too delicate to break. So, I created a base about 1mm thick to the top most post. Then I used a pinvise to make a small hole in base on bottom. I used a toothpick cut off to glue to bottom. This assembly then can be glued into railing. It is much easier to handle is one of the main reasons. I also used a pinvise to drill hole in railing. This way, I can put a droplet of glue into hole on railing and get my samson post lined up without worry about post sliding everywhere.

hullforum19.jpg
 
Re: OcCre Santisima Trinidad Build Log

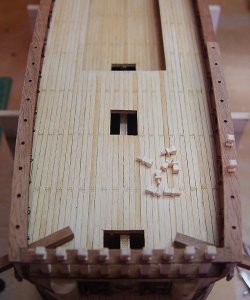
I was able after many hours able to get the Samson Post as good as I could "as I say, within reason".

Nothing has been glued in yet. I went extra steps in drilling holes and mounting the Samson Post on the toothpicks. I wanted to be able to "drop and align" those post in and use white glue.

hullforum20.jpg

hullforum21.jpg
 
Re: OcCre Santisima Trinidad Build Log

I have been putting on a light coat of Polyurethane on the Wales and Rubbing Strakes. Then on to painting the underside of the Gun Port lids and mounting them appropriately. I have taken all of my Samson post off (as they were not glued anyway) and putting them off to the side. I am going to have to flip the ship upside down to do the work on the lids-didn't want to chance breaking a post.
 
Re: OcCre Santisima Trinidad Build Log

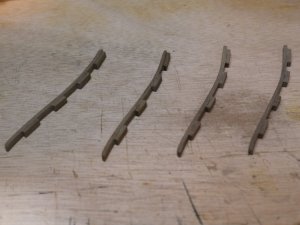
These are the fenders. The pictures are not good because my lazy streak was in full force and I did not feel like getting the ship and parts over to the photo shot box. So, I did the best I can. I need to do better than this for all my friends here.

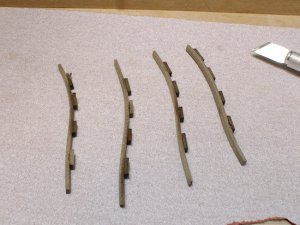
One shot shows the fenders as made on the bench and then temporarily put in place. They are not glued in place yet. These little guys are tough to do. You have the slight curve of the ship, plus the notches.

hullforum22.jpg

hullforum23.jpg
 
Re: OcCre Santisima Trinidad Build Log

When I get both sides done, then I will get out my photo box.
 
Re: OcCre Santisima Trinidad Build Log

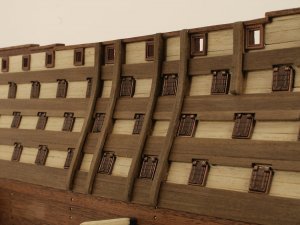
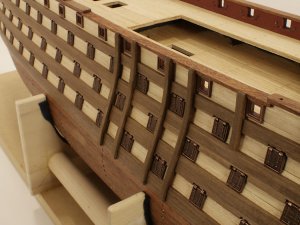
The Fenders are glued in on one side. You might notice that the ship has a coat of polyurethane satin on it. As soon as I paint a coat on, I wipe it down with a soft towel. Now, on to the other side to complete the Fenders. I removed the Samson Post as I do not want them to get damaged. After this step, I am not sure what to do. I might start on the Gun Port lids and securing them in place.

hullforum24.jpg

hullforum25.jpg

hullforum26.jpg

hullforum27.jpg
 
Re: OcCre Santisima Trinidad Build Log

I have a little more work on the Hull that really want to get out of the way before venturing onto the deck. I am very anxious about getting started on the deck, but I must devote my attention to these other details. You know, once it is done, it is done as they say.

To those that are advanced - this is nothing new, however, it is new to me and I am writing this in case someone out there struggles the same.

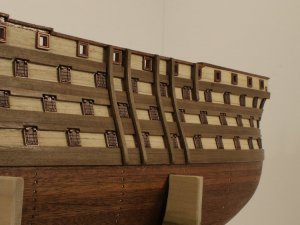
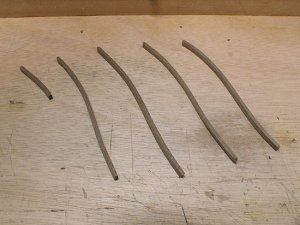
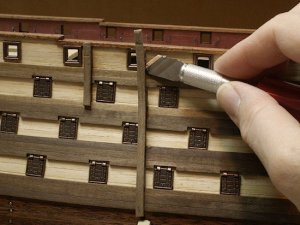
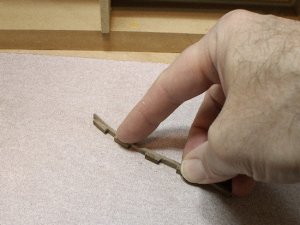
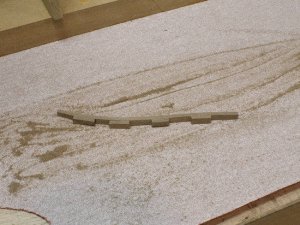
I continue with the Fenders on both Port and Starboard side. The following images try to demonstrate the efforts of the steps involved as much as possible. All of the pieces are made out of African Walnut at 2mm x 4mm. All cut to length as necessary. The first step, I measure the rough length of the Fender, then soak in water and form the curve with my hands. The next step, I cut each piece that will fit in between the Wales. They are cut rather snug so they will not fall out. They are temporarily positioned in place and not glued in. The next step, I put a small amount of glue on the fender spacers facing me. They still are not glued to the hull just yet. Then I took each fender and pressed the fender up against the Hull onto the fender spacers. Once the glue dried, as the image shows, I took a tool and pried the completed fender from the hull. Remember that the fender spacers were not glued to the hull. Then I removed them so that I can sand the edges smooth. Then, I assembled the completed Fenders back to the Hull with glue. I also applied a light coat of Olympic Polyurethane Interior Satin finish. I used a towel to clean off the excess. Fenders all trimmed and glued to hull.

fenders01.jpgfenders02.jpg

fenders04.jpgfenders05.jpg

fenders06.jpgfenders07.jpg
 
Re: OcCre Santisima Trinidad Build Log

The Rudder Assembly was a little more difficult than I thought it was going to be. The instructions are not clear, however, there is one photo in the instructions that give you a hint of how it is to be built. The "Score" on the rudder came laser cut. However, the score on the "Inner Post" had to be notched out. The "Braces" were pre made from Brass from the kit. The "Pintles" were cut from a long piece of 1.5mm Ø Diameter brass rod. The "Pintles" were cut to a length of about 10mm. I used the supplied brass nails on each rudder Brace and Inner Post Brace. I also had to cut the nails shorter.
 
Re: OcCre Santisima Trinidad Build Log

Well, I decided to go ahead and paint the Gun Port Lids while the hull is laying upside down on the bench. It is easier to do this now. It is unfortunate that the Anti Fouling Red #4228 from Model Masters is discontinued. I ordered some hull red from Model Expo and it sure is bright red. I have just enough of the #4228 left over to paint the lids. After this, I am probably going to have to mix my own.
 
Re: OcCre Santisima Trinidad Build Log

I found out really quick that Rudders are not my favorite. Now, I am moving onward to working on Gun Port Lids.<br/>

I know that Danny suggested that I wait until later to do this. However, I think that I am going to be tempted to go ahead, and I have my reasons.<br/>

The image that you see is experimenting with a few gun port lids. However, I might say, that once I am happy with perhaps one or two, I might hold off on installing all of them. I know that Danny said that those are so easy to get caught on things and have a way of getting in the way with the rest of the build, but I will think about it.

Here are exerts from my build log online. I am experimenting with a few Port Lid Rigging before I commit to performing this task to all Port Lids. I drilled a small hole in the Rubbing Strakes. About .5mm. I have some Rigging Thread that I bought from Model Expo. The size is .010 inches. I use CA glue and put a small amount on end of thread. When I pass the thread thru the hole, it will glue itself to the inside of the hole very securely. At a later step, using the same drill size, I then drill a hole in the upper lid portion. The other end of thread is pulled thru and glued. The hinges are also glued for reinforcement.
 
Back
Top