Polaris by Occre - First build

Joined
Feb 1, 2024
Messages
34
Points
48

Hi this will be a log of my first build which I thought might be nice to record. No doubts there will be ups and downs along the way. Any comments or suggestions would be welcome and I am happy for any mistakes to be pointed out.
 
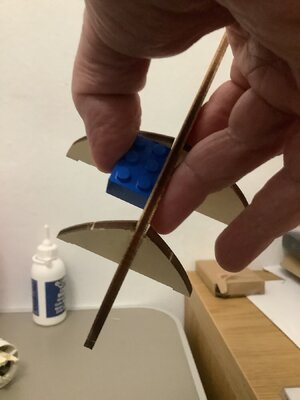
Many folks raid the kids toys for Lego to use for squares to keep ribs inline with keel.

Looks like your off to a good start, and remember to keep posting, and if you have problems just post info and photos and the crew here will get back to you with there thoughts and opinions, which are not always the same, it give you a choice of what actions to take.
 
Hi Marty and welcome to this great hobby. It has kept me sane through some tough times The Lego block is a great idea and innovation and problem solving are the name of the game..... along with patience of course. My father use to tell me to "hurry slowly." Good luck with your build mate.
 
Hi Marty... Thank you for starting this build log. I'll be following it as I, too, am just starting the Polaris. I'm currently installing the planks to the sub-deck. Slowed down a bit to take advantage of the relatively nice weather. I find it difficult to stay inside when its 70* (F) outside.
 
Hi Marty... Thank you for starting this build log. I'll be following it as I, too, am just starting the Polaris. I'm currently installing the planks to the sub-deck. Slowed down a bit to take advantage of the relatively nice weather. I find it difficult to stay inside when it’s 70* (F) outside.
It would be great to share any ideas along the way. I know I have never used a pin pusher before for example and the rigging looks complicated. Best not to look too far ahead I guess and just take one challenge at a time. Best of look with your model.
 
It would be great to share any ideas along the way. I know I have never used a pin pusher before for example and the rigging looks complicated. Best not to look too far ahead I guess and just take one challenge at a time. Best of look with your model.
On YouTube there is a guy called home harbour who has also built this model. I have found it useful looking at this too. Might be worth a look?
 
Will be using the pin pusher soon. Are there any tips with regards to this or is it as easy as the videos appear?
 
On YouTube there is a guy called home harbour who has also built this model. I have found it useful looking at this too. Might be worth a look?
I saw his video and decided to use his technique for planking the deck rather than the long strips of material and contact cement called out in the plans. I drew grids on the sub-deck as a guide for placing the planks. I chose a 3 plank offset (staggered) pattern starting at the stern with a 55mm long plank in the center, a 40mm long plank on either side and a 15mm length aside the 40mm planks. Once the stern row is complete then its 55mm lengths the rest of the way except for the edges and bow section. I "colored" one side and end of each plank with a #2 pencil to simulate caulking and I made a little jig to create the look of nails. Once the deck is complete, I'll sand it, brush off the dust then coat it several times with acrylic varnish with the hopes the sawdust will fill in the little holes. Is it a bit more work? Yes indeed, but I'm liking the way it looks so far. Also, a 5mm wide plank is not necessarily 5mm wide so each plank needs to be dry-fit before gluing (white PVA glue). I found this technique in the book "Ship Modeling Simplified" by Frank Mastini.
 
Will be using the pin pusher soon. Are there any tips with regards to this or is it as easy as the videos appear?
I'm looking at purchasing one of these. I think the other types of pin pushers are fraught with potential issues of pin bending and guessing where the pin is actually being placed. These pliers seem they would take the guess work away. Just my 2 cents.
 
I have a pinpusher from Amati, doesn't work for me at all, and the one from Occre. This is working 'ok' for me but many times the pins are inserted crookedly and so don't hit the bulkwards. The best and very time consuming way for me is to drill small holes (0,2 drill with my Proxxon IBS/E) and push the pins into them by hand or tweezers (this Micro-Mark tool would fit perfect for this) and then hammer them down. I try to not insert them completely to be able to remove them later.
 
Hi Marty and welcome to this great hobby. It has kept me sane through some tough times The Lego block is a great idea and innovation and problem solving are the name of the game..... along with patience of course. My father use to tell me to "hurry slowly." Good luck with your build mate.
Festina-Lente-2016-1.jpg
Hey Uncle Davydd,
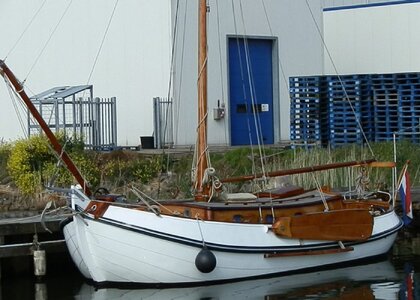
Maybe nice to know that "Festina Lente" (hurry slowly in Latin) is a very common name for traditional- and working ships in the Netherlands ;-)
 
I saw his video and decided to use his technique for planking the deck rather than the long strips of material and contact cement called out in the plans. I drew grids on the sub-deck as a guide for placing the planks. I chose a 3 plank offset (staggered) pattern starting at the stern with a 55mm long plank in the center, a 40mm long plank on either side and a 15mm length aside the 40mm planks. Once the stern row is complete then its 55mm lengths the rest of the way except for the edges and bow section. I "colored" one side and end of each plank with a #2 pencil to simulate caulking and I made a little jig to create the look of nails. Once the deck is complete, I'll sand it, brush off the dust then coat it several times with acrylic varnish with the hopes the sawdust will fill in the little holes. Is it a bit more work? Yes indeed, but I'm liking the way it looks so far. Also, a 5mm wide plank is not necessarily 5mm wide so each plank needs to be dry-fit before gluing (white PVA glue). I found this technique in the book "Ship Modeling Simplified" by Frank Mastini.
i saw that video too and liked the final result. I did not decide to try this on my first build but looking forward to seeing how you get on. Best of luck with this.
 
a good start of the model and also with this building log - if you have problems etc. do not hesitate to post them here - you well get help
 
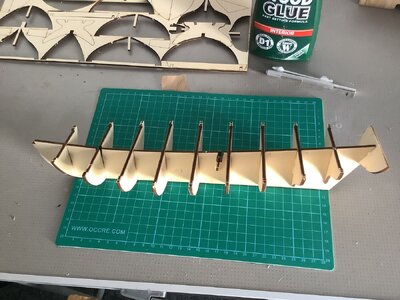
Checked decking with ribs to check fit. All seems good, snaps in to place but pops off when I leave go. Hopefully it’s just the fact that there was no glue in place. Waiting for varnish for decking then will see what happens.
 
Back
Top