La Salamandre 1752 1:48 (CAF) by Salty

Finishing frames continues.

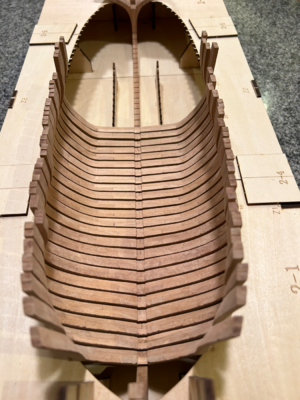
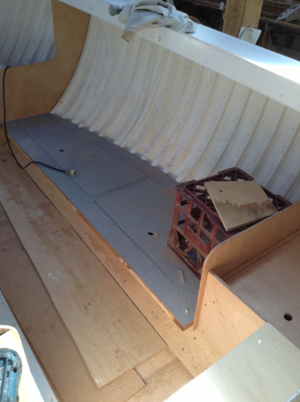
This is the inside of my boat Peggy (see post #35) when she was being built.
IMG_0065.jpeg

She actually has twice as many frames as specified in the plans (the builder thought she was too lightly timbered and added extra), so you can perhaps see how heavily timbered La Salamandre is by comparison (if a comparison between a day sailer and a bomb ketch is possible!?).

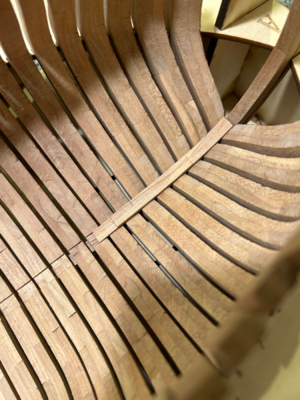
The frames were steamed to shape and not sawn as would be the case with a larger vessel. If you look closely at the them, you can see the rivets used to hold the planks. After passing through the plank and frame, the end of the rivet was cut off, a washer was placed over it and it was peened over.

I don’t think I can remember ever seeing this detail in a model. In real life, I imagine the spike/bolt was clenched over a washer which would look very similar. In any event, probably very few were actually visible, but there is food for thought if you were so inclined. Obviously, there would be nothing protruding on the inside if treenails were used.
 
I just want to start this diary entry by thanking everyone who has been checking my progress lately. The phrase “pull up a chair” is sometimes used on this forum and there is actually a small couch opposite the table where I am working. Lately, it seems like a few people might have been there, space permitting, because it has a habit of being covered with plans and other modelling clutter. Hopefully, I can keep you sufficiently entertained.

I am now more than half way:

IMG_0405.jpeg

The bevels for frames 15 to 19 were so small that I am only really looking at them as part of the final finishing with 120/240 grit sandpaper. No bevelling at all for frames 20 to 24 which I did earlier while still gluing up the rest of the frames.
 
More progress, but each frame needs a little more bevelling as I work my way aft:

IMG_0412.jpeg

IMG_0413.jpeg

I had a day off work recently and the house to myself, so have been able to finish a few ahead of schedule.

I am feeling pleased with the way the hull seems to be shaping up.
 
And now for something completely different…

IMG_0979.jpeg

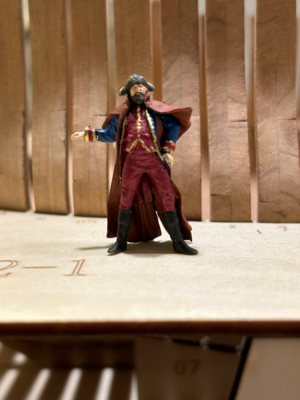
Tom at CAF sent him as a small present in a parcel with some other things, so in between frames, I have been painting.

I almost didn’t see him until I was about to put the packaging in the recycling bin. I think he is supposed to be a French naval officer at 1:48 scale but for now he will have to settle for being shipyard foreman until La Salamandre is finished.

EDIT: I apologise for wasting the valuable time of forum members who thought they were going to get an update on building a model ship. Perhaps we should just put the whole unfortunate incident behind us and the forum moderators will not take any action if I promise I will get on with the serious business of La Salamandre.
 
Last edited:
EDIT: I apologise for wasting the valuable time of forum members who thought they were going to get an update on building a model ship. Perhaps we should just put the whole unfortunate incident behind us and the forum moderators will not take any action if I promise I will get on with the serious business of La Salamandre.
No problem - you are the owner of this building log, so you can post what you like to post - off topic can only be others
and definitely figurines like this are never off topic, often very interesting for others to bring some life on board of our "static" models
BTW: You did a good job in the painting of this figurine !!!

 
Thanks to all who are keeping up with progress on La Salamandre. I am probably not the best photographer or a very lively writer, but I hope my posts give you an idea of what is happening.

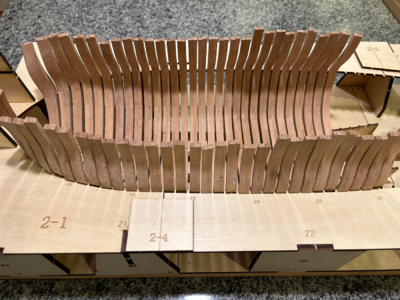
The view from the bow for a change with a few more frames finished.

IMG_0417.jpeg

IMG_0418.jpeg

I don’t think I will need to do much fairing when it’s all together. There are some areas in the photos where things don’t look quite right, but these seem to be where the the tips of the frames are a bit narrow. Heaven only knows how this happened. I thought I tested the fit of the frames on the plan before assembly. Perhaps modelling gremlins do exist. Hopefully, when I put filler blocks between the frames, I will be able to marginally widen the tips of the frames.
 
Last edited:
Thanks to all who are keeping up with progress on La Salamandre. I am probably not the best photographer or a very lively writer, but I hope my posts give you an idea of what is happening.

The view from the bow for a change with a few more frames finished.

View attachment 396057

View attachment 396056

I don’t think I will need to do much fairing when it’s all together. There are some areas in the photos where things don’t look quite right, but these seem to be where the the tips of the frames are a bit narrow. Heaven only knows how this happened. I thought I tested the fit of the frames on the plan before assembly. Perhaps modelling gremlins do exist. Hopefully, when I put filler blocks between the frames, I will be able to marginally widen the tips of the frames.
Good morning Salty. Those gremlins are definitely out there…..it’s a true story they work my my build every night ;) . Your frames are looking really good, those gremlins are fighting a loosing battle here. Cheers Grant
 
Grant, thanks for confirming that modelling gremlins do actually exist. My family is less charitable - I make all the mistakes and, half the time, I am not even smart enough to work out how they occurred.

Almost there. Only three to go.

1695810341848.png

1695814651106.png

I am relieved this phase of construction is drawing to a close. My fingers feel a bit the worse for wear with all the sanding, but it is satisfying to see the jig fill up.
 
Last edited:
Important is only that you do not the same mistake twice (or three times)
As long as the result is looking so good like your framing - let us make mistakes -> the result is very good
I know this Salamandre kit very good - so I can really evaluate your work
 
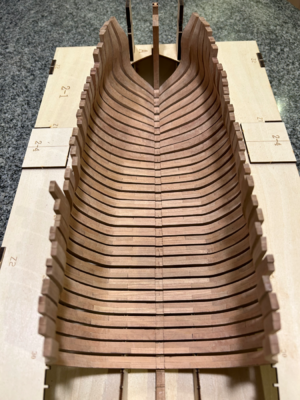
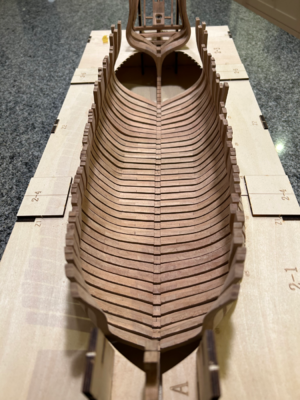
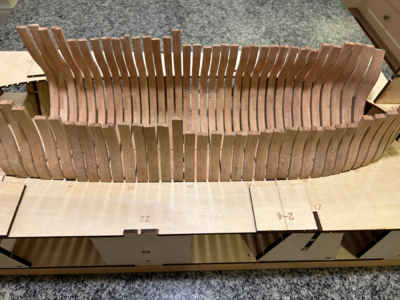
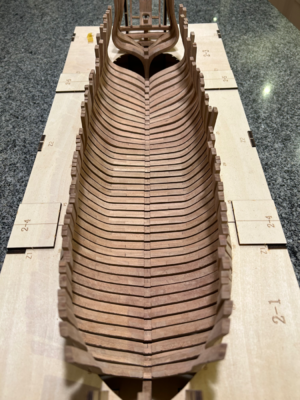
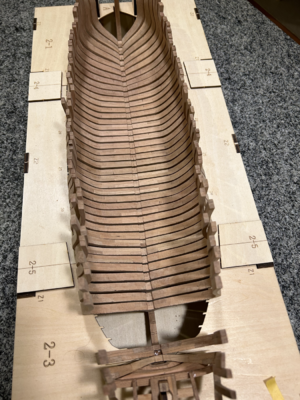
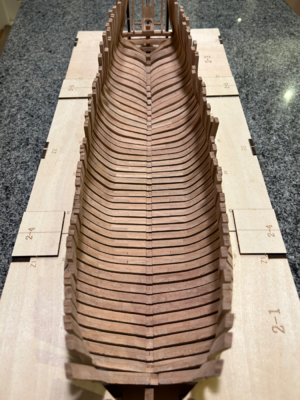
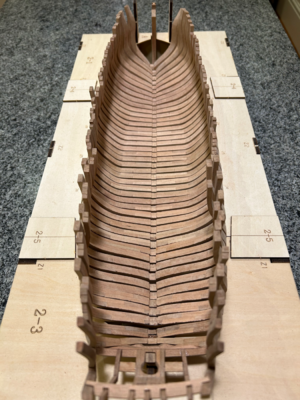
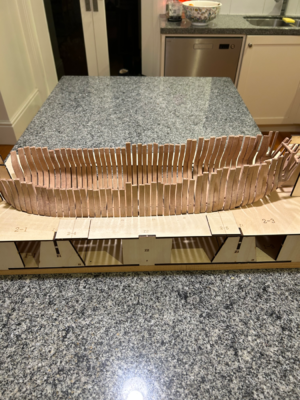
All the frames are now finished and sitting loosely in the jig:

IMG_0431.jpeg

IMG_0432.jpeg

IMG_0437.jpeg

I have to say that I am reasonably pleased with the results. At the risk of being a little defensive, I feel the photos are a little unflattering and show the frames to be a bit rougher than in real life. When I adjust the frames to fit the keel and keelson, I will look for any obvious spots that need more.
 
Last edited:
Uwek, I appreciate you keeping an eye on my progress. I am sure mistakes will be made along the way, but hopefully nothing that can’t be fixed. I might have to look for a larger swear jar…

Paul, thanks also for your encouragement. I am a regular visitor to your diary and certainly look to your work when deciding what is I should be aiming for in my own. I think you did a wonderful job with the ceiling planking in Kingfisher. Sometimes it’s difficult to really know what is possible sitting at the end of my dining table working on La Salamandre, but SOS certainly has plenty of examples what can be done.

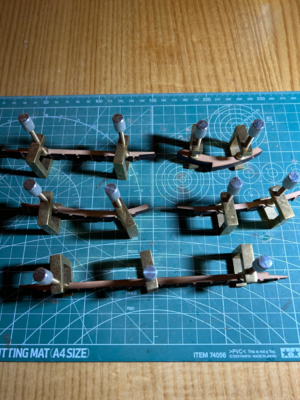
Here are the glued up pieces for the keelson which sit on top of the frames:

IMG_0366.jpeg

Removing the laser charring looks a little difficult, given the notches are quite shallow, but it nice to be doing something other than bevelling frames for a change.
 
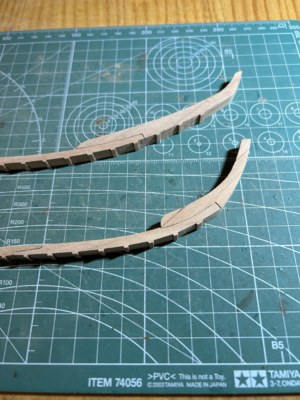
Here are the finished pieces for the keelson - stern above, bow below

1696669517825.png

There’s also a few long sections in between, but you get the idea.

The next job is to fit it to the frames - a “moment of truth” of sorts for all the work of the previous months.

We have just started daylight saving time in Australia and the sun doesn’t set until 7.30 pm, so it’s a pleasant way to end the day working on La Salamandre with the back door open.
 
All the frames are now finished and sitting loosely in the jig:

View attachment 397534

View attachment 397536

View attachment 397535

I have to say that I am reasonably pleased with the results. At the risk of being a little defensive, I feel the photos are a little unflattering and show the frames to be a bit rougher than in real life. When I adjust the frames to fit the keel and keelson, I will look for any obvious spots that need more.
Good evening. Whew….!! A lot of frames and looking good. One day when I attempt a POF, I think I will throw a party when the last frame is fitted and she comes out of the jig. Cheers Grant
 
Grant, no party just yet, but planning one perhaps when she comes out of the jig (whenever that might be). On a more serious note, I think you should think about some sort of plank on frame model. It’s a different type of model, but a model all the same and you obviously have great skills in that department. By the way, South Africa has done better than Australia in the rugby. The cricket isn’t looking much better either…

The next step is to trial fit the keelson to the frames. Although I made sure the keelson would fit in the slot in each frame when I did the bevelling, this doesn’t guarantee the keelson will fit over a number of frames. I am also checking each frame to see that it fits the slot in the keel at the same time.

I am also making some adjustments to the outside bevels on the frames so they sit in the jig and on the keel.

Although I thought I did a pretty reasonable job on the frames, I have found a few which require a little more work, particularly the slots for the keelson. I am using a musical instrument maker’s knife which gives a much more precise finish than sanding.

Here is the first part:

IMG_0907.jpeg
 
Hi Salty, if you don't mind...what is this? I'm not so great with machines so I make most of my ship parts using hand tools so I would be most interested in something like this...
...the only 'musical instrument maker’s knife' I can think about for the job Salty describes is the scarpers.

 
Fellow modellers

This is my diary of building La Salamandre 1752 using a kit purchased from CAF.

View attachment 361242

La Salamandre may not as popular as some other ships, but there are enough examples being built on forums so I am not completely by myself. I like the idea of a partially planked hull showing the frames and below decks, as well as the fact that she is rigged. There are some great examples being built from this kit - Koreets, Uwek, ADC, BigMike and Tedboat - and I will be happy if mine turns out half as well.

I don’t intend to do a review of the kit as this topic seems to be well covered by Uwek and others. I am pleased with the quality of the parts, but obviously assembling them is the challenge. The instructions are basic, but at least they provide a sequence for building. Hopefully, I can work out how each step should be undertaken to achieve the necessary results. Tom at CAF is a pleasure to deal with.

To help, I have a copy of the Boudroit and Berti monograph, as well as Frolich’s The Art of Ship Modelling which has a section devoted to this ship. I also have a small collection of other nautical books bought over the years, including Marquardt’s Eighteenth Century Rigs and Rigging, Harland’s Seamanship, as well as a number on traditional wooden boat building and rigging.

I am using a few basic hand tools. I don’t have any power tools, although I might change my tune when it comes to bolts and treenails. At present, my “workshop” is the end of the kitchen table.

I don’t expect this will be a quick build by any means, but I hope you will find it interesting.

Salty
Hallo @Salty
we wish you all the BEST and a HAPPY BIRTHDAY
Birthday-Cake
 
Back
Top