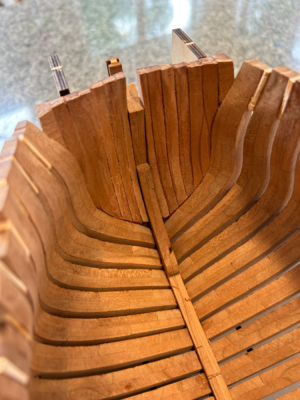
La Salamandre 1752 1:48 (CAF) by Salty

Paul and Ken, thanks for your wise words. I will do my best to keep them firmly in mind in the future.

Not much progress, as shortly after my last post, I managed to cut my thumb while working on La Salamandre. I needed maybe half a dozen stitches (in truth I am not sure how many as I couldn’t bear to look). When I explained how I did it, the doctor gave me the haemostat and two tweezers he used on me as a consolation prize of sorts and told me not to do it again. Apparently, they just throw the instruments away after one use. I think they’ll be really useful. One pair of tweezers has the usual corrugated jaws but the other has U shaped piece on the tip for trapping thread and could be useful for rigging.

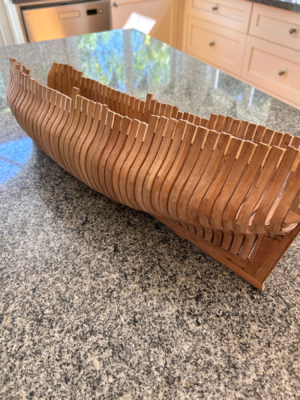
Here she is minus the hawse pieces:
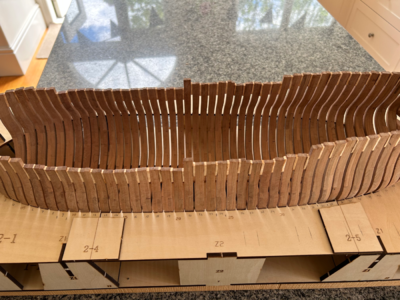
IMG_0992.jpeg

IMG_0988.jpeg

La Salamandre is feeling a bit more like a ship. It’s taken a while to reach this point but, all things considered, things have gone relatively smoothly. That’s not to say there have been periods where I have been quite anxious - e.g. gluing the frames and keelson and filler blocks in particular - but I seem to have been able to work through the issues. I have been assuming the plans are right and I am wrong and have been loathe to start modifying bits to make them fit. This approach, coupled with regular visits to Uwek’s log and Boudroit and Berti, have kept me on the straight and narrow.
 
Paul and Ken, thanks for your wise words. I will do my best to keep them firmly in mind in the future.

Not much progress, as shortly after my last post, I managed to cut my thumb while working on La Salamandre. I needed maybe half a dozen stitches (in truth I am not sure how many as I couldn’t bear to look). When I explained how I did it, the doctor gave me the haemostat and two tweezers he used on me as a consolation prize of sorts and told me not to do it again. Apparently, they just throw the instruments away after one use. I think they’ll be really useful. One pair of tweezers has the usual corrugated jaws but the other has U shaped piece on the tip for trapping thread and could be useful for rigging.

Here she is minus the hawse pieces:
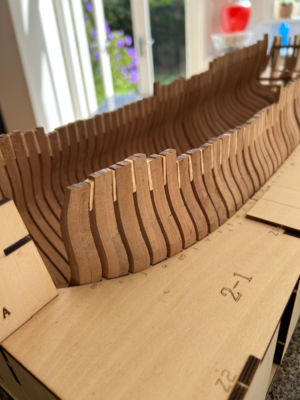
View attachment 406173

View attachment 406172

La Salamandre is feeling a bit more like a ship. It’s taken a while to reach this point but, all things considered, things have gone relatively smoothly. That’s not to say there have been periods where I have been quite anxious - e.g. gluing the frames and keelson and filler blocks in particular - but I seem to have been able to work through the issues. I have been assuming the plans are right and I am wrong and have been loathe to start modifying bits to make them fit. This approach, coupled with regular visits to Uwek’s log and Boudroit and Berti, have kept me on the straight and narrow.
Good afternoon Salty. Quite a journey, injury and all. I love Ken’s post as it is so true- great advice. From my view point your frames are looking awesome. Cheers Grant
 
Thanks again to all who are following La Salamandre.

Paul and Grant, thanks for your posts. Despite my thumb healing well, I am still a little restricted and can’t do much model making. My family has also banned me from using anything sharper than a butter knife until further notice.

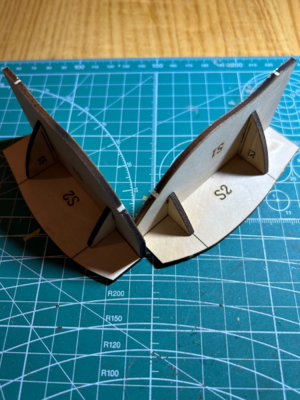
Today I started the hawse pieces at the bow. The first step is to build the plywood jigs.

IMG_0052.jpeg

The curved edge of S1 matches the bevelling on frame 1 and the curved edge on S2 matches the rabbet in the stem.

There are seven pieces on each side.

IMG_0320.jpeg

The next step is to bevel the inside so they sit on the curved brackets on the jig.
 
The hawse pieces are relatively tricky, especially if you are not allowed to use any tool which can really cut more than butter.

Maybe you want to take a look at my building log, where I tried to describe, how I made them


and


looking at these older photos - already 5 years ago ..... time is running
 
Paul, I hope the jigs will work as well. So far with La Salamandre, everything seems well thought out. Yes, I am finding it a difficult kit to build, but I haven’t been completely baffled yet by the instructions or parts provided, although no doubt a time will come…

Uwek, thanks for the links to your posts. I wouldn’t have started the kit without your log giving me comfort that a model could actually be built. That’s the beauty of SOS. Your support and encouragement are really appreciated.

Grant, thumb all better now with stitches removed, but one unfortunate outcome is my dream of being George Clooney’s hand double are over. That’s it - I don’t have any jokes left about the injury.

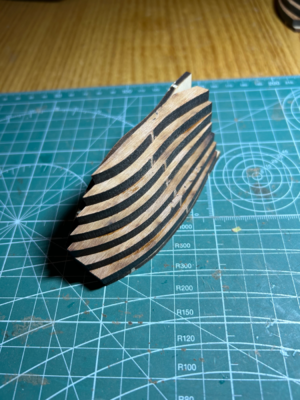
Here are the beveled hawse pieces for starboard

IMG_0322.jpeg

I used a small rasp - about 60-80 grit - to remove most of the wood - followed by 120 and 240 grit sanding sticks. I don’t really want to do anything more to the inside of the pieces after they are glued together.

I glued the hawse pieces together on the jig:

IMG_0323.jpeg

Although all this looks rather straightforward, I found it quite difficult to actually end up with something I was happy with. The first issue was making sure the pieces overhang the plywood jig on the curved section that sits on frame 1. The second issues was making sure the inside was reasonably fair. This involved slightly repositioning the pieces second and third from the top away from the supports underneath.
 
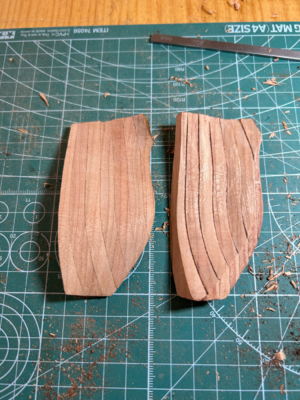
Here are the finished hawse pieces:

IMG_1004.jpeg

The profiles of the faces of the jig match the rabbet on the stem and the bevel on frame 1, so it was a matter of making a fair curve using a rasp and the sanding sticks to finish. A bit of care was needed not to take too much material off too quickly on the edges, particularly the one which sits on frame 1. Mind you, there is not a lot a spare wood left by the time you finish sanding out the laser charring in the individual elements of the hawse pieces.
 
Here are the finished hawse pieces:

View attachment 408566

The profiles of the faces of the jig match the rabbet on the stem and the bevel on frame 1, so it was a matter of making a fair curve using a rasp and the sanding sticks to finish. A bit of care was needed not to take too much material off too quickly on the edges, particularly the one which sits on frame 1. Mind you, there is not a lot a spare wood left by the time you finish sanding out the laser charring in the individual elements of the hawse pieces.
Beautiful!
 
Thanks to all who are checking on my progress which seems to be slow but steady. The speed at which some other builds progress makes me wonder if there’s some secret I don’t know, but I’m happy pottering along. I was a bit dubious about starting a SOS log, but I’m glad I did.

The process of fitting the hawse pieces to frame 1 and the stem is next.

To do that properly, I think I need to be able to see more of the stem and frame 1 than I can with everything sitting in the jig. So, with more than a little trepidation:

IMG_0993.jpeg

IMG_0995.jpeg

IMG_0994.jpeg

It was actually reasonably easy. I dismantled most of the the jig (running a razor blade along the glued joints) and then eased the horizontal plywood section holding the frames downwards to free the hull.

What can I say? I think it’s a good basis for the rest of the model. It needs some more refining but I think I can be confident in the knowledge things are largely as they should be and I hopefully won’t be making lots of little adjustments to compensate for errors in the hull. Lots of the framing is going to be covered in planking or possibly cut away, so I’m not rushing to “fix” anything just yet. I would like to neaten her up a bit, but I’ll resist the urge for now as I might create problems further down to track.
 
Congratulation for reaching this step that the hull structure is free from the jig.
Isn´t it a cool feeling to have the hull structure in your hands?
Looking very good - I like your work very much - Very good!
 
Lining up where to fit the hawse pieces was a little tricky. In the end, I went for a few millimetres below the top of frame 1. In this position, the curves on the two faces best matched those on the rabbet on the stem and the bevel on frame 1.

To get the hawse pieces to fit, however, I had to pare down the top half of the face which butts up against the stem as the other edge was a millimetre or so wider than frame 1. I did most of this with a finger plane, with final adjustments with a chisel. It all seems simple now, but it certainly took a while to work out what to do and how best to do it. And the usual endless fit-mark-trim-check cycle. More than little anxiety was associated with all this because there are no re-dos as you only get one set of hawse pieces.

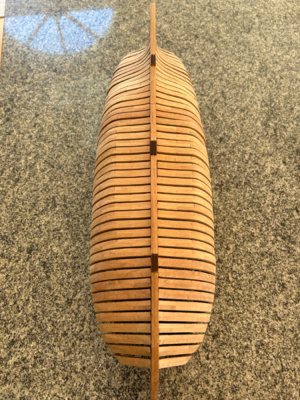
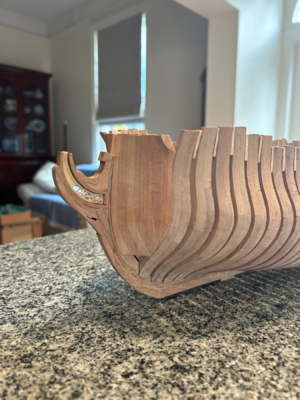
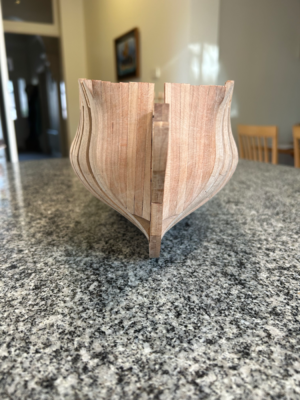
There is the result

IMG_1015.jpeg

IMG_1014.jpeg


IMG_1016.jpeg

I haven’t done any fairing yet with the hawse pieces after glued in place.

I have a few musical instrument makers tools - chisels, knife, rasp and finger plane among others - which I have found really useful. They are a little expensive, but they will last longer than me and are the perfect size for model making.

The stem and the stern seem to cause a fair bit of difficulty in many models, both plank on frame and plank on bulkhead. I feel the same about La Salamandre. But if they weren’t difficult, I guess everyone would be building models…
 
That all looks very promising Salty. I really struggled here on my current project and probably don't have the shape quite right, but it is what it is. I thought about trying again (at the time) but doubted my ability to turn out a better result.

Question: what's with the gap at the bottom? My hawse timber flow right into the stem/keel/cant frame 1...
 
Paul, I followed your progress on your hawse pieces and thought you did a wonderful job. It’s hard to believe Kingfisher is only your second model. I am very lucky I have the logs of Uwek and BigMike with photos of what the finished articles for La Salamandre should look like. The CAF website also has a small collection of pictures as well. The gap down the bottom will have filler blocks. There are 3 pieces on each side which are glued and then shaped prior to being installed. But that’s not the end of the story…

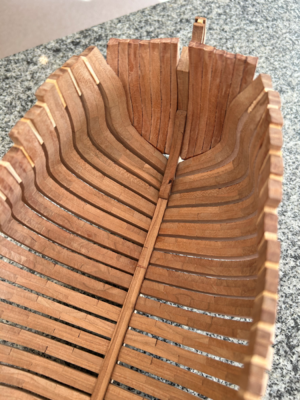
Now for a mea culpa. On the inside of the hull, the top of frame 1 marginally overhangs the three outer most staves of the hawse pieces.

IMG_1012.jpeg

My original plan was to simply fair frame 1 and the hawse pieces. I am not sure what I was thinking (more likely just not thinking at all). I have done some further investigation and fairing would mean modifying the two breast hooks - one sits at the top of the stemson and the other at the top of the stem - as well as the pre-cut margin plank for the upper deck.

It can be a slippery slope when you start altering things. I have been working on the assumption that the kit is right and I am wrong and have been reluctant to change anything because of flow on effects. I can’t see how the overhang occurred. I have been back over the plans and the logs of other builders without success. It may be due to the way the hawse pieces are built. Boudroit and Berti show the staves a being like segments of an orange, whereas CAF uses a parallel arrangement. In the end, I don’t think it’s worth torturing myself anymore about why, but get on with a solution.

I have an idea I can build up the staves in the hawse pieces with some 0.5 mm cherry veneer - three layers to the outer, two to the next and one to the next.
 
Thanks again for all your interest in my project.

Here is the repair:

IMG_1029.jpeg

There are three layers on the outer most stave of the hawse pieces, two on the whole of the next one with an additional layer on the top half, and one on the third stave.

To fit the pieces, I made paper templates, cut out the veneer, dipped in hot water for a minute and then taped them to the hawse pieces for half an hour or so. I am quite surprised at the amount of bend and twist required to get the pieces to sit neatly.

All in all, I think it is a reasonable fix, bearing in mind none of it will actually be visible in the final model. As best as I can see, the breast hooks seem to fit, so hopefully I haven’t created problems for later on. Also, in the finished model, the hawse pieces finish 5 mm above the stem, so much of what I have done will be removed in any event.

I am a little disappointed this has occurred, but if I am being objective, it’s a small detail and it’s probably inevitable at some point something is not going to go as planned. It will just have to be our little secret…
 
Back
Top