Kingfisher 1770 1:48 POF

The problem (if it is a problem :cool: ), however, might arise because of limited knowledge and required experience. I am sure most, if not all, questions could be answered in some articles and books. I found a great source of knowledge, specifically for POF models in the books Swan Class Sloops Series by David Antscherl, (volumes 1 and 2), and Greg Herbert a student who builds the model for this practicum. Volume 1 actually based on laying the keel and all structural parts including the transom framing. Once you grasp the construction method, it should give you assurance and should avoid the guesswork. Below are sample pages from my book
View attachment 354118
View attachment 354119

No need to buy all 4, start with: The Fully Framed Model, HMN Swan Class Sloops 1767 - 1780 Volume I - Revised by David Antscherl
Thank you, Jim. I appreciate your excellent advice. I have this series of books and I agree, they are very helpful.

The difficulty is even though these books intend to guide a builder - they are necessarily written from the perspective of a master modeler. As such they assume knowledge and experience (and skill with milling tools, etc.) that are still over the horizon from my perspective. The practicum from LSS is also very helpful and assumes a bit less experience from the builder. Mr. Hunt was very clear up front that this kit would be a serious challenge. He was right.
 
Paul,

what you are describing is the history of my model building career in the last 10-12 years.


I think that Jim is absolut right with his meaning.


As far as I know LSS followed the Antscherl books quite well. On MSW should be two build logs of the kit: the log of the prototype model from Bob and the Kingfisher from Remco. The main difference between the kit and a really scratch build is, that LSS has milled the parts for yor you.

If you cannot overcome your self-doubt stop the project, build a small vessel in the same style and in two years start with much more experience again. II'm afraid that if you don't, you'll get stuck in the same loop that's been holding me back for years now.
In autumn last year I decided finally to stop working on my bigger projects and to build first a small cutter. It has all elements of the bigger ships but it is really less complicated. It's not enough that I learned a lot of English shipbuilding of the period, I also need the building experience to fullfill my Triton or Fly project.
This is an excellent post, Christian! In a strange way it is comforting to learn that you experienced exactly what I am experiencing. Even with all the resources I have at hand the lack of practical experience actually making the parts of the ship is revealing how unprepared I actually am.

I would LOVE to see Bob Hunt's prototype build report, but I cannot locate it anywhere (on any forum including his own).
 
I think Paul, you got a lot of advice here. I'm doing in this time the same thing, the difference is I'm working on the drawings. My conclusies to this point is, you need the complete stern to ad these details. Then you can find out the angle and how far it goes up or down. And like you said, afraid to go to far in your work. You can't add wood. Succes
Thank you, Stephan. I think I'll take a second cup of coffee and try again later :).
 
Hello Paul, I can only agree with the previous speakers who have the necessary experience. It's all a learning process that you have to go through. I think the most important thing is not to stick your head in the sand and not to give up. If necessary, take a break and try to collect enough information. Christian's suggestion to start another or simpler project is also an option. In a way, I'm doing the same thing with La Palme and the current construction of Le Rochefort, just to get more experience. Stephan also mentioned a very important argument, the wood that's gone is gone, so it's better to remove less. Martin also says to leave a little more and then test how the planks adapt at this point. From my point of view it is probably the biggest problem that it is a kit and not a homemade one, which in turn means that you may not be able to rebuild a part that is not okay because you do not have the right resources -> like the right wood. However, I agree with Daniel that your kingfisher will be an outstanding model.
Keenly observed Tobias. There is very little waste on the milled sheets of boxwood and while I could make replacement parts for small bits - large pieces cannot be remade from the supplied material.

I actually have an order pending fulfillment (for a long while now - I'm getting concerned) from a milling shop in northern Europe. My preferred Russian supplier (all the pink pear on my Vasa) could not fulfill an order for boxwood. The wood supplied with the kit is beautiful - I hope what I ordered will be a good match. Having that in hand will take some of the pressure off (though I'll need to process the dimensional stock I ordered to proper thickness).
 
Hello Paul, may I ask where you ordered from in Northern Europe? Hobbymill.eu? If so, Vahur knows that boxwood can only be delivered at the end of January. That was the info I got from Vahur at the end of November
 
Thank you kindly, gentlemen, for the encouraging posts and likes. I've decided to refine the tapering a bit more in order to get me closer to the build requirements found in TFFM.

A passing observation from my experience using this series of books thus far: the measurements provided in the text are generally given full-size and in the imperial system. For example, for the stern deadwood I am told to make the width at the bearding line (basically where you see the notched area for the frames to seat into) 15 inches and then taper down to 5 inches at the bottom where the deadwood joins the keel.

By using actual measurements from a full-sized ship this allows the book series to accommodate every modeler's preferred scale. Makes perfect sense, right?

Well, this creates all sorts of tripping-up points for me because I think in metric (Why, you ask? Because I can picture 2.6 mm in my mind but not .104 inches). This means I need to first convert inches into mm and then adjust for my scale (1:48). Of course, the math isn't hard, but it all introduces room for mistakes to be made. I find myself constantly checking and recalculating things over and over again. I can't tell you how many times I've said to myself: how can you be so dumb?

When my dad was frustrated with me he used to say, "you've the dumbest smart kid I ever met." I didn't like that very much - but it seems he may have been right ROTF.
My father used to say: "Oh, Marc! Pull your head out of your <<donkey emoji>>!"

I didn't enjoy that, either. Most of the time, though, he was right.

I'm enjoying your progress, Paul. Certainly, these are vexing problems of the "how?"
 
Last edited:
Hello Paul, may I ask where you ordered from in Northern Europe? Hobbymill.eu? If so, Vahur knows that boxwood can only be delivered at the end of January. That was the info I got from Vahur at the end of November
Yes. From Vahur. Coincidently he sent me an update just this morning. He's started my order in the shop.
 
Very good work Paul.

Maarten makes a very good point , much easier to visualise the rabbet when the frames start going in.

I am a firm believer in revisiting details like. this with the framing in place.That is what I did on the bow of Saint Philippe, just a simple groove which was then feathered out to blend with the tips of the bow framing after the framing was fitted.This IS the safe way to do it. You can overthink the geometry when in fact it is a simple if a little small, fairing job.

Kind Regards

Nigel
 
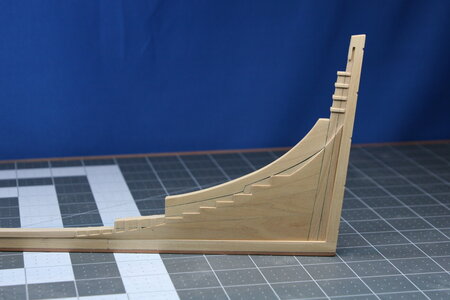
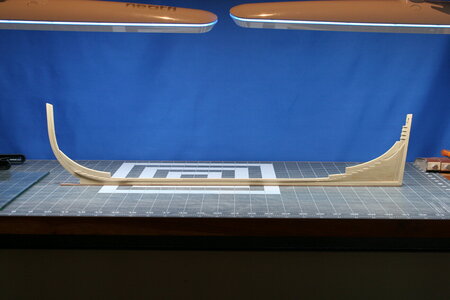
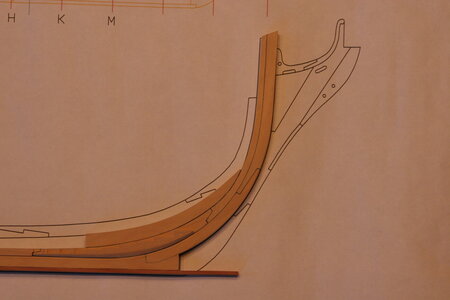
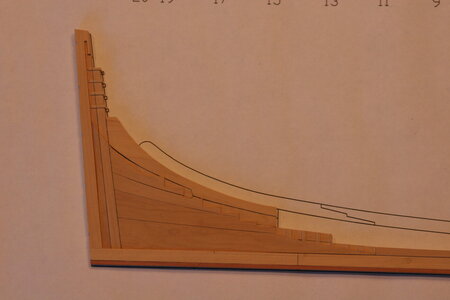
Work continues on the aft centerline...

View attachment 354104

View attachment 354105

View attachment 354106

The precision required is beginning to concern me. I have been having a hard time committing to the work out of concern that I'm messing something up now that won't be easy to fix later. I find myself thinking: I guess that's right more often than I would prefer...

It seemed best to only partially finish the rabbet at the upper sternpost at this stage. I assume I will be able to refine it later when the transom pieces are fabricated and test-fitted.

I'll say this much: POF construction is quite a challenge in terms of figuring out WHAT to do - as well as the actual DOING. I have a deeper respect (awe) for some of the work I see on this forum than I had before beginning this build.
Good afternoon Paul. I cannot give you technical advice (beyond my pay grade), however the little I know about you, with your skill , determination and analytical mind “, you will certainly find the answer. The guys in the know have certainly added to this. Cheers Hrant
 
Gentlemen, my thanks for your kind words and advice. After a few days off I decided I would press on with the Kingfisher and just reach out for help as needed. I think I forgot this is just a hobby that I do for fun. Sometimes I take myself too seriously.

My next task was to add the aft deadwood and sternposts to the keel. I was careful to keep everything vertical...

IMG_9319.JPG

Here is the overall state of things:

IMG_9317.JPG

Of course I have been checking the fit along the way...

IMG_9324.JPG

IMG_9327.JPG

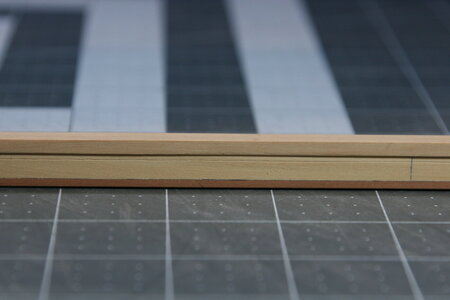
Below you can see the false keel (in pearwood) on the bottom, the keel itself with a line scribed in for the rabbet, and then the rising wood on top. The kit simplifies the rising wood and notches the frames rather than the 'keel'. It will look fine when all the frames are in place (so says the kit instructions):

IMG_9323.JPG

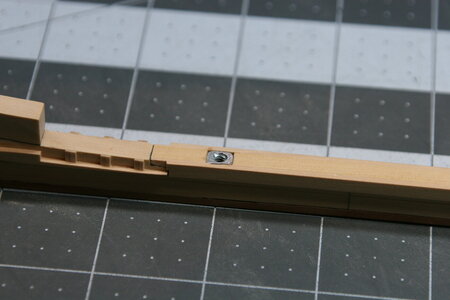
On my Vasa it never occurred to me that I needed to add a way of mounting the ship onto pedestals when I was done so I ended up using a cradle base. On this current ship I added some integral nuts to give me the option of a pedestal stand in the future.

IMG_9322.JPG

The nut is epoxied in place (there is a matching nut on the other end of the ship, but you can't see it anymore).

Before cutting the rabbet I practiced on some leftover wood in my scrap pile. Those trials were mostly tragic with a few moments of limited success. I have now ordered a small v-shaped chisel and I'll give that a try when it arrives in a week or two.

Thanks for stopping by!
 
Great job Paul! You are doing excellent work. But I agree it’s just a hobby and should be fun! So don’t put unnecessary pressure on yourself. You have already exceeded most people’s first ship build on your Vasa. So don’t try to be a master on your second ship! :p
 
Hi Paul. Why don't you consult the two build logs on the LSS Patrick Henry by Mike Shanks and @DocBlake Dave on SOS? Even though it is not the Kingfisher, I am sure that there will be many areas that are common - seeing both are LSS kits. Then, you also have @tedboat 's build log on the Kingfisher which you can consult as well.


Armed Virgina Sloop. 1:32 Scale POF Admiralty Style. Lauck Street Shipyard

 
Looking very good PaulThumbsup I think I commented on your Vasa build that you are your own worst critic. This project is as near to scratch as you get without actually being a scratch build. The mindset is quite different to building a normal kit.Far more problem solving and considerable thinking time, probably more than actual building.

My best advice is not to box yourself into a corner and leave yourself some wiggle room.Be prepared to assemble the bare bones of the framing even if you leave all the framing in an unfinished state and not glued to the keel. Only then once satisfied, start final assembly.

It is very easy for some builders I follow to post pics of finely finished sections of framing fitted to the model, but they have years of POF building behind them and the ability to think 20 steps infront.

Kind Regards

Nigel
 
Back
Top