You are using an out of date browser. It may not display this or other websites correctly.
You should upgrade or use an alternative browser.
You should upgrade or use an alternative browser.
Kingfisher 1770 1:48 POF
- Thread starter dockattner
- Start date
- Watchers 109
You set us on a wrong feet, Paul.That was also my thought by the last picture.See this as a compliment, Paul.
Regards, Peter
Some proof of different woodgrain:
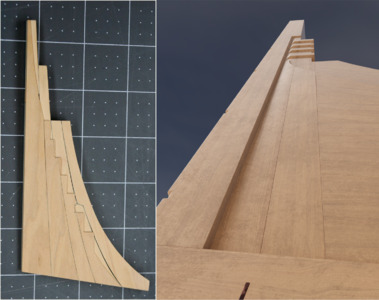
But if these are the images from the manual, then my compliments for that manual!
The deformation of the rabbet can be explained. Similar to the Bluenose. On the deadwood, the hull plank is flattened and then twisted to match the bulge of the frames near the keel:
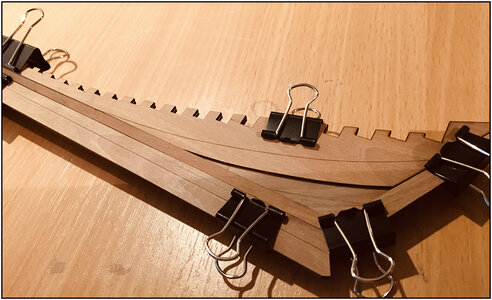
IMHO.
Regards, Peter
Last edited:
Gentlemen,Phoning a friend... Topic: rabbet at the sternpost.
In the LSS instructions it says the rabbet transitions above the bearding line from a shallow V and ends in a U - but TFFM seems to say the rabbet remains a shallow V above the bearding line.
View attachment 353725
Should the rabbet be more of a U near the top (unlike what is shown in this graphic image)? That would seem to make more sense...but...
View attachment 353724
View attachment 353726
THIS IS ONLY A COMPUTER RENDERING. I posted it to clarify my question about the rabbet. These 3D images demonstrate a rabbet with a shallow V shape above the bearding line - but the Lauck Street instructions call for that rabbet to become U shaped at the top.
I'm asking: which is correct?
Sorry Heinrich. I introduced some abbreviations in my introductory comments but it was careless of me to assume anyone would hang on to my personal shorthand.I understand that LSS is Lauck Street Shipyard, but I have no idea what TFFM means?
Yes, LSS represents Lauck Street Shipyards. TFFM refers to a multivolume series of books under the working title: The Fully Framed Model by David Antsherl and Greg Herbert. TFFM is the go-to source for anyone scratch-building a swan class ship model.
Yes Christian. You can purchase a chapter by chapter set of 3D renderings from Greg Herbert. The cost is reasonable in light of what you get (invaluable from my perspective).Wow, this is a beautyful stem. Are there more pictures of the model available? The transition of the rabbet looks good.
Home Page
Scratch built ship model plans and accessories for the Swan class of ships circa 1767.
www.admiraltymodels.com
Last edited:
Hello Paul I think you are referring to the area marked with the red arrow. In the Ancre monographs this area is also always V-shaped and not semicircular. I think it should be V-shaped because your planks are also at right angles at the end and not rounded to create a clean transition. You also have this at the bow. See pictures.
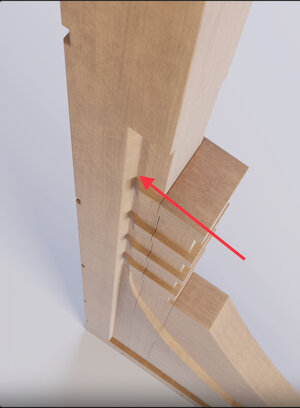
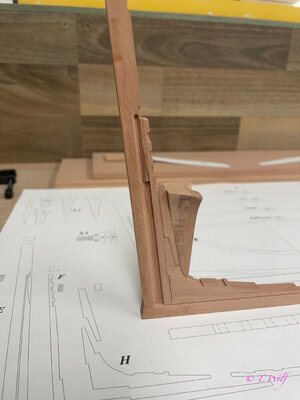
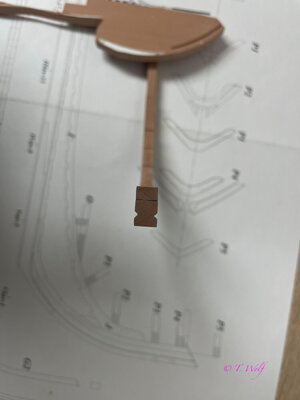


Thank you Tobias. That's exactly what I was looking for. This is all new to me so there are many mysteries I need to uncover that the rest of you have sorted out already...Hello Paul I think you are referring to the area marked with the red arrow. In the Ancre monographs this area is also always V-shaped and not semicircular. I think it should be V-shaped because your planks are also at right angles at the end and not rounded to create a clean transition. You also have this at the bow. See pictures.
View attachment 353821
View attachment 353822
View attachment 353823
Did you mill the groove or use hand tools?
I pre-milled it with the machine and then reworked it by hand.Thank you Tobias. That's exactly what I was looking for. This is all new to me so there are many mysteries I need to uncover that the rest of you have sorted out already...
Did you mill the groove or use hand tools?
Ditto- exactly what I thought when I saw those pics.Are you modeling now on a computer and make a virtuel model?
It is not a real photo of your wooden model stern post, or?
Work continues on the aft centerline...
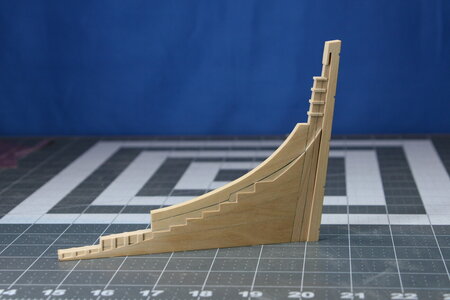
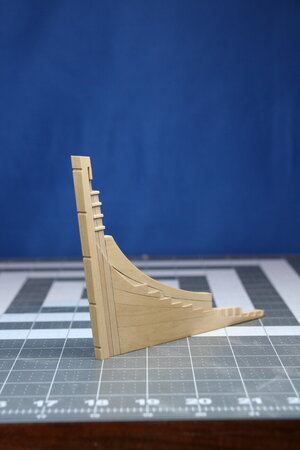
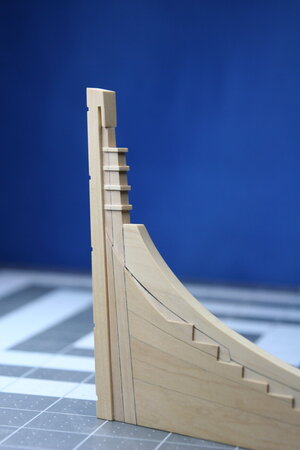
The precision required is beginning to concern me. I have been having a hard time committing to the work out of concern that I'm messing something up now that won't be easy to fix later. I find myself thinking: I guess that's right more often than I would prefer...
It seemed best to only partially finish the rabbet at the upper sternpost at this stage. I assume I will be able to refine it later when the transom pieces are fabricated and test-fitted.
I'll say this much: POF construction is quite a challenge in terms of figuring out WHAT to do - as well as the actual DOING. I have a deeper respect (awe) for some of the work I see on this forum than I had before beginning this build.
Wish I could be of more help Paul. I'm working on getting a POF, but I don't believe it will be nearly as complicated as yours. I am right back in the rookie chair with POF builds. It looks to me like you are already working at a precision of sub millimeter distances. Once again, I have full confidence that you will turn out one of the best builds given enough time. As for mistakes, I'm also pretty sure you're going to make some, but that will be part of the learning experience. So just enjoy it my friend.
Don't count on it! I bet they are all equally challenging to a certain extent.I don't believe it will be nearly as complicated as yours
I wish I had some build logs of this LSS kit to look at. The ones that exist jump over the part I am working on right now. There are some scratch builds to follow, but the kit deviates in some important ways for the sake of buildability...
Lots of head-scratching and deciphering of instructions going on at my house.
Hi Paul,
The shape of the rabbet at a specific point of the keel is depending on the angle of the hull planking reaching the hull at that specific point.
At the bottom of the keel the planking is flush with the keel so the rabbet is cut to countersink the plank into the stern post.
Higher at the stern the hull shape widens and the planks reach the stern at an angle. The end of the plank is sawn square so the rabbet is a V shape. Towards the top of the stem (bow) the planks are reaching the stem at nearly 90 deg in a blunt ship so here the rabbet goes to a type of u shape.
As long as you keep in mind that the rabbet has the shape to absorb the end of a square sawn plank at the angle the plank reaches the keel, stem or stern you are ok. This means the rabbet changes shape all along the hull.
The rabbet was one of the few things which were often cut by the master shipwright himself because of this difficulty.
So if you do it right you can call yourselve a master shipwright.
The problem (if it is a problemThe precision required is beginning to concern me. I have been having a hard time committing to the work out of concern that I'm messing something up now that won't be easy to fix later. I find myself thinking: I guess that's right more often than I would prefer...
It seemed best to only partially finish the rabbet at the upper sternpost at this stage. I assume I will be able to refine it later when the transom pieces are fabricated and test-fitted.
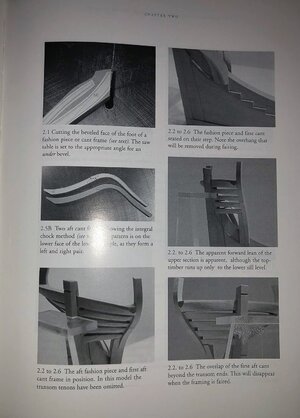
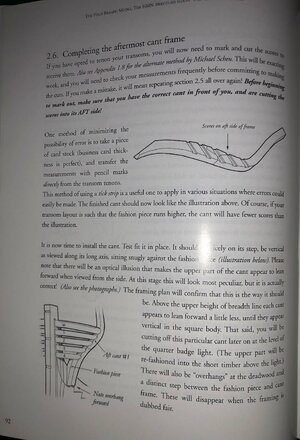
No need to buy all 4, start with: The Fully Framed Model, HMN Swan Class Sloops 1767 - 1780 Volume I - Revised by David Antscherl
- Joined
- Oct 23, 2018
- Messages
- 537
- Points
- 353

Paul,
what you are describing is the history of my model building career in the last 10-12 years.
I think that Jim is absolut right with his meaning.
As far as I know LSS followed the Antscherl books quite well. On MSW should be two build logs of the kit: the log of the prototype model from Bob and the Kingfisher from Remco. The main difference between the kit and a really scratch build is, that LSS has milled the parts for yor you.
If you cannot overcome your self-doubt stop the project, build a small vessel in the same style and in two years start with much more experience again. II'm afraid that if you don't, you'll get stuck in the same loop that's been holding me back for years now.
In autumn last year I decided finally to stop working on my bigger projects and to build first a small cutter. It has all elements of the bigger ships but it is really less complicated. It's not enough that I learned a lot of English shipbuilding of the period, I also need the building experience to fullfill my Triton or Fly project.
what you are describing is the history of my model building career in the last 10-12 years.
The problem (if it is a problem), however, might arise because of limited knowledge and required experience.
I think that Jim is absolut right with his meaning.
I wish I had some build logs of this LSS kit to look at. The ones that exist jump over the part I am working on right now. There are some scratch builds to follow, but the kit deviates in some important ways for the sake of buildability...
As far as I know LSS followed the Antscherl books quite well. On MSW should be two build logs of the kit: the log of the prototype model from Bob and the Kingfisher from Remco. The main difference between the kit and a really scratch build is, that LSS has milled the parts for yor you.
If you cannot overcome your self-doubt stop the project, build a small vessel in the same style and in two years start with much more experience again. II'm afraid that if you don't, you'll get stuck in the same loop that's been holding me back for years now.
In autumn last year I decided finally to stop working on my bigger projects and to build first a small cutter. It has all elements of the bigger ships but it is really less complicated. It's not enough that I learned a lot of English shipbuilding of the period, I also need the building experience to fullfill my Triton or Fly project.
Last edited:
- Joined
- Aug 8, 2019
- Messages
- 4,180
- Points
- 688

I think Paul, you got a lot of advice here. I'm doing in this time the same thing, the difference is I'm working on the drawings. My conclusies to this point is, you need the complete stern to ad these details. Then you can find out the angle and how far it goes up or down. And like you said, afraid to go to far in your work. You can't add wood. Succes
Hello Paul, I can only agree with the previous speakers who have the necessary experience. It's all a learning process that you have to go through. I think the most important thing is not to stick your head in the sand and not to give up. If necessary, take a break and try to collect enough information. Christian's suggestion to start another or simpler project is also an option. In a way, I'm doing the same thing with La Palme and the current construction of Le Rochefort, just to get more experience. Stephan also mentioned a very important argument, the wood that's gone is gone, so it's better to remove less. Martin also says to leave a little more and then test how the planks adapt at this point. From my point of view it is probably the biggest problem that it is a kit and not a homemade one, which in turn means that you may not be able to rebuild a part that is not okay because you do not have the right resources -> like the right wood. However, I agree with Daniel that your kingfisher will be an outstanding model.
This is really helpful Maarten. It all makes perfect sense - now I just need to DO it!Hi Paul,
The shape of the rabbet at a specific point of the keel is depending on the angle of the hull planking reaching the hull at that specific point.
At the bottom of the keel the planking is flush with the keel so the rabbet is cut to countersink the plank into the stern post.
Higher at the stern the hull shape widens and the planks reach the stern at an angle. The end of the plank is sawn square so the rabbet is a V shape. Towards the top of the stem (bow) the planks are reaching the stem at nearly 90 deg in a blunt ship so here the rabbet goes to a type of u shape.
As long as you keep in mind that the rabbet has the shape to absorb the end of a square sawn plank at the angle the plank reaches the keel, stem or stern you are ok. This means the rabbet changes shape all along the hull.
The rabbet was one of the few things which were often cut by the master shipwright himself because of this difficulty.
So if you do it right you can call yourselve a master shipwright.


