- Joined
- Jan 9, 2020
- Messages
- 10,378
- Points
- 938


Every chapter give a nice view on this inventive building proces, Heinrich. A bit like the Belle Poule by Donnie.Dear Friends
As mentioned to Jan, I had another wonderful day in the Nantong Shipyard. On the agenda for today was installing the half-ribs/gunport stanchions (not sure what to call these) onto the upper gundeck.
View attachment 435276
And at the conclusion of the workday, this is what she looks like tonight.
View attachment 435279
View attachment 435281
View attachment 435282
View attachment 435284
View attachment 435285
Dry fit of the upper gundeck bow piece. (Just fitted for fun, at this stage.)
View attachment 435286
Now for those who thought that this was a case of removing the resin pieces from their backing sheets, applying glue, slotting them into position and achieve miraculous and perfect angles - think again! Resin pieces or no resin pieces, when you are trying to align what is essentially frames with only a semi-jig type configuration at the bottom end while the top remains free-floating (without any jig as support), you are going to have loads of fun. And when you are out by maybe two or three degrees, and you have to remove the frame (secured with CA glue) to correct that, you will have even more loads of fun! Had these ribs/frames (call it what you will) been done in wood, it would have been far easier.
In any case, it's done - they are correct, and I will call it a day. Tomorrow, there are a few odds and ends I want to do (maybe even go kayaking) so there is nothing major planned for the shipyard.
Thank you all for following along, supporting, raising reservations, offering advice and just being there. It is great and I appreciate it very much.

Hi Jan - yes, there was a lot of alignment to be done. After the first five or six you develop a sense of how the fit should be at the bottom to ensure good alignment, but those first five or 6 ribs were a real challenge. And it's a little challenge that needs to be repeated x 44 times! If those parts had been made of wood, it would have been much easier - but that would have driven up the kit's costs again.@Heinrich. It's neat to to the kits components come together, looks a lot of careful alignment. I am very curious of how the planking will go.
Jan

Inventive is the word, Peter! There are indeed similarities with the Belle Poule, although I think this one is even more extreme.Every chapter give a nice view on this inventive building proces, Heinrich. A bit like the Belle Poule by Donnie.
A lot off parts to line out.
Regards, Peter



Wow that looks good! But those are some tough shipyard inspectors!Dear Friends
In a fleeting moment the weekend has come and gone. I know that I said yesterday I was just going to fiddle fart around and even though I took things easy, I still got some work done.
View attachment 435401
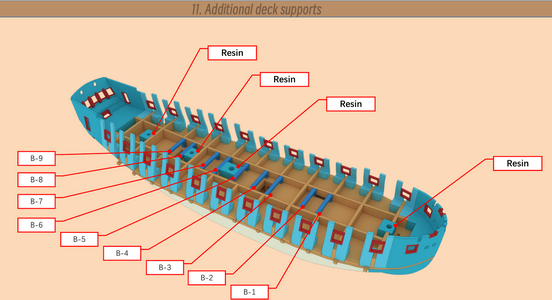
Looking closely at the instructions, I noticed that there are 9 x supporting beams which needed to be placed as extra support for the deck. If you look at the illustration above, you will see that these beams are marked in blue. Finishing off the deck supporting structure are a further 4 x resin blocks which all have the same height as the supporting beams, thus offering extra support especially where the two deck halves will join in the center of the ship.
View attachment 435402
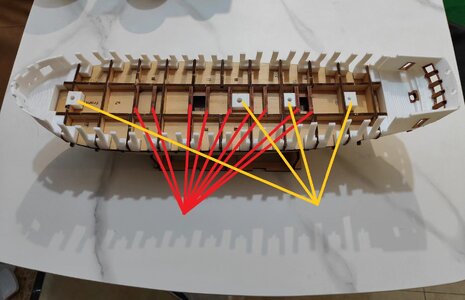
The 9 x deck beams are indicated by the red lines and the four resin support pieces by the yellow ones. Interestingly, the 9 x extra beams are made from Pear wood which I found strange as their function is largely industrial and they will not be seen. Oh well ...
View attachment 435403
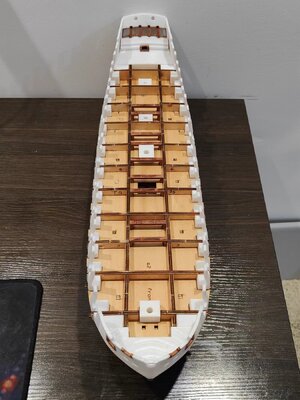
Another view of the extra deck beams and 4 x resin support pieces.
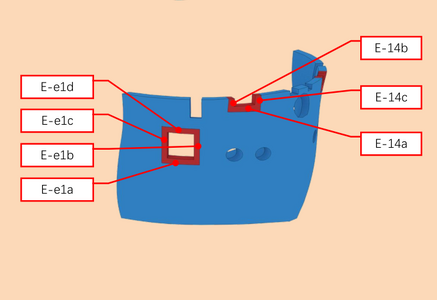
Before I could place the upper deck bow filler permanently, there was some work that I had wanted to do first as I just thought it would be easier off the ship. It entailed lining the two most forward gunports and lining the cutouts which I presume are meant for the catheads. (See illustration below).
View attachment 435404
View attachment 435405
The completed job still awaiting final sanding and finishing.
Some of you may recall that I said earlier I have not yet started the final sanding of the hull in anticipation of the second planking, because that will be done from the waist downwards. On the picture below, you should get a good indication why.
View attachment 435406
Notice the protrusions between the ribs and on the false deck itself which protrude from the ribs. Once the gunport frames have been installed, and sanded flush with the bulwarks, these nobbles will be cut off and the whole waistline sanded smooth, before I will progress to the hull.
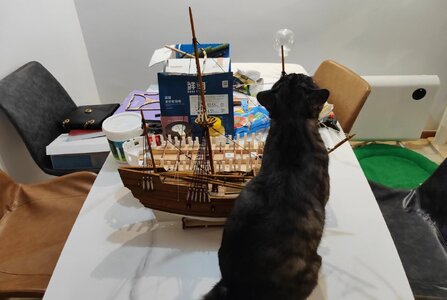
Finally, the Admiral and I had a good laugh. I put together the stand quickly and test fitted the ship to that. As I placed it on the work surface, Strider jumped up, gave the Pandora one look and then let me know in no uncertain terms of what he thought of it.
View attachment 435407
Didi (literally meaning younger brother) did not pay the Pandora any attention either, but as soon as I placed the WB on the table, they were all attention.
View attachment 435408
View attachment 435409
Strider, in particular, examined the Admiral's rigging carefully.
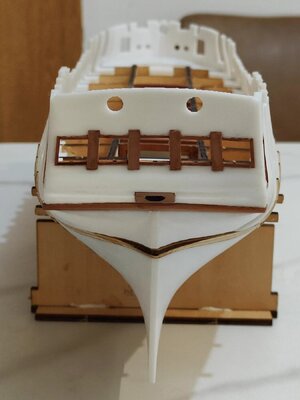
In any case, my friends, that's me for the weekend. To all those who clicked "Like", followed along, interacted and the like, thank you for a great weekend. Until the next update, I leave you with a stern shot of the lady (all dry-fitted still).
View attachment 435410

These ones are very nosey!Catzillas don't pay attention to such a little things

It's always a pleasure my friend. I am glad that you like it.Hello Heinrich! Thanks for the wonderful presentation of your ship. Looking forward to your next post.
Good morning Heinrich. Didi and Strider not impressed with all the white stuffDear Friends
In a fleeting moment the weekend has come and gone. I know that I said yesterday I was just going to fiddle fart around and even though I took things easy, I still got some work done.
View attachment 435401
Looking closely at the instructions, I noticed that there are 9 x supporting beams which needed to be placed as extra support for the deck. If you look at the illustration above, you will see that these beams are marked in blue. Finishing off the deck supporting structure are a further 4 x resin blocks which all have the same height as the supporting beams, thus offering extra support especially where the two deck halves will join in the center of the ship.
View attachment 435402
The 9 x deck beams are indicated by the red lines and the four resin support pieces by the yellow ones. Interestingly, the 9 x extra beams are made from Pear wood which I found strange as their function is largely industrial and they will not be seen. Oh well ...
View attachment 435403
Another view of the extra deck beams and 4 x resin support pieces.
Before I could place the upper deck bow filler permanently, there was some work that I had wanted to do first as I just thought it would be easier off the ship. It entailed lining the two most forward gunports and lining the cutouts which I presume are meant for the catheads. (See illustration below).
View attachment 435404
View attachment 435405
The completed job still awaiting final sanding and finishing.
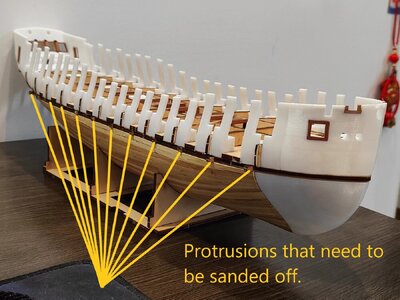
Some of you may recall that I said earlier I have not yet started the final sanding of the hull in anticipation of the second planking, because that will be done from the waist downwards. On the picture below, you should get a good indication why.
View attachment 435406
Notice the protrusions between the ribs and on the false deck itself which protrude from the ribs. Once the gunport frames have been installed, and sanded flush with the bulwarks, these nobbles will be cut off and the whole waistline sanded smooth, before I will progress to the hull.
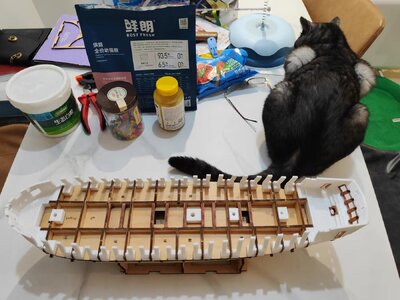
Finally, the Admiral and I had a good laugh. I put together the stand quickly and test fitted the ship to that. As I placed it on the work surface, Strider jumped up, gave the Pandora one look and then let me know in no uncertain terms of what he thought of it.
View attachment 435407
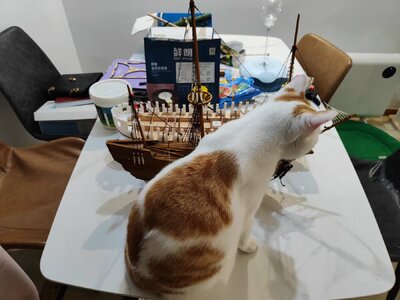
Didi (literally meaning younger brother) did not pay the Pandora any attention either, but as soon as I placed the WB on the table, they were all attention.
View attachment 435408
View attachment 435409
Strider, in particular, examined the Admiral's rigging carefully.
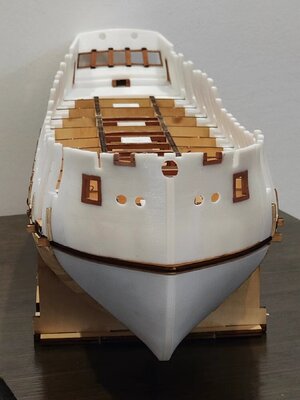
In any case, my friends, that's me for the weekend. To all those who clicked "Like", followed along, interacted and the like, thank you for a great weekend. Until the next update, I leave you with a stern shot of the lady (all dry-fitted still).
View attachment 435410
 . As usual H, all the preparation is being done meticulously. Spot on. Cheers Grant
For sure! They prefer the "chewy" wooden stuff which leave nice teeth marks for all posterity to enjoy!Good morning Heinrich. Didi and Strider not impressed with all the white stuff. As usual H, all the preparation is being done meticulously. Spot on. Cheers Grant
If your Admiral has a hairfohn, you might try that as well to loossen CA glue my friend. Some CA glues respond very wel to heat, they get soft enough to loossen themIt is novel for sure, Christian and in theory, the execution is excellent too. The big question is how the planking over the resin pieces will go. You are 100% right - acetone seems to be the preferred choice for CA glue removal.
Dream on Walterone,Catzillas don't pay attention to such a little things


 if they don't pay attention, then they are just waiting for the moment that you loose sight for a moment.
Thank you for the hairdryer tip my friend. My zeeduivels are both very young (8 months and 7 months respectively) so they haven't done any damage - yet! Rather not to my main builds - the sampan was knocked off a bookshelf with minimal damage). But I am afraid that as they get more experienced in being up to no-good, the damage will become more of a risk.Dream on Walterone,
if they don't pay attention, then they are just waiting for the moment that you loose sight for a moment.
Our Catzilla's do it for instance when they are passing it walking, they come look and a bite is done, and you can start again
