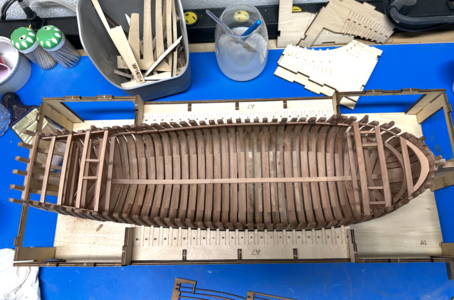
Hayling Hoy: POF kit [COMPLETED BUILD]

I do think RDN1954 has got the point. It looks like almost each frame mismatches the berth. It's quite strange as my very same operation went remarkably smooth (but one of the first single frame - the n. 3 - I put together, resulted a little bit scarce in width) despite I simply trusted the scantling profiles, even ignoring the draw... . Rubberbands are the prompt and most suitable solution, anyway. Cheers
Sorry I didn't see the comment from RDN1954 earlier. I think I saw the picture and assumed it was my post :D
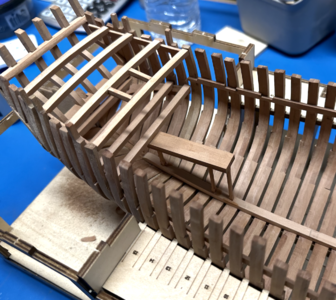
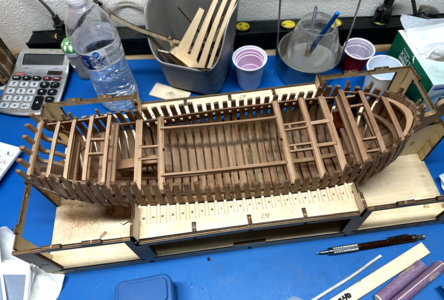
The look of those frames is a little deceiving and it drove me nuts for a while. For some reason, despite great care, a few frames didn't sit back in the slots on the jig all the way. They are aligned, but didn't make it all the way out. I remade a couple of the midship frames just for this reason, but it didn't get any better. I think it's just the frame design. You can easily push both sides of the frames out a little bit to line up.It was a delicate game with a paper wedge or two to get them to improve alignment without filling the jig. . I just got done installing the clamps. All it took was a little gentle pressure to get them to line up and dry attached to the frame, the clamp, and each other in good order.

I beveled all these pieces completely before installation, largely because the instructions told me not to shape the frames fully assembled (although later it said you could do some sanding on the inside?). I think the ideal situation would have been to have unbeveled frames. mount them on the keel together, and shape in place. For this model, beveling and the occasional nudging and gluing will have to do.

I don't know if I'm ready for it, but a regular building board seems like a more satisfying way to do things. With a jig, the frames need to be beveled (at least on the outside) in advance to putting them on the keel before they are fixed. Also, I wasn't super happy about the vertical alignment of all the frames. Maybe it was an optional illusion, but they didn't seem perfect. Finally, the marked bevels on the frame aren't super accurate, especially when it comes to the heel of the half frames. One day I hope to have the knowledge and hands for that sort of thing.
 
I got the clamps in and the breast hook-like thing in (is it a stringer)? I think I got the location right, pulled it mainly from eyeballing the 3D renderings. I found it in the book, too. I don't think I will simulate the bolts. At this point I am aching to get more built. I am very concerned about the pre-fabbed planking. Small differences might make a mess out of those parts. I am a bit anxious about it. Also, I'm not sure the transom is right, some angles are reversed with the installation of those last three parts on each side. There was just no other way to do them. I think this is where more experience would have paid off. Then again, the transom (at least for me) is always a dicey hassle but, just when you are ready to give up, comes together.
1694008888358.png
I did place the last hawse pieces with more of the jig peeled away fore. I am still holding off on the transom shaping. I tried a little bit and it didn't look too promising. Plus I am banging my knuckels on the jig around it and can't access a few important angles. I'm going to wait until I can more safely pull the ship from the jig to shape the transom and do the considerable shaping on the last hawse pieces.

I was gung-ho about doing the beams and decks, but, in the printed instructions, I need to place the galley early. I haven't even started it yet. Here's a good place to read ahead. I've been mesmerized by figuring out how to pull off what was in hand and stopped reading the instructions to a certain point. Not good practice, but recoverable, obviously. The galley is going to take much of the rest of the week, I prefer to airbrush where I can. My hand painting often looks sloppy, especially on pieces that small.

Plus, i am also working on Model Shipways' Nonsuch 30. It has been under the airbrush for primer once. A whole lot of Bondo has been used and more to come. I had a really hard time with the side planking. Again, precut pieces that would have been better spiled. It left a lot of high spots and you really have to build up filler to smooth those up. So, I spent my hour or two last night sanding Bondo. I'd like to get everything in my little spray booth at once, so I need to finish the filler to load up the brush with primer. I am thinking naming the Nonsuch "Mondo Bondo", but my wife needs a ship named after her.

I'll keep you posted on the galley progress, the paint shouldn't take too long and assembly seems straight forward. It seems like a fun thing to add some detail you'll never see.
 
Whew! I'm glad I'm not alone tearing (what's left) of my hair out with all the fiddlyness on top of poor, vague or just plain wrong instructions included in a kit.:mad:
By the way. You seem to have a much better handle on a kit/build (AND the nomenclature) of this sophistication than I've ever dared to attempt, even with a lot of years in!Cautious
I'm really impressed and glued to your build log. Wonderful and very instructive work so far!Thumbsup:D

Pete
 
Sorry I didn't see the comment from RDN1954 earlier. I think I saw the picture and assumed it was my post :D
The look of those frames is a little deceiving and it drove me nuts for a while. For some reason, despite great care, a few frames didn't sit back in the slots on the jig all the way. They are aligned, but didn't make it all the way out. I remade a couple of the midship frames just for this reason, but it didn't get any better. I think it's just the frame design. You can easily push both sides of the frames out a little bit to line up.It was a delicate game with a paper wedge or two to get them to improve alignment without filling the jig. . I just got done installing the clamps. All it took was a little gentle pressure to get them to line up and dry attached to the frame, the clamp, and each other in good order.

I beveled all these pieces completely before installation, largely because the instructions told me not to shape the frames fully assembled (although later it said you could do some sanding on the inside?). I think the ideal situation would have been to have unbeveled frames. mount them on the keel together, and shape in place. For this model, beveling and the occasional nudging and gluing will have to do.

I don't know if I'm ready for it, but a regular building board seems like a more satisfying way to do things. With a jig, the frames need to be beveled (at least on the outside) in advance to putting them on the keel before they are fixed. Also, I wasn't super happy about the vertical alignment of all the frames. Maybe it was an optional illusion, but they didn't seem perfect. Finally, the marked bevels on the frame aren't super accurate, especially when it comes to the heel of the half frames. One day I hope to have the knowledge and hands for that sort of thing.
I got the clamps in and the breast hook-like thing in (is it a stringer)? I think I got the location right, pulled it mainly from eyeballing the 3D renderings. I found it in the book, too. I don't think I will simulate the bolts. At this point I am aching to get more built. I am very concerned about the pre-fabbed planking. Small differences might make a mess out of those parts. I am a bit anxious about it. Also, I'm not sure the transom is right, some angles are reversed with the installation of those last three parts on each side. There was just no other way to do them. I think this is where more experience would have paid off. Then again, the transom (at least for me) is always a dicey hassle but, just when you are ready to give up, comes together.
View attachment 393158
I did place the last hawse pieces with more of the jig peeled away fore. I am still holding off on the transom shaping. I tried a little bit and it didn't look too promising. Plus I am banging my knuckels on the jig around it and can't access a few important angles. I'm going to wait until I can more safely pull the ship from the jig to shape the transom and do the considerable shaping on the last hawse pieces.

I was gung-ho about doing the beams and decks, but, in the printed instructions, I need to place the galley early. I haven't even started it yet. Here's a good place to read ahead. I've been mesmerized by figuring out how to pull off what was in hand and stopped reading the instructions to a certain point. Not good practice, but recoverable, obviously. The galley is going to take much of the rest of the week, I prefer to airbrush where I can. My hand painting often looks sloppy, especially on pieces that small.

Plus, i am also working on Model Shipways' Nonsuch 30. It has been under the airbrush for primer once. A whole lot of Bondo has been used and more to come. I had a really hard time with the side planking. Again, precut pieces that would have been better spiled. It left a lot of high spots and you really have to build up filler to smooth those up. So, I spent my hour or two last night sanding Bondo. I'd like to get everything in my little spray booth at once, so I need to finish the filler to load up the brush with primer. I am thinking naming the Nonsuch "Mondo Bondo", but my wife needs a ship named after her.

I'll keep you posted on the galley progress, the paint shouldn't take too long and assembly seems straight forward. It seems like a fun thing to add some detail you'll never see.
Very nicely done, despite that mismatching issue!
 
Whew! I'm glad I'm not alone tearing (what's left) of my hair out with all the fiddlyness on top of poor, vague or just plain wrong instructions included in a kit.:mad:
By the way. You seem to have a much better handle on a kit/build (AND the nomenclature) of this sophistication than I've ever dared to attempt, even with a lot of years in!Cautious
I'm really impressed and glued to your build log. Wonderful and very instructive work so far!Thumbsup:D

Pete
Thanks a lot Pete! I'll try to keep it coming. The instructions could be better for a newb like me, but I don't mean to disparage them. They might be fine for someone with the proper skill level. I'll find my way though, I'm having fun for sure. I'll keep the progress, such as it is, coming.
 
A word about Bondo. I've used it a lot over the years. I have found (on models especially where I'm often using softer woods.) That Elmer's Wood filler/putty (white tub, orange top) is a suitable substitute. It is water soluble. It can be applied with and smooths out and be leveled easily with a water dampened finger. It is easily reversable and added to when dry, carves and sands easily, models easily while soft, has a reasonably long working time and can be refreshed with water while modeling. Also cured Bondo is often harder that the wood surface surrounding it causing the surrounding wood to sand away faster than the Bondo, becoming uneven. With the Elmer's, if anything, the reverse is true. It will reduce under sanding at the same rate as the surrounding wood, or if it reduces slightly faster it can easily be added to with a little putty applied and evened out with a dampened finger. Plus, it is nontoxic, requiring no special ventilation when being used, and there is no guesswork required to get the resin putty and the hardener mixed in exact proportions. There is practically no waste for the same reason. It can be infinitely added to after drying, since it dries rather than curing irreversibly. The Elmer's will take a stain as well.
I own no stock in Elmer's. ;) But Bondo is another one of those things that is toxic to its' user and the environment, and there is always an unavoidable amount of waste. Plus, if you make a mistake, you won't be stuck with an irreversible problem. Cautious The dried Elmer's is easily removed since it dissolves with water. If it dries in the tub, it can be revived with water. Again, no waste.
'Nuff said.:cool:

Pete
 
Last edited:
Another word about Bondo aka. Resin putty and hardener. (A pea sized amount of hardener to a golf ball sized amount of resin, can be obtained at the hardware store in beige color for wood.) The Elmer's putty, (for all its' virtues) can bear no weight or stand up to any pressure that will make the dried Emer's crumble. The resin putty is also better on edge surfaces, where the Emer's will break off.
 
Another word about Bondo aka. Resin putty and hardener. (A pea sized amount of hardener to a golf ball sized amount of resin, can be obtained at the hardware store in beige color for wood.) The Elmer's putty, (for all its' virtues) can bear no weight or stand up to any pressure that will make the dried Emer's crumble. The resin putty is also better on edge surfaces, where the Emer's will break off.
Hi Peter,
I saw your other thread on filler, hopefully there will be a good discussion there.
I use Bondo Glazing & Spot Putty. It doesn't require hardener and is very fine, can be applied with a pallet knife or the like easily, filling very small defects or be used to build up an area. Everyone has their favorite!
Glenn
 
I am also working on the galley. I got the resin piece primed and will paint a brick red today and hopefully get to panel lining the brick pattern soon.
A bit of disaster. I went to make the brass chimney. I used the right tool to fold it up (although it still didn't look very crisp) and then decided that, with a critical, visible part, I was going to try silver soldering for the first time. I had bought everything I needed a while back and was going to take the master class of building the winder on the Willie Bennett skipjack model from MS. Yeah, I didn't do that and falsely assumed I had some mastery already (the YouTube effect). I had it a little right but clamped the chimney to put a little pressure to close the seam. Of course when I went to heat it up for transferring some solder, I got a scaly, collapsed chimney. Somehow, I forgot how soft brass gets with heat. I got a little solder on to tack the piece together, reshaped the square shape a bit, and tossed it in 30% acetic acid overnight (I'm not good enough to need a pickle pot yet). Hopefully it will turn out ok in the end.
Also, I lost one of those tiny little vents for the side of the galley. Boy, I'm glad this sucker is below deck. I've got a lot to learn. Maybe I should make some really tiny jewelry for a little while until I get the hang of it. :D Chalk it up to experience.
I'll post some pictures once I get a little further.
 
Hi Peter,
I saw your other thread on filler, hopefully there will be a good discussion there.
I use Bondo Glazing & Spot Putty. It doesn't require hardener and is very fine, can be applied with a pallet knife or the like easily, filling very small defects or be used to build up an area. Everyone has their favorite!
Glenn
Oh yeah! I forgot about that stuff. I've only used the red auto body paste. Is it made in other colors more suitable for matching to wood? Very nice product to use, covers a multitude of minor sins.
Your mention of it triggered my dissertation on comparative fillers. Only later did I discover that there is a specific category for the discussion of such matters. In the future I will endeavor to post my responses in the most appropriate places, and not go careening off topic. :rolleyes:
Thanks for the link to the wood-putty-fillers thread.
Your project is looking very good, and you log has been VERY instructive! your work is very fastidious and patient.Okay

Regards, Pete
Thanks Pete, it's much appreciated!
 
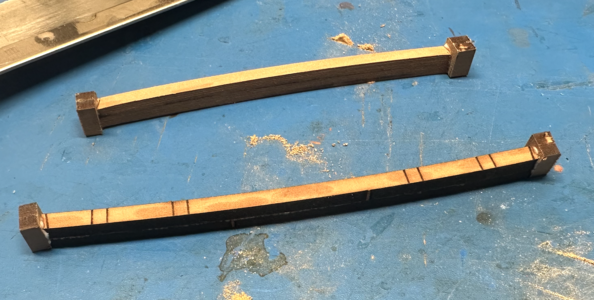
Boy, talk about "spoke too soon"! I was just saying how smoothly the beams were going when I ran into a problem. Some beams weren't long enough to bridge the span between clamps. This is disturbing for two obvious reasons. That means the hull is off and that I am going to likely have to go beam-by-beam to get at least that much right. I am considering measuring all the beams and the hull to see if I need to start cutting new beams, but I will deal with the immediate issue.
Who said there weren't board extenders?
1694353506731.png
The first beam started out fine, as is.
1694353591720.png
And the extended beams blended right in once it was sanded properly.
1694353690778.png
Here are the beams you saw glued up.Not terrible.
1694353745700.png
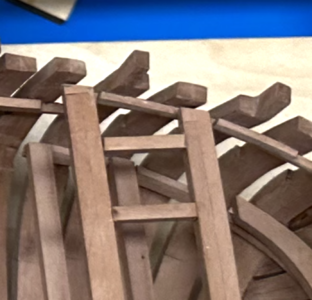
A note on the N18 carlings. Yeah, not even close on length. Measure the distance between beam and cut accordingly, both fore and aft. The aft carlings are very far off. I don't know why they used the same size piece for all six. And this isn't due to my hull, I used the distance between the slots in the clamps to cut the final pieces and it all looked very nice in the end.
 
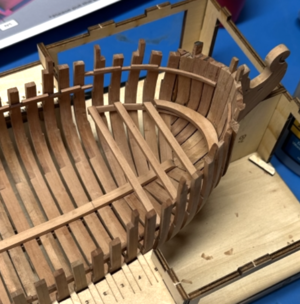
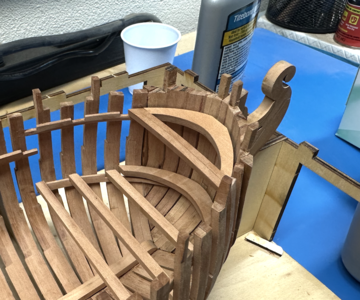
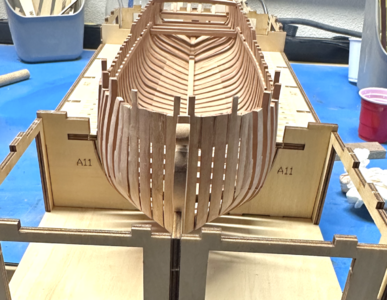
Now on to more. I finally settled those last hawse pieces, now that the forward hull is better secured with clamps and i've removed part of the jig that gives me more access to the bow.
I have to admit, I didn't really think it was going to come together but now I think it looks pretty good.
Here's the starboard piece fitted after shaping it as much as I dared on it's own. Port is the piece on that side shaped into place.
1694354194528.png
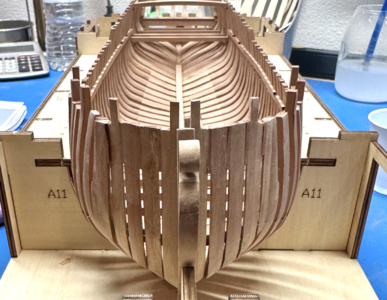
And now my near final bow.
1694354322023.png
I still plan to pop it out of the jig at some point and better fair and fine sand the frames.

I have to say, I am proud of the work I did on the hull, but pre-bevelling the frames isn't great. I think of this because now you can start to see better that each was shaped individually. Also, it's difficult to bevel the frames with strictly flat curves, especially with my Dremel setup. Most surfaces of the bevels have a slight rounding to them. Fortunately, overall, they aren't too far from fair and will be plankable with a little more work. Finally, after shaping the hawse pieces in place, the fairing of the un-bevelled frames seems time consuming but doable and for a much better look. In a future POF kit, I'll look for something I can fair later. Although I'm not looking forward to the inside. I sanded off some skin on my finger trying to get in there and fair a little more before I installed the keelson. I made a tool on the 3D printer that helped, but I do understand the moaning in build logs when builders get to fairing frames. It could take most of the time it did to build the frames in the first place.
 
I still haven't really shaped the transom, just some rough and maybe ill-advised attempts. I'm anxious about how it will turn out. It's always the transom, right? I wish I have a more methodical way to approach them. As mentioned, I will eventually turn out the hull from the jig and do some final shaping as well as finish the transom. The concavity of those little partial frames have me nervous. The aft beams all lined up more or less so I think I set the half frames properly, no weird angles to the heels as might be the case in the fore frames. We'll have to see. I think I should be thankful that much of the transom will be planked on both sides if I follow the kit instructions.

About planking. I don't have a lot of confidence that the pre-cut planks are going to work out. With some of the "individuality" of the hull, I can't imagine they would be a tight enough fit to look good. I will give it a try, but I also bought some cherry sheets to spile the planks. I have done it only once before, so if I go that route, I have a plan. I bought a little kit from Model Ship World/Nautical Research Guild to practice planking a hull, plenty of spiling to do. It would take a long time, but it might be worth it given the investment in this kit. Gotta learn some time right? Seems like a lot of work for 6 runs of planks that shouldn't take much shaping, but I might do it.

Finally and related, I have to start thinking now about how to present the finished model with respect to planking and showing off details. Right now I plan to do external planking on both sides, especially with potential issues with the transom. I don't think I'll be rigging this model right away. I have other kits (yes, I have bought more kits than I need or could use, sadly) that might be better suited to rigging and learning. I can always display this model on it's merit as fully framed and then take it off the shelf to rig it some time on the future. I'd really like to get to some other kits to learn other things. It's all about time, right? So much to learn and taking this up later in life. There is still going to be a lot of fun with this model though, lots of fun.

I better order some cherry sheet stock to replace some of the remaining beams, I'm running low from all the frames and other things I had to try again. I'm interested in thoughts/advice about above, so feel free to register your opinion and offer your wisdom.
 
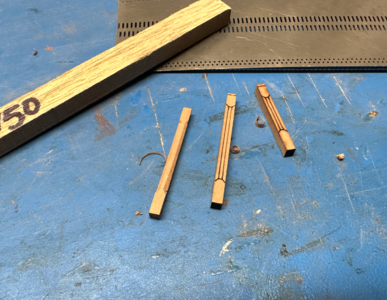
On to other details. I started the platform for the capstan. This involves carving some octagonal pieces, small octagonal pieces. It's a little daunting and hard to make look right. I fully marked all side with the pattern scribed onto the laser cut face and started there. First a back cut for the tapers, cut off the tapers, and then cut away the corners to something flat. Somehow, flat doesn't look entirely flat. But at this scale and at this depth in the model, the practice-looking pieces should be right at home. One down, two to go.
1694356831627.png

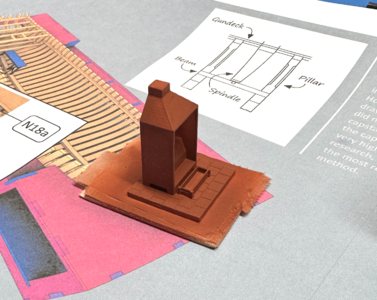
I'm also catching up on the galley. This is out of the spray booth. I love airbrushing and the results are always worth it in my opinion. Here it is attached to a chunk of wood with double-sided tape. I went with a English brick red. I am wondering if I should have picked a regular flat red. Well, I like it. I'll find out the truth of it sometime in the future. But I am assuming it was built of brick and unpainted.
1694357099742.png

Ok, time to go to the shop and make more progress. Hopefully, I'll have time to get those octagonal pieces done along with blackening the rest of the brass for the galley. Not looking forward to using CA glue to apply the brass to the painted resin piece (I hate CA glue, categorically). I might try some Weld Bond, it's below decks, right?
 
I haven't yet seen, although I can easily have missed it on this vast collection of build threads and related topics, the use of proportional dividers in spiling planks.
I have only done it once on my "Chasseur" hull, I used the "Pride II" plans from Model Shipways and scratch built the whole POB hull. I divided each bulkhead into four sections and each section into four. Easy to do with proportional dividers. I could have gone the route of laying out the length of the curve of each bulkhead as a flat line and dividing those, but a gentleman who was spiling a POF model he was building showed me that he could just divide up the curved pieces in place and the flattening of the curves didn't matter. The net result was the same. As I say, I only did it once, but it worked satisfactorily well, precluding a lot of measuring and translating of curved surfaces to flat. The rest of the process is pretty much the same as I have seen here. There remains the necessity of compensating for the narrowing or widening of the strakes, bow and stern, with stealers.
Some good books: A primer on planking by David Antscherl, a download; Simple Hull Planking Techniques for Beginners by Dirk De Bakker and Greg Brooker, Model Ship World; Planking Techniques for Model Ship Builders by Donald Dressel, Tab Books ( McGraw- Hill), This book goes into detail into deck planking and the issue of tapering and Joggling planks' as well as pretty much everything else on the subject of planking and related topics I have seen here of late on the threads I've been following.

Hope this proves useful. As always, the floor is open.;)
Pete
 
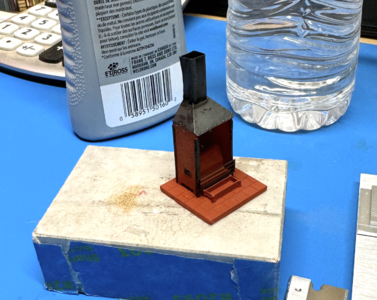
I finished the galley. The bent corners were really tough, despite using some decent equipment. But gluing them on with CA glue smoothed them out a little and they didn't look too bad. The instructions call for something metal inside the galley, but there was no part. I was probably supposed to put in rod or something but, give it's visibility, I didn't want to go too far down the rabbit hole.
1694438251132.png
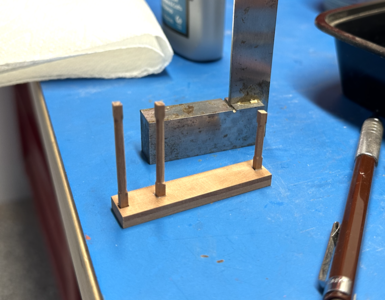
I also rapped up the octagonal posts and built the capstan platform.
1694438336229.png
Not really a great way to square these other than eyeball-ometry. It couldn't have been too crooked though.1694438441539.png
 
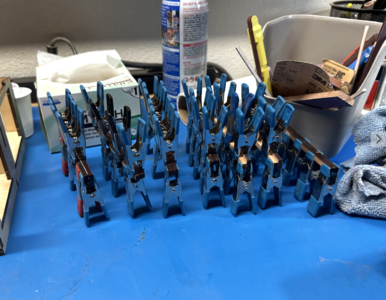
The next step is putting in the beams, lots to glue up. I've been a little worried about this after having to extend the beams for the forecastle. I used all but 4 of my spring clamps for this.
1694438595972.png
Hey, they mostly fit, what a relief! There was only one, the fore most beam, that was even close. The rest were a little oversized.
1694438719671.png
The only problem at this point are the long carlings. They don't fit and will require a modification to their length. They have an asymmetric curve to them, so it's a bit hard to figure out which end goes where, I'll see if I can find it in the plans. At first I thought I mis-spaced the clamps and the error led me here, but all of those midsection beams are on the same clamp. Not a big problem, an easy modification, but I'm going to wait until the last minute to do it, just to make sure the next step is set up right.
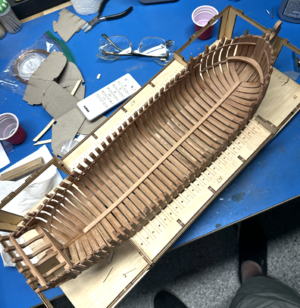
It is really shaping up. I might take it out of the jig next to shape the transom and fair the frames. But getting to this point is pretty exciting.
 
Back
Top