Richard, the saw I suggested is identical in size as the Proxxon, and takes Proxxon blades
You are using an out of date browser. It may not display this or other websites correctly.
You should upgrade or use an alternative browser.
You should upgrade or use an alternative browser.
Cutty Sark Semi Kit 1/40 Prototype
- Thread starter RichardHDunn
- Start date
- Watchers 26
Lay an already cut plank on the saw table next to the blade and move the fence up to the plank.
- Joined
- Dec 15, 2023
- Messages
- 114
- Points
- 103

That's fine for a rough gauge, don't forget I am a qualified joiner and wood machinist mate. But when you are dealing with fractions of a mm even the fur can have an effect when cutting wood 3mm wide and 2mm thick.Lay an already cut plank on the saw table next to the blade and move the fence up to the plank.
because there are about 70 runs of deck planking on her deck I have to be absolutely exact with it.
Re the brand
I am sticking with Proxxon as I trust the quality.
I did consider the other brand you mentioned Brian but when you said you use the Byrnes for fine work after rough cutting on it I got the impression it's not great for that, also a colleague of mine told me he tried one and sent it back after it burnt out after a days cutting.
Maybe he got a bad one but either way I am going with a Proxxon FET and sticking with what I know and trust.
Last edited:
- Joined
- Dec 22, 2022
- Messages
- 46
- Points
- 103

Hello. Maybe something from this will be useful.


- Joined
- Dec 15, 2023
- Messages
- 114
- Points
- 103

Thankyou, yes Kevin who took these sent me these months ago, but they are an incredible asset.Hello. Maybe something from this will be useful.
- Joined
- Dec 15, 2023
- Messages
- 114
- Points
- 103

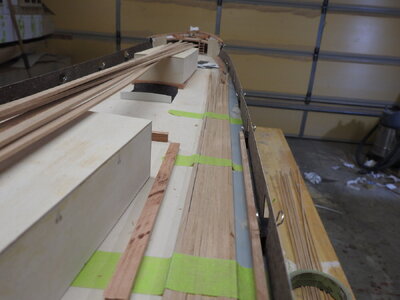
Well aside from getting the new saw and getting halfway through sawing the deck planks, 77 lengths of 2x3mm Anigre 1800mm long, I went and bought a pack of 125gsm black paper for the caulking, the width is to scale.
I have also found that Laminate/Formica for the bulwarks is a better option, its easy to sand and quite strong enough as well as gluing to wood very well.
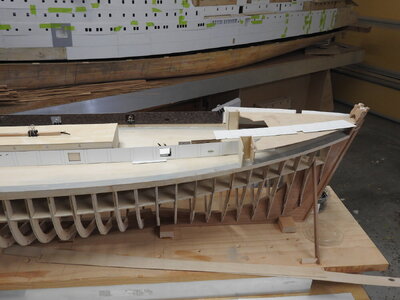
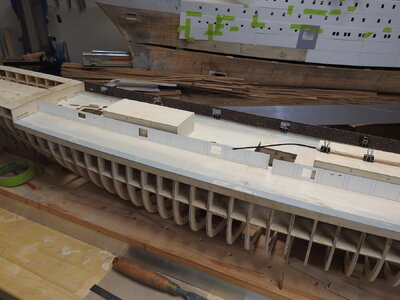
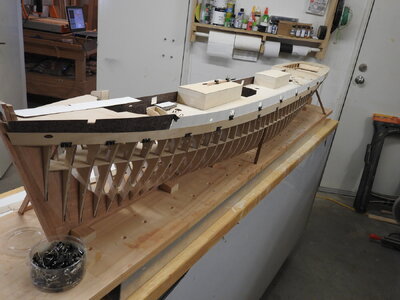
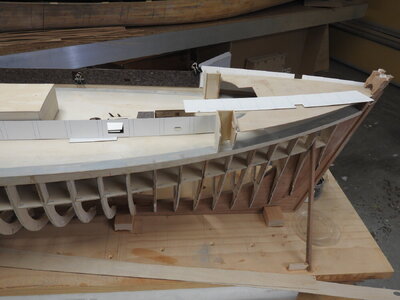
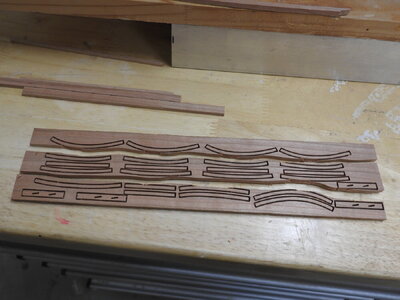
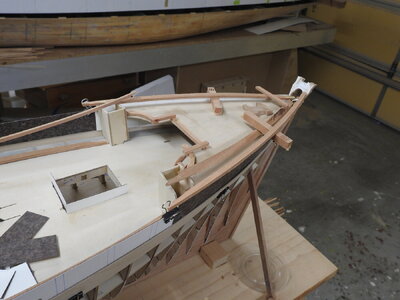
These images show the bulwark and hatch coaming parts, the far side is clamped on but not exactly where it goes at the bow so ignore the height.
They are .6mm thick and the buttstrap/stanchion positions are inked into the surface on the Cnc.
It is intended that the white side is inboard, to make painting easier and it means the surface bonded to the sheer plate has better keying as it can be left unsanded on the overlap portion.
Note the sheave slots to the left and cathead recess in the bow, as well as the frame lines on the bow plate for accuracy of styrene placement.


Last edited:
- Joined
- Dec 15, 2023
- Messages
- 114
- Points
- 103

An extreme close up of the deck planking and one caulk line that has been scraped to test the scale, planks are only 3.1mm wide, that's one plank and one paper they have not been sawn to thickness yet so are a bit up and down.
The light is a bit bright above so the wood looks a lot lighter than it actually is
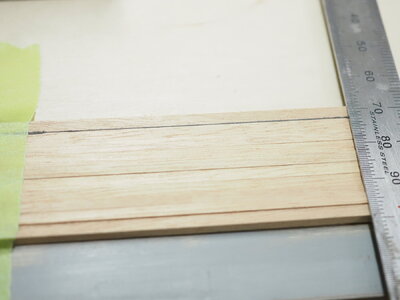
The light is a bit bright above so the wood looks a lot lighter than it actually is

Last edited:
Its progressing nicely Richard.
- Joined
- Dec 15, 2023
- Messages
- 114
- Points
- 103

Some more shots.
Note that the member of the margin planks etc have been machine on cnc but not right through, I will release them with the saw as its easier do that way, what you see here such as around the poop is thicker than it needs to be.
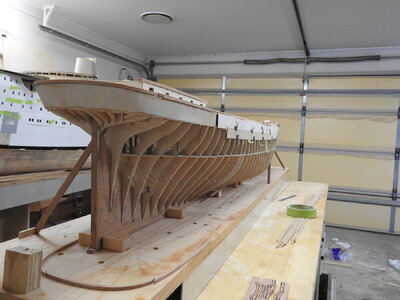
The margin plank here you will notice appears to be narrower at the aft end, this is how it is so the planking is parallel to coachhouse see shot onboard under.
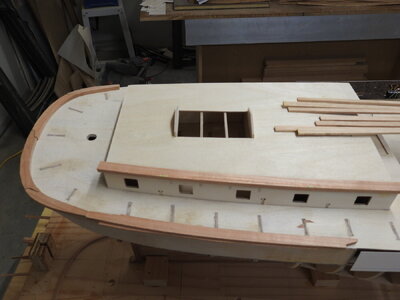
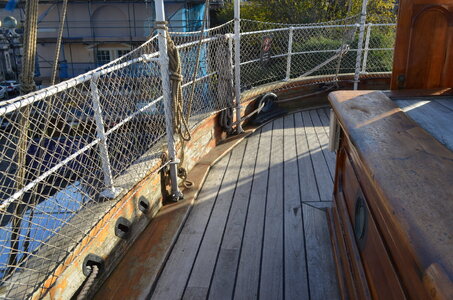
You will also notice the taffrail aft is made of 3 layers of timber and is thicker than the rail everywhere else, it thins just out of shot in the foreground.
I have opted to make this part as in the ship from parts that need to be assembled.
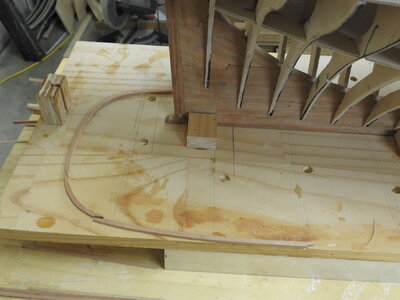
Here it is unpainted to see how it goes together.
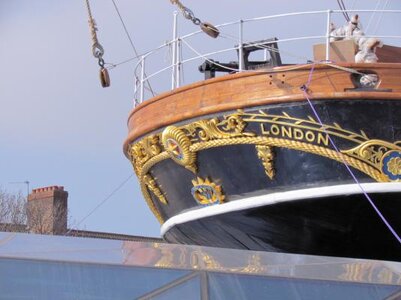
The Topgallant rail around the stern , are these parts.
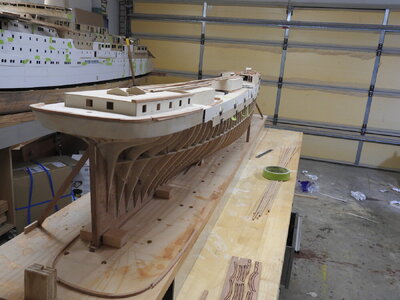
The image below shows the Ddeck plankings correct colour.
The planks on the deckhouse roof are the lengths of margin planks
The components of the fore deck laid out roughly
Note that the member of the margin planks etc have been machine on cnc but not right through, I will release them with the saw as its easier do that way, what you see here such as around the poop is thicker than it needs to be.

The margin plank here you will notice appears to be narrower at the aft end, this is how it is so the planking is parallel to coachhouse see shot onboard under.


You will also notice the taffrail aft is made of 3 layers of timber and is thicker than the rail everywhere else, it thins just out of shot in the foreground.
I have opted to make this part as in the ship from parts that need to be assembled.

Here it is unpainted to see how it goes together.

The Topgallant rail around the stern , are these parts.


The image below shows the Ddeck plankings correct colour.
The planks on the deckhouse roof are the lengths of margin planks

The components of the fore deck laid out roughly

Unbelievable detail Richard. Don't know how you do it but it looks fantastic.
I love your model already
- Joined
- Dec 15, 2023
- Messages
- 114
- Points
- 103

Thankyou.
OMG is cutting deck planking a loooooooooong job or what!
A ship like this with expansive decks has so much planking, I am going to bundle it up like real stacked timber in packs of 50 and photograph it on the deck, I reckon it will be an eye opener to how much teak was used, it's HUGE.
Given the planking is to scale width and thickness 3mm wide and 2.2mm thick it will be interesting to see.
I thought it was bad ripping the width and thickness but cutting each length into 5-6 planks slowly so as not to chip the corners is just plain painfull, 2 afternoons and only 10% done
Last edited:
- Joined
- Dec 15, 2023
- Messages
- 114
- Points
- 103

Roughly 850 planks 152mm long.
- Joined
- Dec 15, 2023
- Messages
- 114
- Points
- 103

We had a long weekend this weekend and thought I would start planking the hull but the universe had other plans.
I spent it working, I have 2 super yachts to model in 3d for work, one 55m and one 65m.
I spent it working, I have 2 super yachts to model in 3d for work, one 55m and one 65m.
- Joined
- Oct 29, 2019
- Messages
- 91
- Points
- 58

BINGO !!In regards to the accuracy of the work here is a shot of a strip bent around frames, not yet bevelled.
View attachment 416045
- Joined
- Oct 29, 2019
- Messages
- 91
- Points
- 58

I as well would LOVE a 1/48 kit !!SORRY for my writing error , I meant to say : THINK ( intend ) and not sink, about the 1:48 and 1"50 scales.
Happy New Year !
- Joined
- Jun 19, 2013
- Messages
- 477
- Points
- 268

Fine work for sucha large scale. WOW 1/40!. Try to pull that off with a real large clipper, like , Sovereign of the Seas, or The Donald McKay....in the same scale.
It would be over twice the size. Cutty Sark was a *Tiny* thing...compared to American clippers.
Your work is impeccable.
Rob
It would be over twice the size. Cutty Sark was a *Tiny* thing...compared to American clippers.
Your work is impeccable.
Rob
- Joined
- Dec 15, 2023
- Messages
- 114
- Points
- 103

I plan to get back to this this weekend, the Super Yachts should finish up today, my eyes are burning from 2 weeks of straight 3d work and the last week 14-16 hour days.
Just found this log (as well as Ships of Scale, I guess from the old magazine that I subscribed to -- didn't know this site existed) -- I followed along on the NRG site but more info here. This such a fantastic build -- I'm doing the Sergal version but it has many errors so kit-bashing extensively (yes, I corrected stem/keel (forefoot?) junction, which is "square" and not round, like American clippers) -- but, oh my, I look at it then look at mine and want to cry  . You are doing major justice to a beautiful lady.
That caulking looks great Richard. Very authentic I'd sayAn extreme close up of the deck planking and one caulk line that has been scraped to test the scale, planks are only 3.1mm wide, that's one plank and one paper they have not been sawn to thickness yet so are a bit up and down.
The light is a bit bright above so the wood looks a lot lighter than it actually is
View attachment 422765


