Candelaria by Occre 1:85 - Firstbuil

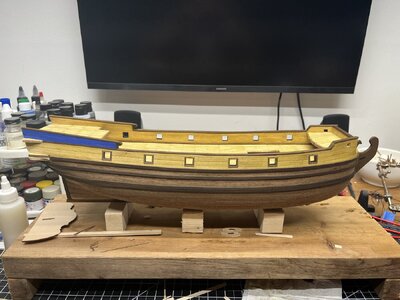
I plan on painting the "Cadillac Fins" before mounting the hand rails and wood trim aft so I don't have to worry about needing to be delicate with the brush later down the road. This is when I realized the paint provided with the kit set is much lighter than pictured on the photos on the box & site. I honestly don't think it would look bad at all, but I pulled a few other blues off my rack... I know taste is subjective, but any opinions are welcome.

View attachment 428002

View attachment 428003


View attachment 428004
WOW, stringing the tackle looks impressive, I'll take pointers from your methods.
I'm working on all of the interior parts first before moving on to the stern portion, like painting the metal parts & attaching them.
The blue you see on your computer/photos is deceving so I would just pick the color that you like.

Still playing/experimenting with the tackle... but, yeah, it is fun to get into something different to break up the wood work.
 
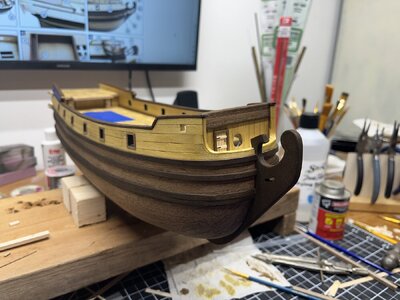
Made some pretty good progress over the past few days... Got the bow deck done, finished the handrails, attached the false keel, and glued on the gun port frames. I had made enough of them up to do the interior as well, but any reference photos I looked didn't have frames on the interior, so I left them off.

IMG_1510.JPG

IMG_1511.JPG
 
Made some pretty good progress over the past few days... Got the bow deck done, finished the handrails, attached the false keel, and glued on the gun port frames. I had made enough of them up to do the interior as well, but any reference photos I looked didn't have frames on the interior, so I left them off.

View attachment 429341

View attachment 429342
Fine job at the bow Frank. Like the fit & finish & also the gun port frames:)
 
Very good and accurate work - Bravo, especially for the first ship project - BRAVO
you are on a very good way - btw: also your chosen "blue" is looking good
 
Hi Frank, question about the cannon carrriages. What did you use for the axles? In post #139 the end of the axle looks white. Did you use something other then the brass rod? In my kit on the larger wheels the hole is drilled too big making for a sloppy fit. I cannot understand why Occre would not drill the same size hole for all of the wheels.
 
Wonderful progress ,looking great
Fine job at the bow Frank. Like the fit & finish & also the gun port frames:)
Very good and accurate work - Bravo, especially for the first ship project - BRAVO
you are on a very good way - btw: also your chosen "blue" is looking good

Thank you very much, guys! Work at the bench has been very slow as of late... lots going on at work, and a bit whooped at the end of the days.
 
Hi Frank, question about the cannon carrriages. What did you use for the axles? In post #139 the end of the axle looks white. Did you use something other then the brass rod? In my kit on the larger wheels the hole is drilled too big making for a sloppy fit. I cannot understand why Occre would not drill the same size hole for all of the wheels.

Dang it... busted. You caught me cheating, using plastic on my wood model... :p

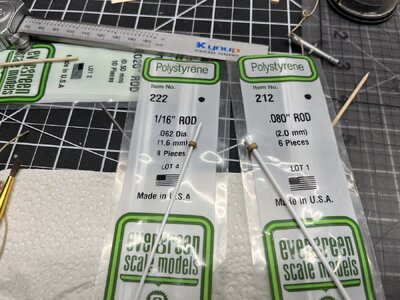
Yeah, the brass rod they give you is only one size, and the front & rear wheels are different sizes, so I used styrene rod that I had on hand.

IMG_E1517.JPG

IMG_1518.JPG
 
Dang it... busted. You caught me cheating, using plastic on my wood model... :p

Yeah, the brass rod they give you is only one size, and the front & rear wheels are different sizes, so I used styrene rod that I had on hand.

:)
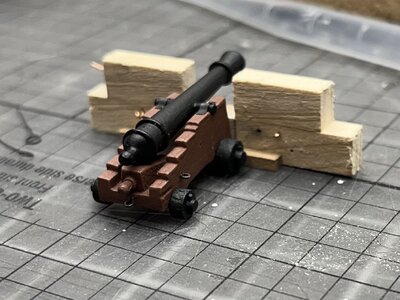
Your cheating paid off & I like your scratch building techniques such as the copper cleats for holding down the cannon & jacking up the breech with a block of wood. Looks like you added a belaying pin also?
I found that a tooth pick is just the right diameter for the larger wheels & the small wheels just need to be drilled out a tad so I'll go with that. Thanks for the information.
 
Last edited:
Back
Top