Bomb Vessel Granado Cross Section, Scale 1:72, POF Kit by Miniature Arts

Hi Uwe, thanks again for your valuable input even I know all these images and info's :) It is good for others to have these here too. Thanks.

I will see which way I go :)

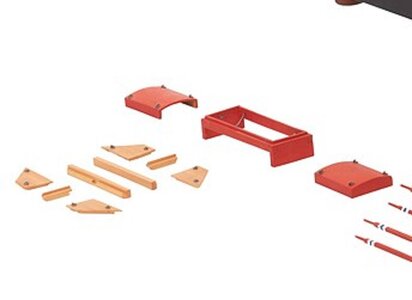
About your solution, with the nails here, quick disassembly does not work, because everything should be plugged in and just held inside by hooks and eyebolts.

View attachment 398582

cheers

Dirk
I was following here the well known model
The parts which you mentioned was a frame, which was lifted by one piece. That was my understanding until now.
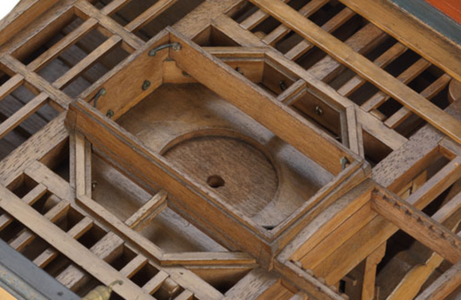
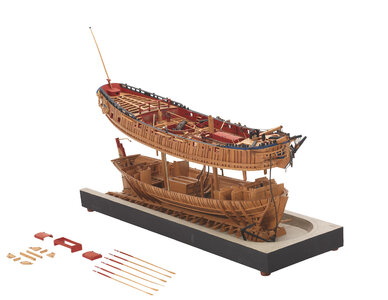
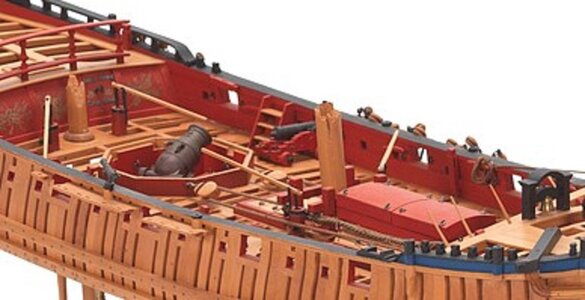
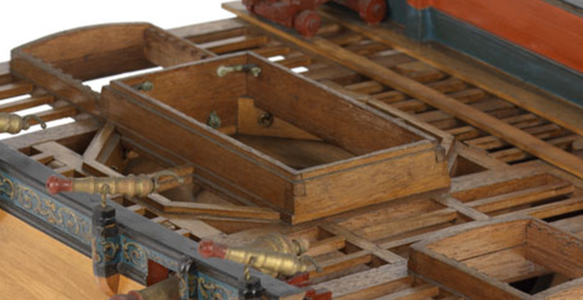
The model in the NMM made by Leigthly is presented with a frame box - I made my section identical
l5780_003.jpg l5780_003a.jpg

l5780_003b.jpg

Other section models are showing such inner connections like you mentioned
Screenshot 2023-10-09 143518.png Screenshot 2023-10-09 143621.png

I was thinking, that they had to lift also the heavier roof elements, so such a frame should be also not problem for some strong bodybuilderseamen - or lifting tackles with yard arms etc.
 
The upper deck were finished, the hanging knees will follow when the deck is glued in the hull (I thought about doing the deck removeable but that will not work unfortunately). That will be some fun ... haha ... not. I really

d353bfb4f9db5dcbf2e493da5f7c.jpg


b251c590a8711c806ea4266885fc.jpg


b336e506f7e89ad4a9b5234fe7da.jpg


Then the Mortar were built and painted, all the metalwork will follow later. I also finished the Mortar Housing and decides to go like it is in the kit and the Goodwin Book.

6f513b1d95d79573d65140f7bf56.jpg


809e9f4eb647f34177e21c50f1e7.jpg


Lot's of adjustments were necessary (Side Covers - I might redo them completely later) and some parts just don't fit (canopy planks - the laser kerf problem) or were wrong (inner Canopy Transom). Nothing will be glued, everything is removeable.

For the deck planking I will use (American) Holly and the planking will be removeable too.

f7a5db1caa6834a55c5cd381da57.jpg


b0539b4df32b2f88020c748674ac.jpg


0b27b60b2efe7a0dca0c4663dc9b.jpg


0335a040a74de713e181ec609fc9.jpg


f3da736f7ee12c6acd54e722a746.jpg


572136d86dc332aef4c39c221bcf.jpg


f6f98529ec1b4249907e819f660a.jpg


306590d1e2aed0e376ccde96e23f.jpg


a25f7c0392899c6b3aab1c48a101.jpg


da24b888117ed78462e24d8945fd.jpg


2e18a42357bff1e82f31d7fe4635.jpg


86db13a128aca6140efde99618e0.jpg


c25506d49c7143dc84e37ae3b0af.jpg


9f97c12b37558f13dff159088d83.jpg


0cefb363ec0390e772207741b667.jpg


871504441decb2cbf91f9d55ea84.jpg


Cheers

Dirk
 
I've said it before, but it bears repeating: I do so appreciate the precision of your work. The layered beam construction creates very nice joinery by design (notwithstanding the annoying color difference in the components), but the symmetry you create is a tribute to your skills.

I laughed when you kept saying 'this part will be removable.' I think you are building a kit, not a model from a kit ROTF.
 
The kits inboard planking is very simplified, no waterway no spirketting. I did not like that and orientated myself on the drawings from the Anatomy of the Ship.

It looks easy after it is done but took a good while to build. No kit material were used. I learned a lot about errors I made at the beginning of the build and I am not 100% satisfied with the result but think it is "ok".

I also did some of the eyebolts and rings. The kit ones are way to oversized though.

Edit: Damn I followed the MSB Drawings when building the spirketting, should have checked AOTS better. The spirketting needs to be up to the gunports ... it's to low. Nothing I can/will change in this state ...


25bd8f5663c43b43bb1a4750b053.jpg


074c6e40d661365edc8b3ee5919f.jpg


dd6ea02bd149b6620b87b49ca7ac.jpg


8ee1784bd82f4b5b5a81b086f814.jpg


0c8e3ae73449e628c01579bf8f1b.jpg


278c4b28535c0c8cade6f8ea7729.jpg


ab5977cc2ca7014216ba65bc212c.jpg


96ab449f6b5f415e85504c75890c.jpg


175439c6b445e0c87e6c8bd20e99.jpg


210b587f9ee71994cb6af5c2a94a.jpg


580c0b49e3fe4553abd0eb90be2d.jpg


954d864149f8ead1e084d0417341.jpg


3c76bd422917559a92ce008e2e28.jpg


c3eea812b7488d02e130a69d2e92.jpg


Cheers

Dirk
 
Last edited:
Thanks Paul & the likes :)

I started the outboard planking. Here the kit is missing the Upper Main Wale - I will do next - instead there is a simple plank. Filing the sweep ports - I hate this :) - needs to be done too but it might be that I just fake the ports outside.

f46828b60c686b587e698b0a3f36.jpg


c245adf14233389e8b1ce0e91660.jpg


a47d03184ff607d3516e00a62d33.jpg


317e6b923c91938202272115a52c.jpg


8bd4e28fadcace60cfa6a8255997.jpg


5a9042e5b4bf7bb7294a456f2119.jpg


9b5901cc1009d34450adcdee116c.jpg


Cheers

Dirk
Dear Dirk
you are doing wonderful work it's looks beautiful
 
Hi Paul,

the sheer rail is solid black wood. But it would be no problem with the brass pins too if it would be inked wood. I just put a drop of my blackening solution on the pin and it is black in seconds then I simply carefully wipe off the rest. Another way is to blacken the pin before it is fully inserted into the wood.

cheers

Dirk
 
I was thinking more in terms of sanding off the top of a brass pin to make it flush to the surface of the rail. But I guess the tinting of the rail could be reapplied and then sealed. I find 'repairs' rarely turn out as nice as the original work. As you have seen, I share your interest in creating the best possible finish. Solid black wood solves that issue.

Thanks much!
 
Since yesterday I am COVID negative again, yeah ... 17 days :-D

Lot's of smaller stuff has been built. Cleats, Kevel Cleats, Ring Bolts on Deck, scuppers completed and the channels. Unfortunately the channels are not "complete" .. (same with the MSB Drawings though) they should be upt to the cut. Also the deadeyes are missing, I will do them.

Here you can see the "missing" part.

d65a69ba4b02e0349ba7b929daca.jpg


Anyway I scratched it :)

59368db9e74bdd7f51f28f01f81d.jpg


837d43411ef2fbd8f906e5014a9e.jpg


fb8d3e36e2f9ae6306f557ba0b66.jpg


9a7c9a3547913da9f4f01de83f15.jpg


077f4195423491a87ff7b86e7b58.jpg


d92a66b2274530b2fc830d9f0a58.jpg


eaccd0df7948469bffe0d984c531.jpg


de2ce9293a53dada1fc2308cdcf2.jpg


dc94eae6f4055ea8ab60504ba45d.jpg


b12aac13a97e6fb1ced5f128d6f0.jpg


Cheers

Dirk
 
I'm happy you are now released to re-enter society Dirk!
In the meantime, f.e. here in Austria it changed completely:
If you do not have symtoms that you are sick, you have to go to work, even if your are positive tested

@Dubz Modelling World - very clean and accuarte work
 
Back
Top