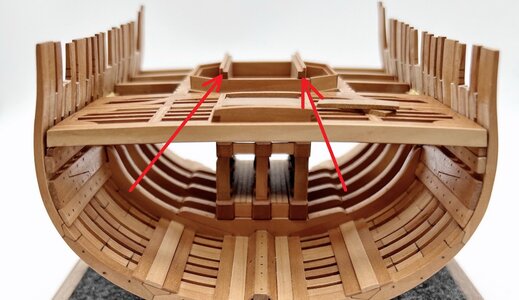
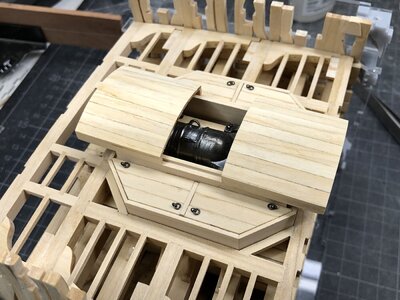
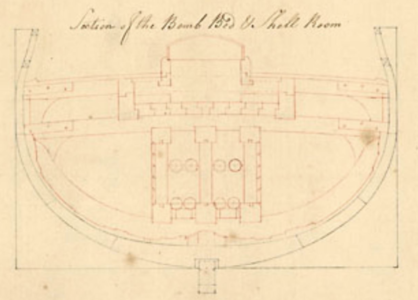
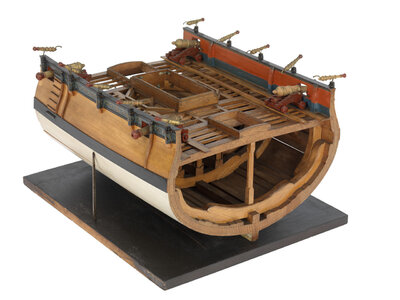
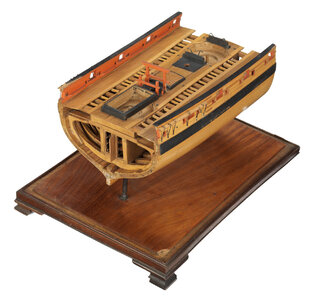
Bomb Vessel Granado Cross Section, Scale 1:72, POF Kit by Miniature Arts

Thanks for the likes, any comments and/or questions are appreciated :)

The shell room is done. A tricky part. In this small scale every angle and every 10th millimeter is important to have the whole ensemble look right. I think it's ok, not perfect but ok.

I did not used the kits upper & lower support beams as they should made of two parts which I did not like and I needed them a small bit higher.

I am adjusting the parts and the joints from the bottom to top so at the end it might be that the hull is a bit flatter than intended.


de846a27ea1917a5f2cda1787bff.jpg


6badb0a2ef48fa993c9a0a0106bb.jpg


3360cbadb8a1582bbab7beadbe5d.jpg


c7e23267e0b45cd13dd232e1069c.jpg


ecd8198a47e36b22211e86b1edc5.jpg


a2527e581c45e4be90a3d075ff00.jpg


675a2179f5175304df5dacab81ca.jpg


ac6391c22adfa2eccf9b1cbfe865.jpg


a3fbdc0b230e2fbb25931b5bee68.jpg


83b44f29b3e5655da9974ea8a539.jpg


34a4d7095aeed8be5e7da33c8153.jpg


Cheers

Dirk
 
Mortar Pit Beams & Planking. Nothing glued yet. I do as much dry fitting as possible.

I also did fillers for the frame, something I should have done at the very beginning. It's always about learning :)

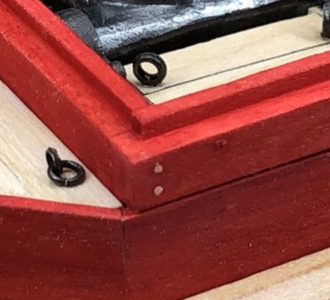
And some details for the Mortar Deck Clamp.

aba0af7693ee235304940284c3b3.jpg


2c4de0fd5fcc149c5d476a7cfb64.jpg


a668bf392faa25452ef6bcdf4ea0.jpg


ad6a7550447888689be04324e89d.jpg


ec0c88fae42e9d3d343c78e710d5.jpg


da26bfd1025101f19c6b9d8d0b42.jpg


6fe1c26fd352a0217cd849fcf79a.jpg


ee8237d49aa6b5ebba581b9d4f35.jpg


Outside frames sanded, oiled and finished with "Ballenmattierung".

81711ba0fd23e920fae9aac7d5a5.jpg


dc49c07a3d04dfb9bf6f3262cde7.jpg


Small little Gem :)

c751c9ca7ba56171d6db66077f2d.jpg


f0c90abfc5e4393501d302824e3f.jpg


It's a bit inconsequence to do the Mortar Pit Secondary Planking as one part (with lasered planks and nails) but the Mortar Pit Primary Planking with 10 single planks. And it is unfortunately a good example why the laser should have been better adjusted. The kerf with round about 0.2 mm is really bad, and 0.2 mm x 10 results in a gap of round about 2 mm. So I had to redo these planks ;-)

bb441725ec4c4490c13d27867b03.jpg


I regularly get asked why I use oil so soon in my builds. One reason is to seal the wood as soon as possible to avoid getting problems with glue. What I also do when I need to glue parts in tricky areas is using masking tape so the glue can't penetrate wood where it should not..

65a4693cc5cb67f84246fc852d7a.jpg


And I use needles as guides so I get the exact position I found out when dry fitting.

68ad5c2a4cb29e119d16b6669587.jpg


Cheers

Dirk
 
Thanks for the likes, I wonder why there are so less comments and/or questions though ...

Mortar Platform glued in position, Mortar Pit Support Standards added, Upper Deck Clamp (Lower Strake) nailed.

84c456046338f76e4b4060e0c7e5.jpg


f0fd45bebd8d9f6c106ce78ff0f0.jpg


6fd5c3a744dc8b0cdfa1cdab4bb7.jpg


4570f892891d450580bd2405b850.jpg


0c22063b9b5a3dfd194a8a39498e.jpg


165f7b469f7048e937c3ee175858.jpg


Upper Deck beams sandwiched. I really don't like this sandwich design, it is even worse when the color difference is that big.

The upper decke will be build outside (it should work), maybe I paint it or do some beams from scratch. Time will tell :)

e0d43b433d40dbf2be6614f49974.jpg


30bc98e404c00c26a0a4e0c37e1f.jpg


a240bfe3679cff0cd48af54fd9d2.jpg


One thing I want to emphasize very clearly, even if there are some problems with the kit (there always are!), for the price everyone should strike and build this little Cross Section. The price / performance ratio is incredibly good. And I am a damn perfectionist ... hehe :-D

Cheers

Dirk
 
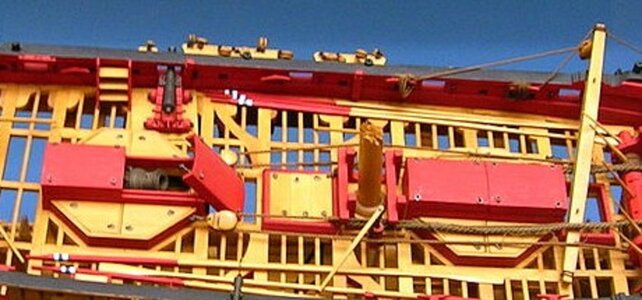
More progress on the upper deck. As is so often the case, the kit manufacturers do not take into account that there can be slight dimensional differences in such a complex model and do not design their parts with slight oversizes where it would make sense to be able to sand the down until they fit. The Double Lodging Knees are quite fragmented now, as they way way too small, unfortunately. Still unhappy about the sandwiched beams ...

And don't rely on the Chinese manual to much, stuff like the hatch is there shown totally wrong.

Any comments and/or questions?

a2c630c3da816032f87177736e0c.jpg


76e4bd548a735d92ebc23b05aee4.jpg


53856d7ab1cbcdaf0339e3e49221.jpg


1f4d79cbf0fcf183b79245f94774.jpg


3fa2698e3001545baecaf310a896.jpg


748590f66f941fe4ed545e799c56.jpg


43e136d37af6ce340c2dd1faf8b4.jpg


fe03c8e9c46cb04e71eee0652b0a.jpg


d7e4efbcff260363a0ba3aa5886c.jpg


766835976f8bdf2397ebea3416c4.jpg


0161a9607008eee9f42c9257422f.jpg


8ba6123c3838580c3fc2062e15c7.jpg


81f68b58f25ba6d51e8545676e1d.jpg


I also did the base and the case in my usual style :)

f22f16530f226e00341dba9ffc82.jpg


4c0c1e18ce131efc4d0c7b86fb53.jpg


Cheers

Dirk
 
Looking good - clean and accurate execution of the deck structure
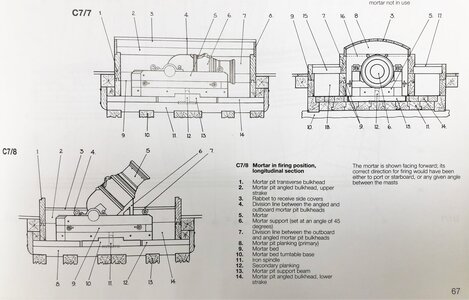
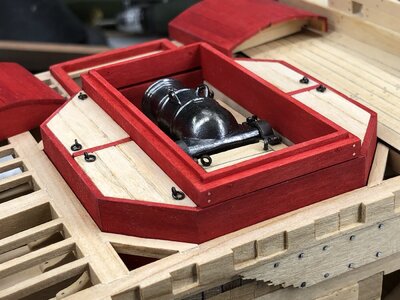
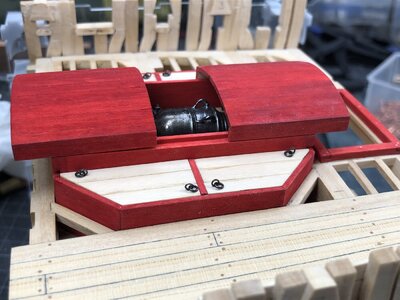
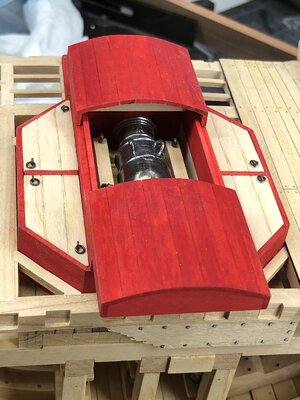
Only a short hint related to the inner walls of the mortar cover base, before you fix it permanently - check the orientation with the construction of the roof parts of the kit

Dubz.jpg

Goodwin was showing them like you did - some contemporary drawings also
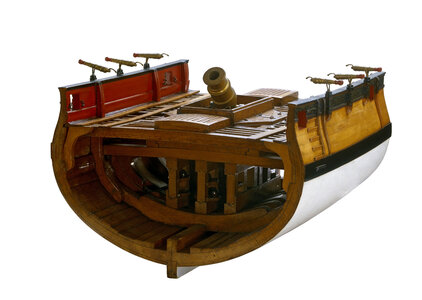
but several contemporary section models and also the Lightley model is showing them turn by 180° - the same like I did on my section and also full hull

you see the roof has to slide over the top notch

IMG-8956.jpg
 
More progress on the upper deck. As is so often the case, the kit manufacturers do not take into account that there can be slight dimensional differences in such a complex model and do not design their parts with slight oversizes where it would make sense to be able to sand the down until they fit. The Double Lodging Knees are quite fragmented now, as they way way too small, unfortunately. Still unhappy about the sandwiched beams ...

And don't rely on the Chinese manual to much, stuff like the hatch is there shown totally wrong.

Any comments and/or questions?

a2c630c3da816032f87177736e0c.jpg


76e4bd548a735d92ebc23b05aee4.jpg


53856d7ab1cbcdaf0339e3e49221.jpg


1f4d79cbf0fcf183b79245f94774.jpg


3fa2698e3001545baecaf310a896.jpg


748590f66f941fe4ed545e799c56.jpg


43e136d37af6ce340c2dd1faf8b4.jpg


fe03c8e9c46cb04e71eee0652b0a.jpg


d7e4efbcff260363a0ba3aa5886c.jpg


766835976f8bdf2397ebea3416c4.jpg


0161a9607008eee9f42c9257422f.jpg


8ba6123c3838580c3fc2062e15c7.jpg


81f68b58f25ba6d51e8545676e1d.jpg


I also did the base and the case in my usual style :)

f22f16530f226e00341dba9ffc82.jpg


4c0c1e18ce131efc4d0c7b86fb53.jpg


Cheers

Dirk
Hi Dirk, what a super neat job, it looks very good indeed, the effort and attention to detail that you’ve put into this build really shows, and your log is very well documented, it does you credit. Ken
 
Looking here, the Kit's way to show seems not totally wrong ....

View attachment 398483
I know this contemporary drawing, and there are also others existing showing this

also Goodwin is showing it in "your" way
IMG-8376.jpg

But I have my doubts as a ingenieur - if the notch is outside, rain and seawater could enter between the roof and the wall much easier. Also the sliding of the roof along the notch would not be possible, only when you cut one side open

with "my" solution - you can slide the roof elements and no water can go inside
IMG-9004.jpg IMG-8998.jpg

IMG-9005.jpg

contemporary section models

f2489_2 (1).jpg l0277_001.jpgl0332_001.jpg

and the Leightley model

Granado_bomb_vessel_modela.jpg

check it how the roof of the kit model is designed - than you will know, how you have to fix these wall elements with the notch
 
Hi Uwe, thanks again for your valuable input even I know all these images and info's :) It is good for others to have these here too. Thanks.

I will see which way I go :)

About your solution, with the nails here, quick disassembly does not work, because everything should be plugged in and just held inside by hooks and eyebolts.

1696595157760.png

cheers

Dirk
 
More progress on the upper deck. As is so often the case, the kit manufacturers do not take into account that there can be slight dimensional differences in such a complex model and do not design their parts with slight oversizes where it would make sense to be able to sand the down until they fit. The Double Lodging Knees are quite fragmented now, as they way way too small, unfortunately. Still unhappy about the sandwiched beams ...

And don't rely on the Chinese manual to much, stuff like the hatch is there shown totally wrong.

Any comments and/or questions?

a2c630c3da816032f87177736e0c.jpg


76e4bd548a735d92ebc23b05aee4.jpg


53856d7ab1cbcdaf0339e3e49221.jpg


1f4d79cbf0fcf183b79245f94774.jpg


3fa2698e3001545baecaf310a896.jpg


748590f66f941fe4ed545e799c56.jpg


43e136d37af6ce340c2dd1faf8b4.jpg


fe03c8e9c46cb04e71eee0652b0a.jpg


d7e4efbcff260363a0ba3aa5886c.jpg


766835976f8bdf2397ebea3416c4.jpg


0161a9607008eee9f42c9257422f.jpg


8ba6123c3838580c3fc2062e15c7.jpg


81f68b58f25ba6d51e8545676e1d.jpg


I also did the base and the case in my usual style :)

f22f16530f226e00341dba9ffc82.jpg


4c0c1e18ce131efc4d0c7b86fb53.jpg


Cheers

Dirk
Brilliant!
 
Back
Top