You are using an out of date browser. It may not display this or other websites correctly.
You should upgrade or use an alternative browser.
You should upgrade or use an alternative browser.
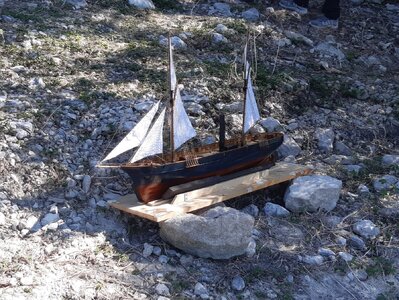
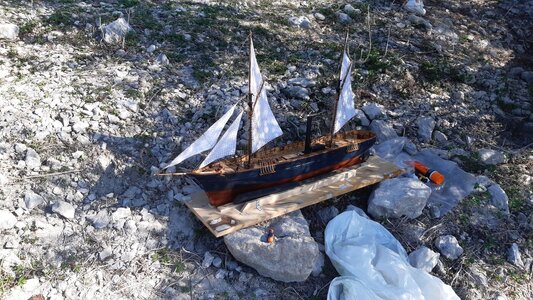
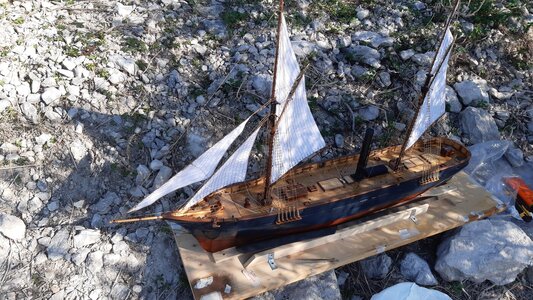
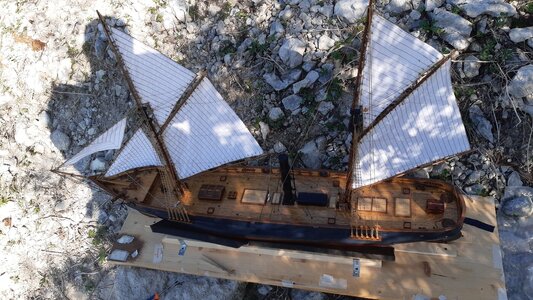
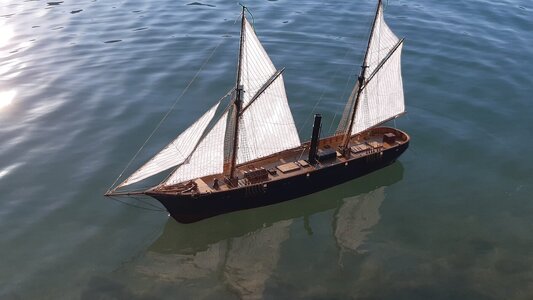
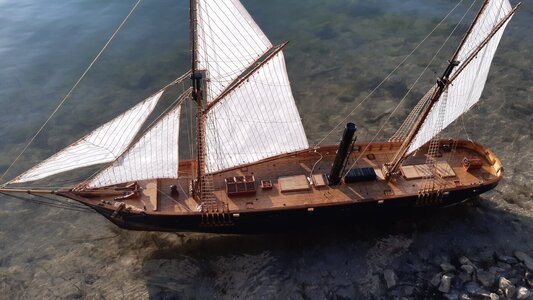
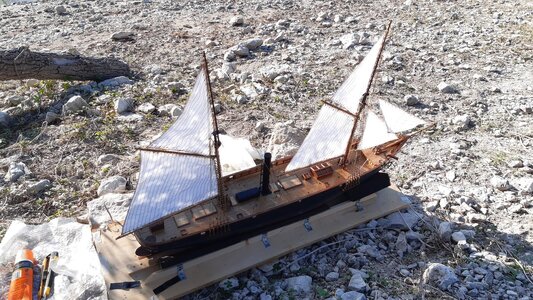
1/60 scale RC model of a schooner, loosely based on a gunboat steamship from the second half of the 19th century.
- Thread starter AlessandroROMA
- Start date
- Watchers 16
I'm looking forward to seeing her on the water!And now for the ultimate test!
- Joined
- Sep 22, 2023
- Messages
- 173
- Points
- 143

Hai assolutamente ragione Mike, le manovre fisse erano sempre coperte di catrame.Inizialmente non ci avevo pensato perché le immagini che avevo erano di quadri in bianco e nero e non c'erano colori. Inoltre, molti velieri che ho visto su YouTube (anche riproduzioni di navi antiche) non erano catramati. Poi, studiando altre immagini di navi di quel periodo, e studiando le tecniche navali, mi sono accorto che le manovre fisse erano in realtà nere. Quando avrò finito il modello sto pensando di ricolorare di nero tutte le manovre fisse e di colorare di rosso lo scafo sotto la linea di galleggiamento (questo dettaglio mi è stato segnalato dall'attentissimo osservatore Johan).This is very good, but the standing rigging was usually tarred to stop it rotting and should either be painted black, or made from black thread.
Mike
You're absolutely right Mike, the standing rigging was always covered in tar.
Initially I didn't think about it because the images I had were of black and white paintings and there were no colours.
Furthermore, many sailing ships I saw on YouTube (even reproductions of ancient ships) were not tarred.
Then, studying other images of ships from that period, and studying naval techniques, I realized that the standing rigging was actually black.
When I finish the model I'm considering recoloring all the standing rigging black and coloring the hull below the waterline red (this detail was pointed out to me by the very attentive observer, Johan).
- Joined
- Sep 22, 2023
- Messages
- 173
- Points
- 143

I'm looking forward to seeing her on the water!
Posterò a breve un video della prova in un lago, purtroppo le riprese sono pessime, non ero attrezzato bene e la giornata era priva di vento.
Ma qualcosa di buono si vede.
I will post a video of the test on a lake shortly, unfortunately the footage is terrible, I wasn't well equipped and the day was windless.
But there is something good to be seen.
- Joined
- Sep 22, 2023
- Messages
- 173
- Points
- 143

And now for the ultimate test!
Si sono molto curioso del tuo giudizio (anche se negativo o critico) e delle tue argute osservazioni.And now for the ultimate test!
Mi scuso fin da ora per le pessime riprese (fatte col cellulare).
Yes, I am very curious about your opinion (even if negative or critical) and your witty observations.
I apologize in advance for the bad footage (taken with my cell phone).
- Joined
- Sep 22, 2023
- Messages
- 173
- Points
- 143

Ringrazio degli apprezzamenti: Dave Teel, Johan, Colin B, Peter Vogt, Webber007, Norway, Peter Gutterman, Jimsky e Uwek.
Thanks for appreciation: Dave Teel, Johan, Colin B, Peter Vogt, Webber007, Norway, Peter Gutterman, Jimsky and Uwek.
Thanks for appreciation: Dave Teel, Johan, Colin B, Peter Vogt, Webber007, Norway, Peter Gutterman, Jimsky and Uwek.
- Joined
- Sep 22, 2023
- Messages
- 173
- Points
- 143

Un saluto a tutti i modellisti e in particolare a quelli che finora hanno avuto la pazienza di seguirmi.
I test in vasca mi hanno portato a voler fare una prova più impegnativa al lago.
Vi racconto come è andata la prova al lago alla fine di quest'estate.
Fatto questo potrò illustrarvi gli attuali impegni.
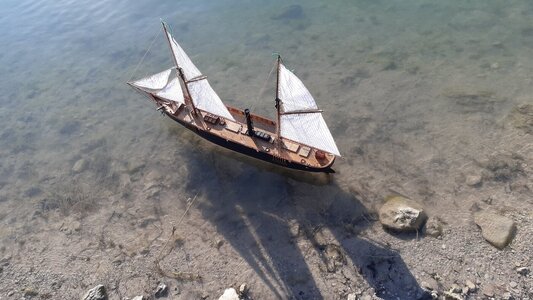
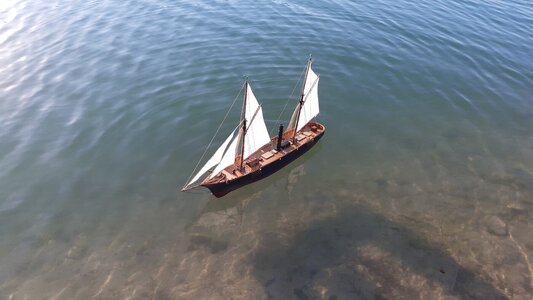
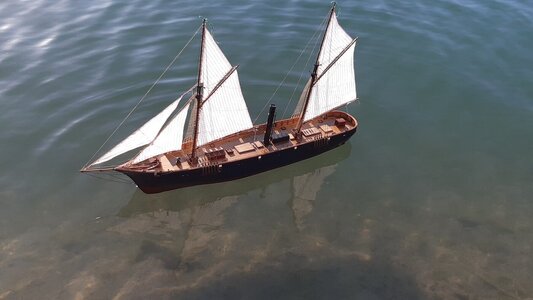
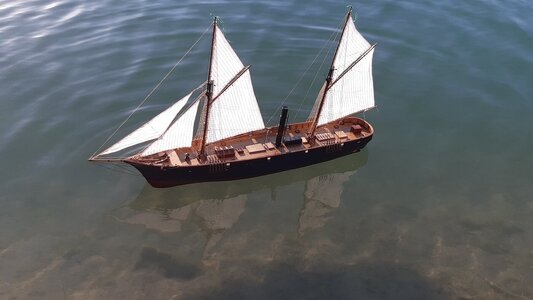
La prova al lago la potete vedere in questo video:
Lo metterò per ultimo.
Mi scuso per le pessime riprese video, ma lo scopo non era filmare e non mi sono preparato bene.
ESITO E VALUTAZIONINAVIGAZIONE AD ELICA
Dal punto di vista della navigazione a motore nulla da eccepire.
Regolando la leva del telecomando si ottiene una velocità realistica.
Con l'elica in movimento il timone risponde molto bene.
All'occorrenza è possibile sfruttare la massima potenza del motore (ma questa non è più una navigazione realistica).
NAVIGAZIONE
Per quanto riguarda la vela il bilancio può dirsi positivo ma assolutamente da ripetere vista la mancanza di vento.
Quel pomeriggio solo qualche debole raffica ogni tanto.
Nemmeno i fili di lana si sollevavano per farmi capire da che direzione provenisse il vento.
Credo che servano almeno quattro nodi, da otto a dodici sarebbero l'ideale, probabilmente anche di più per divertirsi, ma quel giorno ce n'erano al massimo due e solo ogni tanto.
Buono per nuotare ma non per navigare.
Lo so, avrei dovuto vedere prima le previsioni, ma comunque avevo a disposizione solo quel giorno e sarei partito comunque.
Nei pochi istanti di vento (purtroppo non più di un minuto consecutivo), e nonostante fosse così debole, ha anche navigato di bolina.
Tuttavia non ritengo il test concluso.
Senza una certa quantità di slancio il timone non sembra essere efficace. E 'normale.
Non ho pensato di fare un test ad hoc per verificare questo: avrei dovuto spingere la goletta dalla riva al largo con la massima forza e dare subito il comando al timone a sinistra o a destra, ripetendo poi la stessa cosa prova ma sempre con minore spinta iniziale.
Se la nave gira va bene, significa che il timone funziona anche senza che si debba azionare l'elica, altrimenti è un grosso difetto, un limite che va conosciuto e, possibilmente, superato.
STABILITÀ E TENUTA ERMETICA
Non si può dire nulla su nessuna di queste caratteristiche.
C'era così poco vento che non si inclinava quasi mai e quando succedeva lo faceva pochissimo e per poche decine di secondi.
Non una sola goccia è caduta sul ponte, che può essere investito dall'acqua (che dobbiamo evitare di raggiungere nella stiva).
Ciò di cui sono particolarmente soddisfatto è che naviga anche con profondità di pochi centimetri, basterebbe una pozzanghera molto grande.
CONSUMO ENERGETICO E DURATA DELLA BATTERIA
Non avere il monitoraggio della telemetria o alcuna spia di stato della batteria è un grosso problema.
Andarli a misurare ogni tanto è impensabile perché aprire i coperchi è un'operazione lunga.
Ho pensato ad una soluzione, un circuito elettronico che devo ancora verificare.
Quando ho finito (un pomeriggio intero) ho misurato le batterie ed erano ancora cariche.
Ho ancora margine per migliorare l'autonomia.
Nella configurazione attuale, una batteria è dedicata all'alimentazione del ricevitore e dei servomeccanismi, mentre l'altra è dedicata al variatore di tensione (ESC) e quindi al motore elettrico.
In questo modo, come ho già detto, si scollega il positivo del BEC (circuito eliminatore batteria) del variatore.
Visto che il motore assorbe molto di più, forse sarebbe meglio dedicargli una batteria con più carica rispetto all'altra.T
uttavia, ho inserito il cablaggio in modo da poter modificare la configurazione ogni volta che voglio.
Al di là del disagio di non sapere quanta carica rimane, visto l'ampio margine e il comportamento sperimentale in fase di scarica a 200 mA e 1,2 A, posso stare abbastanza tranquillo.
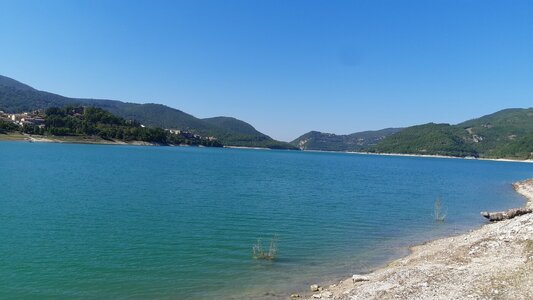
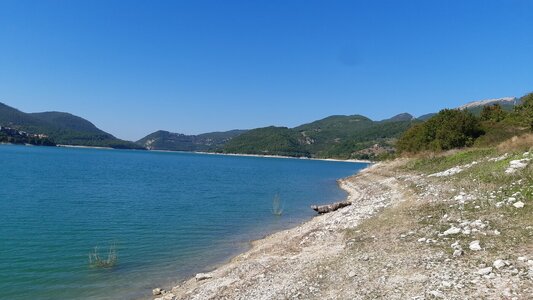
Il Lago del Turano è un lago artificiale situato in provincia di Rieti (Sabina orientale), nel Lazio, al limite occidentale della riserva naturale del Monte Navegna e del Monte Cervia.Situato a 536 m s.l.m. lungo il corso del fiume Turano, il lago è lungo una decina di chilometri ed ha un perimetro di circa 36 km.Il bacino è di origine artificiale: fu realizzato nel 1939, con la costruzione della diga del Turano nei pressi degli abitati di Posticciola e Stipes, con lo scopo di produrre energia idroelettrica ed evitare che le piene del fiume inondassero la pianura reatina.
superficie: 5,58 km²
profondità: 68 m
Paesaggisticamente molto bello e balneabile.
Greetings to all modelers and in particular to those who have had the patience to follow me so far.
The tests in the tank led me to want to do a more challenging test at the lake.
I'll tell you how the test at the lake went at the end of this summer.
Once this is done I will be able to explain the current commitments to you.
The test at the lake can be seen in this video:
I'll put it last.
Sorry for the bad video footage, but the purpose was not to film and I didn't prepare well.
OUTCOME AND EVALUATIONS
PROPELLER NAVIGATION
From the point of view of motor navigation, nothing to complain about.
By adjusting the remote control lever you obtain a realistic speed.
With the propeller running, the rudder responds very well.
If necessary it is possible to exploit the maximum power of the engine (but this is no longer realistic navigation).
SAILING
As far as sailing is concerned, the outcome can be said to be positive but absolutely to be repeated due to the lack of wind.
That afternoon only a few weak gusts every now and then. Not even the woolen threads rose to let me understand which direction the wind was coming from.
I think you need at least four knots, eight to twelve would be ideal, probably even more for fun, but that day there were a maximum of two and only every now and then.
Good for swimming but not for sailing.
I know, I should have seen the forecast first, but I only had that day available anyway and I would have gone anyway.
In the few moments of wind (unfortunately no more than a consecutive minute), and despite it being so weak, it also sailed close hauled.
Nonetheless, I don't consider the test complete.
Without a certain amount of momentum the rudder does not appear to be effective. This is normal.
I didn't think of doing an ad hoc test to verify this: I would have had to push the schooner from the shore out to sea with maximum force and immediately give the command to the rudder to the left or right, then repeating the same test but always with less initial thrust.
If the ship turns, that's fine, it means that the rudder works even without the propeller having to be operated, otherwise it's a big flaw, a limit that must be known and, possibly, overcome.
STABILITY AND HERMETIC SEAL
Nothing can be said about any of these features. There was so little wind that it almost never tilted and when it happened it did so very little and for a few tens of seconds.
Not a single drop fell on the deck, which can be hit by water (which we must prevent from reaching the hold).
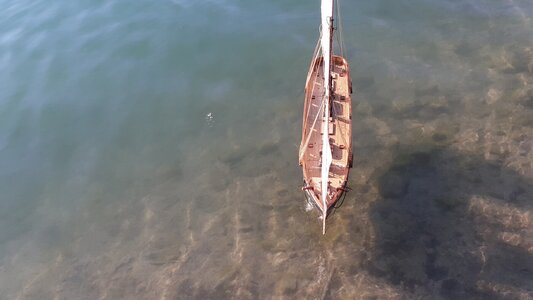
What I am particularly satisfied with is that it navigates even with depths of just a few centimetres, a very large puddle would be enough.
ENERGY CONSUMPTION AND BATTERY LIFE
Not having telemetry tracking or any battery status lights is a big deal. Going to measure them every now and then is unthinkable because opening the lids is a long operation.
I thought of a solution, an electronic circuit that I have yet to verify.
When I finished (a whole afternoon) I measured the batteries when empty and they were still full.
I still have room to improve the durability.
In the current configuration, one battery is dedicated to powering the receiver and servomechanisms, while the other is dedicated to the voltage variator (ESC) and therefore to the electric motor.
In this way, as I already said, the positive of the BEC (battery elimator circuit) of the variator is disconnected.
Since the engine absorbs much more, perhaps it would be better to dedicate a battery with more charge to it than the other.
However, I put the wiring in so I can change the configuration whenever I want.
Beyond the discomfort of not knowing how much charge remains, given the large margin and the experimental behavior during the discharge phase at 200 mA and 1.2 A, I can feel quite comfortable.
Lake Turano is an artificial lake located in the province of Rieti (eastern Sabina), in Lazio, on the western edge of the Monte Navegna and Monte Cervia nature reserve.
Located at 536 m above sea level along the course of the Turano river, the lake is about ten kilometers long and has a perimeter of approximately 36 km.
The basin is of artificial origin: it was built in 1939, with the construction of the Turano dam near the town of Posticciola and Stipes, with the aim of producing hydroelectric energy and preventing the river's floods from inundating the Rieti plain.
surface: 5.58 km²
depth: 68 m
scenically very beautiful and suitable for swimming.
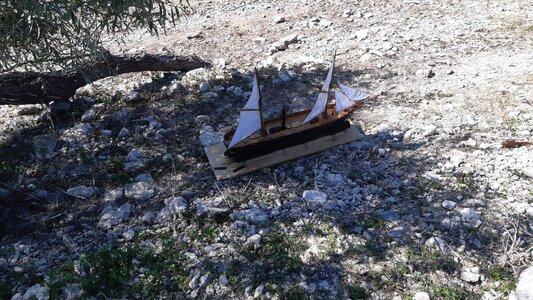
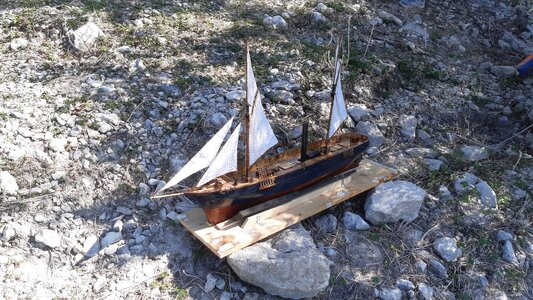
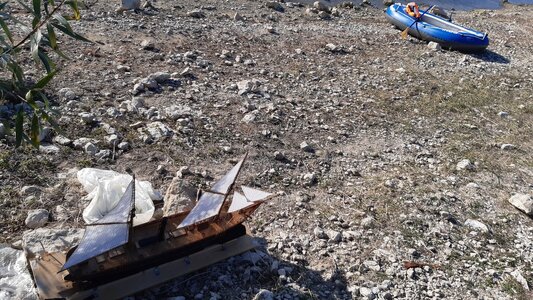


- Joined
- Sep 3, 2021
- Messages
- 4,256
- Points
- 688

Well, at least she sailed and personally I'm not a fan of pushing the envelope on a maiden trip. You can always expand on her abilities after gaining more insights on how she handles
She truly looks to be in her element though and very convincing to boot.
Congratulations on a successful completion of this extraordinary build.
She truly looks to be in her element though and very convincing to boot.
Congratulations on a successful completion of this extraordinary build.
- Joined
- Sep 22, 2023
- Messages
- 173
- Points
- 143

Grazie mille Johan, ma la nave non è ancora completata.Well, at least she sailed and personally I'm not a fan of pushing the envelope on a maiden trip. You can always expand on her abilities after gaining more insights on how she handles
She truly looks to be in her element though and very convincing to boot.
Congratulations on a successful completion of this extraordinary build.
Mancano i cannoni, le scialuppe, la bussola, le palle di cannone, alcune manovre correnti e altri piccoli accorgimenti opzionali.
Spero di non alzare troppo il baricentro.
Nei prossimi messaggi posterò lavori attuali. Ora mi sto cimentando nella costruzione dei cannoni.
Se finisco per la prossima estate potrò provarla al lago veramente completa.
P.S. una domanda che non c'entra niente. Ma sbaglio o la tua bandiera era dei paesi bassi prima?
Thank you very much Johan, but the ship is not completed yet.
The cannons, lifeboats, compass, cannonballs, some running rigging and other small optional features are missing.
I hope I don't raise the center of gravity too much.
In the next messages I will post current works.
Now I'm trying my hand at building cannons.If I finish it by next summer I will be able to try it at the lake in a truly complete way.
P.S. a question that has nothing to do with it. But am I wrong or was your flag from the Netherlands before?
- Joined
- Sep 3, 2021
- Messages
- 4,256
- Points
- 688

No, you're not wrong, but currently I'm enjoying a stay in Barcelona.P.S. a question that has nothing to do with it. But am I wrong or was your flag from the Netherlands before?
(I also send you a PM, check your SOS messages.)
- Joined
- Sep 22, 2023
- Messages
- 173
- Points
- 143

Buonasera a tutti.
Vi volevo comunicare un errore molto importante nel mio modello navale.
Chi vuole costruire dei modelli navali si rifà a kit o progetti esistenti curati da professionisti o case costruttrici, però capita che su alcuni particolari si possa fare riferimento a modelli in scala esistenti.
Per questo motivo segnalo un errore che mi è stato fatto notare da Johan per non far cadere in inganno (anche se involontariamente) nessun modellista che osservi il mio modello.
Johan (da signore quale è) mi ha fatto notare la cosa in un messaggio privato invece che nel forum.
Ritengo importante che l'errore sia noto perciò riporto la mia risposta all'osservazione che mi ha fatto Johan.
"Ciao Johan.
Ieri stavo preparando una risposta che ho dovuto cambiare totalmente perchè mi hai fatto scoprire una cosa sconcertante.
Inizialmente avevo posizionato il boma molto più in basso, perchè secondo i miei calcoli doveva stare li.
Peraltro mi ero servito di sagome altre 3 cm per simulare un marinaio alto 1,80 m.
Tempo fa mi accorgevo che quell'altezza era troppo bassa (in realtà è stato un mega abbaglio di cui ancora oggi non mi capacito) e così alzai gli alberi aggiungendo un cilindretto alla base.
Come puoi vedere nelle foto ho alzato il boma, allungando l'albero dalla base.
Fino a ieri ero convinto di aver fatto bene perchè 25 mm mi sembravano troppo pochi. Un boma a 1,5 metri sarebbe stato troppo pericoloso per i marinai.
L'ho allungato a 35 mm pensando che 2,1 metri sarebbe stata una misura ideale.
Dico fino a ieri perchè ieri, cercando le foto e pensando alla spiegazione da darti, ho constatato l'errore madornale che ho fatto.
Invece di prendere la misura dal deck al boma ho preso la misura dal deck al primo anello.
Ora effettivamente il boma è troppo alto.
Non riesco a digerire questo errore. Ma quello che è peggio è che l'avevo fatto bene inizialmente e ho pure perso un sacco di tempo per modificarlo.
Come ho fatto a fare un errore così banale?
Ho diminuito la velatura ma questo non mi importa, quello che è brutto è che un boma così alto è tecnicamente incoerente per qualsiasi epoca.
Devo dire che ho sempre avuto la sensazione che c'era qualcosa che non andava. Più un fatto di gusto e sensazione che altro, ma ero tranquillo (fino a ieri) perchè mi ricordavo di aver misurato bene.
Ho subito pensato a come poter rimediare, ma stavolta è ancora più complicato dell'errore sulle sartie.
Dovrei tagliare tutte le manovre fisse e tutte le manovre correnti e cercare di riattarccarle sulla sommmità per non rifarle. In questo modo potrei sfilare l'abero che non è incollato.
Però non basta, dovrei rifare il fiocco perchè verrebbe inclinato e la base non sarebbe più parallela al deck.
Inoltre dovrei rifare i piede d'albero.
Pensavo che l'errore fosse solo uno, cioè il bompresso troppo lungo e invece devo sopportare pure questo.
Già il bompresso era una grossa delusione perchè inizialmente lo avevo calcolato più corto. Per due motivi: uno pratico: il modello navale sarebbe stato più corto e sarebbe entrato in qualsiasi portabagagli. Il secondo motivo è che bompressi così lunghi con un unico fuso non esistevano. Superata una certa lunghezza bisognava unire due fusi.
Questi non sono compromessi per la navigazione RC, ma sono errori pessimi. Sto valutando che fare. Rifare tutto mi riporterebbe indietro di due anni."
Se qualcuno trovasse una nave vera con un boma alto circa 2,70 metri dal deck potrei smettere di essere contrito e rammaricato per l'insuccesso. Ma non credo che possa esistere.
Good evening everyone.
I wanted to let you know about a very important error in my ship model.
Those who want to build naval models refer to existing kits or projects created by professionals or manufacturers, but it happens that on some details it is possible to refer to existing scale models.
For this reason I point out an error that was pointed out to me by Johan so as not to mislead (even if unintentionally) any modeller who observes my model.
Johan (like the gentleman he is) pointed this out to me in a private message instead of in the forum.
I think it is important that the error is known so I report my response to the observation that Johan made to me.
"Hi Johan.
Yesterday I was preparing an answer that I had to completely change because you made me discover something disconcerting.
Initially I had positioned the boom much lower, because according to my calculations it had to be there.
Furthermore, I had used templates measuring 3 cm tall to simulate a 1.80 m tall sailor.
Some time ago I realized that that height was too low (in reality it was a huge mistake that I still can't understand today) and so I raised the trees by adding a small cylinder to the base.
As you can see in the photos I raised the boom, extending the mast from the base.
Until yesterday I was convinced that I had done well because 25 mm seemed too little to me.
A 1.5 meter boom would have been too dangerous for the sailors.
I stretched it to 35 mm thinking that 2.1 meters would be an ideal measurement.
I say until yesterday because yesterday, looking for the photos and thinking about the explanation to give you, I realized the huge mistake I made.
Instead of taking the measurement from the deck to the boom I took the measurement from the deck to the first ring.
Now the boom is actually too high.
I can't stomach this mistake.
But what's worse is that I did it right initially and I also wasted a lot of time editing it.
How did I make such a trivial mistake? Why did I get this blunder? I had done everything right.
With this error I decreased the sail (or I raised the sail center with the same sail) but this doesn't matter to me, what's bad is that such a high boom is technically inconsistent for any era.
I have to say that I always had the feeling that something was wrong.
More a matter of taste and sensation than anything else, but I was calm (until yesterday) because I remembered having measured well.
I immediately thought about how I could fix it, but this time it's even more complicated than the mistake on the shrouds.
I would have to cut all the standing rigging and all the running rigging and try to reattach them to the top so as not to do them again.
This way I could remove the tree that isn't glued.
But it's not enough, I would have to redo the jib because it would be tilted and the base would no longer be parallel to the deck.
Also I would have to redo the mast base.
I thought there was only one mistake, that is, the bowsprit was too long, but instead I have to put up with this too.
The bowsprit was already a big disappointment because I had initially calculated it to be shorter.
For two reasons: one practical: the naval model would have been shorter and would have fit in any car trunk.
The second reason is that such long bowsprits with a single spindle did not exist.
After a certain length it was necessary to join two spindles.
These are not compromises for RC navigation, but they are very bad errors. I'm considering what to do. Doing it all again would set me back two years."
If someone found a real ship with a boom about 2.70 meters high from the deck I could stop being contrite and regretful about the failure. but I don't think it exists.
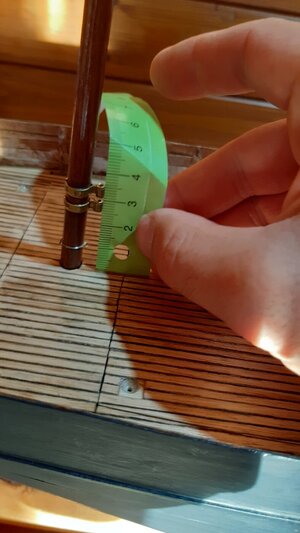
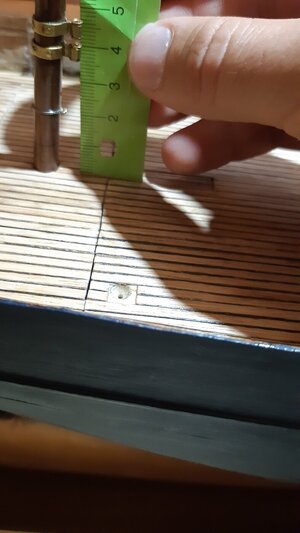


- Joined
- Sep 22, 2023
- Messages
- 173
- Points
- 143

Un saluto a tutti i modellisti.
Ho pensato che l'unico modo per non rifare tutte e due le "Gaff Sail", tutti i cerchi, e tutte le manovre è attaccare un pezzo di vela sotto.
La linea trasversale di cucitura non mi preoccupa perchè può sembrare realisticamente la parte da terzarolare.
Il problema sarà l'attacco del boma (che avevo incollato, inchiodato e saldato).
Ho pensato di preparare l'aggiunta della vela, vedere se mi convince, provare ad unirla. Se anche così la cosa va bene, prenderò coraggio e procederò con le rotture.
Nel frattempo mi sto dedicando ai cannoni, anche se molto lentamente.
Progettare e costruire le scialuppe di salvataggio sarà molto più divertente, ma anche questo lavoro sui cannoni è piuttosto impegnativo.
Per quanto riguarda la scelta dei cannoni, non è stato facile.
Sono pochi i modelli in scala copiabili di quel periodo e quei pochi che li costruirono prestarono poca attenzione ai cannoni, sembrano essere il punto debole, l'elemento più vicino.
Le case modellistiche (almeno quelle italiane o conosciute in Italia) non hanno nei loro cataloghi nulla che si avvicini ad esso.
C'è molto materiale per i periodi precedenti e un po' per quelli successivi.
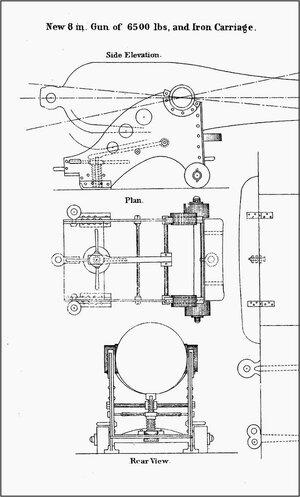
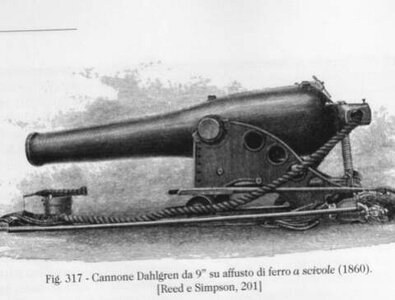
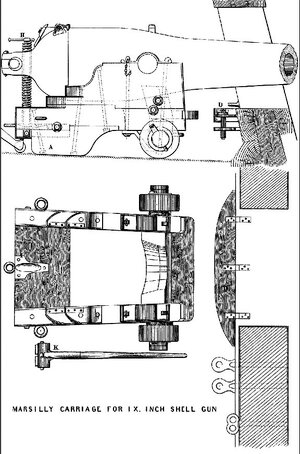
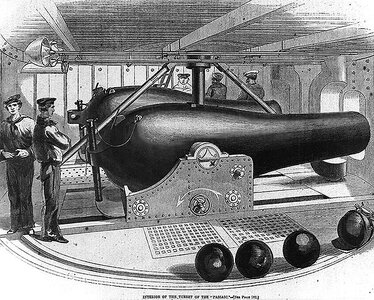
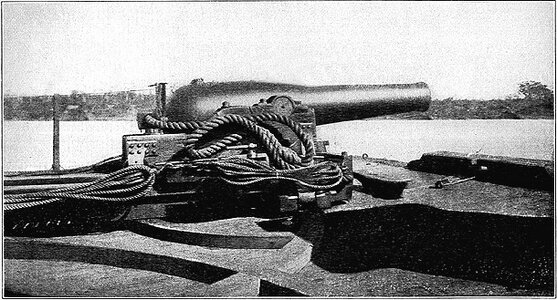
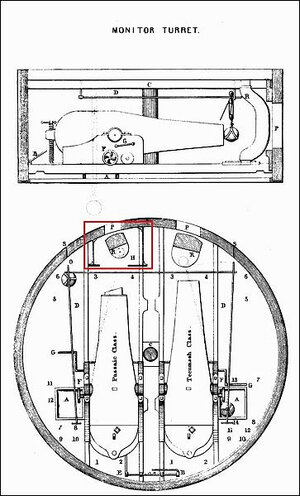
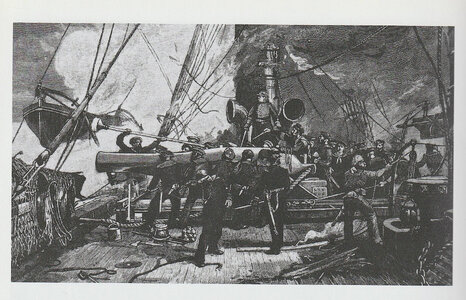
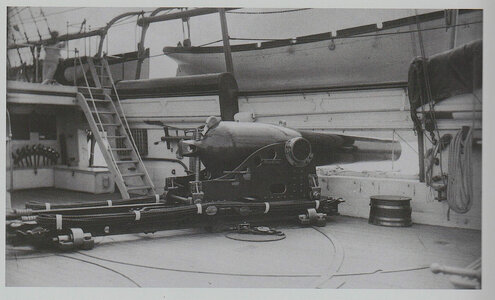
Dopo varie ricerche ho deciso di utilizzare i cannoni Dahlgren visti nella prima immagine.
Molto tempo fa ho disegnato le canne di vari calibri e le ho stampate in ABS (o PLA, non ricordo più).
Durante la costruzione mi sono reso conto che mettere un grosso calibro in caccia o a centro nave come previsto avrebbe rappresentato troppi problemi, alcuni dei quali per me insormontabili in quanto il modello è un RC con vele funzionanti.
Decisi quindi di mettere otto fucili solo in batteria e tutti dello stesso calibro.
In questo modo ho rinunciato a quelli di grosso calibro che avevo già stampato.
Quelli di grosso calibro, come potete vedere nelle foto, sono meno affusolati ma comunque molto diversi ed originali rispetto ai modelli dei secoli precedenti.
Ho provato a rifare la canna del cannone nel miglior modo possibile (purtroppo senza alcuna misura e all'inizio solo con una foto prospettica) copiandola dalla prima immagine allegata.
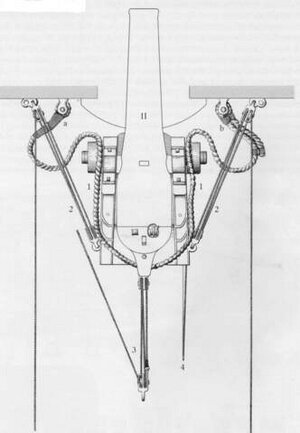
Poi, col passare del tempo (forse perché internet ha ceduto alle mie insistenti ricerche ed è stato più generoso con le immagini) ho trovato qualcos'altro che vi mostro in allegato.
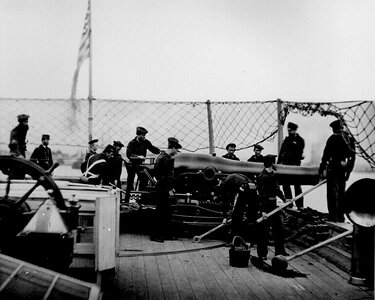
In questo post vi mostrerò le immagini che sono fonte di ispirazione per i miei disegni.
Nei messaggi successivi vi mostrerò i disegni che ho realizzato, poi le canne e poi come sto attualmente lavorando con gli affusti.
In questo settore i nostri amici americani dovrebbero conoscere l'argomento meglio di chiunque altro.
Greetings to all modelers.
I thought the only way not to redo both "Gaff Sails", all the circles, and all the maneuvers is to attach a piece of sail underneath.
The transversal stitching line doesn't worry me because it can realistically look like the part to be reefed.
The problem will be the boom attachment (which I had glued, nailed and welded).
I thought I'd prepare the addition of the sail, see if it convinces me, try to join it.
If things go well even then, I will take courage and proceed with the breakups.In the meantime I'm dedicating myself to cannons, albeit very slowly.
Designing and building the lifeboats will be much more fun but this work on the cannons is also quite challenging.
As for the choice of cannons, it was not easy.
There are few scale models from that period that can be copied and those few who built them paid little attention to the cannons, they seem to be the weak point, the closest element.
The model houses (at least the Italian ones or those known in Italy) don't have anything in their catalogs that even comes close to it. There is a lot of material for the earlier periods and some for the later ones.
After various research I decided to use the Dahlgren cannons seen in the first image.
A long time ago I designed the barrels of various calibers and printed them in ABS (or PLA, I don't remember anymore).
During construction I realized that putting a large caliber in the fighter or amidships as expected would have represented too many problems, some of which were insurmountable for me as the model is an RC model with functional sails.
Therefore I decided to put eight guns only in battery and all of the same caliber.
In this way I gave up on the large caliber ones that I had already printed. The large caliber ones, as you can see in the photos, are less tapered but still very different and original compared to the models of previous centuries.
I tried to redo the cannon barrel in the best possible way (unfortunately without any measurements and at the beginning only with a perspective photo) by copying it from the first attached image.
Then, as time passed (perhaps because the internet gave in to my insistent searches and was more generous with images) I found something else that I show you in the attachment.
In this post I will show you the images that are a source of inspiration for my drawings. In subsequent messages I will show you the drawings I made, then the barrels and then how I am currently working with the carriages.
In this sector, our American friends should know the subject better than anyone.
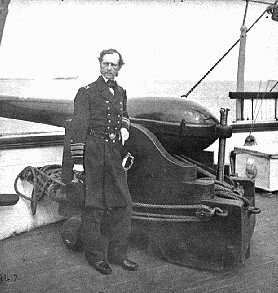


Last edited:
- Joined
- Sep 3, 2021
- Messages
- 4,256
- Points
- 688

That might be a good option, adding an additional strip of sail underneath the existing sail. A lot depends on how well you're able to "recover" from the existing sail installations. Simulating a reef line is a nice cover up.I thought the only way not to redo both "Gaff Sails", all the circles, and all the maneuvers is to attach a piece of sail underneath.
The transversal stitching line doesn't worry me because it can realistically look like the part to be reefed.
The problem will be the boom attachment (which I had glued, nailed and welded).
I thought I'd prepare the addition of the sail, see if it convinces me, try to join it.
If things go well even then, I will take courage and proceed with the breakups.

- Joined
- Sep 3, 2021
- Messages
- 4,256
- Points
- 688

Wow, that's quite a deep-dive into the canons of that particular era.Un saluto a tutti i modellisti.
Ho pensato che l'unico modo per non rifare tutte e due le "Gaff Sail", tutti i cerchi, e tutte le manovre è attaccare un pezzo di vela sotto.
La linea trasversale di cucitura non mi preoccupa perchè può sembrare realisticamente la parte da terzarolare.
Il problema sarà l'attacco del boma (che avevo incollato, inchiodato e saldato).
Ho pensato di preparare l'aggiunta della vela, vedere se mi convince, provare ad unirla. Se anche così la cosa va bene, prenderò coraggio e procederò con le rotture.
Nel frattempo mi sto dedicando ai cannoni, anche se molto lentamente.
Progettare e costruire le scialuppe di salvataggio sarà molto più divertente, ma anche questo lavoro sui cannoni è piuttosto impegnativo.
Per quanto riguarda la scelta dei cannoni, non è stato facile.
Sono pochi i modelli in scala copiabili di quel periodo e quei pochi che li costruirono prestarono poca attenzione ai cannoni, sembrano essere il punto debole, l'elemento più vicino.
Le case modellistiche (almeno quelle italiane o conosciute in Italia) non hanno nei loro cataloghi nulla che si avvicini ad esso.
C'è molto materiale per i periodi precedenti e un po' per quelli successivi.
Dopo varie ricerche ho deciso di utilizzare i cannoni Dahlgren visti nella prima immagine.
Molto tempo fa ho disegnato le canne di vari calibri e le ho stampate in ABS (o PLA, non ricordo più).
Durante la costruzione mi sono reso conto che mettere un grosso calibro in caccia o a centro nave come previsto avrebbe rappresentato troppi problemi, alcuni dei quali per me insormontabili in quanto il modello è un RC con vele funzionanti.
Decisi quindi di mettere otto fucili solo in batteria e tutti dello stesso calibro.
In questo modo ho rinunciato a quelli di grosso calibro che avevo già stampato.
Quelli di grosso calibro, come potete vedere nelle foto, sono meno affusolati ma comunque molto diversi ed originali rispetto ai modelli dei secoli precedenti.
Ho provato a rifare la canna del cannone nel miglior modo possibile (purtroppo senza alcuna misura e all'inizio solo con una foto prospettica) copiandola dalla prima immagine allegata.
Poi, col passare del tempo (forse perché internet ha ceduto alle mie insistenti ricerche ed è stato più generoso con le immagini) ho trovato qualcos'altro che vi mostro in allegato.
In questo post vi mostrerò le immagini che sono fonte di ispirazione per i miei disegni.
Nei messaggi successivi vi mostrerò i disegni che ho realizzato, poi le canne e poi come sto attualmente lavorando con gli affusti.
In questo settore i nostri amici americani dovrebbero conoscere l'argomento meglio di chiunque altro.
Greetings to all modelers.
I thought the only way not to redo both "Gaff Sails", all the circles, and all the maneuvers is to attach a piece of sail underneath.
The transversal stitching line doesn't worry me because it can realistically look like the part to be reefed.
The problem will be the boom attachment (which I had glued, nailed and welded).
I thought I'd prepare the addition of the sail, see if it convinces me, try to join it.
If things go well even then, I will take courage and proceed with the breakups.In the meantime I'm dedicating myself to cannons, albeit very slowly.
Designing and building the lifeboats will be much more fun but this work on the cannons is also quite challenging.
As for the choice of cannons, it was not easy.
There are few scale models from that period that can be copied and those few who built them paid little attention to the cannons, they seem to be the weak point, the closest element.
The model houses (at least the Italian ones or those known in Italy) don't have anything in their catalogs that even comes close to it. There is a lot of material for the earlier periods and some for the later ones.
After various research I decided to use the Dahlgren cannons seen in the first image.
A long time ago I designed the barrels of various calibers and printed them in ABS (or PLA, I don't remember anymore).
During construction I realized that putting a large caliber in the fighter or amidships as expected would have represented too many problems, some of which were insurmountable for me as the model is an RC model with functional sails.
Therefore I decided to put eight guns only in battery and all of the same caliber.
In this way I gave up on the large caliber ones that I had already printed. The large caliber ones, as you can see in the photos, are less tapered but still very different and original compared to the models of previous centuries.
I tried to redo the cannon barrel in the best possible way (unfortunately without any measurements and at the beginning only with a perspective photo) by copying it from the first attached image.
Then, as time passed (perhaps because the internet gave in to my insistent searches and was more generous with images) I found something else that I show you in the attachment.
In this post I will show you the images that are a source of inspiration for my drawings. In subsequent messages I will show you the drawings I made, then the barrels and then how I am currently working with the carriages.
In this sector, our American friends should know the subject better than anyone.
View attachment 425894
View attachment 425895
View attachment 425896
View attachment 425897
View attachment 425898
View attachment 425899
View attachment 425900
View attachment 425901
View attachment 425902
View attachment 425903
View attachment 425904
In this field I'm way out of my depth, so I wouldn't be able to say anything sensible about it. Still impressed by your research though.
- Joined
- Sep 22, 2023
- Messages
- 173
- Points
- 143

Buongiorno a tutti.
Grazie Johan dei tuoi interventi.
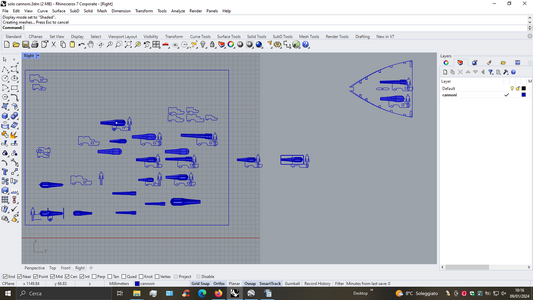
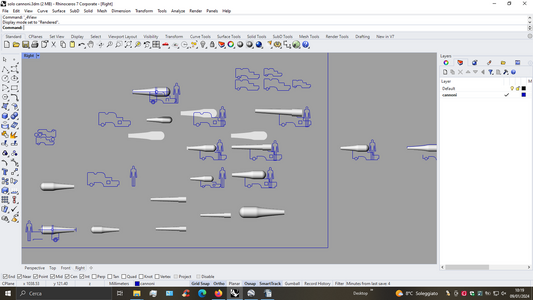
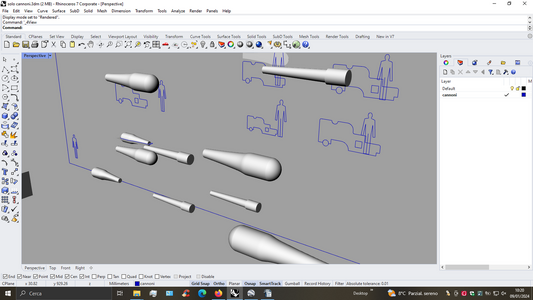
Nelle prime immagini potete vedere i vari disegni dei cannoni.
Ho provato varie forme e dimensioni in relazione ad un uomo alto 1,80 metri in scala 1/60.
Ho inoltre progettato e stampato diversi possibili affusti.
Alla fine ho deciso di utilizzare quelli della colonna evidenziati con un ovale giallo.
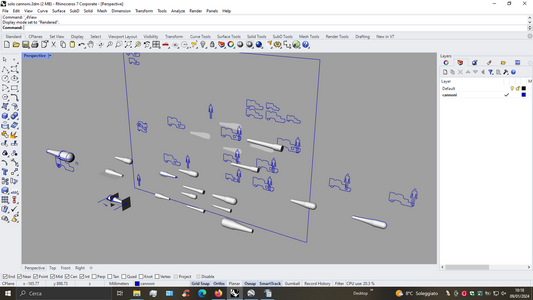
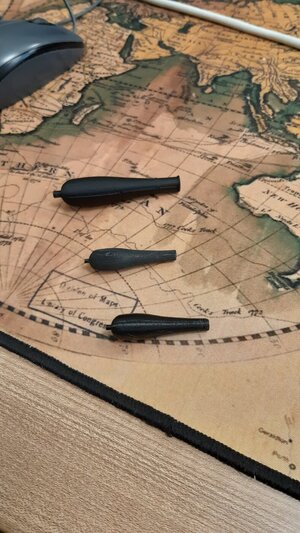
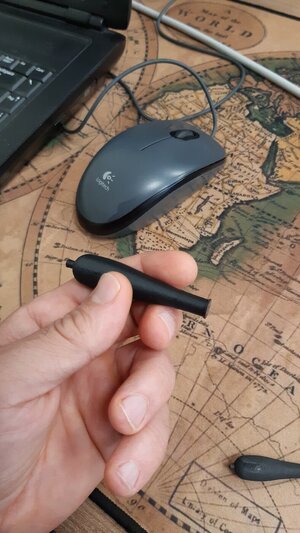
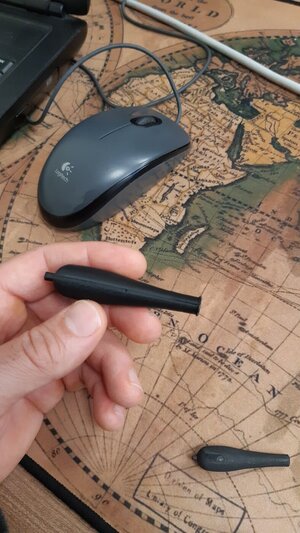
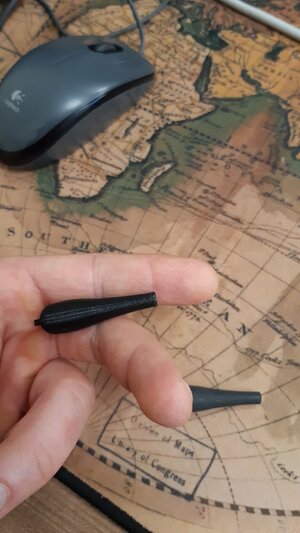
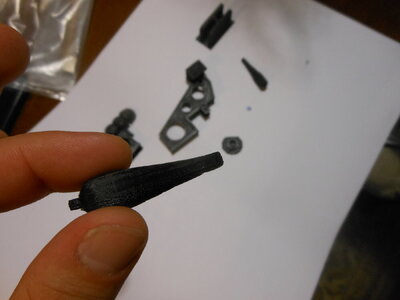
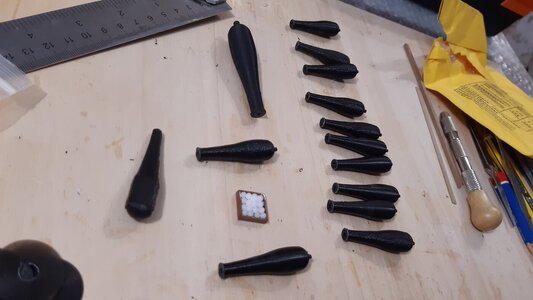
Nelle ultime immagini potete vedere le creazioni dei cannoni con la stampa 3D.
La qualità è scarsa, le zigrinature sono visibili e fin troppo evidenti (purtroppo la superficie non è liscia e dovrò carteggiarla prima di verniciarla).
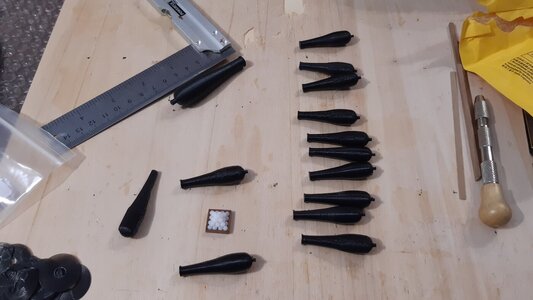
Avevo realizzato prototipi di diverse dimensioni pensando anche ai calibri più grandi da posizionare a centro nave o in caccia (non so quale sia la definizione giusta, intendo la posizione di prua capace di sparare anche frontalmente) ma poi ho rinunciato.
Adesso userò quelli che vedete nell'ultima foto, in particolare otto di quei dodici più piccoli che sono tutti uguali.
Mi sono sembrati i più vicini per forma, dimensione e proporzione alla foto di Dalghren in posa davanti al suo cannone.
Logicamente non lascerò il colore della plastica ma cercherò una vernice adatta.
Good morning everyone.
Thanks Johan for your interventions.
In the first images you can see the various designs of the cannons.
I tried various shapes and sizes in relation to a 1.80 meter tall man in 1/60 scale.
I also designed and reported several possible carriages.
In the end I decided to use those from the column highlighted with a yellow oval.
In the latest images you can see the creations of the cannons with 3D printing.
The quality is poor, the knurls are visible and all too evident (unfortunately the surface is not smooth and I will have to sand it before painting it).
I had made prototypes of different sizes also thinking about the larger calibers to be placed amidships or in fighters (I don't know what the right definition is, I mean the bow position capable of shooting also from the front) but then I gave up on them.
Now I will use the ones you see in the last photo, in particular eight of those twelve smaller ones that are all the same.
They seemed to me to be the closest in shape, size and proportion to the photo of Dalghren posing in front of his cannon.
Logically I won't leave the color of the plastic but I will look for a suitable paint.


Good work on the gun-muzzles -
did not know, that these ships had so much different calibers on board......
did not know, that these ships had so much different calibers on board......
- Joined
- Sep 22, 2023
- Messages
- 173
- Points
- 143

Ciao Uwek, Grazie.Good work on the gun-muzzles -
did not know, that these ships had so much different calibers on board......
Beh in riferimento alla sola classe USS Unadilla c'erano tre tipi di calibri diffrenti a bordo di ogni nave, così distribuiti:
1 × 11-in Dahlgren smoothbore
2 × 24-pdr smoothbore
2 × 20-pdr Parrott rifle
Prendendo in considerazione tutti i cannoni Dahlgren di quell'epoca, montati a bordo delle varie navi i tipi di calibro sono molti di più.
Tuttavia io ne ho fatti tanti solo perchè stavo facendo delle prove.
Erano quasi tutti da scartare.
Hi Uwek, Thank you.
Well in reference to the USS Unadilla class alone there were three different types of calibers on board each ship, distributed as follows:
1 × 11-in Dahlgren smoothbore
2×24-pdr smoothbore
2 × 20-pdr Parrott rifle
Taking into consideration all the Dahlgren cannons of that era, mounted on board the various ships, there are many more caliber types.
However, I made a lot of them just because I was doing tests.
They were almost all to be discarded.
Last edited:
- Joined
- Sep 22, 2023
- Messages
- 173
- Points
- 143

Ciao Johan.
Ho pensato che nel prossimo progetto inserirò emissione di fumo e suono della sirena antinebbia.
I cannoni funzionanti credo che sia troppo difficili per me.
Per questo modello non sono previste aggiunte.
Stop a pesi aggiuntivi.
Hi Johan.
I thought that in the next project
I will include smoke emission and fog horn sound.
Working cannons I think is too difficult for me.
There are no additions for this model.
Stop additional weights.
- Joined
- Sep 3, 2021
- Messages
- 4,256
- Points
- 688

Sounds like some wicked good ideas!I thought that in the next project
I will include smoke emission and fog horn sound.


