Willie Bennett Skipjack circa '30s build log- warts and all

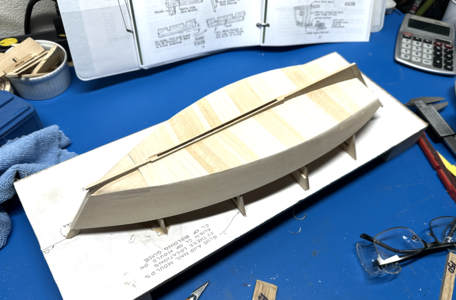
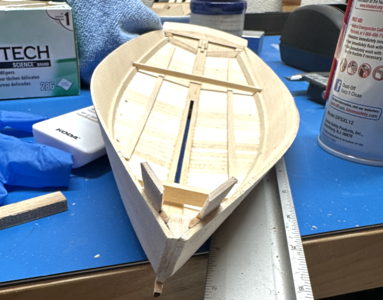
Got started on the bottom yesterday. it's pretty straightforward and fun, just set up a mitre on your cut or sanding and it goes quickly, making sure one side doesn't grow faster than the other.
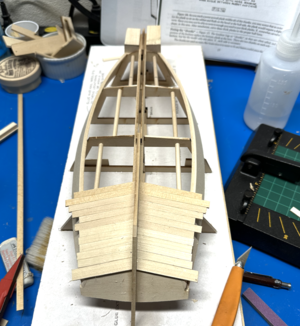
1685282956946.png
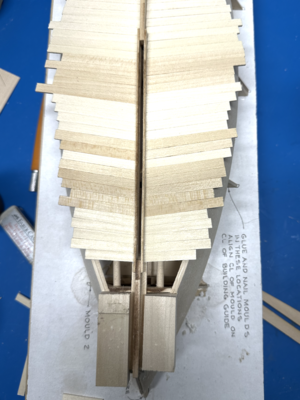
I got within range of the chunks and started changing the angle of installation...
Yeah, it's nice but looks a little too gradual.
1685283070185.png
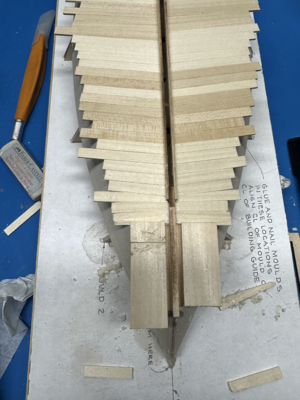
That smooth but noticeable change in the patter is typical of all the drawings I've seen of flatties and sharpies, so I did it again.
1685283155541.png
We'll see how it comes out.
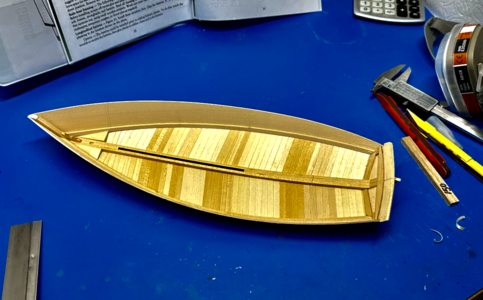
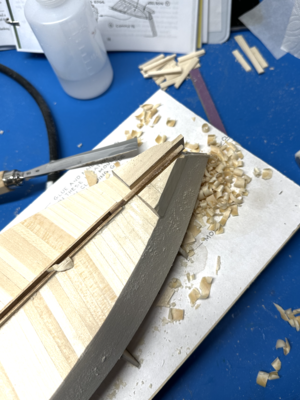
I think the extra time of backing up on the bottom planking to get the angles right was worth it. To me. Here I am literally chipping away at the chunks.
1685283288641.png
 
Got started on the bottom yesterday. it's pretty straightforward and fun, just set up a mitre on your cut or sanding and it goes quickly, making sure one side doesn't grow faster than the other.
View attachment 376620
I got within range of the chunks and started changing the angle of installation...
Yeah, it's nice but looks a little too gradual.
View attachment 376621
That smooth but noticeable change in the patter is typical of all the drawings I've seen of flatties and sharpies, so I did it again.
View attachment 376622
We'll see how it comes out.
I think the extra time of backing up on the bottom planking to get the angles right was worth it. To me. Here I am literally chipping away at the chunks.
View attachment 376623
Is that how the hull bottoms were built on the full size skipjacks?
 
You mentioned a novel about skipjacks? Have you read "Chesapeake" by James A. Michener?

Here's a bibliography put together by author Christopher White:

  • Beautiful Swimmers: Waterman, Crabs and the Chesapeake Bay (Back Bay Books, 1994) by William W. Warner.


  • Chesapeake Bay Log Canoes and Bugeyes (Tidewater Publishers, 1963) by M. V. Brewington


  • Chesapeake Bay: Nature of the Estuary-A Field Guide (Tidewater Publishers, 1989) by Christopher P. White


  • Chesapeake Bay Schooners (Tidewater Publishers, 1992) by Quentin Snediker and Ann Jensen


  • Chesapeake Bay Sloops (Chesapeake Bay Maritime Museum, 1982) by Thomas C. Gillmer


  • Chesapeake Bay Skipjacks (Tidewater Publishers, 1993) by Pat Vojtech


  • Chesapeake Sailing Craft, Part I (Tidewater Publishers, 1975) by Robert H. Burgess


  • Follow the Water (John F. Blair, 1961) by Varley Lang


  • Harvesting the Chesapeake (Tidewater Publishers, 1990) by Larry Chowning


  • An Island Out of Time: A Memoir of Smith Island in the Chesapeake (Vintage, 1997) by Tom Horton


  • Notes on Chesapeake Bay Skipjacks (Chesapeake Bay Maritime Museum) by Howard Chapelle


  • The Oyster (Tidewater Publishers, 1986) by Robert Hedeen


  • The Oystermen of the Chesapeake (International Marine Publishing, 1970) by Robert de Gast


  • The Oyster Wars of Chesapeake Bay (Tidewater Publishers, 1981) by John Wennersten


  • Skipjacks of the Chesapeake Bay (unpublished manuscript, 1967) by Curtis Applegarth


  • They Live by the Wind (Knopf, 1969) by Wendell P. Bradley


  • Tom Young’s Skipjacks (Evans-Coates, 1995) by Effie Young Lewis
 
Hi Bert,
Thanks for the encouragement and heads up. I’m not sure 6 months is going to be enough for me :) . I’ll try my hand at silver solder on some scraps around the place. I’ve been watching lots of YouTube on jewelry making and someone in the forum suggested an excellent book on the topic. Looks like this model is where I learn hands on.
Your model is fantastic! Nicely done, thanks for sharing. I have something to aspire to.
Regards,
Glenn
Hi Glenn:
Thanks for the follow-up. I'll look forward to seeing the building of the Skipjack as it progresses. Once again, if you have any questions that I could possibly help you with please let me know, as I had a few struggles of my own (and not the fault of the kit), but that's all part of the ship modeling journey!

Best regards, Bert
 
You mentioned a novel about skipjacks? Have you read "Chesapeake" by James A. Michener?

Here's a bibliography put together by author Christopher White:
Wow! Amazing list. All of the building stuff that I read was very interesting, to a point. You have to get in there to figure out what's going on. In Howard Chappele's note, there's some great shirt stuff about the changes in the harvesting rules, the oyster police, and how some captains emptied out the bars to man their ships. Definitely a novel in there somewhere.
Thanks for sharing this! I'll pick one or maybe two. I think I might be done with the model before I finish the list :)
 
Isn't it amazing that you think you will get more time in the shop with the long weekend, but in the end get less? I'm not so hardcore as to begrudge time with family over Memorial Day.
 
Finally complete on the building jig!
1685457701869.png
Note: the instruction manual is in a binder, out in plain view most of the time. I recommend it. What you pay for in this kit are the manual, the plans, and a pile of basswood and birch that could be adapted to the purpose, saving you a full-on scavenger hunt. This is like a scratch build but with excellent, if challenging, instructions and hyper detailed plans. Almost all of the detail sections on that plan sheet are mini- or not so mini-projects.
 
Ok, I'm much better after the big CRACK!

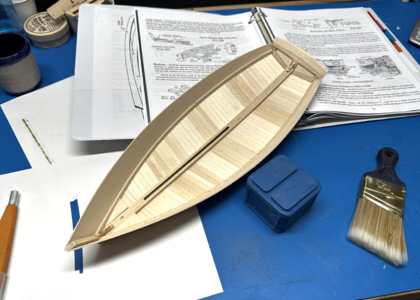
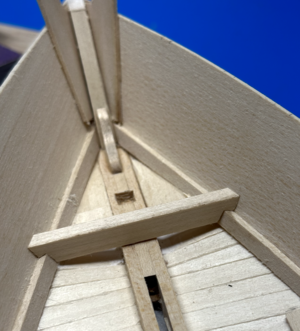
It was time to take the skipjack hull off the moulds and I cut the stem and stern post. Then I began the process of jiggling the frame to loosen up the little bits of extra glue that held the hull to the moulds. Inevitably though, you have to go for it and pull. And I forgot that, it seems, for all of these models built upside down on a frame that when it lets loose, you get a big CRACK! sound, making you think you ripped the guts out of the poor thing. But further inspection revealed it was in one piece. I have to remember it's just part of the process. I've heard it twice before and it's never fun, but then you are sitting there holding this really cool thing you made.
1685458390324.png

I did warn you this was going to be a bit basic, but hopefully it will either bring back fond memories of early in your modelling career or save you from the panic of the big CRACK!
 
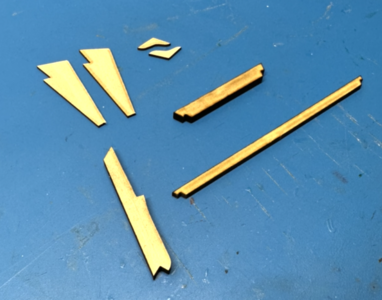
Back to the laser cutter for a couple of pieces that might benefit from the good shape fidelity and avoid the easy-to-mess-up symmetry. Specifically, I cut the knightheads for the bow and the quarter knees for aft out of 1/16" sheet, the aft strongback out of 1/8", and then stem and forward strongback out of 3/16". I could have carefully fashioned these, but I am so far along making paths to grab shapes from the plans that it's just easier and faster. Lots of smoke on this one, especially with the 3/16". The laser is supposed to cut thicker as well. It's amazing what you can do with a 10W violet laser and an inexpensive gantry. Amortized across multiple builds, I think it was a good investment. That, and all the time spent learning Illustrator and Lightburn. You don't have to be good in advance, but you do have to commit.

Anyway, again, not traditional fabrication. I do intend to build below deck as it would have been built. Then again, let's see what happens when I get in the thick of it.
1685459088958.png
 
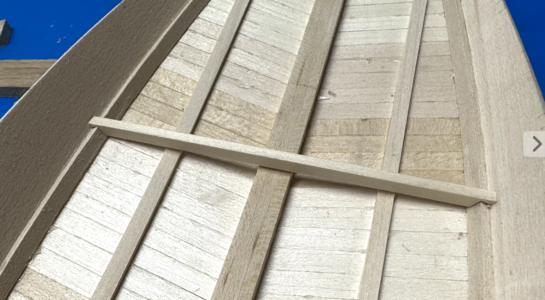
I spent a huge amount of time drawing the deck beams for the laser cutter. For some reason I drew them 3/16" deep with notches 1/8" deep. Of course i was going to ask the question to the forum and went back to triple check the plans (better to look with your eyes than your mouth). There is was, plain as day. beams and carlins are all 4"x 4". Crap. At least I figured out how to do it. But 1/16 " overhang doesn't seem strong enough for all the building you have to do above it. Oh well, this seems like a good time to be a slave to the plans.
 
Glenn, I bought three of the books you mentioned as I knew nothing about the history of the Chesapeake Bay and the Skipjack fishing industry. I'm enjoying your build and how you are learning as you go along. Have fun! Magic Mike
 
Glenn, I bought three of the books you mentioned as I knew nothing about the history of the Chesapeake Bay and the Skipjack fishing industry. I'm enjoying your build and how you are learning as you go along. Have fun! Magic Mike
That's great! I hope you enjoy them as much as I did. And I got a fantastic overview (and more detail than i could understand) in Chapelle's Boatbuilding. Also, i don't know if you saw the incredible bibiography billcanoe put together above.

Thanks Mike, I'll try to keep progress coming.
 
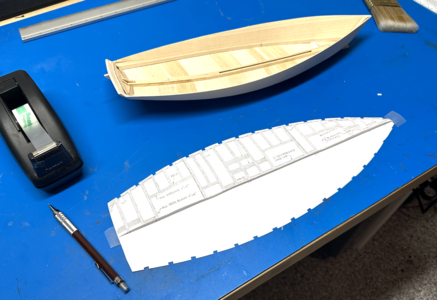
I'm getting ready to put in the inner structure of the ship. One challenge is going to be getting all the frames and the deck beams where they need to be with some accuracy. I made a copy of my plans at Kinko's (not cheap but worth it I think) and cut out the view from above with the frames and deck beams shown. I got a sheet of extra large card stock and taped it on, cut around it, excluding the ship side to get closer to the frames, and then notched out the frames. I flipped it over and did the same. I ended up with a nice template. I am keeping the printout because once I've confirmed I have the frames, I'm going to cut further to find where I need to notch the clamp for the deck beams.
1685628693889.png
 
WART ALERT!
Well, it looks like laser cutting finally bit me in the keyster on a couple of parts. I lifted the shapes for the strongbacks directly from the plans, but they aren't long enough. I think maybe they are viewed from the side with the shortest dimensions and the curvature wasn't taking into account when I lifted them. Looks like I got "burned" :).
After realizing the mistake last night, I was going to just install the knees and hope it didn't show. I slept on it and I don't think i could handle knowing it was there below deck. I'll remeasure, adjust, and re-cut. I was going to do it the old fashioned way this time, but just sheet stock to fabricate the part, I figure it will look a lot cleaner on the cutter. I have a beat up jig saw (don't buy shop tools from Lowe's, long story) but now hobby table saw. The cutter does both for me straight from the plans. But you really have to think ahead with the plans.
1685629754145.png
1685629798402.png

The whole experience with transferring the plans for these strongbacks has me really nervous. I have spent many hours carefully drawing all the deck beams, applying the camber on the plans, getting all the notches in, setting up an etch for the carlins. If that stuff doesn't fit... I cut one from paper and it seemed to be on the money. Maybe it's a good time to cut some more, now that I am closer to having the clamp notches laid out. Hope this isn't a gigantic wart.
1685630101687.png
Most of the wat through drawing all the deck beams and carlins. I am cutting some paper today to test.


On the upside, the knightheads finished up nicely. But again, I cut per the plan and I had to do a lot of shaping of the overall part, not just the bevel.
1685630338470.png
 
Time to catch up my log a little...

I re-cut the two strongbacks to see if I could do a little cleaner and crisper. It only takes the setup time to run another cut. I made sure to primarily use a knife rather than sandpaper. I am finding that, although a little more high stakes, the knifes and chisels give you a much cleaner and crisper look. And the laser cutter has given me lots of redos. I think everything under the deck on Willie Bennett is practice, unless you want to leave up planks. I've decided I'm going to seal mine up.
1686318669585.png
1686318709785.png
 
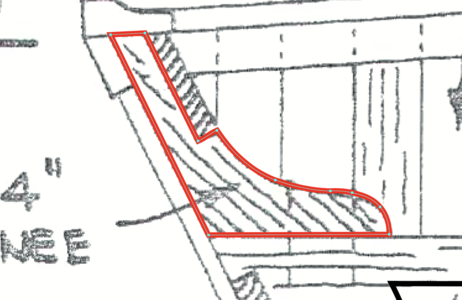
A word about the knees. I cut them from the plans but they weren't really wide enough to shape properly. Also, the notch for the clamp was too low. Maybe my hull isn't shaped corrrectly, but I think I need a new part to make it right.
1686319042908.png
My first cut of the knee. View is looking aft, should be widest view

1686319200586.png
Original part in red, new part in green. The oversized areas are easily shaped in basswood.

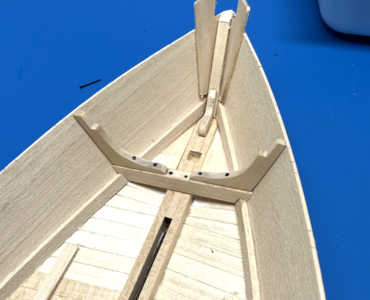
I'm happier now. I put in some nail heads that were already blackened for another project to simulate bolts. Drilled out the knees with a little drill press before installed to get it to look about right. Darker patches on the wood aren't the nail heads. I tried to get the char off with a silicon polishing wheel as recommended on this website. It was a blow out and incorporated some color into the wood that was very hard to sand out without reshaping. I was happy enough with the treatment to avoid another part cutout. I'm going to install the tie rod later.
1686319384116.png
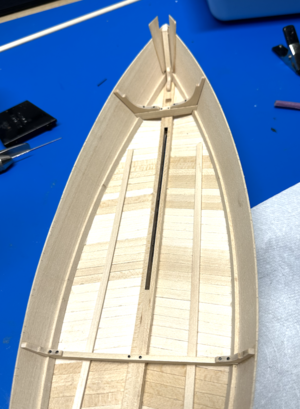
Forward strongback with knees
1686319605608.png
View of both strongbacks. Bizarre lens effect, distorting the lines. Don't worry, this hull is pretty fair.
 
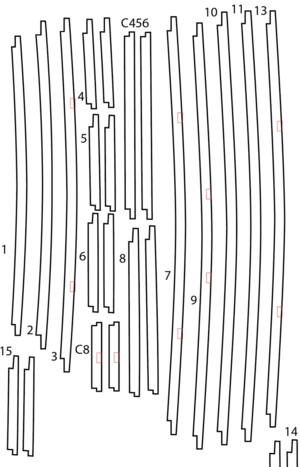
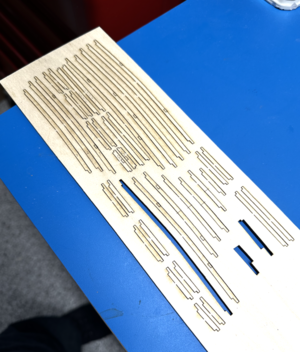
It took a week and lots of learning on Illustrator to draw all the deck beams, but I did it. Here is the cut form.
1686319737968.png
Frames with cuts for carlings on 1/8" sheet stock.
I included a layer for carlings I drew as well. I'll cut at lower power to cut halfway through so I can just chip out the notch. At least that's the plan. It took a lot of time, but I figured there wasn't going to be a lot of good alternative to getting the curved beams other than a ton of cutting and sanding. It still took a week though, so not totally lazy, drawing the camber properly took quite a bit of fussing.

There are no numbers on these parts. Apparently you have to outline the text path in Illustrator to see them. I got it write on a cut for another piece.

I already stole beam 16, it's the one that the forward bulkhead is built onto. I'm going to need it for the centerboard case.

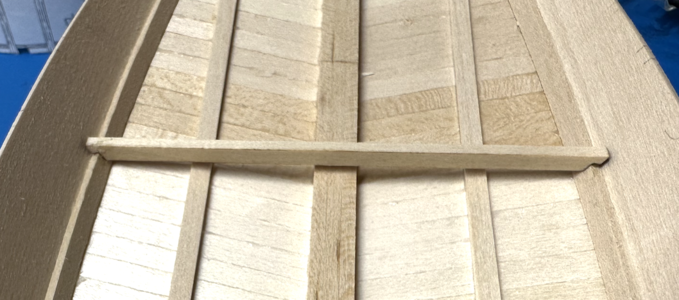
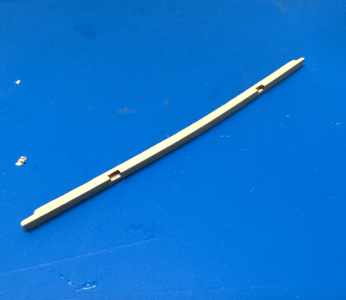
It came out really well. I got lucky on the laser power for the carlings cut layer, almost perfectly half way through. Cutting the notch was inserting the knife and flicking the scrap away. Took me a lot longer with the char than it did the notches.
1686320593061.png

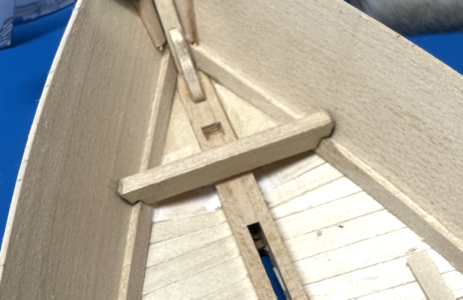
The beam is a bit wide athwartship, but is easy to modify with a knife. And I think all of them are going to get some shaping once all the beams are in place.
 
Back
Top