Hello Members,
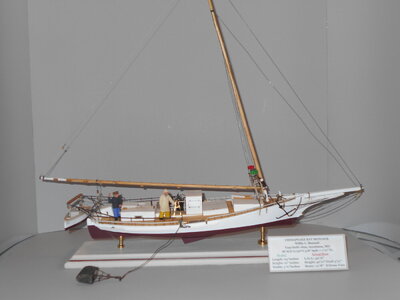
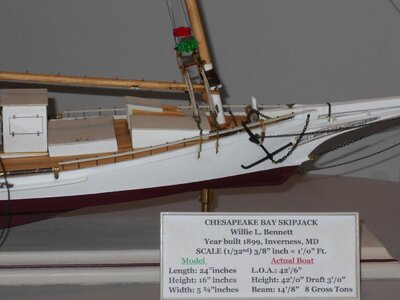
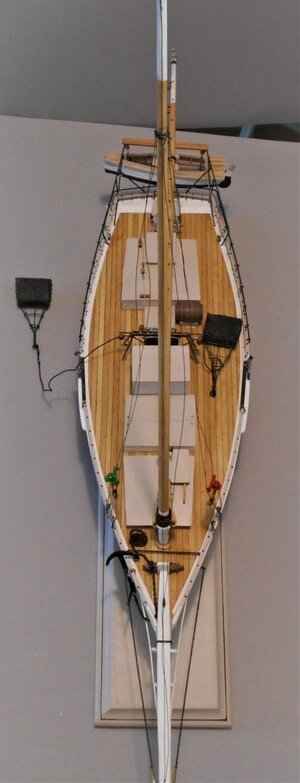
I've decided that my next model is going to be of the Skipjack Willie Bennett. The kit is by Model Shipways. This is my first build log, so please be gentle. Ah, everyone is super supportive here, I'm not worried.
A little about my experience with the hobby thus far. My first model was the Niagara from Model Shipways. I did some surprisingly nice work here and there, but I was in over my head. I tried another model of the same caliber but that never got to the finish line either. Along the way I learned a lot, and accumulated a lot of do-dads and funky tools, etc... I put the hobby down for about 8 years. I got rid a lot of my stuff and considered giving Niagara a fireship burial at sea.
During COVID, I became more interested and decided to start again. I ordered the Gunboat Philadelphia. Not super hard and I was doing a nice job, even learned how to splice rope to make some great stropped blocks (the trick is beeswax). But I had a disagreement with a can of stain and that was that. I wasn't thinking far enough ahead on the build, rookie mistake. I finally decided I needed to back up and start from the start.
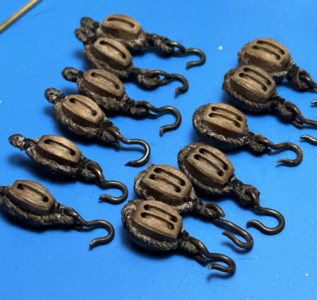
(Blocks to rig the guns on Gunboat Philadelphia. I made SO many hooks to get the shape and size right (literally months) and taught myself a full-sized short splice and then worked forever on doing it at scale, giving up many times. I still have my first successful splice I made before making a looped splice and plan to keep it in a place of honor. The blocks are 9mm)
I decided to build the set of boats in the Model Shipwright's series, David Antscherl's tutorial series from Model Shipways. With the extra detail and smaller scope, I was able to make some pretty fantastic model (IMHO). One advantage -besides Mr. Antscherl's detailed instructions- were all the pre-cut parts. I'll get back to that. I'm also competent with an airbrush, which helps a lot.
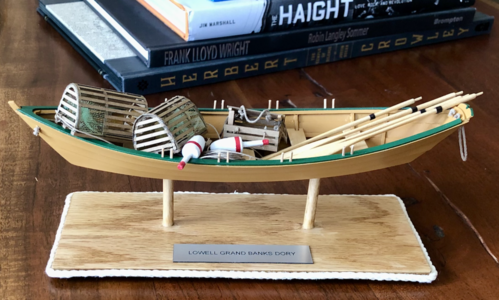
(Grand Banks Dory from MS. I turned those lobster trap buoys out of birch, much to the detriment of my patience and sanity)
So I considered a lot of boats/ships I could build. I don't think I'm ready for a tall ship quite yet. Of the successful series, I had built 2 out of 3 work boats. American work boats. The dory and Muscongus Bay Lobster Smack were both well documented in the 30's-50's by Howard Chapelle. Plans for the Lobster Smack are available from the Smithsonian for $10 a sheet, and, of course, I got it. I bought a copy of "American Small Sailing Craft" by Howard Chapelle (WW Norton & Co., 1951), cheaply online from a used book site and I was hooked on the small American workboats. Along the way I met the bateau (p 80) and the skipjack (p 323). I remembered that MS had a skipjack kit and decided since I was probably going to need a kit for my next build, I could do a bit of research on the type and maybe even the ship's namesake.
I was really in luck on reading material. I backed up a bit and got another great book on the cheap, Chappelle's "Boatbuilding" ( WW Norton & Co., originally 1941). I learned the major construction differences amongst classes of craft and studied the V-Bottom construction carefully. I downloaded the instructions for MS's Willie Bennett and decided I would get my money's worth in building a model like it was built at scale, an early achievement in my hobby career, even if most of the authentic detail would be hidden. I was able to find Chapelle's plans for Willie Bennett at the Smithsonian, adding to the excitement. I found another book, "Notes on Chesapeake Bay Skipjacks" (from the Chesapeake Bay Maritime Museum), also by Chapelle. It's a bit dry on construction minutia, but has some fantastic info and accounts on the interesting, and sometimes seedy, past of skipjacks. There's a novel there, I just know it. Finally, to better visualize what I was going to build, I found "Chesapeake Sailing Craft: Recollections of Robert H. Burgess" (Tidewaters Publishers, original 1975, expanded version 2005). This guy was in love with everything that floated in Chesapeake Bay and took some loving photographs of skipjacks. I was set.
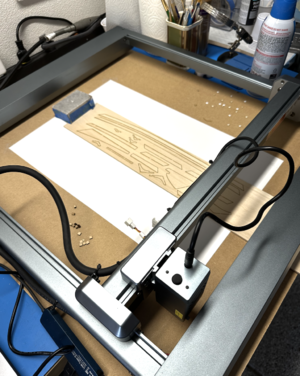
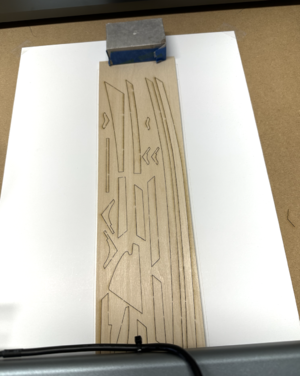
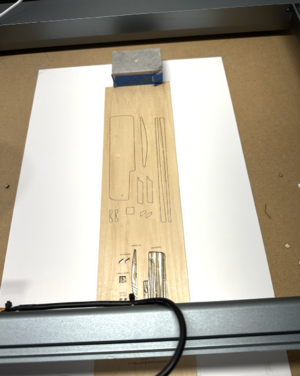
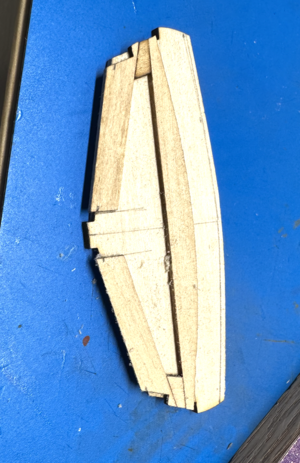
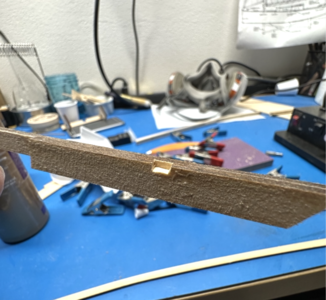
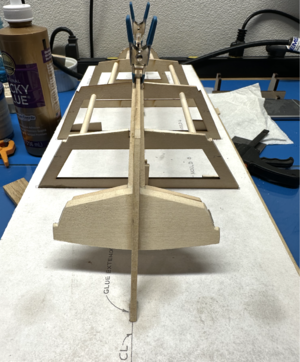
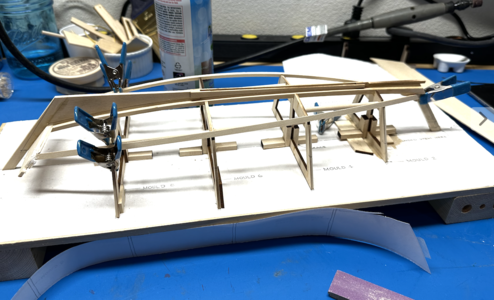
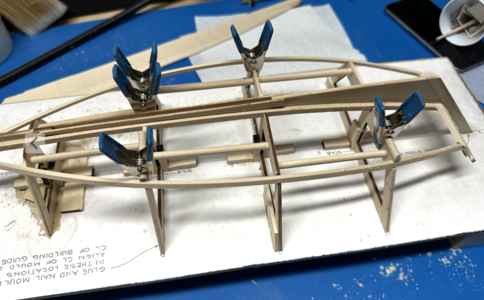
I got my model during all my reading. When I opened up the box, I realized that this was going to be much more challenging than I thought. It was mostly strips, a few narrow sheets, and dowels. There was one laser cut sheet with the parts to build up the keelson. And that cut sheet was not in the kit when it was originally released in 1995, the only update i could find. I had asked for building as per original construction techniques and, with a few cheats here and there, I got it.
I am really excited about enjoying building this model and having Willie Bennett on my shelf someday. It's got everything: lots of wood fabrication, plenty of soldering and metal work, needs to be airbrushed for best effect, the chance to build internally metal stropped blocks, etc.. I've already reached out on this forum to clarify some details before I started and got some great advice and pictures. I titled this build "warts and all". I see so many fantastic models on this sight that magically were perfect in between steps. I'll try to be honest about snags and areas of confusion without trying to draw to much attention to the flaws that i will carry through. I have to believe that areas I struglle with are spots where either people have advice or others have stumbled as well.
So, thanks for your interest and buckle up.
I've decided that my next model is going to be of the Skipjack Willie Bennett. The kit is by Model Shipways. This is my first build log, so please be gentle. Ah, everyone is super supportive here, I'm not worried.
A little about my experience with the hobby thus far. My first model was the Niagara from Model Shipways. I did some surprisingly nice work here and there, but I was in over my head. I tried another model of the same caliber but that never got to the finish line either. Along the way I learned a lot, and accumulated a lot of do-dads and funky tools, etc... I put the hobby down for about 8 years. I got rid a lot of my stuff and considered giving Niagara a fireship burial at sea.
During COVID, I became more interested and decided to start again. I ordered the Gunboat Philadelphia. Not super hard and I was doing a nice job, even learned how to splice rope to make some great stropped blocks (the trick is beeswax). But I had a disagreement with a can of stain and that was that. I wasn't thinking far enough ahead on the build, rookie mistake. I finally decided I needed to back up and start from the start.

(Blocks to rig the guns on Gunboat Philadelphia. I made SO many hooks to get the shape and size right (literally months) and taught myself a full-sized short splice and then worked forever on doing it at scale, giving up many times. I still have my first successful splice I made before making a looped splice and plan to keep it in a place of honor. The blocks are 9mm)
I decided to build the set of boats in the Model Shipwright's series, David Antscherl's tutorial series from Model Shipways. With the extra detail and smaller scope, I was able to make some pretty fantastic model (IMHO). One advantage -besides Mr. Antscherl's detailed instructions- were all the pre-cut parts. I'll get back to that. I'm also competent with an airbrush, which helps a lot.

(Grand Banks Dory from MS. I turned those lobster trap buoys out of birch, much to the detriment of my patience and sanity)
So I considered a lot of boats/ships I could build. I don't think I'm ready for a tall ship quite yet. Of the successful series, I had built 2 out of 3 work boats. American work boats. The dory and Muscongus Bay Lobster Smack were both well documented in the 30's-50's by Howard Chapelle. Plans for the Lobster Smack are available from the Smithsonian for $10 a sheet, and, of course, I got it. I bought a copy of "American Small Sailing Craft" by Howard Chapelle (WW Norton & Co., 1951), cheaply online from a used book site and I was hooked on the small American workboats. Along the way I met the bateau (p 80) and the skipjack (p 323). I remembered that MS had a skipjack kit and decided since I was probably going to need a kit for my next build, I could do a bit of research on the type and maybe even the ship's namesake.
I was really in luck on reading material. I backed up a bit and got another great book on the cheap, Chappelle's "Boatbuilding" ( WW Norton & Co., originally 1941). I learned the major construction differences amongst classes of craft and studied the V-Bottom construction carefully. I downloaded the instructions for MS's Willie Bennett and decided I would get my money's worth in building a model like it was built at scale, an early achievement in my hobby career, even if most of the authentic detail would be hidden. I was able to find Chapelle's plans for Willie Bennett at the Smithsonian, adding to the excitement. I found another book, "Notes on Chesapeake Bay Skipjacks" (from the Chesapeake Bay Maritime Museum), also by Chapelle. It's a bit dry on construction minutia, but has some fantastic info and accounts on the interesting, and sometimes seedy, past of skipjacks. There's a novel there, I just know it. Finally, to better visualize what I was going to build, I found "Chesapeake Sailing Craft: Recollections of Robert H. Burgess" (Tidewaters Publishers, original 1975, expanded version 2005). This guy was in love with everything that floated in Chesapeake Bay and took some loving photographs of skipjacks. I was set.
I got my model during all my reading. When I opened up the box, I realized that this was going to be much more challenging than I thought. It was mostly strips, a few narrow sheets, and dowels. There was one laser cut sheet with the parts to build up the keelson. And that cut sheet was not in the kit when it was originally released in 1995, the only update i could find. I had asked for building as per original construction techniques and, with a few cheats here and there, I got it.
I am really excited about enjoying building this model and having Willie Bennett on my shelf someday. It's got everything: lots of wood fabrication, plenty of soldering and metal work, needs to be airbrushed for best effect, the chance to build internally metal stropped blocks, etc.. I've already reached out on this forum to clarify some details before I started and got some great advice and pictures. I titled this build "warts and all". I see so many fantastic models on this sight that magically were perfect in between steps. I'll try to be honest about snags and areas of confusion without trying to draw to much attention to the flaws that i will carry through. I have to believe that areas I struglle with are spots where either people have advice or others have stumbled as well.
So, thanks for your interest and buckle up.






 me to
me to

