Victory Models Kit Revenge 1577 Race Built Galleon scale 1/64

Good day ,
Dear Jim,
"...Edit: You will be surprised at the number of photos of models that rig the ship’s boat the way I did…my approach was not done in a vacuum…"
Yes , You and me as well :))) I would like to say, we were not alone in this fantastish attempts of boat store rigging... but... never again ! :)))
 
Last edited:
I have not posted a build log for some time so I thought it was time. I have started the Victory Models Kit Revenge 1577. It is a classic Race Built Galleon Warship of the Elizabethan Navy. I started the model six months back and set it aside to build a smaller model for my Granddaughter. She asked for a specific model. How could I say no. So this build log is starting after the typical keel and bulkhead construction is complete. Two decks are planked and installed. However, from here we can pick up the concept of the Victory Models kit construction and start progress comments and photo support. The kit itself is well stocked with parts, billets, and small parts. The wood is of high quality. Victory Models uses thin fiber board and plywood shapes as the base or "first planking." One then applies a second planking on the shape and install that on the model. The instruction booklet is photo driven. Short instructions with a photo of where and how the part is attached. There are also 20 sheets of plans that focus on specific sections and the build.

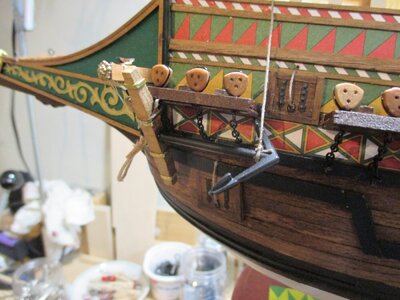
To get started here are a few introductory photos to illustrate the kit I am working with. Victory Models kits are high quality and they have a unique approach to model building.

View attachment 146319

View attachment 146320

View attachment 146321

View attachment 146322
Hallo Jim alias @danielsje
we wish you all the BEST and a HAPPY BIRTHDAY
Birthday-Cake
 
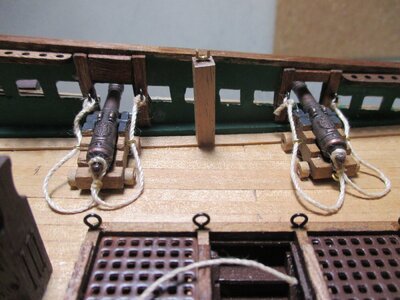
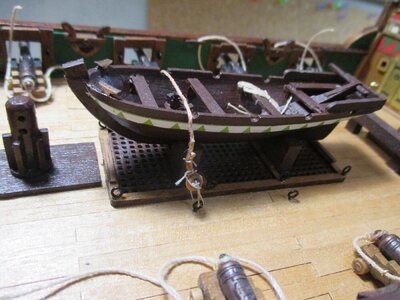
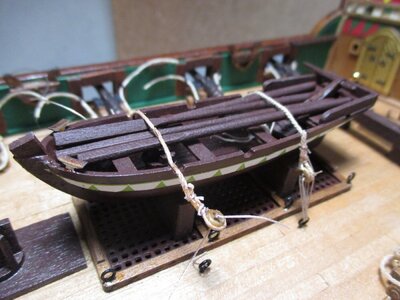
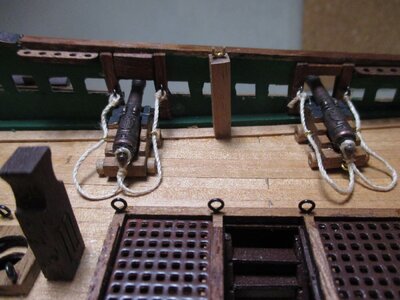
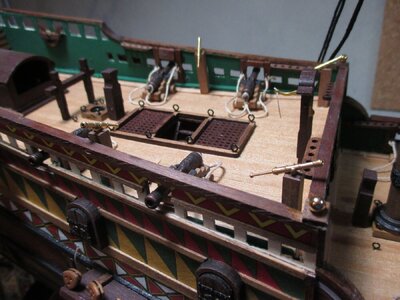
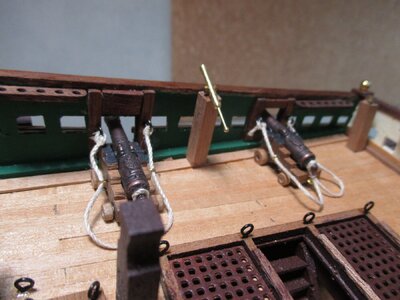
Thanks for the Birthday greetings! I am getting older than dirt! Here are a few updates as to where I am on the Revenge build. Into the final small details of the hull. I have already started getting out stuff to begin the masts and spars. I will build out as much of each mast as I can before mounting to the ship. Same with the spars. More on this later. After some research I discovered that it is common to tie the restraining ropes for the cannon carriage directly to the bulkhead ring with an overhand knot. Tie down rather than loop and seize or seizing on a hook. So I have been doing that. It is double tweezer work and easy but tedious with not much room to work up next to the bulwarks. This kind of work I tend to procrastinate getting it done. I am also rigging the tie downs for the ship's boat using deadeyes which also seems to be more historically correct thanks to the research posted by kirill4 above. This is proving a whee bit challenging since the tie downs and deadeyes are so small. One down...second to go. I mounted the port side anchor. Working on the starboard anchor. I think I will do the starboard anchor partly deployed rather than rigged up tight to the hull. I will report on how that goes later.

IMG_1745.jpegIMG_1747.jpegIMG_1749.jpeg
 
Thanks to Kirill4 for the fantastic research on securing ship's boats in the 1500's. I redid the rigging on the Revenge ship's boat...well...I am in the process of redoing the rigging. This photo shows that process. Not necessarily easy to thread out such small deadeyes but doable. Thanks Kirill4...awesome! Also…a lesson in not being reluctant to remove stuff and redo!

IMG_1764.jpeg
 
Last edited:
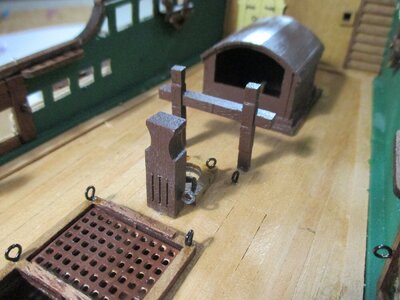
Here is a photo of some of the deck furniture to illustrate how I paint it. My favourite colour to paint out deck furniture is Burnt Umber. This is an earth tone colour that tends to provide a more realistic wood tone for darker wood. One can use Raw Sienna for lighter wood tones as well. But this photo shows how the Burnt Umber provides a darkened wood tone. I use acrylic hobby paints that one can get in hobby stores such as Michaels or Joann Crafts (in US).

IMG_1730.jpeg
 
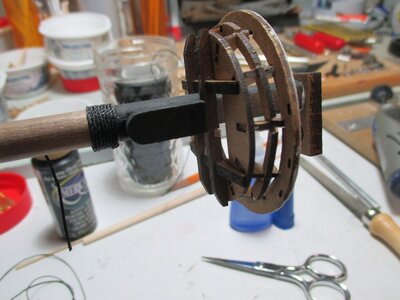
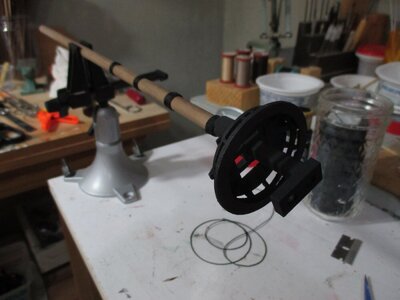
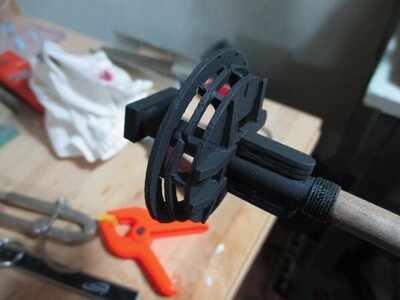
I made an awful mistake...in hindsight! Attached are some photos of the Main Mast Top construction. I started this as a distraction from finishing up the hull details (just have to rig up the starboard anchor). I followed the instructions for the mast top. It is an assembly of circular parts and small upright parts. The instructions say to glue four of the uprights to the base equal distance around the base platform to start. The mistake was gluing them in place. No way could I get them perfectly set to accept the notches in the upper two rings of the top assembly. So as I proceeded I found that the glued in uprights were in fact not aligned enough to slide the assembly rings into place so I ended up breaking the pieces and jury rigging the assembly...gluing the broken pieces back together as best I could.with gaps and slightly crooked in places. It looks OK to the eye right now but it is a total mess! So if any of you are facing a top assembly such as this do not glue anything in place until it is all assembled...then use CA thin to lock the assembly in place. I have a chance to redeem myself with the Foremast Top assembly which is identical. I will of course post how that goes!

Anyway...this is the beginning of the Main mast assembly. Calls for the top to be painted black which I did after the assembly was complete...paint covers many sins! Got started on the mast woldings as well. Next will be the top deadeyes, rigging blocks, and various chocks and stops, etc.


IMG_1753.jpeg


IMG_1761.jpeg


IMG_1763.jpeg
 
Danielsje, get some 1/16"x1/16" hardwood stick and glue the end into one of the notches. When dry, cut off the excess stick flush with the top's upper railing. Fill any gaps with sawdust mixed with PVA, and then paint the repair area black. The paint will fill and hide the seams. You won't see the unsightly gaps anymore, and the railing will appear without notches.

In other words, scratch build your way out of a problem, and take pride in your cleverness.
 
Daniel, I am slowly getting around to looking at what others are building who have been interested in my La Salamandre.

Revenge looks very interesting and you are doing a fine job building her. I am sure you will be able to fix the main mast and Kurt’s solution seems very practical. It wouldn’t be a “proper” build unless there were a few obstacles encountered along the way. I am looking forward to when you start the rigging in the near future.
 
Kurt…that actually gives me several ideas along the same very clever path! Layer onto the outer edge…hmmm…
A thin strip of veneer soaked in water would make the edge look great. It's a bit of futzing, but every little thing you do to a model adds to the WOW factor. You can add dozens of tiny details easily to any kit, because all kits are rather simplistic in details.
 
Last edited:
It's been a minute, huh, Jim. I have finally finished all of the hull details. Ready to move on with the masting and rigging in earnest. The first photo is similar to previous posts but just illustrates the finished details. I dithered about the brass finish on various parts. But I could not decide on an alternate finish that would look good...so I left them the original bright brass. The second photo is just a random shot of deck details...again, similar to previous posts.


IMG_1776.jpeg

IMG_1772.jpeg
 
Back
Top