Well, I have a comfortable chair and some snacks. Seems "The build" is now at hand. Reallyu looking forward to your process ...Thank You Shane. My plan is to start the Indianapolis when I complete the standing rigging on my 1803 Syren. I just completed the port main topmast ratlines and then the starboard today.
You are using an out of date browser. It may not display this or other websites correctly.
You should upgrade or use an alternative browser.
You should upgrade or use an alternative browser.
USS Indianapolis CA-35 1/350 scale by Academy (Will @ Trilogy)
- Thread starter Will @ Trilogy
- Start date
- Watchers 16
Having completed the Syren's standing rigging I'll start on the Indianapolis in the morning. With my limited recent experience building in plastic I've been watching youtube ship modeling videos and plan to follow a build of the Indianapolis by max_afterburner. His video lays out the order of construction and painting. So tomorrow its off we go.
I really will need all the help, comments and suggestions from the plastic modelers on the forum.
So tomorrow I start by drilling out selective port holes and now I come to my first question. The hull and upper sides are primed but I have PE (port holes with eyebrows) question should I put them on before priming?
Normally I would put the PE on before priming and painting. For the Superstructure I generally forego priming as it can cover over the finer more delicate details. So a good scub up (I use white vinegar) to get rid rid of any release agent. If you do use primer make sure to apply as thin a coat as possible... Looking forward to your progess. Cheers.
Will, I have watched many of Max Afterburner videos and have enjoyed them.
Can't wait to see your build!
Can't wait to see your build!
Thank you for the heads up adding pe before priming. I went back and reviewed the videos I bookmarked and yes they all add pe first. How could I forget.
Started the Indianapolis this morning, and while doing a photo shoot of parts and photo etch I've bought for this kit, some issues became noticeable.
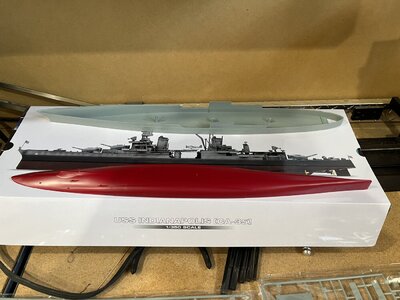
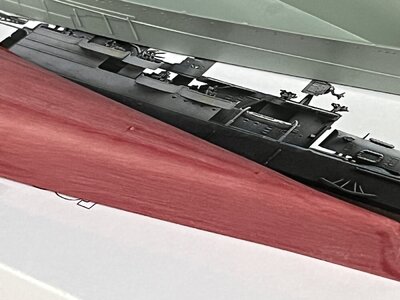
Lower hull (red) and upper hull on box lid.
Now the issues. I've read about sliding moulds but I'm not sure what they are so I'll just call these mould imperfections.
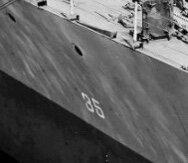
Bow showing imperfections
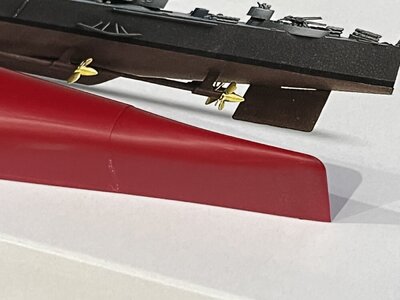
These are on both sides
After area imperfections
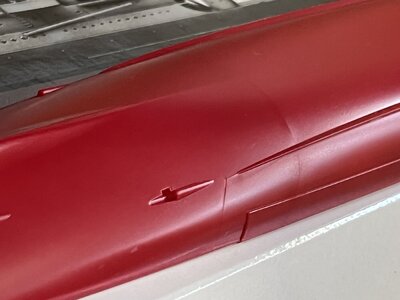
Thinking these are not to be visible I sanded them with 400 paper and then 1000 paper.
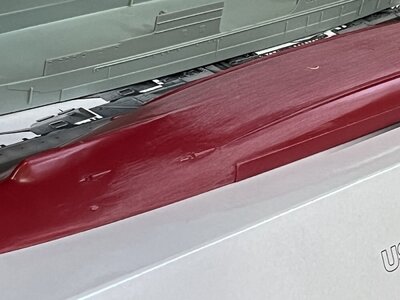
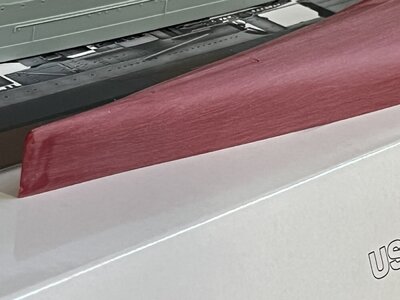
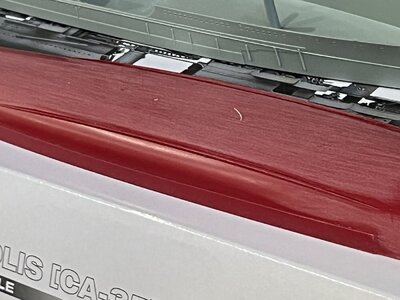
These are the 600 and before the 1000 which I hadn't finished. I might hit this again with 1500 paper to make sure of not sanding marks.
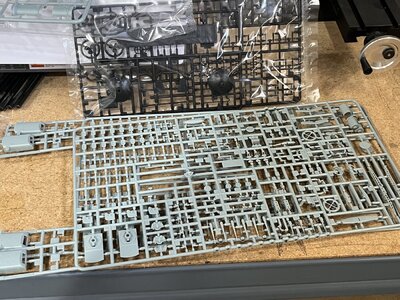
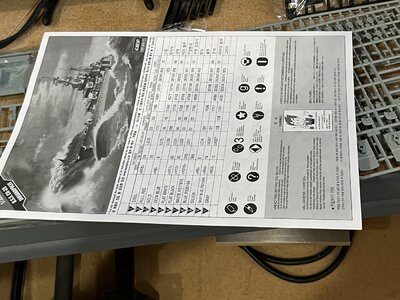
Here's kit sprue and the minimalist instructions
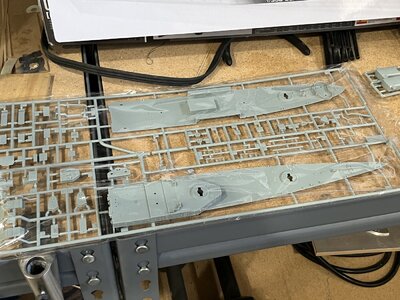
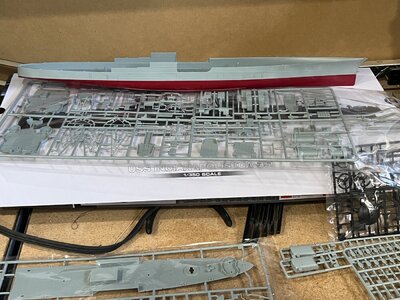
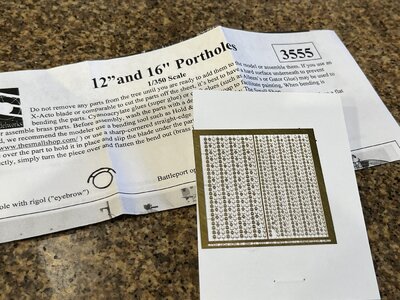
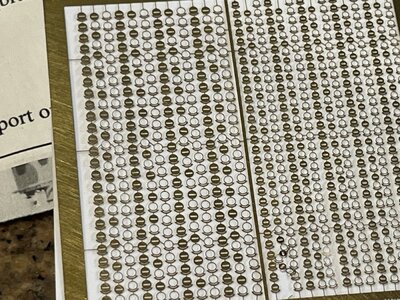
Next some photos of the pe for the Indianapolis realizing that much of the pe will not be used just bits and pieces.
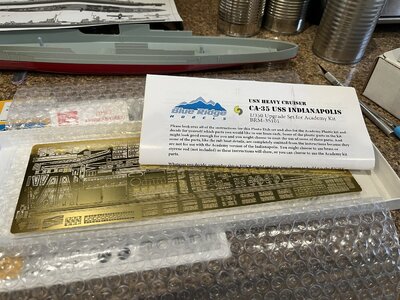
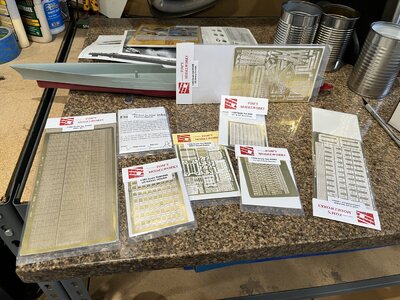
The Indianapolis has over 100 12" portholes in the lower hull and 40 or so 16" portholes in the uppers structures. I found Toms Modelworks made the porthole rings with the eyebrows as on the actual ship.
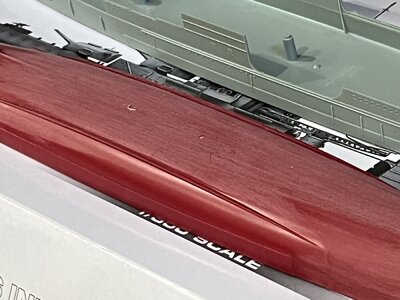
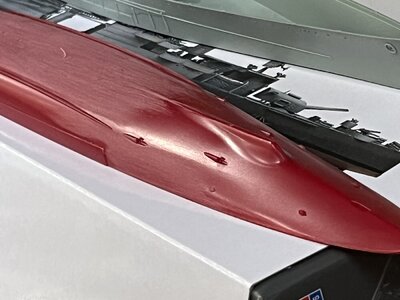
Started the Indianapolis this morning, and while doing a photo shoot of parts and photo etch I've bought for this kit, some issues became noticeable.
Lower hull (red) and upper hull on box lid.

Now the issues. I've read about sliding moulds but I'm not sure what they are so I'll just call these mould imperfections.
Bow showing imperfections

These are on both sides
After area imperfections

Thinking these are not to be visible I sanded them with 400 paper and then 1000 paper.


These are the 600 and before the 1000 which I hadn't finished. I might hit this again with 1500 paper to make sure of not sanding marks.
Here's kit sprue and the minimalist instructions


Next some photos of the pe for the Indianapolis realizing that much of the pe will not be used just bits and pieces.


The Indianapolis has over 100 12" portholes in the lower hull and 40 or so 16" portholes in the uppers structures. I found Toms Modelworks made the porthole rings with the eyebrows as on the actual ship.


Really looking forward to your build. Tom's PE is excellent. The tiny parts you'll need to be extra carefull with as they are prone to "Ping!" and disappearing forever. I learnt to use a toothpick with a spot of 'Mr hobby masking goo' on the tip. This is to pick up the small PE and place in into position (without losing or dropping it) the Masking will simply rub off after placement. You'll need to practice this method a few times first. Also find a good Water-based glue (I use Weld Bond) for initial adhesion. CA can be devastating to the head, throat and sinuses' hence it's avoided where ever posible by yours truly ..... Cheers
Thanks ConsNZ for the input about placing PE's. I've been using a piece of stiff wire tipped with similar sticky stuff and then dipping in a drop of glue and onto the placement.
Went back out to the shipyard while the AC could still keep up AZ heat. Rubbed the lower hull with 1500 wet-n-dry until the surface doesn't exhibit scratches.
Dried it off with lint free wipes and then with a tack rag leaving a somewhat shiny surface.
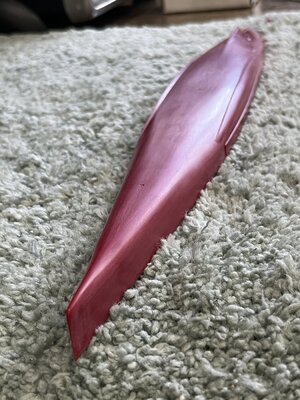
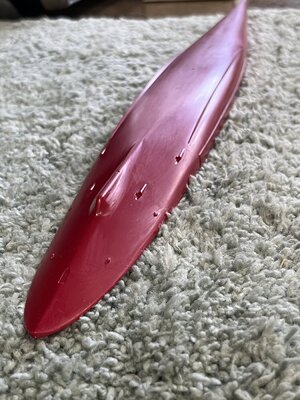
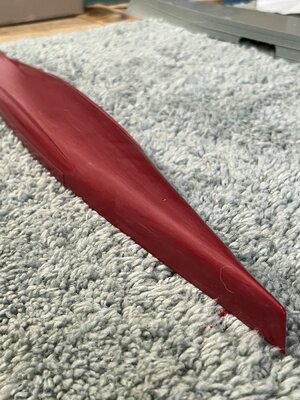
From other models and others logs it always amazes me how photographs show/amplify every flaw invisible to my old eyes.
Maybe I being overly cautious but since I have no parts to add, with the exclusion of props & rudder, I going to spray the lower hull with NATO black. This way I'll be sure no scratches.
Next I dry fit forward and aft decks. Just couldn't wait.
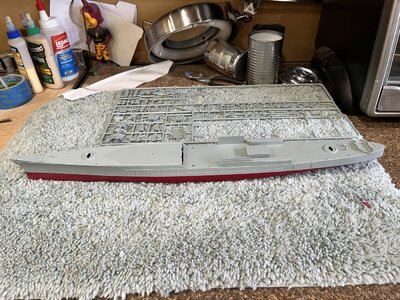
This left an opening so I just had to add the first superstructure, and yes it filled the opening.
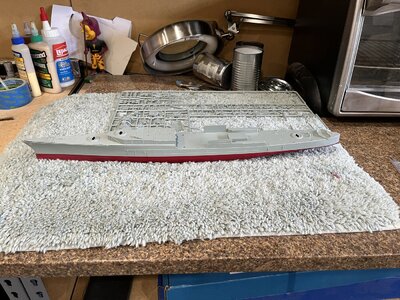
I must say that the dry fitting revealed amazedly tight fit between all the parts.
Dried it off with lint free wipes and then with a tack rag leaving a somewhat shiny surface.


From other models and others logs it always amazes me how photographs show/amplify every flaw invisible to my old eyes.
Maybe I being overly cautious but since I have no parts to add, with the exclusion of props & rudder, I going to spray the lower hull with NATO black. This way I'll be sure no scratches.
Next I dry fit forward and aft decks. Just couldn't wait.

This left an opening so I just had to add the first superstructure, and yes it filled the opening.

I must say that the dry fitting revealed amazedly tight fit between all the parts.
I am glad you started this model. I will be watching....

I will follow also with big interest
Good luck with the build Will. I like the Eduard range of PE upgrade kits; using it on my 1941 Arizona build.Good Morning to All and thanks for the likes, comments and looks.
Yesterday the Eduard upfit kit arrived.
Kit on Indy box
View attachment 311892
Both sheets of PE
View attachment 311893
Closeup of airplane crane
View attachment 311894
Plans for aircraft crane
View attachment 311895
I spent hours reviewing the PE kit verses the Academy kit and was left with WOW oh what will I do. During this extensive review I discovered that the Academy kit has the wrong sprue. The sprue containing the airplane is for the 1944 version not the 1945 version. I had a biplane instead of the the mono wing plane that was added during the 1944 refit at Mare Island. The box artwork is correct the instructions are correct but the sprue is for the earlier kit. I'll have to compare the kit to the Mare Island photographs to look for discrepancies. The photographs have circles drawn about the area changed during the refit. After the review I'll post my findings.
Sent a email to Academy requesting the correct parts. Now we'll wait and see if they respond.
Best Regards
Will
Cheers,
Steve
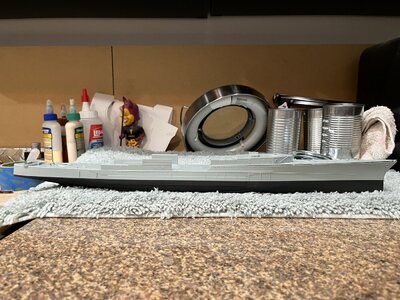
Thanks everyone for the likes and following. I hope to keep you informed of my progress. As to progress I painted the lower hull with Tamiya nato black checking that all the sanding scratched had been smoothed.
Here's a picture showing no scratches visible.
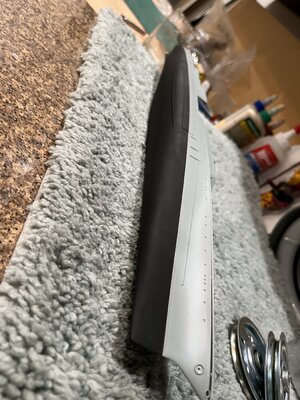
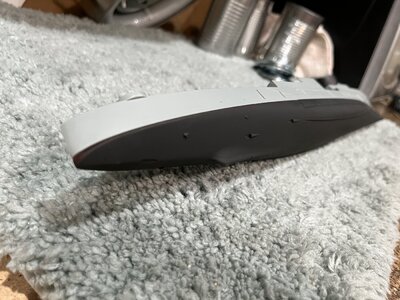
That's it for now.
Tomorrow were off to Bucharest, Romania for a river cruise to Amsterdam so no posts until were back on August 15th.
Here's a picture showing no scratches visible.


That's it for now.
Tomorrow were off to Bucharest, Romania for a river cruise to Amsterdam so no posts until were back on August 15th.
Bach from our vacation. Had wonderful time with a slight problem, i came down with shingles on my left are and hand. Sores healed but nerves still firing and thumb and for finger still numb. Enough whining about me and on to the Indi.
With the numbness I decided to start on making some of the photo etch assembles. The catapult seems like a good place to start so off we go.
Picture of the sheet with the catapult showing
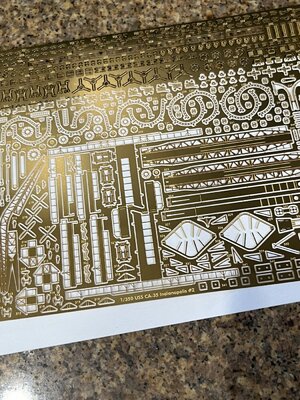
First piece cut from sheet
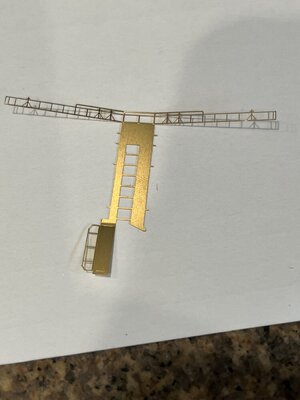
You can see a fingerprint on the part. I followed everyone cleaning suggestions and now how the finger oil won't cause a problem with paint.
I folded the part as the instruction show and put a drop of thin ca on the joints. The ca flowed along the joints just as I hoped making for a secure part. While still delicate.
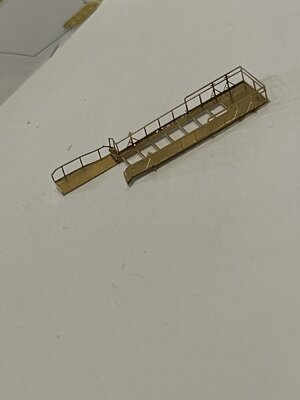
A small start but still a good start.
With the numbness I decided to start on making some of the photo etch assembles. The catapult seems like a good place to start so off we go.
Picture of the sheet with the catapult showing

First piece cut from sheet

You can see a fingerprint on the part. I followed everyone cleaning suggestions and now how the finger oil won't cause a problem with paint.
I folded the part as the instruction show and put a drop of thin ca on the joints. The ca flowed along the joints just as I hoped making for a secure part. While still delicate.

A small start but still a good start.
- Joined
- Dec 24, 2021
- Messages
- 105
- Points
- 88

Looks braw, what is CABach from our vacation. Had wonderful time with a slight problem, i came down with shingles on my left are and hand. Sores healed but nerves still firing and thumb and for finger still numb. Enough whining about me and on to the Indi.
With the numbness I decided to start on making some of the photo etch assembles. The catapult seems like a good place to start so off we go.
Picture of the sheet with the catapult showing
View attachment 324693
First piece cut from sheet
View attachment 324694
You can see a fingerprint on the part. I followed everyone cleaning suggestions and now how the finger oil won't cause a problem with paint.
I folded the part as the instruction show and put a drop of thin ca on the joints. The ca flowed along the joints just as I hoped making for a secure part. While still delicate.
View attachment 324695
A small start but still a good start.
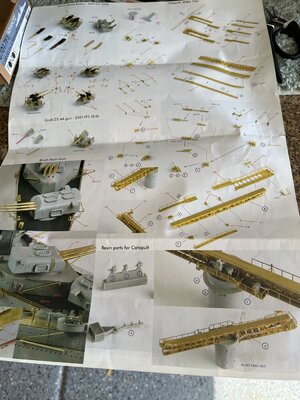
I forgot to mention that I'm using the Pontos super kit for the Indianapolis. Also when very closely studying the kit I noticed that the portholes had the eyebrows moulded inplace so I won't have to use Toms pe eyebrows saving a lot of work. The moulded eyebrows are barely visible but I'm sure that with the wash they'll become visible.
Here's a picture of the Pontos instructions
 T
T
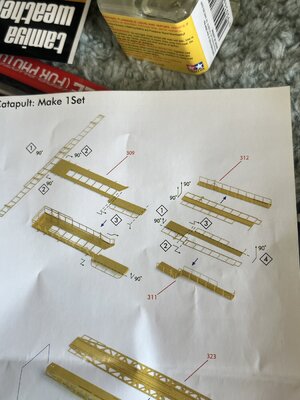
These are the catapult parts I'm making
Thanks Buster for the nice comment and ca glue is superglue for modeling
Here's a picture of the Pontos instructions
 T
TThese are the catapult parts I'm making

Thanks Buster for the nice comment and ca glue is superglue for modeling
That photo etch looks like a fiddly job.
Really looks cool... Think the finger print did a bit of its own etching.Bach from our vacation. Had wonderful time with a slight problem, i came down with shingles on my left are and hand. Sores healed but nerves still firing and thumb and for finger still numb. Enough whining about me and on to the Indi.
With the numbness I decided to start on making some of the photo etch assembles. The catapult seems like a good place to start so off we go.
Picture of the sheet with the catapult showing
View attachment 324693
First piece cut from sheet
View attachment 324694
You can see a fingerprint on the part. I followed everyone cleaning suggestions and now how the finger oil won't cause a problem with paint.
I folded the part as the instruction show and put a drop of thin ca on the joints. The ca flowed along the joints just as I hoped making for a secure part. While still delicate.
View attachment 324695
A small start but still a good start.
Thanks for the looks, likes, and kind comments they keep me going. Today I'll have time to work so hopefully more PE parts to show.
I have realized that the catapult was probably the hardest part of the photo etch. I broke several pieces of the railing with my clumsy left hand. The shingles has made it impossible to delicately use my left hand. The good news is the Pontos pe is for every stage of the Indianapolis life. She started with 2 catapults and I have one left. I'll wait until I get more experience with pe.
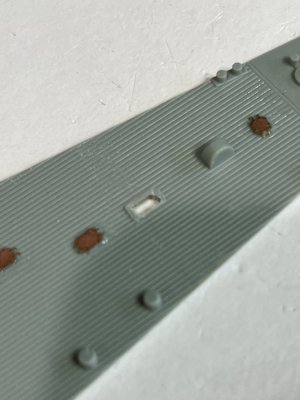
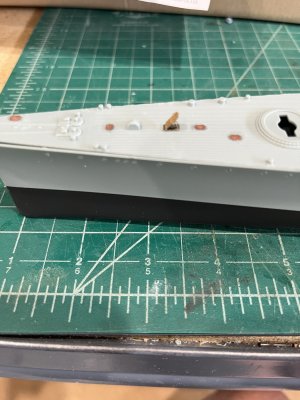
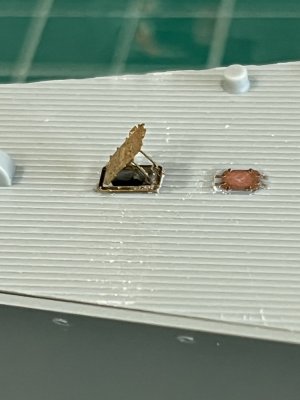
Small hatches on the bow. First had to remove the moulded hatches using a #11 blade and then a flat swiss file leaving a little to simulate the coamings. Next the large open hatch had the deck opened to simulate looking into the ship. Drilled small holes and then cut the opening using a swiss file to complete the opening.
Photo before the cleaning with the file.
Then cut the pieces from the fret and glue using thick CA
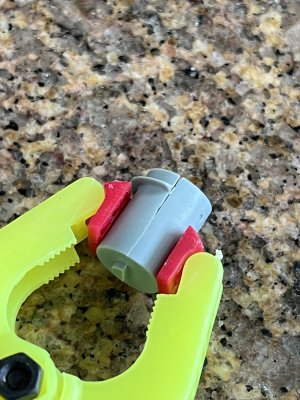
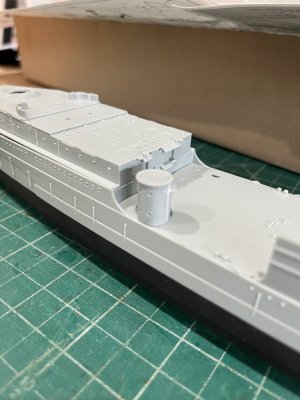
I did assemble the pieces that the catapult rests on. With the side glued together there was a prominent seam visible.
filled the seam with plastic putty and sanded smooth
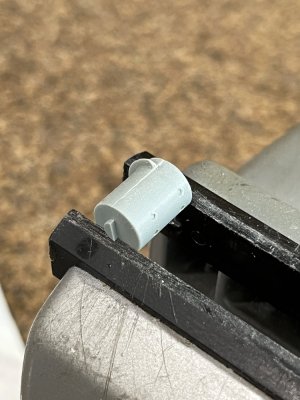
put the cap on and now ready for a catipult.
On to parts with pe before assembling and painting
Small hatches on the bow. First had to remove the moulded hatches using a #11 blade and then a flat swiss file leaving a little to simulate the coamings. Next the large open hatch had the deck opened to simulate looking into the ship. Drilled small holes and then cut the opening using a swiss file to complete the opening.
Photo before the cleaning with the file.

Then cut the pieces from the fret and glue using thick CA


I did assemble the pieces that the catapult rests on. With the side glued together there was a prominent seam visible.

filled the seam with plastic putty and sanded smooth

put the cap on and now ready for a catipult.

On to parts with pe before assembling and painting


