- Home
- Forums
- Ships of Scale Group Builds and Projects
- Bluenose PoF Group Build
- Bluenose Group Build Logs
You are using an out of date browser. It may not display this or other websites correctly.
You should upgrade or use an alternative browser.
You should upgrade or use an alternative browser.
The Schooner Bluenose 1921, POF Yuanqing Models 1:72 [COMPLETED BUILD]
Will be following with great interest
Thank you, my friend, great to have you on board.Dear Daniel
I wish you good luck and joy from the new project, I will join to the friends with great curiosity

Hello Dave and welcome aboard. I see your working on the Endurance, one of the hardest journeys I've ever read about.Will be following with great interest
Good luck Daniel. It will be fun to follow your progress. The "Bluenose" is a beautiful craft. Where do you live in Houston? I'm up in Conroe. Magic Mike
Hello Mike @Magic Mike and welcome aboard. I'm in the far west part of town in the Mission Green area an unincorporated part of Fort Bend County. Conroe is a beautiful area.
Oh boy, I‘m sitting in my recliner ready to follow along.
Canoe21
Lawrence
Hello Daniel, Welcome aboard the great YQ-Bluenose build logs. I will be fowling with great interest.
Regards Lawrence
Regards Lawrence
Thank you, Lawrence, I am delighted to be here.Hello Daniel, Welcome aboard the great YQ-Bluenose build logs. I will be fowling with great interest.
Regards Lawrence
hey Daniel. watching your build with great interest. one of my favorites.
Charlie
Charlie
Hey Charlie, great to see you welcome aboard!hey Daniel. watching your build with great interest. one of my favorites.
Charlie
I may have mentioned before, but I am further south in Fort Bend, in Missouri City.Hello Mike @Magic Mike and welcome aboard. I'm in the far west part of town in the Mission Green area an unincorporated part of Fort Bend County. Conroe is a beautiful area.
Ps - where are the frames!
Patience my friend, patienceI may have mentioned before, but I am further south in Fort Bend, in Missouri City.
Ps - where are the frames!
Good morning, everyone. I can now begin to post a little progress. I have been studying the blocks, deadeyes, and rope work in terms of scale and color and now have all of them ordered as aftermarket upgrades. Color wise they should resemble the BN II with the shrouds being a dark gray which I am excited to see how that will look.
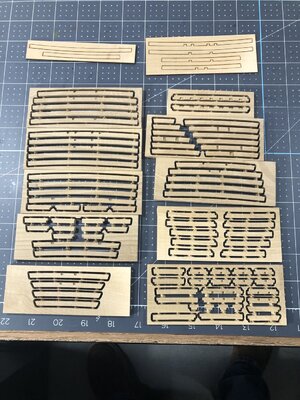
Ok here is a little more unpacking which will illustrate how well organized the kit is. The Deck cross beams are CNC routed, pleasant surprise.
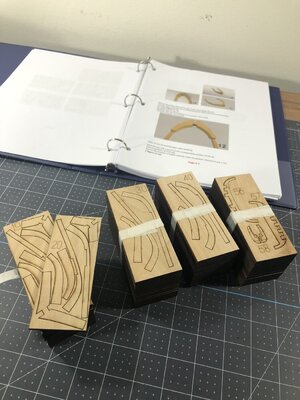
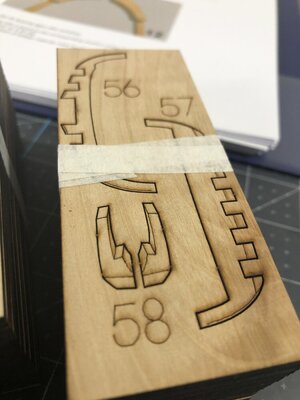
There are extra lines on the rib pieces which are sanding limits! Awesome!
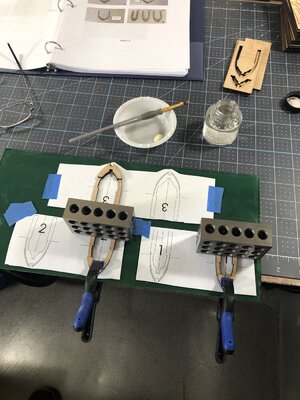
Next I fabed a rib jig supprt. I straight edged the board to ensure flatness then screwed down the jig.
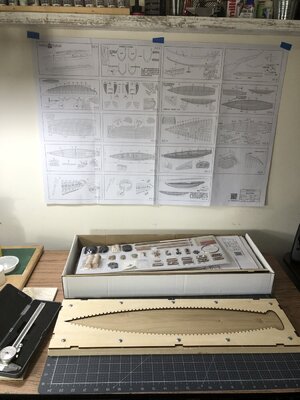
And finally began the rib glue up process, I can see how this will take a while along with a LOT of grinding, filing, and sanding.
Thanks for stopping by.
Until next time Happy Modeling!
Ok here is a little more unpacking which will illustrate how well organized the kit is. The Deck cross beams are CNC routed, pleasant surprise.


There are extra lines on the rib pieces which are sanding limits! Awesome!
Next I fabed a rib jig supprt. I straight edged the board to ensure flatness then screwed down the jig.

And finally began the rib glue up process, I can see how this will take a while along with a LOT of grinding, filing, and sanding.

Thanks for stopping by.
Until next time Happy Modeling!
Last edited:
I see a good starting point, Daniel. Printing the translated manual with the color pictures! A solid base for a nice build.Good morning, everyone. I can now begin to post a little progress. I have been studying the blocks, deadeyes, and rope work in terms of scale and color and now have all of them ordered as aftermarket upgrades. Color wise they should resemble the BN II with the shrouds being a dark gray which I am excited to see how that will look.
Ok here is a little more unpacking which will illustrate how well organized the kit is. The Deck cross beams are CNC routed, pleasant surprise.
View attachment 358329
View attachment 358330
View attachment 358331
Regards, Peter
- Joined
- Jan 9, 2020
- Messages
- 10,378
- Points
- 938

Excellent Daniel! It is wonderful to see you up and running. The frames can become tedious, but that is, after all, what a POF build is all about. The reward comes in that beautifully exposed framework of the ship, so it will be well worth the effort! The bevel lines on the frames do indeed make it so much easier!
- Joined
- Sep 3, 2021
- Messages
- 4,280
- Points
- 688

And now the fun begins. Enjoy your journey, Daniel.Good morning, everyone. I can now begin to post a little progress. I have been studying the blocks, deadeyes, and rope work in terms of scale and color and now have all of them ordered as aftermarket upgrades. Color wise they should resemble the BN II with the shrouds being a dark gray which I am excited to see how that will look.
Ok here is a little more unpacking which will illustrate how well organized the kit is. The Deck cross beams are CNC routed, pleasant surprise.
View attachment 358329
View attachment 358330
View attachment 358331
There are extra lines on the rib pieces which are sanding limits! Awesome!
Next I fabed a rib jig supprt. I straight edged the board to ensure flatness then screwed down the jig.
View attachment 358334
And finally began the rib glue up process, I can see how this will take a while along with a LOT of grinding, filing, and sanding.
View attachment 358339
Thanks for stopping by.
Until next time Happy Modeling!
Great! You’re out of the starting gate! 
I found sanding the bevels using my Proxxon with a medium grit drum sander, on the lower speeds, to be the most efficient way to remove material until you get close to the line. Then I removed the rest with files. Just remember you will do a final fairing of the frames. So it’s okay to leave a little extra if you want. Also be aware your bevel angle changes as you move around the frame. This is more so on the smaller frames. Mid ship is the largest frames and the least bevel. And beware your bevel side changes past mid ship towards the stern. But you will realize all this once you are doing it!
I found sanding the bevels using my Proxxon with a medium grit drum sander, on the lower speeds, to be the most efficient way to remove material until you get close to the line. Then I removed the rest with files. Just remember you will do a final fairing of the frames. So it’s okay to leave a little extra if you want. Also be aware your bevel angle changes as you move around the frame. This is more so on the smaller frames. Mid ship is the largest frames and the least bevel. And beware your bevel side changes past mid ship towards the stern. But you will realize all this once you are doing it!
Good advice Dean, I have 7 frames glued up, no sanding yet. I've checked and double checked more times than I care to admit concerning bevel direction inside and out and yes, the direction changes past the wide part going toward the stern. Where do you get those needle nose long reach spring clamps, I've looked everywhere. I can find long reach, but they are too big and use too much pressure.Great! You’re out of the starting gate!
I found sanding the bevels using my Proxxon with a medium grit drum sander, on the lower speeds, to be the most efficient way to remove material until you get close to the line. Then I removed the rest with files. Just remember you will do a final fairing of the frames. So it’s okay to leave a little extra if you want. Also be aware your bevel angle changes as you move around the frame. This is more so on the smaller frames. Mid ship is the largest frames and the least bevel. And beware your bevel side changes past mid ship towards the stern. But you will realize all this once you are doing it!
Daniel, very beautiful and detailed kit. I'm sure it will be an excellent model. Keep us posted, good luckGood afternoon, I just received my YQ Bluenose and am excited to share my first look at its contents. Of course, it came very well packaged and upon opening there is no apparent damage to any of the contents. I like the way most all the fiddley pieces have been shrink wrapped to a cardboard base. While there are what looks to be ample instructions, I downloaded a set in English since I don't read or speak Chinese. So, let's have a look.
View attachment 357678View attachment 357679View attachment 357680View attachment 357681
Here is one item the 'ships wheel' that I am really glad to see. This was not the original version, quite a few 3d printed versions were made and put in this kit and I'm just glad they still had some for mine.
View attachment 357682
Next are just a few more shots.
View attachment 357683View attachment 357684View attachment 357685View attachment 357686View attachment 357687
In this last photo I am experimenting with tree nails since I'll be using them in this build. I drilled 3 different hole sizes then used a light wood filler dark wood filler and brass nails and brass wire to see the effects. I used walnut as a test source however I will try some pear wood out as well. After a light sanding and wax seal coat I am pleased with it so far. More than likely, I'll go with darker wood filler. 
View attachment 357688
It will be several days before I get started as I'm still in a research phase. I did buy a fine reference book on the Bluenose II by LB Jenson but not to worry I won't get the two confused in my "Bluenose" build. There will be many similarities that will transfer from BN II to the original Bluenose.
I hope you enjoy. Happy modeling.


