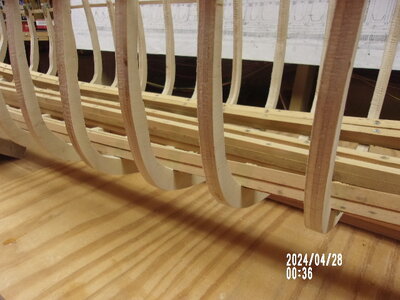
The Great Republic 1:48

How about something like this?


Not exactly bulkheads - not exactly frames - something in between...
That gives you a bit of options. No hold work below the lower decks...but ample flexibility to add decking detail to the open mid decks and weather decks.

Even with skillful scroll/band saw skills...young wood today checks and flakes much easier then tighter or older grain wood.

Good job foe sure. thanks for sharing.

Rob
 
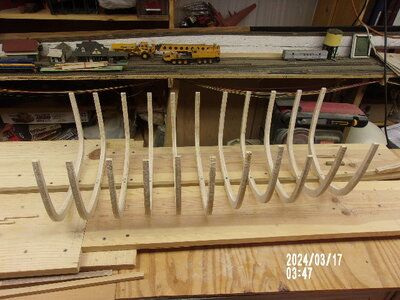
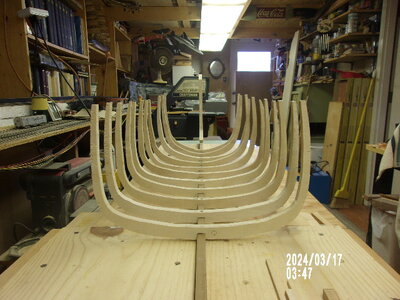
Redesigning the frames too. Making them thicker (stronger) on the bottom across the keel and thinner on the top end above the plank sheer. Top ends should look a lot better too. I hope!
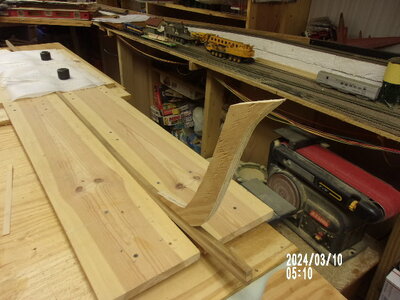
One thing...that may have slipped your mind. There is no bulwarks on the original GR. She had a flush weather deck...with turned stanchions. SOOooooo....
Tapering your frames to accommodate the much smaller frame dimension above the planksheer...really won't be necessary.

Your work just became easier.

Rob
 
Last edited:
Hi Paul and thanks for jumping in here. I thought of doing the frames with regular lumber but at 3/4 inch thick they would be pretty heavy. Looks like you used pine there but not sure. The poplar would be great if I could get it in 1/2" but so far that doesn't seem possible. I'm really thinking about going back to the plywood. With the frames at 1/2" thick, 13" wide and 12" deep and a bit different design than before. They should be more than strong enough especially with ceiling inside most of the hull and the planking on all the outside. I'm putting a bit more meat where the frames meet the keel (3/8") and notching each frame to sit down over the keel 3/8". I'll have a bit more meat at the frame curves too. Sure wish I could find some half inch thick lumber but it has to be about 12" wide too and that's just not anywhere around here. I also figured that I'd cut the frames off at the plank sheer and build the structure above separate. That way I won't have to notch the plank sheer for thirty odd frames and make it fit. First there is the plank sheer and then the main rail which is at the level of the spar deck and then the top rail after that. They called the top rail the "monkey rail" or the "fashion rail" with all turned stanchions above the main rail holding up the monkey rail.
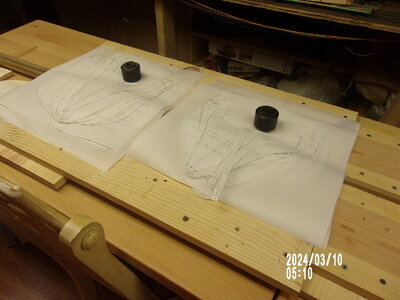
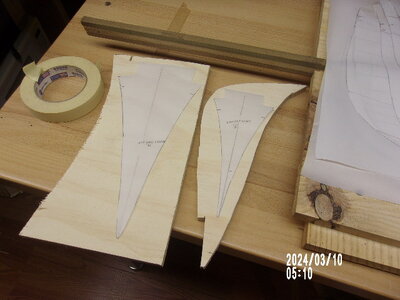
I spent all of last week redoing all my templates for each frame. Remeasured each one top to bottom and side to side and made sure each had a accurate centerline.
If it doesn't work this time there's going to be a nice little bonfire at my house. Not making progress gets old after awhile. Ha! Here's to ya!
One more question: How many half frames are there and where do they start?

100_0216.JPG

100_0217.JPG

100_0218.JPG
 
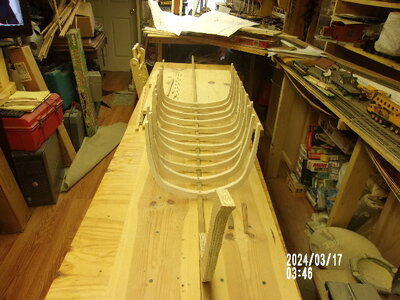
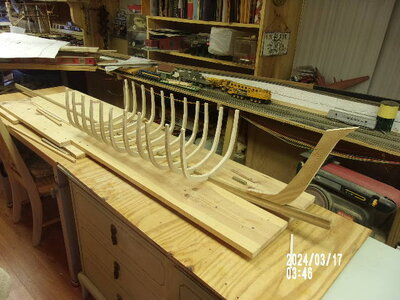
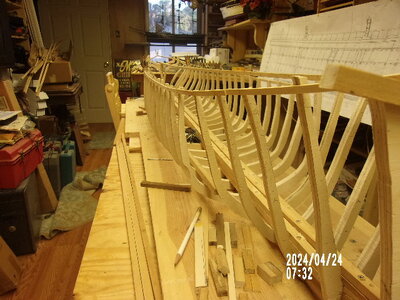
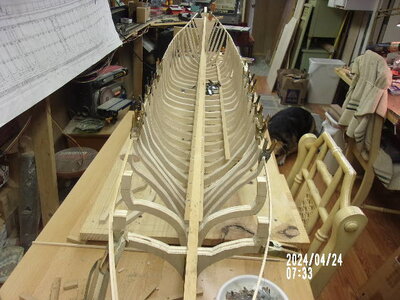
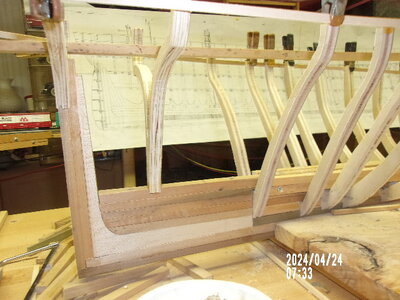
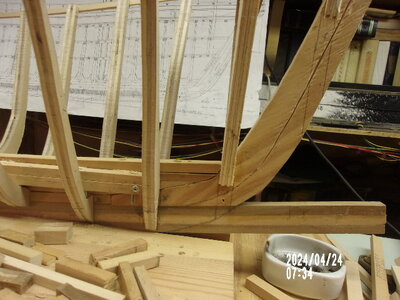
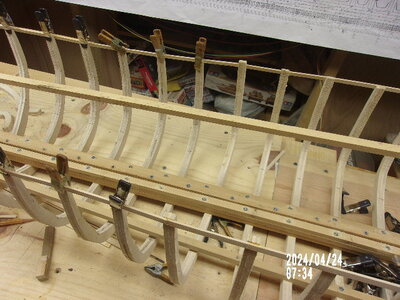
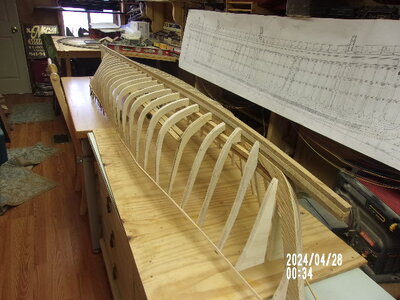
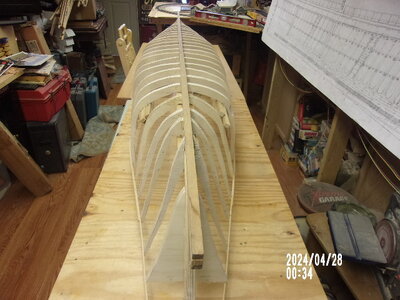
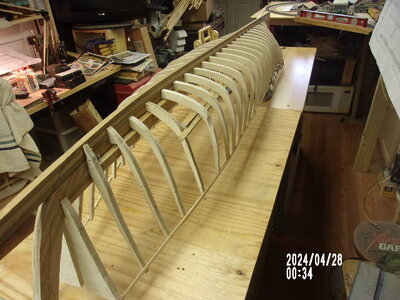
My frames are narrow at the top for the plank sheer. The assembly above that will be added separately All these new frames have a notch at the bottom center that fits over the top keel piece. That will bring the outside planking down to the keel at a lower elevation to hide some of the oversized keel below. The notch has made the placing of the frames easier too. They have thinner top sides to them and a thicker base at the keel. I've also paid more attention to keeping the inside of the frames smoother cut to accommodate the ceiling boards and the wing keelsons which didn't fit right before.
I'm wondering if there were any small rooms built in the bow or stern for small shipments or valuable cargo. Seems like there should be something like that there. Had a bearing freeze up on my band saw so I'm out of the frame cutting business for the moment.Since Craftsmen is out of business I'll have to try and find the part some other way. My pictures look like the same old thing but the frames are a lot different. Should catch up to where I was later this week if I can get the band saw fixed.

100_0219.JPG

100_0220.JPG

100_0221.JPG

100_0222.JPG
 
I forgot to mention that I went back to the plywood because there just wasn't anything available around here for solid wood. However I did find a slightly thinner plywood at HD that was the same price as the cabinet grade plywood but was lighter and had far fewer cavities in it and much smaller cavities too. It's called a hobbyist plywood but that's all I know about it. So far so good.
Hope everybody had a great St. Patrick's Day.
 
I guess with plywood frames the structure will get also more riggid and stabile
 
Hi Uwik and thanks for your comment. I have noticed that a lot of ship models here and online in general use plywood for the ribs or the bulkheads. I don't see why that wouldn't be ok for this model too. The frames are a little bigger than the prototype would have been but that will make for a stronger hull. I think my first frames were just too heavy and difficult to work with. These are cut finer and have been much easier to work with. With the main keel and keelsons and the wing keelsons along with the interior ceiling and exterior planking this ship ought to last at least two hundred years. Ha! I'll let you know.
Meantime a bearing went out on my band saw so the ship yard is out of business for a few days until I can locate a replacement part. Maybe I'll work on the trains for awhile. New video's on YouTube for "Freestyle Moba". Guy is very talented. Take a look if you're into trains at all. Norgale
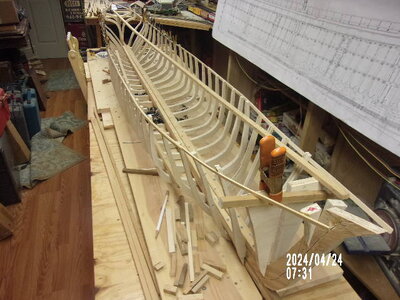
 
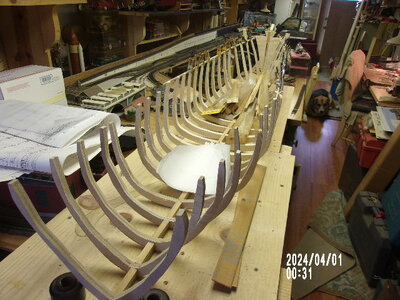
Hi Rob, yes and no. Ha! I have almost finished making all new frames but again, I ran out of wood. I still have to do the last four or five frames at the stern and I spent some time aligning the bow so the plank sheer would be correct. Actually I found that I had omitted one frame accidentally between the center of the hull and the bow. This time however nothing was glued together but only attached with small screws. It wasn't difficult to remove the frames back to where the missing frame went and then reattach the rest. A pretty simple mistake but I got in a hurry and missed the errant frame. Now the sheer line looks much better.
The front half of the hull took two quarter pieces of plywood and then I bought another quarter of a sheet and started on the back half. These sheets are $25 each so now I not only have run out of wood, I've run out of money too. Funny how that happens. So now I wait a few days for my next goubermint welfare check ( SS ) and then I'll finish making and installing the rest of the stern frames and cants. By then I will be back to where I left off with the bad frames so that mistake has cost me several weeks of work. Ya just can't be too careful with this stuff.
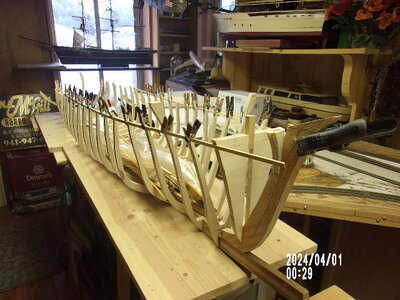
The temperature is now pushing toward the 90"s and I'm spending more time inside because of the heat. I have put the GR aside for now and have been making several changes to my train layout to keep occupied. Been watching the Baltimore bridge accident a lot too. Quite the project to say the least. I didn't have anything really new to add so I skipped my weekly post this past weekend. However since you were kind enough to ask I'll take a few more pictures and post them in a minute. Hope everyone had a nice Easter weekend. Pete.
 
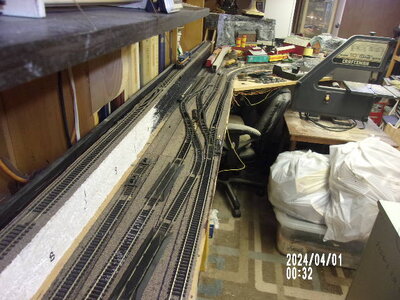
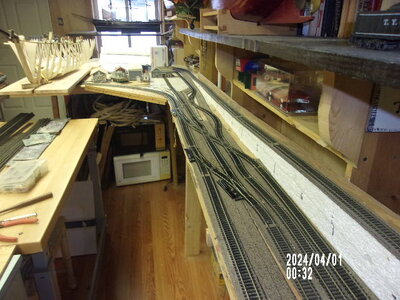
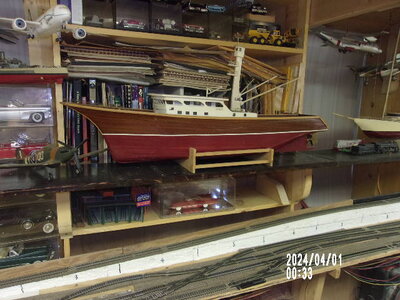
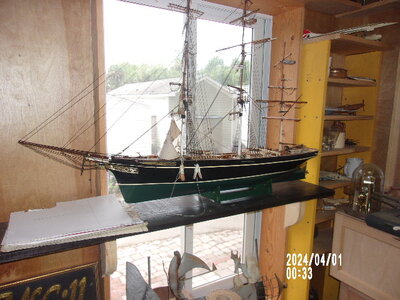
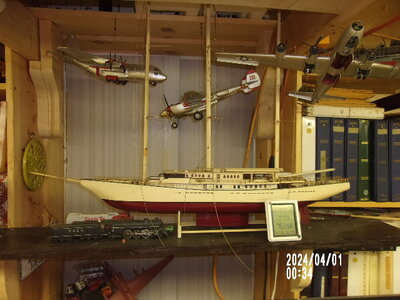
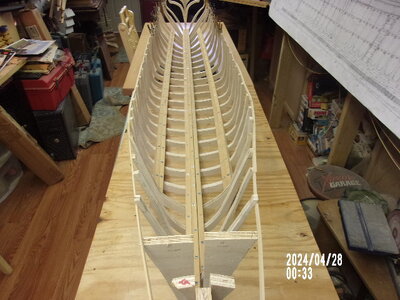
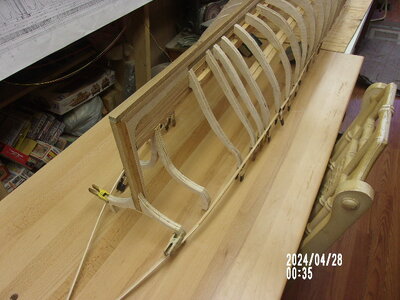
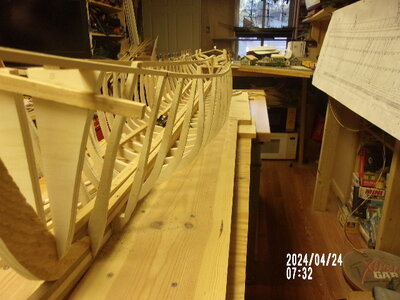
Took a few more pictures and decided that as long as this was "show and tell" I may as well show the railroad and other ships as well. Starting off are three pics of the GR from the bow to stern and then stern to bow. Also one of the few frame locations at the stern still to be done. I see that there will be at least one additional frame to add near the bow to facilitate the flow of the plank lines where the hull narrows at the bow. May have to add one at the stern too before I'm through. Then a couple pics of the railroad. I named it the Bonita Grand Central which is a way optimistic title, and realigned the narrow part of it to haul coal and freight to a power station at one end from the coal mine at the other end. Nothing very great about all that except that I get more ambitious as I near the trains actually running. I do have a lot of fun with this thing. The last three are ships that I have built over the years. The Dumas Tuna Clipper, the Cutty Sark as yet unfinished and the Athena also as yet unfinished. Had to build some extra shelves to get these models off the train table. The Athena was built from a picture I found on line and you can go on YouTube and look up MV Athena and see the real thing. It's beautiful I think. You'll recognize the real one from the picture if I've done the job (so far) right.
So there you go for now. Enjoy the pictures as I always enjoy yours.

100_0223.JPG

100_0224.JPG

100_0225.JPG

100_0226.JPG

100_0227.JPG

100_0228.JPG

100_0229.JPG

100_0230.JPG
 
Your shelf layout looks to be a point to point design. Are you going all the way to landscaping and the like?

Rob
 
The shelf part is 1' x 14' with a 4' x 4' square on each end. Single track around the out side and switching in both ends as well as the narrow part. I don't really have a plan, just some ideas and let the thing grow as it will. This stuff is so expensive any more that I am limited greatly by my ss income. Years ago I could get new locomotives for $25 each and now they are $150 to $400 or so in HO scale. Just a freight car now is near $50 and passenger cars are over a hundred bucks. Ship models are far less expensive at this point so I don't buy much new stuff for the trains. Dead engines get sent off for repair and cars get kitbashed or repaired by me. No unnecessary expenses for me any more. Mostly it's something to mess with when I get tired of doing wood models.
 
Hi Uwik and thanks for your comment. I have noticed that a lot of ship models here and online in general use plywood for the ribs or the bulkheads. I don't see why that wouldn't be ok for this model too. The frames are a little bigger than the prototype would have been but that will make for a stronger hull. I think my first frames were just too heavy and difficult to work with. These are cut finer and have been much easier to work with. With the main keel and keelsons and the wing keelsons along with the interior ceiling and exterior planking this ship ought to last at least two hundred years. Ha! I'll let you know.
Meantime a bearing went out on my band saw so the ship yard is out of business for a few days until I can locate a replacement part. Maybe I'll work on the trains for awhile. New video's on YouTube for "Freestyle Moba". Guy is very talented. Take a look if you're into trains at all. Norgale

I need to add one thing here about the saw bearings. While waiting for the new bearings to arrive I bought a pair of snap ring pliers and took the old bearings out of the machine. The one that seized up was completely stuffed full of saw dust and didn't turn at all. The others were still turning but did have a lot of dust in them too. So I cleaned all the bearings and lightly oiled them so they all turned very well and put it all back together. The saw ran perfectly. Check those bearings FIRST. They may just need a good cleaning. I now have three new bearings for spares but they were only $3.50 apiece at Grainger.
 
I've been goofing off for a month now and not shown any progress so here is a report on the Great Republic. I'm back to where I left off a month ago. The frames are attached and the keel and keelson is assembled along with the wing keelsons. There is one split frame at the stern to put on yet and the deadwood at the stern isn't all finished either. The frames are still being aligned although it all looks ok until I get to the stern. I just don't seem to be able to get the stern aligned properly and I haven't figured out why yet. This model is very strong vertically but is very twisty horizontally. I can imagine the bow of the real ship leaning to port while the stern is leaning to stbd. Must have been an interesting trip at first. But ships do that all the time today so probably not a big problem. Therefore I've decided to continue with the hull interior for now and see if that helps with the frame alignment in the stern. The beam cross members for the decks should stiffen the hull up quite a bit, I hope.
Meantime I dug out my table saw and will start cutting planks and deck timbers since buying all that lumber looks to be pretty expensive even when standard sizes are available. I'd like to use up all this extra wood that I have anyway. So now any future work will be a progression rather than a repeat.
Here are a few pictures.

100_0001 - Copy.JPG

100_0002 - Copy.JPG

100_0003 - Copy.JPG

100_0004.JPG

100_0005 - Copy.JPG

100_0006.JPG

100_0007 - Copy.JPG

100_0009.JPG

100_0010.JPG

100_0011.JPG

100_0012.JPG

100_0013.JPG

100_0014.JPG
 
Back
Top