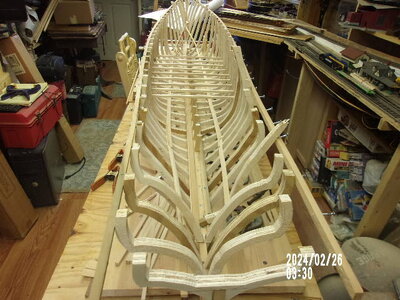
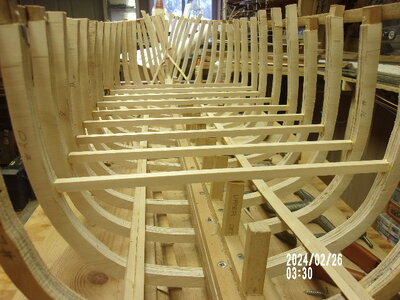
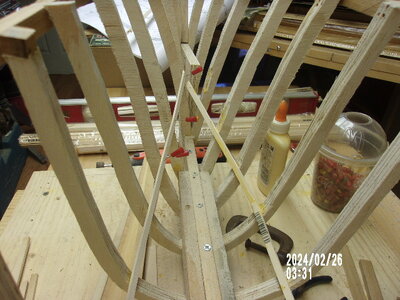
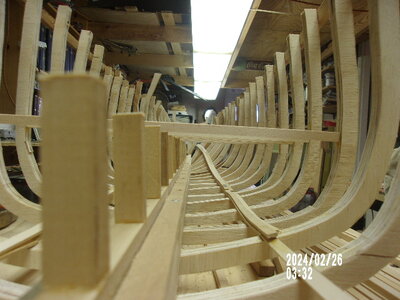
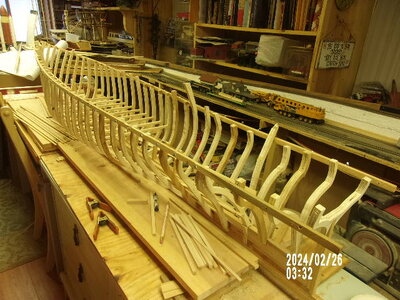
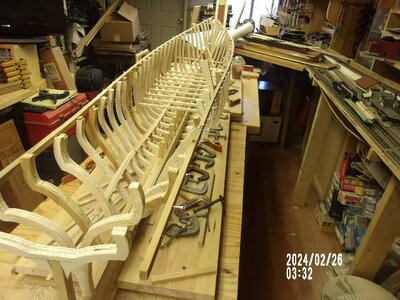
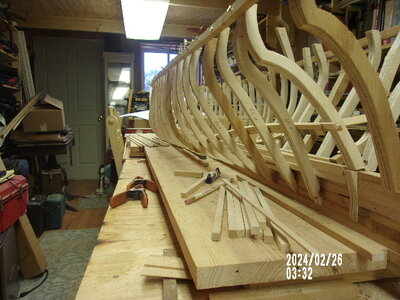
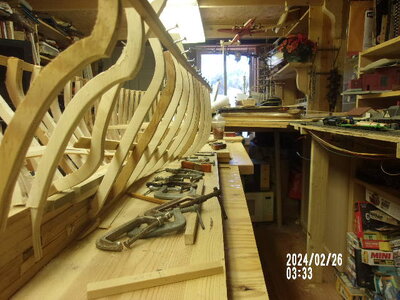
The Great Republic 1:48

Never went to the race track except with my Grandfather. He owned the horses. Ha! I don't like inputting mistakes and this past week had several. However in the interest of learning something from my mistakes there will be some input today or tomorrow. I have two outside projects going right now and I want to get them finished before the summer heat gets here. I can only work outside during the winter.
Posting ones mistakes can be difficult...especially if you are not using them for a learning process. However, with that said, mistakes can solicit help from the masses.

Summer in Florida can be brutal with 90Deg 90% humidity daze.

Rob
 
Great project..I'll be sure to follow along..one question. Have you figured out what this monster is going to weigh?
 
Great project..I'll be sure to follow along..one question. Have you figured out what this monster is going to weigh?
Weigh? Haven't given t any thought except it will be heavy. Moving it when it's finished will be a two man project I think. Actually it probably won't weigh all that much but it will be tricky to move with the rigging and sails on it.
 
Posting ones mistakes can be difficult...especially if you are not using them for a learning process. However, with that said, mistakes can solicit help from the masses.

Summer in Florida can be brutal with 90Deg 90% humidity daze.

Rob
90 degrees isn't all that bad. It's the 110 and 120 degrees that we hit last summer that takes the breath right out of you. If I wasn't so old it wouldn't matter a lot but it's rough on old people to get anything done. You can sometimes just sit in the shade and sweat doing absolutely nothing. I'd like to go North in the summer but from what I see it's not that much better. Many thanks to whoever invented air conditioning. I couldn't live here with out that.
 
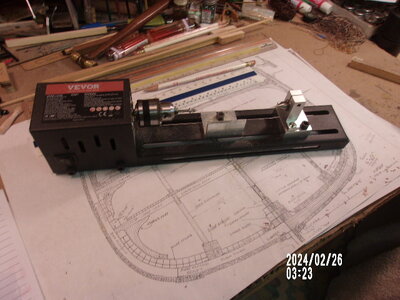
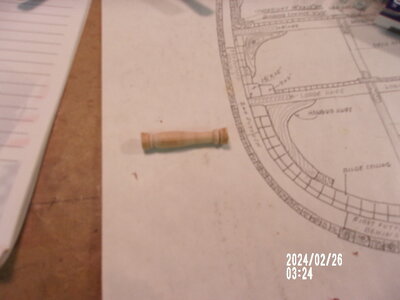
I guess as long as I'm here I may as well do my "input" for this past week so I don't forget it. On my plans it shows turned posts for the top level stanchions and just plain timbers for the lowest ones. I thought it would be neat if I could turn my own stanchions. I went online to try and find a small lathe and sure enough there was one from Vevor Tools that really fit the bill at $50. I knew I'd never build rockets with it but it is great for just such a thing as the little stanchions. So I turned one to see how it went and the stanchion came out fine. Now all I have to do is figure out how to do about a hundred of them exactly (or closely) the same. Should be getting to that this week or next.
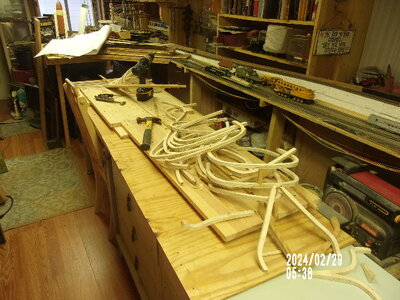
Meantime I discovered that some of the frames are not symmetrical and will have to be shimmed on the outside or shaved to match their adjoining friends. Even if that works ok the starboard side is a bit narrower than the port side and the only remedy there is to start over again and that is not an option for me. I was starting to lay the wing stanchion keelsons when I noticed this and instead of finishing the wing keelsons I started installing some of the lower deck supports to determine the dimensions of the cross beams and before I knew it I had laid a pretty good bunch of the cross beams and covered up access to the wing keelsons. Ya, I got carried away and found that the stbd side is about a quarter inch or so narrower than the port side. That's a BIG mistake on a ship no matter how you cut it. The wing keelsons have to twist their way from the center cargo hold to the stern and stem in a smooth line. This will take some reshaping in the bow and stern to get the keelsons to set right and look smooth. I do not have the right sized lumber for these keelsons so I'm building them by laminating smaller dimension lumber together to get the right size. There is a start on both sides but now I'll have to thread the lumber and clamp it to the frames from under the deck beams I put in to soon. But it can be done so I'm doing it. Just takes more time and clamping is a bummer under the beams.
I've also been messing with establishing the sheer line and the bow and midships is ok but the stern is giving me a bit of trouble. From the last stern frame the deck continues out over the rudder a couple of inches and I do not have a clear picture in my mind of how that is to be built. I could use a solid block but I'd rather do the stern with frames as that is more prototypical. There is still a lot to do before I have to solve that problem so I'll get to it when I get to it.
And then there are the hull planks which are 6"x8" and there are a lot of them. Looks like I'll be cutting lumber for a long time to get all the lumber I need.

100_0206.JPG

100_0207.JPG

100_0208.JPG

100_0209.JPG

100_0210.JPG

100_0211.JPG

100_0212.JPG

100_0213.JPG

100_0204.JPG

100_0205.JPG
 
Last edited:
It is always a bummer when bilateral transfer is not exact. I had noticed that some of your frames were out of harmony....but waited to see if it was simply a preliminary alignment issue. Trace the opposite frames contour according to its centerline position and flip it and transfer the shape and new frame to the effected side....gluing it against the offending frame. This should be a doable correction.

Man it's going to be a big model. Oh...you can make a cutting templet from thin steel(A ruler) of the exact contour of the stanchion and then all you need to do is use it to cut as many identical stanchions as you will require.

Rob
 
That's a good idea Rob. All the turned stanchions are the same so one steel template should be fine. The top deck has two lines of stanchions unsupported underneath and the second deck down has one line of stanchions all the way down the middle supported directly down to the keel by other stanchions below it. It is said that soft mounted stanchions are less desirable but that's the way this one was built. Has to be a light load at the top though.
There are some lumps and bumps on the inside too that have to be smoothed out for the wing stanchions and the ceiling planks. Oh ya, that's another bunch of lumber, the ceiling planks. I'll have to get all that done before I continue with the deck framing. Lots more to do then I first thought.
 
Last edited:
Well the six other things turned into about 30 other things and the best way to correct the problems was to start over. My big mistake was trusting my machinery to do the right job and the printer didn't do that. I should have measured my templates at the beginning and I didn't. That one mistake has snowballed into several mistakes made while correcting other mistakes. Fixing one frame made two others also need fixing so I determined that since the bare bones aren't right, the rest of the ship will just get steadily worse until the whole thing will be ugly and misshaped. Since I would not allow this misshaped model to exist I decided to disassemble it and start over AGAIN. I thought I could save the keel and the bow but even the keel wood timbers split during the disassembly and is now useless kindling. As I said before, whoever has to take this model apart will destroy the whole thing and that's exactly what happened.I did save about a hundred screws that can be used again but that was it.
Anyway it's all part of the learning process and one thing else that I learned is I used too much glue in some places. Where the glue was spread evenly and thinly the wood stuck together and could not be pried apart. Where there were thicker layers of glue they pulled apart rather easily. So I'd suggest using the glue lightly and spread it thinly with your finger or something for best results. (I'm using TiteBond yellow) Also I won't be trusting my printer anymore either. I will measure twice and cut once in the future.
Here's a picture of her old bones. Now I'll do it again. Norgale

100_0214.JPG
 
As a matter of reference I found that the ply wood frames, cut from 5 ply cabinet grade plywood, was rather soft at the base of the frames. Several frames split and came apart when I was removing them. I'm wondering now if that plywood is good for this use? The half inch thickness works well as a frame but, is there a better material to use for the frames? I'd be happy to hear from anyone with advice on this subject.
 
PLywood is NEVER a good choice for single framing. The under half inch cuts can delaminate the plywood and can even separate and chip away. leaving a poor quality frame. If your model is NOT going to be exploded to show internal details...then forego the plywood frames and use the plywood for bulkheads instead. It is more stable and much more rigid. Also....if you are intending to explode your model and internal details are to be seen and admired....plywood would not be my first choice. Some other tight grained wood such as pear or apple might be more suited.

Im saddened you had to start over......but that is always the best course...if you are going astray. Better to begin fresh with a clear corrected plan...then to live with a warped, patched, cover-up, that you will regret, the models entire life.

Working with bulkheads progressed very fast too.

Watching with great interest.

Rob
 
Well the six other things turned into about 30 other things and the best way to correct the problems was to start over. My big mistake was trusting my machinery to do the right job and the printer didn't do that. I should have measured my templates at the beginning and I didn't. That one mistake has snowballed into several mistakes made while correcting other mistakes. Fixing one frame made two others also need fixing so I determined that since the bare bones aren't right, the rest of the ship will just get steadily worse until the whole thing will be ugly and misshaped. Since I would not allow this misshaped model to exist I decided to disassemble it and start over AGAIN. I thought I could save the keel and the bow but even the keel wood timbers split during the disassembly and is now useless kindling. As I said before, whoever has to take this model apart will destroy the whole thing and that's exactly what happened.I did save about a hundred screws that can be used again but that was it.
Anyway it's all part of the learning process and one thing else that I learned is I used too much glue in some places. Where the glue was spread evenly and thinly the wood stuck together and could not be pried apart. Where there were thicker layers of glue they pulled apart rather easily. So I'd suggest using the glue lightly and spread it thinly with your finger or something for best results. (I'm using TiteBond yellow) Also I won't be trusting my printer anymore either. I will measure twice and cut once in the future.
Here's a picture of her old bones. Now I'll do it again. Norgale

View attachment 431714
I faced the same problem with my Medea build. I made an overall 1/4" error in printing the plans and when I discovered it I had to abandon everything I had done so far and start again. 1/4" doesn't sound significant but at 1:48 scale that's a foot out all the way. It can only lead to disaster.
Well done for discovering your error and having the strength to tear it down and start again. Thumbsup
 
Rob and Ian thanks very much for your encouragement and advice. And here I thought that plywood was the preferred wood to use for these frames. I used it but it really didn't seem to be the right stuff. It was strong enough vertically but not too strong at the frame bases where it was more flexible. I'm glad I asked about that even at this point. In checking back over my templates I'm not finding the variance in the frames from side to side that I expected. I may have wandered off the pattern lines in the cutting with my band saw and then the sanding. I do have to go over everything very closely before I start again.
As for pear or apple wood, where in the world would I get that? I've never used anything but the stuff I got in kits and that's usually balsa or bass wood. I don't want balsa as it's way too soft but how about Basswood? I can get that locally and in good sized pieces too. Would that work? What about plain pine or fir or birch or poplar? We have that around here too. I'd like to use something from Home Depot so I can get what I need locally and without paying for freight which is over the top expense wise. Thank you Sleepy Joe.
At this time I'm still wanting to work with the frames rather than the bulkheads. That may change but I'd like to stick with it if I can.
 
I just finished checking all my patterns and when I drew them I made sure there was a center line on each one. To make a quick check on each one I simply folded them each in half at the center line to see how the edges would match up. All were nearly perfect except for three that I can redraw and they were only a quarter inch off. That's as good as a foot by what Ian says and he's right too. However I was looking for as much as a half inch difference between the left and right sides and I found none of that so the problem must be in the construction since the patterns all seem to be correct.
Rob, you mentioned having an exploded view on the model and that's not what I'm after. I'd like to do the interior of the hold the way the plans show because a lot of the strength came from the way the hold was ceiled and the beam timbers braced against the hull sides and the decks laid.. There will be places on the model that the inquisitive person can look down inside and see that there are some interior details. It all adds up to maximum strength for a large hull. I think I'll put some knees in there too. That'll be fun. Norgale.
 
Rob and Ian thanks very much for your encouragement and advice. And here I thought that plywood was the preferred wood to use for these frames. I used it but it really didn't seem to be the right stuff. It was strong enough vertically but not too strong at the frame bases where it was more flexible. I'm glad I asked about that even at this point. In checking back over my templates I'm not finding the variance in the frames from side to side that I expected. I may have wandered off the pattern lines in the cutting with my band saw and then the sanding. I do have to go over everything very closely before I start again.
As for pear or apple wood, where in the world would I get that? I've never used anything but the stuff I got in kits and that's usually balsa or bass wood. I don't want balsa as it's way too soft but how about Basswood? I can get that locally and in good sized pieces too. Would that work? What about plain pine or fir or birch or poplar? We have that around here too. I'd like to use something from Home Depot so I can get what I need locally and without paying for freight which is over the top expense wise. Thank you Sleepy Joe.
At this time I'm still wanting to work with the frames rather than the bulkheads. That may change but I'd like to stick with it if I can.
Basswood will be ok
 
I just finished checking all my patterns and when I drew them I made sure there was a center line on each one. To make a quick check on each one I simply folded them each in half at the center line to see how the edges would match up. All were nearly perfect except for three that I can redraw and they were only a quarter inch off. That's as good as a foot by what Ian says and he's right too. However I was looking for as much as a half inch difference between the left and right sides and I found none of that so the problem must be in the construction since the patterns all seem to be correct.
Rob, you mentioned having an exploded view on the model and that's not what I'm after. I'd like to do the interior of the hold the way the plans show because a lot of the strength came from the way the hold was ceiled and the beam timbers braced against the hull sides and the decks laid.. There will be places on the model that the inquisitive person can look down inside and see that there are some interior details. It all adds up to maximum strength for a large hull. I think I'll put some knees in there too. That'll be fun. Norgale.
Experience shows that views into the hold are difficult if you are fully rigged and have sails set.
My bulkhead version is strong and rigid and according to my habit…….much faster to build.
Simple peekABoo holds can be created under the hold opening if desired.

I’m a lazy builder……

Rob
 
Not with a Boroscope. Somebody will have to be very inquisitive.
If someone gets that close, there’s a great threat for potential damage to be created. And hidden behind glass prevents such curiosities damage.

Rob
 
You are sure right about that but after I'm gone it won't matter to me anyway. Ha!
Found some more problems tonight. A few of my templates have wrong center lines on them. They fold in half ok but the center line was off. Correcting all of them now. Redesigning the frames too. Making them thicker (stronger) on the bottom across the keel and thinner on the top end above the plank sheer. Top ends should look a lot better too. I hope!
 
Last edited:
You are sure right about that but after I'm gone it won't matter to me anyway. Ha!
Found some more problems tonight. A few of my templates have wrong center lines on them. They fold in half ok but the center line was off. Correcting all of them now. Redesigning the frames too. Making them thicker (stronger) on the bottom across the keel and thinner on the top end above the plank sheer. Top ends should look a lot better too. I hope!
Yeah...frames do taper from the keel to the rail.
Even when I built mine....using bulkheads. I still had to fold the template and verify the centerline and make corrections for any non bilateral discrepancies in the frames form. Once that was done....I was confident the hull would be symmetrical.
Your build is going to be significantly larger then my 1/128 version. But I had space issues. It and its case had to fit in a specifically designated area, in my library/study.

Following with enthusiasm.
Rob
 
Back
Top