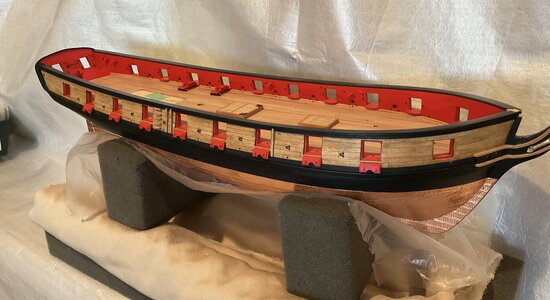
Syren 1803 1:64 Model Shipways

Edit:

Back in my post #585 I had a brain fart and wrote a couple of things in error:

The carronades I am using are 18lb, not the kit supplied 24lb. I changed out the kit ones some while ago. The 2mm round shot I used is the correct size.

I used NaturOil on the racks not shiny finish True-oil.
I don't usually have brain farts. Mine are more like the runs with a bunch of ..... ROTF
 
No worries Roger we all have the farts. OMG I sometimes can't remember breakfast let along what I wrote days ago.
Sometimes I think memory in advancing years is akin to trying to keep water in a rusty bucket full of holes.

I don't usually have brain farts. Mine are more like the runs with a bunch of ..... ROTF
Good grief, what have I started?
 
Last edited:
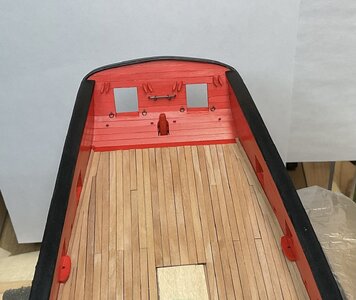
A small weekend progress update. I have fixed the carronade swivel brackets port and stb’d, which are pined and glued in place. The cleats aft are also pined and glued as are the aft eye and ring bolts.

I blackened the brass wire “horse” and temporarily added two different sized traveller rings for the boom sheet. I can’t find sufficient information about how the double block was attached to the horse. It if was simply stropped with a rope becket my thinking is the becket would wear very quickly. However, I can see it being more practical for the block to be hooked to the traveller ring. If it’s hooked then I need to work out the hook and ring size. Anticipating that I added a 2mm and a 3mm ring intended to cut off the redundant one at a future date.

Work continues on the multitude of eye and ring bolts and cleats. Thanks for following along.

IMG_4689.jpeg
 
A small weekend progress update. I have fixed the carronade swivel brackets port and stb’d, which are pined and glued in place. The cleats aft are also pined and glued as are the aft eye and ring bolts.

I blackened the brass wire “horse” and temporarily added two different sized traveller rings for the boom sheet. I can’t find sufficient information about how the double block was attached to the horse. It if was simply stropped with a rope becket my thinking is the becket would wear very quickly. However, I can see it being more practical for the block to be hooked to the traveller ring. If it’s hooked then I need to work out the hook and ring size. Anticipating that I added a 2mm and a 3mm ring intended to cut off the redundant one at a future date.

Work continues on the multitude of eye and ring bolts and cleats. Thanks for following along.

View attachment 434085
Good evening Roger. One day when I’m big I will build like this. As always your work is at the highest level. Cheers Grant
 
As always, your work is exemplary!
Good evening Roger. One day when I’m big I will build like this. As always your work is at the highest level. Cheers Grant

You guys are too kind. Both of your builds are really fine examples of how to attain a progressively higher and higher standard, something most of us can only dream of achieving.

Your supportive compliments always provide that boost some of us youngsters need :).
 
A small weekend progress update. I have fixed the carronade swivel brackets port and stb’d, which are pined and glued in place. The cleats aft are also pined and glued as are the aft eye and ring bolts.

I blackened the brass wire “horse” and temporarily added two different sized traveller rings for the boom sheet. I can’t find sufficient information about how the double block was attached to the horse. It if was simply stropped with a rope becket my thinking is the becket would wear very quickly. However, I can see it being more practical for the block to be hooked to the traveller ring. If it’s hooked then I need to work out the hook and ring size. Anticipating that I added a 2mm and a 3mm ring intended to cut off the redundant one at a future date.

Work continues on the multitude of eye and ring bolts and cleats. Thanks for following along.

View attachment 434085
Beautiful !
What did you use for paint?
 
Young man, you are far too modest! That is beautiful work on parts that I can only imagine must be very finnicky to work with. If I look at your inner planking again, I cannot but feel amazed at the level of finish you have created. On Pandora, the inner planking and rails will form a focal point - I only wish I can attain close to the results you are showing us, here!
 
Beautiful !
What did you use for paint?
Hi Jeff, thank you. I use Vallejo paints only, both by airbrush and by normal brush painting depending on what I am trying to achieve. There are specific Vallejo paints for the type of paint application.

Rather than re-write a post I made from July 2022 I have attached it here and hope it will answer some of your questions. Lot’s of trial and error and testing on various types of wood helped as I moved forward.

 
Young man, you are far too modest! That is beautiful work on parts that I can only imagine must be very finnicky to work with. If I look at your inner planking again, I cannot but feel amazed at the level of finish you have created. On Pandora, the inner planking and rails will form a focal point - I only wish I can attain close to the results you are showing us, here!

Well I haven’t been called “young man” for quite a while but I’ll take it ROTF.

Your use of the term “finicky parts” is very appropriate. As you well know those tiny parts of our models can certainly improve the aesthetic appeal of our builds but my goodness they can be a pain in the butt. I take it slowly, curse a lot, rinse and repeat but I know we can all relate to that.

I’m really looking forward to seeing all the different parts of your Pandora come together. I know that all parts of your model will be exceptional, as they were on your previous builds.

As always, thank you Heinrich.
 
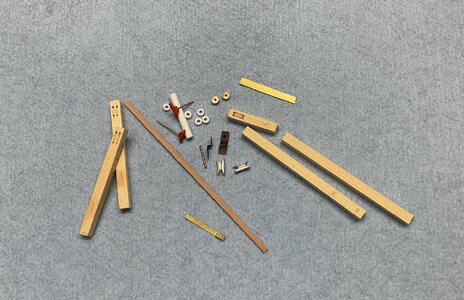
Just a few shots of some progress from these past few weeks. The first photo is just a pile of parts I am playing with, which I hope will turn into a reasonable rendition of the catheads. I used Alaskan Yellow Cedar for the wood. I’ll use tiny sheaves held in place with bent and shaped brass strips for the cathead stopper cables, and ring bolts, cleats and other parts as necessary.

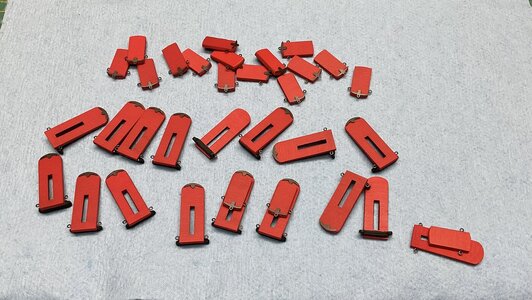
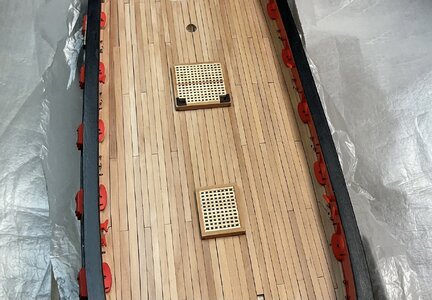
I have started building the carronade sleds. They are now painted with drilled and glued eyebolts along with the supplied PE plates. I used the kit supplied wheel assemblies, painted black, underneath the sleds. I’ll intermittently work away on the sleds and carronades while completing other ship parts. I placed a couple of sleds temporarily on the deck just to get a feel for height etc

I had previously installed the swivel brackets at the gunports but have now added the many eyebolts and cleats on the inner bulwarks too. The breech line eyebolt rings are also drilled out but not secured yet. I’ll secure the breech lines to the rings at the bench then mount them when the carronades are ready.

So that’s it for now, as always I appreciate your valuable time looking in on my build, as well as your always well received comments, likes and input. Have a great weekend.

IMG_4724.jpeg

IMG_4722.jpeg

IMG_4731.jpeg

IMG_4734.jpeg
 
Back
Top