Syren 1803 1:64 Model Shipways

Beautiful work on the Sren! ;) That kit is one of the better ones out there.
Thank you Krt, it’s tempting to leave the Y off and blame the the ship’s chippy but deep down I know that will not happen ROTF.

Good morning Roger. WOW. She is beautiful rendition of the S'ren.... ;).Grst job on the gun port lids with those tiny eye bolts. Cheers Grant
Thanks Grnt, I keep telling myself I need to speed up the build and spend less time on all fours on the floor trying to find the meaning of Y ROTF.

Very impressive looking model!.
Thanks Jack, much appreciated :)

It is looking very good
with or without the Y
Ok, can I count this as one vote for no Y ? :D

She didn’t ask you Y you lost it?
Oh yes, she constantly asks me things like that but not in the abbreviated form of Y ROTF
 
Wow Roger! Super work on your Syren! Such a clean build. You could give a seminar on dust accumulation prevention. Seriously, I really applaud your ability to keep scale on such small elements. Really well done!
 
Wow Roger! Super work on your Syren! Such a clean build. You could give a seminar on dust accumulation prevention. Seriously, I really applaud your ability to keep scale on such small elements. Really well done!
Thanks Ken I really appreciate your comments. Dust control has to be the bane of all of us. I purchased a small desk top filter system back in 2021 because of dust allergies, which helps me a lot (I forget how to link a post, but it’s discussed in my post #24). Mind you, if you notice the photos don’t show what’s lying around the bench area ;).
 
Sweeps

Crap, crap, crap…. as I looked at my photos above I just noticed my sweep hinges on the port side are back to front. That is going to bug me every time I look at the model. Crap, they have to come off - very carefully. I see carpet searches in my near future :rolleyes:.

The sweep covers need to be hinged for’d of the little ports so as not to interfere with the “performance of the sweeps”.

To be continued…
 
A few weeks have passed but it’s time for a quick update to keep me accountable :). Firstly, my best wishes to you all for 2024 and I hope your holidays were everything you desired.

Rather than photos I’m just going to list my continued progress:

-The waterways are now completed with pear stock.
-Some deck fittings are now being secured.
-Riding bitts and fore bitts parts are cut from pear. It took longer to prepare the pear, which I cut down from billets than making the bitts.
-The catheads (in Yellow Cedar) are underway.
-Upper and middle rails for’d, in pear, are ready for scribing.
-The swivel brackets for the carronades are painted ready for mounting pins to be drilled.
-Boarding ladder steps cut from pear are now in place on the hull.
-Main channels are painted black with mounting holes drilled and brass wire inserts completed.
-Fenders and chesstrees are stained and glued on.

The Syren “Y” has yet to be replaced. It was never found and there’s no way I’m going through the now full vacuum bag looking for a 2mm brass letter :rolleyes:.

Thanks for looking in on me.
 
If you contact Model Expo, they should send you a replacement. That is one of the benefits in their ads. (I'm assuming that it is part of the original kit)
Yes, thanks. I have a replacement, which I will fix soon. The kit came with three sets of the SYREN lettering, which was part of the photo etch sheet. I have one left because the first disappeared forever into the workshop bilges, the second into the carpet and the third is still on the PE sheet. I think they give you three sets anticipating modellers like me who lose tiny parts :D.
 
Changed out the ship’s wheel

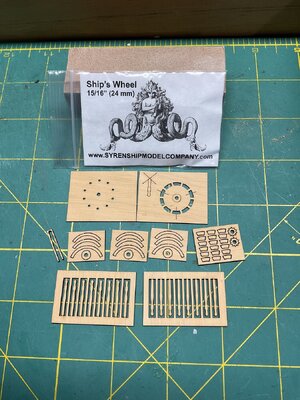
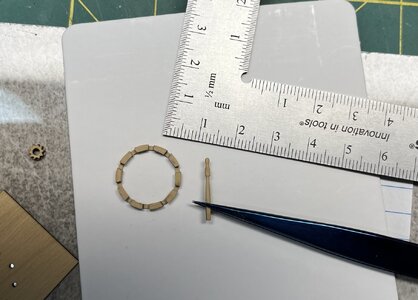
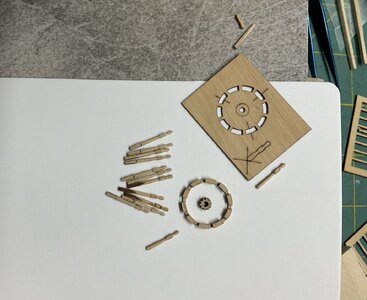
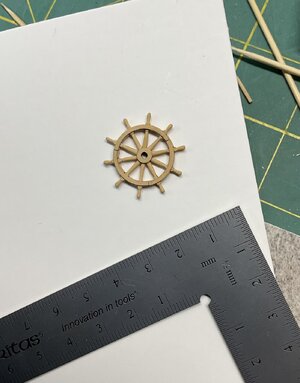
A couple of eye straining days working on the ship’s wheel. I wanted to use a wooden wheel instead of the supplied metal one so turned to a boxwood kit, which I know a few Syren builders have used on their models.

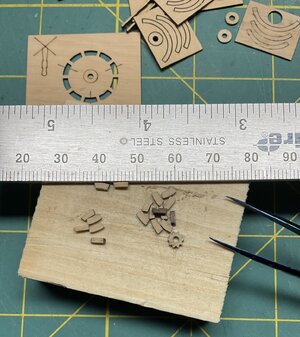
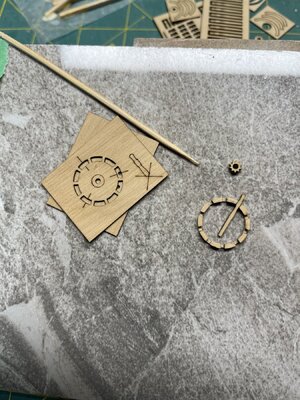
I purchased the 24mm kit, which is in keeping with the early 1800’s wheel diameter of 4 to 5 feet, spoke to spoke. The parts for the kit are extremely small and fragile but working slowly and carefully it’s fun to see the wheel take shape. The only part that I found a little frustrating was the char that needed to be carefully removed from various parts without affecting the size of the tiny pieces. Nevertheless, the supplied templates are well cut and a must for a successful build. The hardest part is “turning” the ten flat 3/16” (1.2mm) wood pieces into a reasonable and consistent depiction of round spokes. I used sandpaper, needle files, and cut up emery boards.

I think the following photos are self explanatory. The last one is the completed wheel before final clean up and before applying a suitable finish. As usual close ups are not complimentary but from a foot away I think the wheel looks ok.

My next step is to cut out and make pedestals and a barrel from pear. I might add a platform once I start seeing this mini project come together.

IMG_4595.jpeg

IMG_4603.jpeg

IMG_0933.jpeg

IMG_0934.jpeg

IMG_4611.jpeg

IMG_4626.jpeg
 
Changed out the ship’s wheel

A couple of eye straining days working on the ship’s wheel. I wanted to use a wooden wheel instead of the supplied metal one so turned to a boxwood kit, which I know a few Syren builders have used on their models.

I purchased the 24mm kit, which is in keeping with the early 1800’s wheel diameter of 4 to 5 feet, spoke to spoke. The parts for the kit are extremely small and fragile but working slowly and carefully it’s fun to see the wheel take shape. The only part that I found a little frustrating was the char that needed to be carefully removed from various parts without affecting the size of the tiny pieces. Nevertheless, the supplied templates are well cut and a must for a successful build. The hardest part is “turning” the ten flat 3/16” (1.2mm) wood pieces into a reasonable and consistent depiction of round spokes. I used sandpaper, needle files, and cut up emery boards.

I think the following photos are self explanatory. The last one is the completed wheel before final clean up and before applying a suitable finish. As usual close ups are not complimentary but from a foot away I think the wheel looks ok.

My next step is to cut out and make pedestals and a barrel from pear. I might add a platform once I start seeing this mini project come together.

View attachment 422106

View attachment 422107

View attachment 422111

View attachment 422116

View attachment 422124

View attachment 422126
That looks great !
 
Very good result - I guess much much better than the original
 
Very good result - I guess much much better than the original

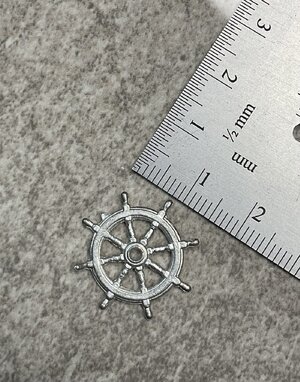
Hi Uwe, thanks for your input. Yes, I agree the wood kit wheel looks much better than the supplied metal one. Though as I take a fresh look at it this morning I’m not happy with my wood rim placements- I see a possible redo of a couple of parts.

Actually the Model Expo wheel is one of the better metal pieces from the ship kit but trying to paint it to look like wood will not work for me. Also, I was intrigued with the little wooden kit and wanted to try it out.

IMG_4623.jpeg
 
Hi Uwe, thanks for your input. Yes, I agree the wood kit wheel looks much better than the supplied metal one. Though as I take a fresh look at it this morning I’m not happy with my wood rim placements- I see a possible redo of a couple of parts.

Actually the Model Expo wheel is one of the better metal pieces from the ship kit but trying to paint it to look like wood will not work for me. Also, I was intrigued with the little wooden kit and wanted to try it out.

View attachment 422201
Good afternoon Roger. No comparison- great call to make the wooden one
 
Back
Top