Sopwith Camel. Artesania Latina [COMPLETED BUILD]

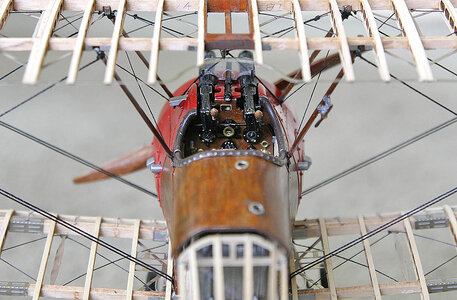
Hello, again thanks for your likes. Today’s update is showing you the completed rigging, the mounted engine, a few bits and bobs and the very nice display stand. The rigging was a real pain to do, the eyelets being stainless steel PE have very sharp internal edges, the thread could only be pulled through if it was vertical to the eyelet and not at even a slight angle otherwise the sharp edges gripped and prevented the thread from sliding through, it was therefore very difficult to get any tension whilst tying off. Another issue was the eyelets only had a small contact area on the wooden frames and easily came away when tension was applied, some pieces even had three eyelets attached to one small piece of PE making things even more precarious, all pretty frustrating, but with a bit of ingenuity I prevailed. I started to make up the undercarriage, but I broke one of the two axles, I wasn’t worried as I have found that the replacement service to be excellent so I requested a new one. In the meantime I started to make up the second axle unit, knowing how brittle the first had been I was very careful, unfortunately I broke that one as well in exactly the same place so I’ve decided to make my own axles. I think that a couple of days at the bench will see this project finished and I’ll be moving on to my next one.


View attachment 431330

View attachment 431331

View attachment 431332

View attachment 431333

View attachment 431334

View attachment 431335
Just WOW, especially jour painting! Great work, Ken.
Regards, Peter
 
Hello, again thanks for your likes. Today’s update is showing you the completed rigging, the mounted engine, a few bits and bobs and the very nice display stand. The rigging was a real pain to do, the eyelets being stainless steel PE have very sharp internal edges, the thread could only be pulled through if it was vertical to the eyelet and not at even a slight angle otherwise the sharp edges gripped and prevented the thread from sliding through, it was therefore very difficult to get any tension whilst tying off. Another issue was the eyelets only had a small contact area on the wooden frames and easily came away when tension was applied, some pieces even had three eyelets attached to one small piece of PE making things even more precarious, all pretty frustrating, but with a bit of ingenuity I prevailed. I started to make up the undercarriage, but I broke one of the two axles, I wasn’t worried as I have found that the replacement service to be excellent so I requested a new one. In the meantime I started to make up the second axle unit, knowing how brittle the first had been I was very careful, unfortunately I broke that one as well in exactly the same place so I’ve decided to make my own axles. I think that a couple of days at the bench will see this project finished and I’ll be moving on to my next one.


View attachment 431330

View attachment 431331

View attachment 431332

View attachment 431333

View attachment 431334

View attachment 431335
Hi Ken, you're doing an awesome job with this build! I look forward to seeing how you fix your axle issues. I started this kit just after you did, your build log is helping me move forward with mine. Thank you!
 
Hello everyone, again thanks for following and your kind comments and likes.
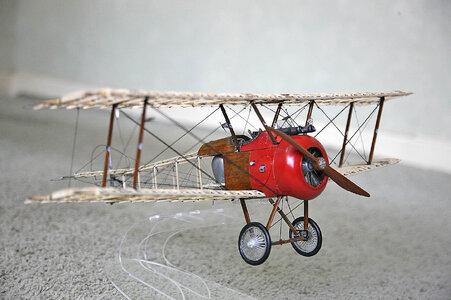
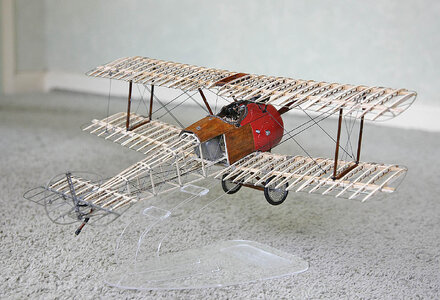
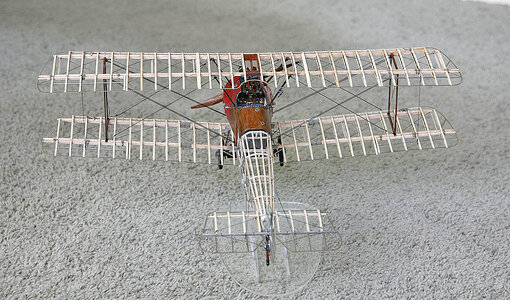
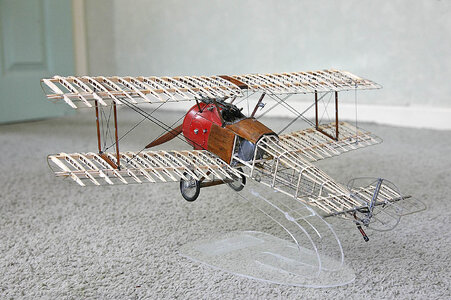
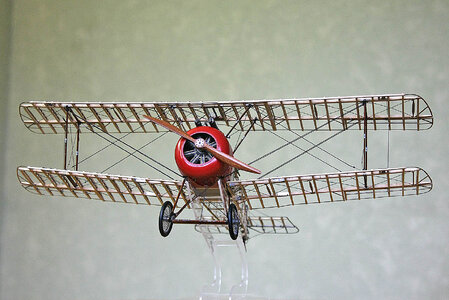
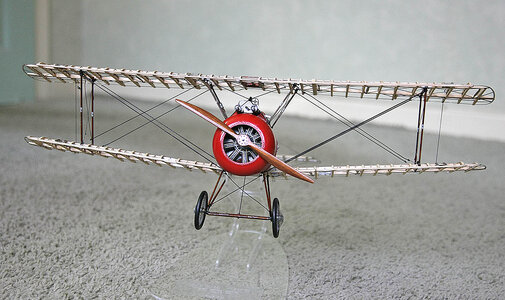
The Sopwith is now finished, and is ready to display, I hurried it a bit towards the end as I just wanted it finished so just the final pics I’m afraid. It came out in my pinion only OK, nothing special. It was a good effort by Artasania but not great, it relied too much on photo etch for many of its parts, many very small and being under tension with little contact area broke away easily during the build which was very frustrating. This is a fragile model and needed very careful handling, I must admit it wasn’t really fun to build and I wouldn’t want to build it again.
Now onto the next project.

133.jpg

134.jpg

135.jpg

137.jpg

138.jpg

139.jpg

140.jpg
 
Hello everyone, again thanks for following and your kind comments and likes.
The Sopwith is now finished, and is ready to display, I hurried it a bit towards the end as I just wanted it finished so just the final pics I’m afraid. It came out in my pinion only OK, nothing special. It was a good effort by Artasania but not great, it relied too much on photo etch for many of its parts, many very small and being under tension with little contact area broke away easily during the build which was very frustrating. This is a fragile model and needed very careful handling, I must admit it wasn’t really fun to build and I wouldn’t want to build it again.
Now onto the next project.

View attachment 434512

View attachment 434513

View attachment 434514

View attachment 434515

View attachment 434516

View attachment 434517

View attachment 434518
Very nice work on the Sopwith. Lots of well done details.
 
  • Like
Reactions: Ken
I like your efforts in making this a fine example of the Camel.
It also reinforced my personal feeling that it's not a build that with my mediocre close up ision and fumble fingers I should attempt
 
  • Like
Reactions: Ken
Hi Ken, I think your model turned out much better than just OK...I think you did a great job! Thanks for the pics and tips along the way, it's helping me with my build a lot.
Steve
 
  • Like
Reactions: Ken
Hi Ken, I think your model turned out much better than just OK...I think you did a great job! Thanks for the pics and tips along the way, it's helping me with my build a lot.
Steve
Hi Steve, Thanks a lot for your thumbs up on my build. Yes it’s a nice model, the problem we have as modellers is that we are our own harshest critics, we know of every smallest imperfection and judge it on them. Enjoy your build. Ken
 
I like your efforts in making this a fine example of the Camel.
It also reinforced my personal feeling that it's not a build that with my mediocre close up ision and fumble fingers I should attempt
Hi Dave, Thanks, I know exactly what you mean about fumbling fingers, I have my fair share. Our hearts not our heads or ability chooses the models we take on but they usually turn out ok. It’s all part of the learning curve.
 
That looks great. Nicely done.

Jan
Hi Jan, Many thanks for following and for your welcome comment, it does encourage one to post builds on the forum when others appreciate what you try to do. ken
 
Congratulations for finishing this model
I can hear your "Puh! It is finished"
 
  • Like
Reactions: Ken
Hello everyone, again thanks for following and your kind comments and likes.
The Sopwith is now finished, and is ready to display, I hurried it a bit towards the end as I just wanted it finished so just the final pics I’m afraid. It came out in my pinion only OK, nothing special. It was a good effort by Artasania but not great, it relied too much on photo etch for many of its parts, many very small and being under tension with little contact area broke away easily during the build which was very frustrating. This is a fragile model and needed very careful handling, I must admit it wasn’t really fun to build and I wouldn’t want to build it again.
Now onto the next project.

View attachment 434512

View attachment 434513

View attachment 434514

View attachment 434515

View attachment 434516

View attachment 434517

View attachment 434518
Congratulations with the finish of this very beautiful plain, Ken. It’s looking very nice on that plexi stand, free in the air.
Regards, Peter
 
  • Like
Reactions: Ken
Hello everyone, again thanks for following and your kind comments and likes.
The Sopwith is now finished, and is ready to display, I hurried it a bit towards the end as I just wanted it finished so just the final pics I’m afraid. It came out in my pinion only OK, nothing special. It was a good effort by Artasania but not great, it relied too much on photo etch for many of its parts, many very small and being under tension with little contact area broke away easily during the build which was very frustrating. This is a fragile model and needed very careful handling, I must admit it wasn’t really fun to build and I wouldn’t want to build it again.
Now onto the next project.

View attachment 434512

View attachment 434513

View attachment 434514

View attachment 434515

View attachment 434516

View attachment 434517

View attachment 434518
Hi Ken
Splendid work
Congrats
 
Back
Top