Sopwith Camel. Artesania Latina [COMPLETED BUILD]

Looks like you are making great progress. I can commiserate on big bumbly fingers versus small parts. I’ve gotten to be quite the expert on that phase of my various builds.

I also enjoyed many a day flying RC aircraft, after getting started in the hobby with U-control. There was many a day that aircraft lovingly build in winter months returned home in a sorry state to be rebuild to fly another day.

So with that said I’m thoroughly enjoying your build log.

Jan
 
Ken, your Camel is wickedly cool. While I find your building skill to be envied, your creativity used in the display is without par. I have never seen anything like it and conjures up visions of the "dawn patrol". For all of us WWI fanatics, you have done us proud. Thanks for a terrific log and wonderful pictures.
 
Hello and welcome to my build. Thanks for your likes and comments, they do make a difference and make the log more interesting.

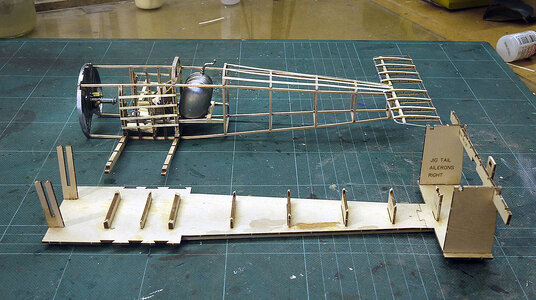
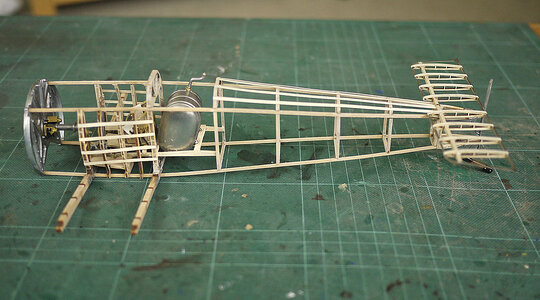
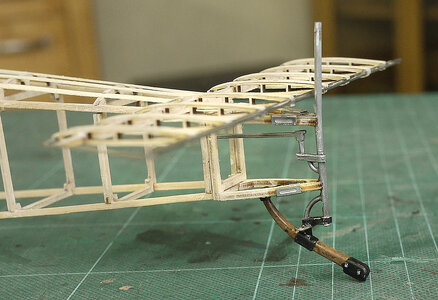
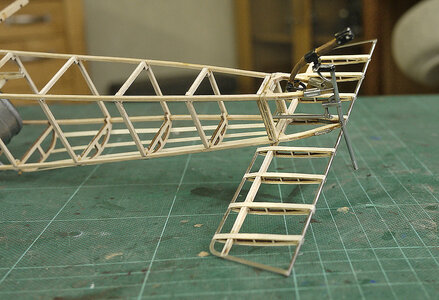
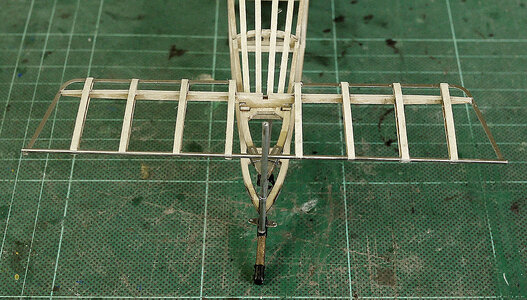
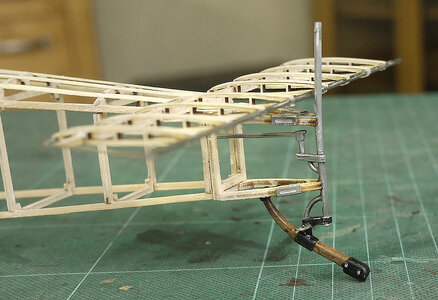
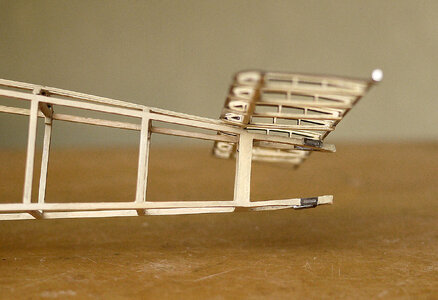
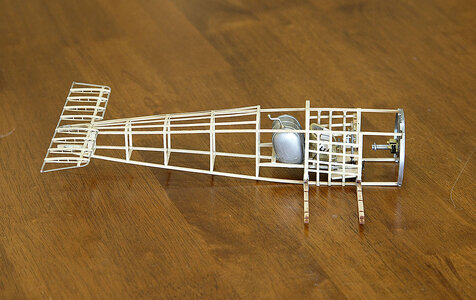
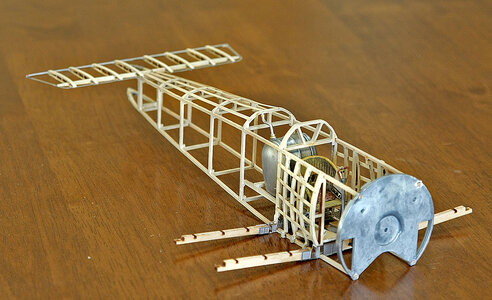
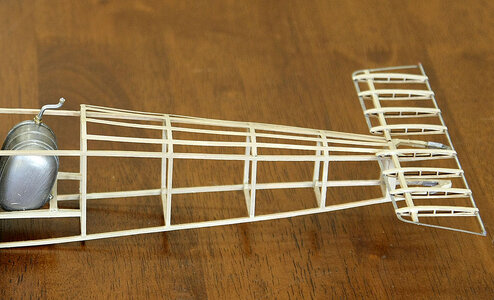
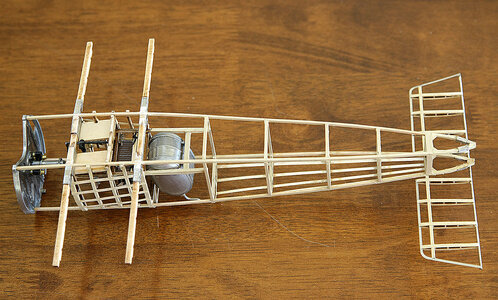
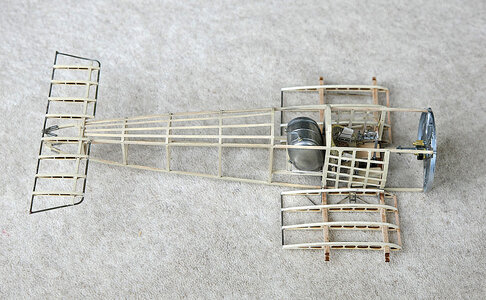
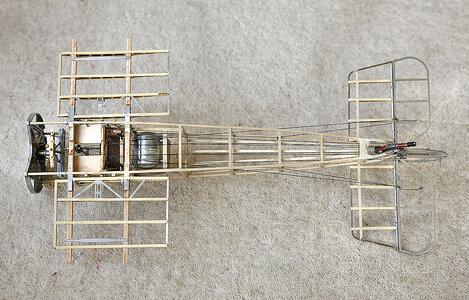
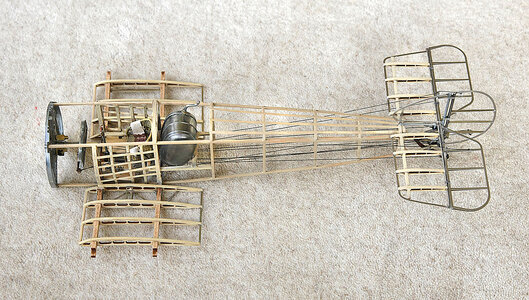
In my last post I said that I was going to release the fuselage from its jig. I was nervous as this required cutting it away from the jig along with a bit of pulling and twisting but it all went to plan and as you can see it was successful without any breakage, Phew! I trimmed the tail parts, added some pre cut shaped pieces and PE supports for the tail skid, then the underside rib cappings after which I gave the whole thing a good sanding. I assembled and painted the tail skid which included a pillar for the tail fin to be attached, then fitted the unit. I was unfortunate enough to break off about 10mm from the top of the pillar, it was my fault and nothing to do with a fragile part, blast :(. It shouldn’t be too difficult to make good when I attach the fin but AL. have a parts replacement policy so I’ll contact them and see how I get on, it would be better than a repair. Until I hear something I’ll leave finishing the tail and move on to something else.


040.jpg

044.jpg

045.jpg

046.jpg

047.jpg
 
Ken. you are doing a fantastic build.
It's also got me looking at my next endeavor and that Sopwith Camel has leaped to near or at the top of my list. Sigh!
I've done some looking and have found that there are several brand iterations. The one I really like is the Hasegawa 1/8th scale. That is until I researched the price, $1050USD+/- (OUCH!) which is well out of my thin wallet's range. I'm now considering the Hasegawa 1/16th scale version and that's only just to be different. What this one does not have is a building jig which I really like on your AL model. Oh well, I need to finish at least a couple that are on my bench first and enjoy your build in the meantime.
 
Hello, Thanks for dropping by.

I’m still making rapid progress with the build and all is still going ok. I’ve removed the damaged tail skid and will either replace or repair it, I’m going to leaving that part of the build until later but whilst it’s off I’m going to give the fuselage some much needed attention to get a more acceptable finish, I’ll explain in another post.

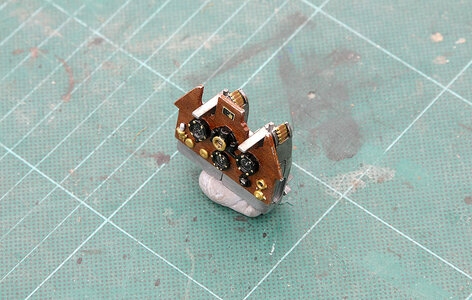
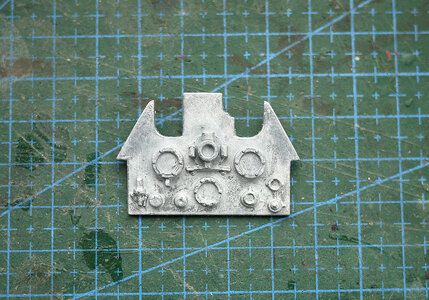
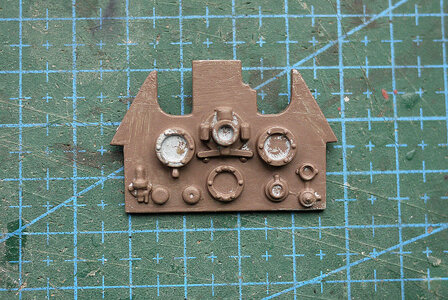
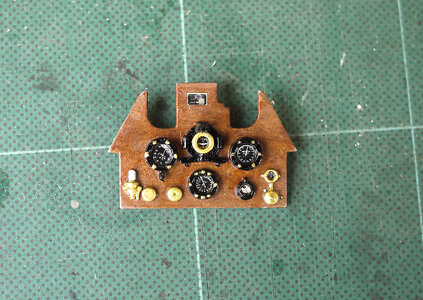
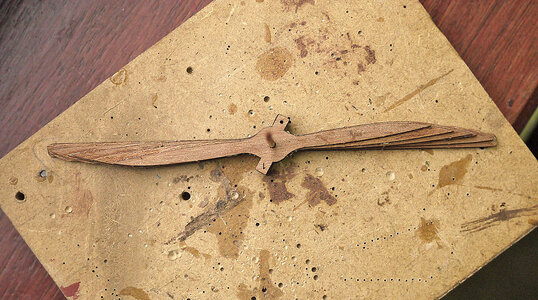
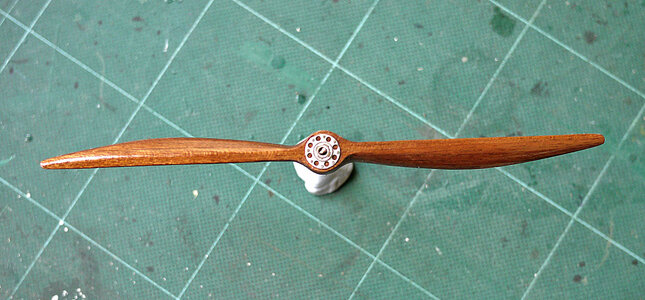
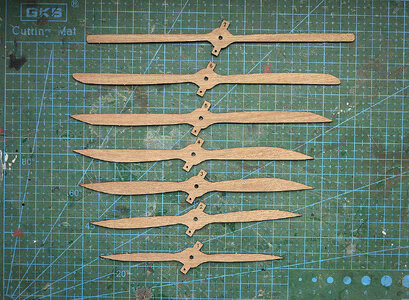
I’ve made up and painted the instrument panel, giving it a wood appearance and applying the decals. I couldn’t resist making up the propeller, it was made from seven pieces each smaller in size, layered up, glued together to make a laminate, they had a positioning tab to get their alignment correct so it wasn’t difficult. When set it was sanded to its final shape, a PE boss was added after which I applied a sanding sealer and a coat of varnish. This was my first making of a propeller, it was fun and I’m rather pleased with it.


048.jpg

050.jpg

051.jpg

052.jpg

053.jpg

054.jpg
 
Good morning modellers. Yesterday I mentioned that I was going to try and improve the finish on the fuselage as I wasn’t satisfied with it. I had intended this to be a fairly quick build as a break from ships and I hadn’t considered making it a perfect showpiece, just a fun build. It was looking ok on my bench but on seeing the photos I realised that the finish was really not very good, I wouldn’t accept it on my ship models so I thought why should I accept it on an aircraft, let me explain. The main issue was that every part had a raw plywood edge and it wasn’t exactly the best ply that I’ve used, secondly having pre cut slots for the parts to fit was never going to achieve perfect joints often leaving small gaps. Thirdly there are three different types of wood used, each different in grain and colour so it wasn’t exactly harmonious. Looking at Donnie and Deans build I was shamed into at least trying to get it to look better so I set to.

First it was out with the filler which I rubbed into each joint, when dry I carefully sanded everywhere, I then gave it a liberal coat of sanding sealer to harden and seal the grain before another sanding using 400 grit, this got rid of the hair type fibres leaving a good surface to paint. I mixed my acrylic paint to the desired colour and painted all the wood surfaces, the fuselage I think is much improved, joints look ok, no ply edges are showing, the wood looks the same and there is good uniformity of colour, I would have preferred a wood finish but for this build that wasn’t possible. I think that it was time well spent and now I’m happy to move forward.


This was the photo that prompted me to make some improvement

045.jpg

This is how that area came out

061.jpg


055.jpg


056.jpg


057.jpg


058.jpg
 
Hi Ken. A definite improvement on the finish. Is the frame as delicate as it appears in the pictures? If so, great job getting a nice finish on the wood.
Hi Jeff, yep, the stringers are only .3mm thick and the ply frames are 1.8mm sq. Thin ply is never going to have any strength, you only need to sneeze and it’s broken. It would have been better to get a good surface before it was assembled but it was too fragile, it got a little more strength when it was a built structure, it’s not really an issue now as I’m accustomed to being gentle with it but give me some planks, nails and a hammer any day.
 
Could the thin pieces have been strengthened with some thin CA glue? I have done this a couple of times on delicate pieces but not on something this large.
Hi Jeff. I’ve already done that, every little helps. Ken
 
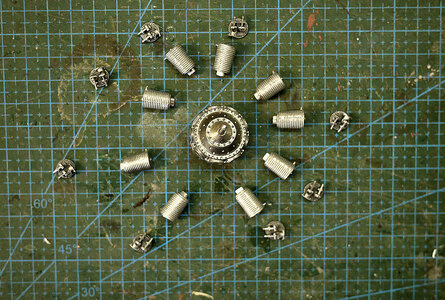
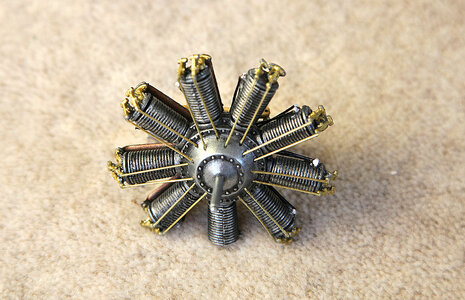
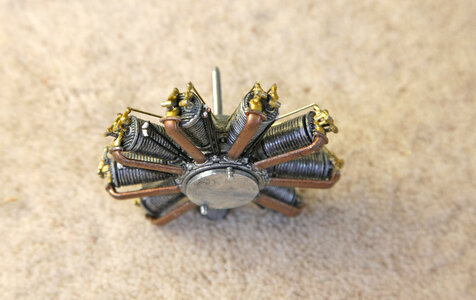
Hello, thank you for being here and for your likes. The build continues and now that I’m into it I’m starting to enjoy it quite a bit. Having to leave the tail until I hopefully get the spare part from AL. I thought that it would be fun to have a go at the engine. Although I haven’t shown it the tappets valve seats and head are separate items which need to be built up before fitting onto the cylinder barrel, all the parts are nicely detailed and fitted well. You will notice that one of the nine cylinder heads is missing, I was one short in the kit so for completion I’ll have to wait until AL. send me the part, a bit annoying. I left the engine silver but to give it some depth I gave it a good dose of very thinned black enamel wash which I think was successful, I painted the tappets gold and the rear inlet copper. The pushrods were made up from .5mm brass, which there was nowhere near enough in the kit, the ignition cables were made from black jewellers wire, these were a pain to do but on the whole I think that it’s been a success.


060.jpg


062.jpg


064.jpg
 
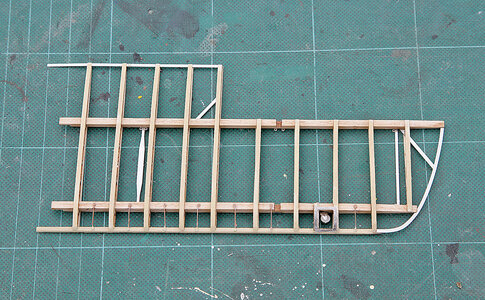
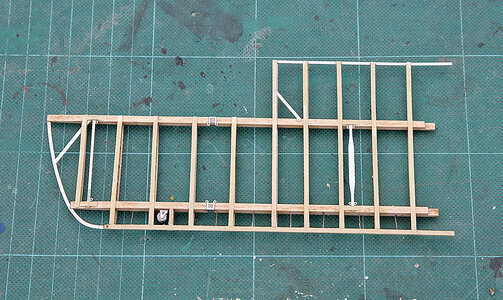
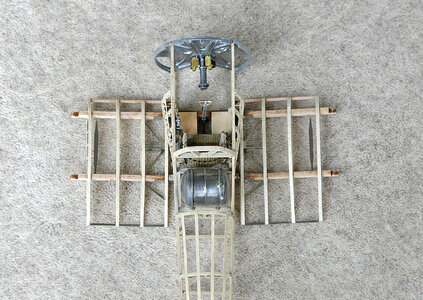
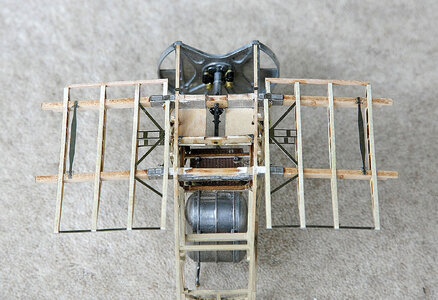
Hello and welcome. I’m now starting on the wings. This is out of sequence with the instructions but until I get the replacement rudder part I can’t continue with further work on the fuselage as this would make rigging the tail control wires impossible. I made up the engine in the meantime but this didn’t take long so it has to be the wings which can be attached later, again using a supplied jig. I made and fitted the inner part of the lower wings, they need cleaning up and painting but I’ll do the whole wing in one go, I also fitted some of the many bracing and rigging points. I think that the photos show the result better than I can explain.


066.jpg


067.jpg


068.jpg
 
Hi Ken, you're doing an amazing job on this build!
I started this kit last weekend but I haven't made near the progress you have. I'm looking forward to watching you complete this build, I've learned a lot so far.
Steve.
 
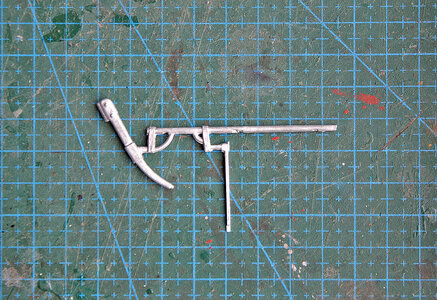
Good morning. I’m pleased to say that the replacement tail skid/rudder post arrived from AL today. The procedure was very easy, I went onto their web site and found a heading ‘replacement parts’ I filled in a simple request form giving the part number, I even added a comment saying that it was my fault for the breakage. No questions were asked and it only took four days for the part to be delivered. I’d say that is pretty good service, well done AL.

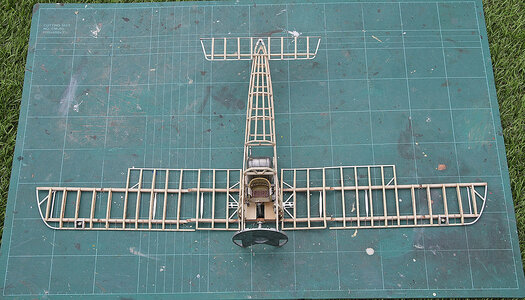
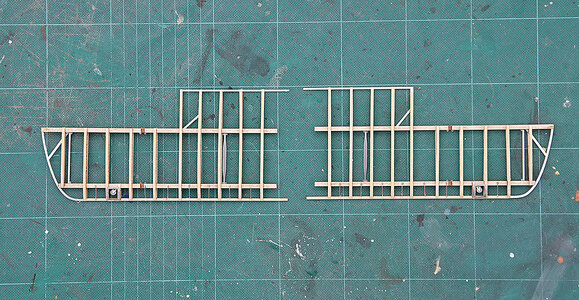
Whilst I was waiting I built up the lower wings, they are now complete except for the rigging and ailerons. They were quite easy to make up and this time all the parts were a very good snug fit. My method was to dry assemble the ribs, get everything lined up correctly, secure, then put a drop of thin cyno on the joints, you can see it leach into the joint, this will have the benefit of also strengthening the surrounding area and is a very clean way of using cyno. I’ve used this method on my quarter scale RC models and never had a failed joint even during some of my pretty poor landings. I fitted the PE parts, wing tips, trailing edges, braces and rigging points and am happy with the result. I was very pleased to see that AL had included at least one spare of each type of rib, none have yet been needed but there inclusion is welcome.

I’ve also made up and attached the ammo feed trays to the dash, they will be fitted later as a unit, I’ve found that the detailing on the kit parts mostly very good and certainly to an acceptable level for a kit aimed to be relatively easy to build.


Replacement tail skid
076.jpg


075.jpg

071.jpg

072.jpg

073.jpg

074.jpg
 
Last edited:
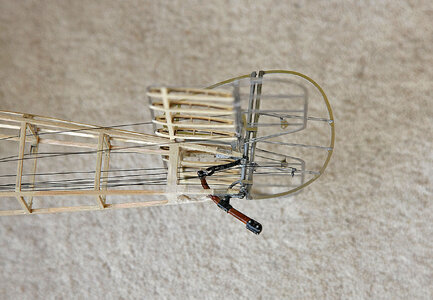
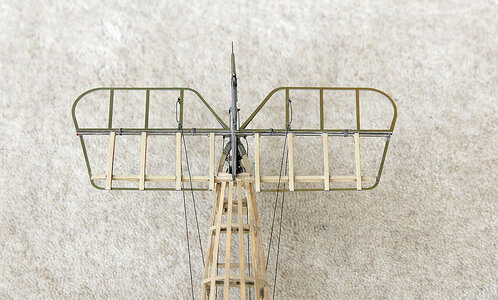
Hello and welcome once again. I’ve got quite a bit done over the last couple of days. Having got the replacement tail skid which was essential for making up the tail section I managed to finish off that part of the build including the rigging. I found that the hinges supplied for the elevators were no use at all, they could not be fitted in any practical way, instead I just used grey sewing cotton wrapped around instead, it works and looks ok. I found the rigging very difficult to do, the fishing line supplied wasn’t at all supple and had a spring to it, let go with the tweezers and it sprung to anywhere but where you wanted it to be, I also found that my old eyes just couldn’t focus on it for some reason, perhaps a trip to the opticians is called for. I am also finding it a problem handling and fitting the many very small PE pieces and there’s rather a lot yet to do, it’s not the kits fault but my hand condition, I should have taken this more into account before deciding to take on this type of build.
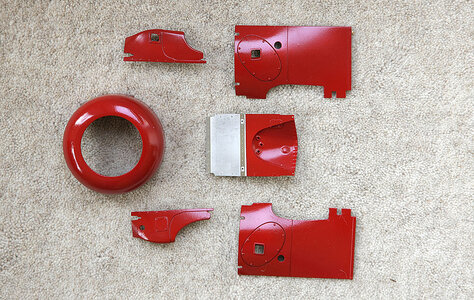
I’ve painted the metal parts that are red in colour, no problem there, I find that with this type of metal acrylics chip very easily so I sprayed using Humbrol enamel and got the finish I’d hoped for. So far, so good.


077.jpg

078.jpg

079.jpg

080.jpg

081.jpg
 
That enamel finish looks amazing!
Hi Rob. Thanks. I prefer the finish that you get with enamels but they are messy and take much longer to dry but that’s the price you pay. I didn’t want the finish to be too shiny or smooth I think that would have looked wrong but a shiny sort of lightly textured surface was about right. I’ve now got to paint the rear half of that side panel to look like wood, that’s going to be a challenge.
 
Back
Top