San Felipe 1690 from ZHL

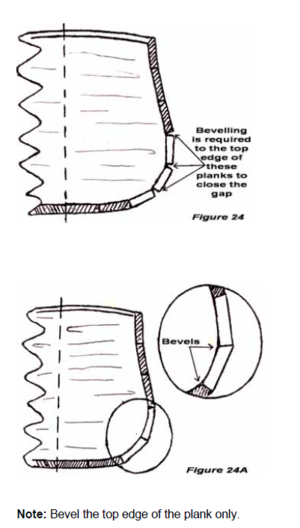
If I could...pick an edge to bevel...since you are working from the top down - bevel the lower edge of the upper plank and leave the upper edge of the lower plank untouched. Beveling both facing edges/planks creates an irregular flow - only bevel one side...

Does that make sense? You are early in the planking process! You can apply Kurt's suggestion to THIS build!
 
Thanks for the advice. I plan defiantly planned on beveling but I was about to make the mistake of doing both the top and bottom. I'll take Paul's advice and only do the bottom side. Makes sense.

Scott
Or the other way around - just always keep one true straight running edge of the plank and it keeps everything looking good.
 
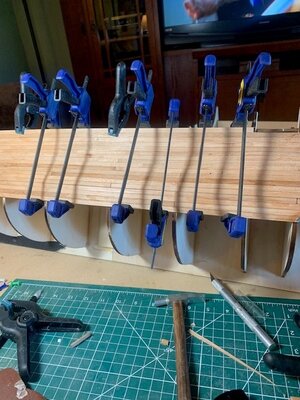
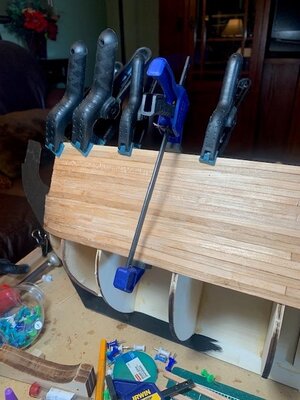
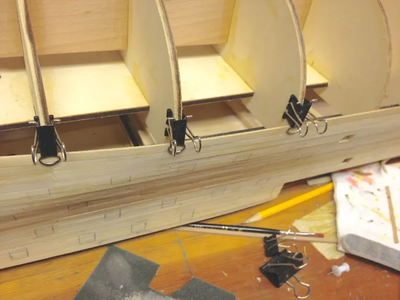
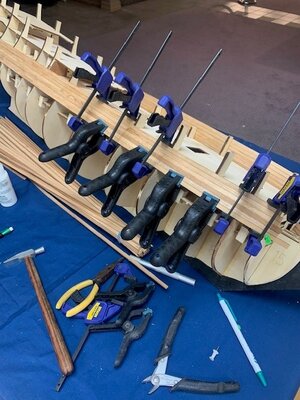
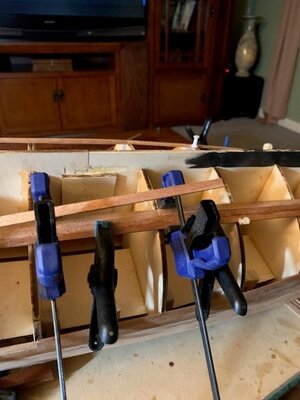
Planking continues on. I've been using medium thick CA glue as it gives you a few mins to get your clamps on before it totally kicks. I have to switch to white glue as the CA fumes are kicking my butt. My right eye swelled up mightily last night so it's clear that I gotta put it away. Going forward its going to be white glue. I'm ok with white glue but for me its messy. I'll play around with better ways to use it. Have to.

Either way. I am pretty much finished with the Cherry Wood on the port side. For the very upper sections on the bow I'll use the provided wood from ZHL. It gets painted so no need to use the Cherry. For the heck of it I glued on the first plank of Mahogany. Looks good.

Also - I have been beveling the underneath side of the planks. Seems to work just fine.

Plugging away.

Scott

10-16-2023 more planking.jpg10-16-2023 Planking continues.jpg
 
Paul,

Holy Moly!! $35 for a little bottle of glue! Sheesh. Unless I am a complete failure with the white glue I'll give this a pass. But.... I have the link :). I'm going to give the boat a couple days off while I get my eyes back to normal.

Thanks for the link.
 
Greg,

Check your parts list. Do you have any windows for the bow? I do not and I do not see anything about windows in the kit at all
So - I identified a 3D print shop that can do some for me. I just need to come in with some specs. If your kit does not have any I can have them double up and send you a set. I'll post my specs here first.

Scott
I just checked and I don't have the windows either. I have a 3D printer so am pretty confident that I will be able to come up with something. Thanks for the heads up I hadn't noticed.
 
Jack,

Yep, that is exactly what I am doing for beveling. But, I am doing the bottom instead of the top. I have officially reached that portion of the hull where this will become critical. I need to really give this a think because it seems I am allergic to CA glue and my clamps aren't big enough to squeeze things tightly in place.

hmmmmm.
 
Paul,

Holy Moly!! $35 for a little bottle of glue! Sheesh. Unless I am a complete failure with the white glue I'll give this a pass. But.... I have the link :). I'm going to give the boat a couple days off while I get my eyes back to normal.

Thanks for the link.
Agreed. To the point that it is silly expensive... But keep it in perspective: how much do you spend on a night out with your partner? Or on a bottle of wine? Or on coffee over the course of a week? By the time I dollar cost average the cost of this glue (might last me 6 months) I am more than happy to use it if it allows me to continue model building.

Plus, waiting for PVA to dry takes all the fun out of it for me (though to be fair, I use PVA all the time for its flexible bonding properties - CA can be brittle). Anyway, I wanted to at least make you aware of the option.

You're doing a really nice job on your build!
White glue takes forever to dry, but yellow carpenter's glue (Titebond II) grips a tad better while wet and seem to dry faster. TIP: If you have ZERO patience, apply a hot air gun to the wet plank LIGHTLY to warm it up, WHILE making dark sure the part is clamped or held TIGHTLY in the correct position with no gaps. It will grab within a minute, and you can then let go or remove pins/clamps. Just don't burn your fingers doing this. It need to be warm, not scorched.... or on fire.
 
Paul, You are using logic!! I'll try Kurt's approach (above). If this gives me too many fits I suck it up and order the expensive stuff.

This evening I will put some planks on the other side where I have plenty of room for clamps. Wood glue of course.......

Scott
 
Paul, You are using logic!! I'll try Kurt's approach (above). If this gives me too many fits I suck it up and order the expensive stuff.

This evening I will put some planks on the other side where I have plenty of room for clamps. Wood glue of course.......

Scott
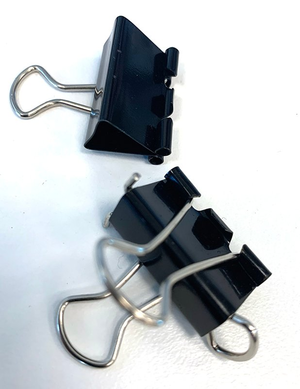
You've seen this trick, haven't you? Planking clamps using paper clamps. This works well because the clips grab the hull frame tightly. This is an alternative if you don't use Amati 7mm Fine pins (which are the BEST pins), and want to avoid putting tiny pinholes in the planks, especially if you are doing a single layer planked hull.
1697646755036.png

1697646819549.png
 
Third thing for today is instructions and the need to study them way way forward or you're going to be in trouble.
Looks at this picture. I circled part 7B. I noticed that is was very close the the main mast hole. Hmmmm ok I guess.


View attachment 394911

Now comes the spooky part. Because I was so close the hole it just did not seem right. So I kept poking my way through instructions. Then finally in pic

Here it is again in pic 34:

View attachment 394912

I found it!!! on pic 41 part 7B is gone!!!! Now it makes sense. Glad I did not just glue the thing in place!! That would have been a mess.

GregW sent me these instructions in English (thanks Greg) and there is no mention of this at all. If you are just following instructions step by step you'd be in trouble. I also spotted other items that happen in the future that you need to be aware of as well.

View attachment 394913


I'll just tack this down (7B) with a couple drops of glue.

Good fun stuff.
Dark Wood??? oh man. I was using things like "toothpicks walnut" "toothpicks mahogany" Toothpicks all sorts for wood. But never just a simple Dark Wood. Pretty funny. Thanks Signet. I'll order these straight away.

Just back from getting my trigger finger fixed. Very sore left hand right now so the build will need to wait a week or so. Pretty bruised as well. Stitches out on Oct 10.

Next step is to start planking. I need to plan this out very carefully as I have just so much cherry and mahogany to work with and how to deal with the water line.

Back in a week or so.

Scott View attachment 397333
Ouch!! I hope you feel better soon!!! Have a happy weekend!!!
 
Ok - planking continues. This platform is chalk full of planking so no need to bore everyone with the step by step.

Because I am using my hand made Cherry Wood planks I wanted to give everyone my honest assessment of this wood. At least what I am working with.

When dry the wood is very stiff and hard. So much so I was very worried about bending. To my great surprise, when you give the strips time to soak up some water the planks become incredibly easy to bend. AND much easier to cut! The soldering iron approach doesn't seem to work well though. The crimper approach works great. I noticed that the picture makes the rounded but look a little flat. It's not its ok.

Planking continues.
View attachment 399496View attachment 399497
It’s looking very nice!!!
 
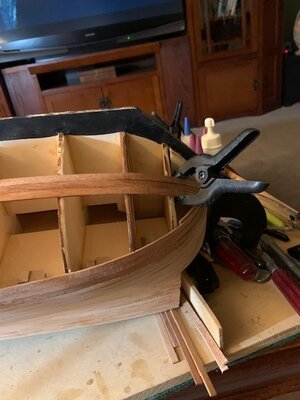
Planking continues on. I've been using medium thick CA glue as it gives you a few mins to get your clamps on before it totally kicks. I have to switch to white glue as the CA fumes are kicking my butt. My right eye swelled up mightily last night so it's clear that I gotta put it away. Going forward its going to be white glue. I'm ok with white glue but for me its messy. I'll play around with better ways to use it. Have to.

Either way. I am pretty much finished with the Cherry Wood on the port side. For the very upper sections on the bow I'll use the provided wood from ZHL. It gets painted so no need to use the Cherry. For the heck of it I glued on the first plank of Mahogany. Looks good.

Also - I have been beveling the underneath side of the planks. Seems to work just fine.

Plugging away.

Scott

View attachment 400498View attachment 400497
Scott where did you get the cherry? I’ve been looking but can’t seem to find a good place. I’ve ordered my ZHL San Felipe in mid september so it’s gonna be at least a month and a half before l get it, so l am working on getting cherry and pearwood. Have a nice weekend!!!
 
Good evening everyone. Kurt, I made up a bunch of the clamps with glued in wood to accomplish the same as your suggestion. I got away with just using the long clamps till now. But they are not big enough for the mahogany section. This approach is perfect. Thanks for the suggestion.

I got the cherry from a wood specialty shop in southern Denver, "Rockler fine woods". If you have access to ETSY.COM there are some Amish folks that are selling specialty woods as well. You might poke around in there to see what you can find.

For the build. Still planking...... finished most of the Cherry on the port side and started down on the starboard side. I tossed in a picture below.

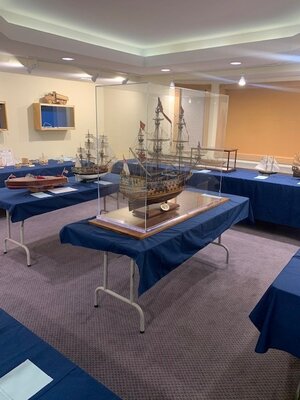
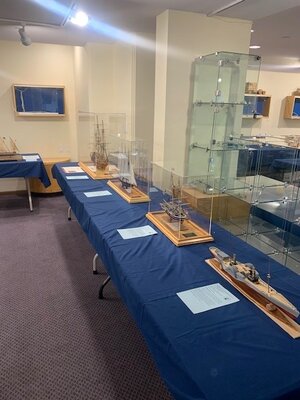
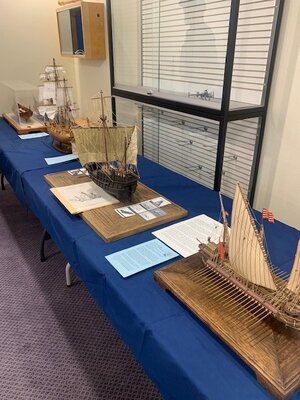
This weekend was our modeling club "Rocky Mountain Shipwrights" yearly exhibit. Only one big boat in the show. I was going to bring the Montanes but I couldn't get it in to my car and my Jeep is getting repaired. We got reasonable attendance. Next Spring we have another at a library.

Plugging away.

Scott

10-22-2023 Modeling Club Exhibition Pic 1.jpg10-22-2023 Modeling Club Exhibition Pic 2.jpg10-22-2023 Modeling Club Exhibition Pic 3.jpg10-22-2023 Started starboard cherry planks.jpg
 
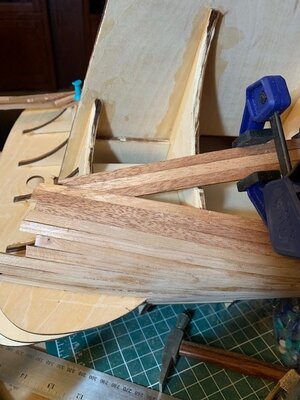
Time for another post - at least to stay relevant. Planking continues. I am not into the hand made Mahogany planks. I am finding them to be very easy to bend and frankly a little too soft. Depending on which board I ripped up to make the planks dictates the stiffness of the plank. I'm going to need to be very careful once I start sanding. Using the wood clue instead of the CA glue has slowed things down a bit but not overly so.

Another interesting thing is that each plank is a bit different in color. So I am mixing them. I wonder how this is going to look once I stain and sand.

We'll see.

It's going to take a while.

Have a great day everyone.


10-30-2023 Planking continues Pic 2.jpg10-30-2023 Planking continues Pic 3.jpg


10-30-2023 Planking continues Pic 1.jpg
 
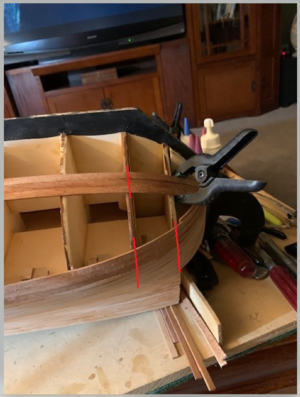
If the planks are very soft, you had probably better use fill blocks of balsa between the frames, or you will see hard bend lines (red) over each frame near the bow and flat areas between frames. And, you can't use filler and sanding to hide these defects if you are making a single planked hull. Sight you eye down the length of the hull and you'll see if the curves are smooth or segmented.
1698718500152.png
 
Last edited:
Back
Top