Greg. Does this platform have a private communications function. That way we can pass across emails.
You are using an out of date browser. It may not display this or other websites correctly.
You should upgrade or use an alternative browser.
You should upgrade or use an alternative browser.
San Felipe 1690 from ZHL
- Thread starter Scott Shilling
- Start date
- Watchers 32
-
- Tags
- san felipe zhl
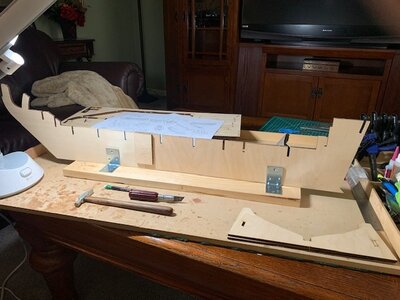
Got a campaign function this morning for a few hours. Once I get back it's time to start the project. I'll start posting in earnest once things get going. First step is to build the frame holder. On the Montanes I had a bend and a twist to deal with. Gotta avoid that as I have plans to tree nail the decking. Oh Oh. need to stop by the hardware store to see if I can get a drill bit holder for my Dremel.
Well, the gluing and torcher has begun. I figured I post a couple of pics of my tools and work area. I don't have a proper workshop so I am forced to create a simple workspace on my basement coffee table. 4 feet wide by about 2.5 feet deep. Underneath the platform is felt to make sure the table underneath is protected. I'm lucky as I have a wife that doesn't mind watching the tv whilst looking through the rigging. (in about 6 to 8 months from now).
I have now accumulated most of the classic modeling tools. Spent a ton of time running down rigging tools. Probably the most important item that I picked up was the disc sander. Won't need that for a while. So to make space I have put away all tools that are not need until later.
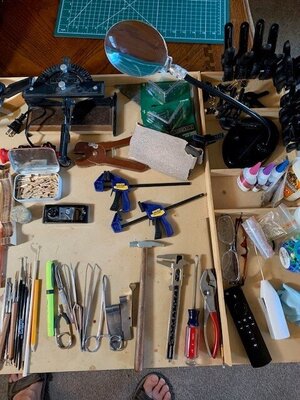
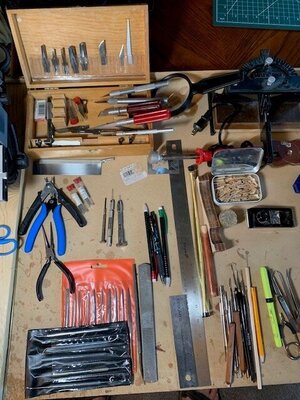
I have now accumulated most of the classic modeling tools. Spent a ton of time running down rigging tools. Probably the most important item that I picked up was the disc sander. Won't need that for a while. So to make space I have put away all tools that are not need until later.


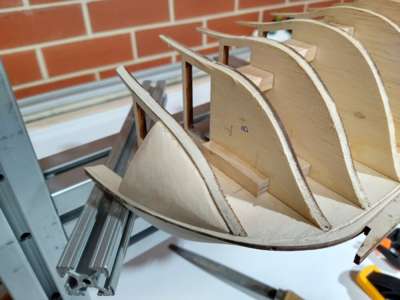
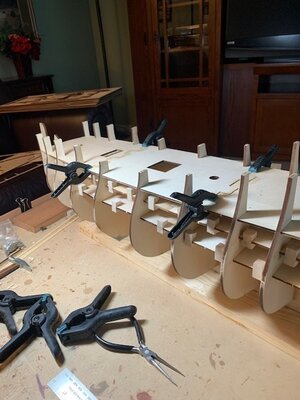
Internal frame work complete. I was amazed at how tight everything was. Darn near did not need any glue. Did have to use some nails on the lower section but all in all it went together ok. I do see one issue that needs to be address straight away. the bowsprit mast will not fit. I'll need to fix this before doing much anything else. I am hoping I can reach now there with a Dremel.
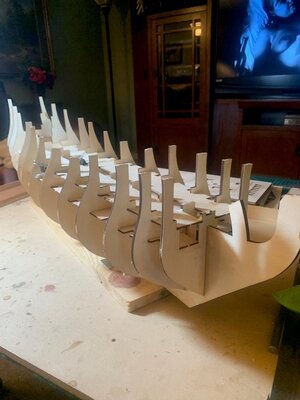
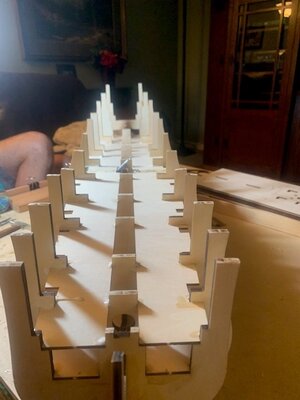
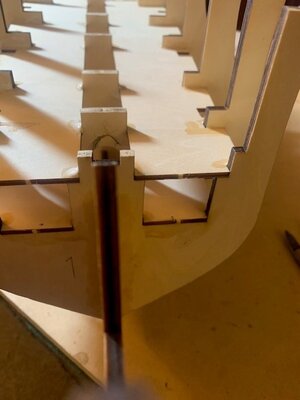


Yes at the top of the page click on the envelope. That is for private messagesGreg. Does this platform have a private communications function. That way we can pass across emails.
Greg - I sent you a note.
Hi Scott, thank you for sharing!! I wanted to ask you what are your thoughts about the general quality of the wood in this model? I am considering getting one. CheersInternal frame work complete. I was amazed at how tight everything was. Darn near did not need any glue. Did have to use some nails on the lower section but all in all it went together ok. I do see one issue that needs to be address straight away. the bowsprit mast will not fit. I'll need to fix this before doing much anything else. I am hoping I can reach now there with a Dremel.
View attachment 393770View attachment 393769View attachment 393768
I am very surprised frankly. The wood quality far exceeded my expectations. Other bits not so much. String is a bit wobbly, belay pins are pewter, etc... But, the wood quality is pretty good.
Tolerances are very tight.
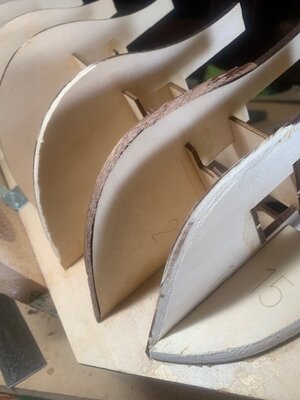
Tomorrow's plan is to file down some of the ribs so that the blanks will lay flat.
Tolerances are very tight.
Tomorrow's plan is to file down some of the ribs so that the blanks will lay flat.
Because I want to tree nail the deck I dug out the materials that were provided for decking. One - I don't really like the color of the wood and Two - it's 4.3mm wide. Seems not wide enough for the task (tree nailing). Now, the pear veiner that they provided for the hull seems much better (remember I am using home made cherry and mahogany planks). but this time it's just too wide. 7mm So, my solution is the cut the pear down to 5.5mm.
I tried this using a ruler and a blade. Ha ha ha lol. Funny me. Gotta find another way, maybe a paper cutter. I'll figure it out.
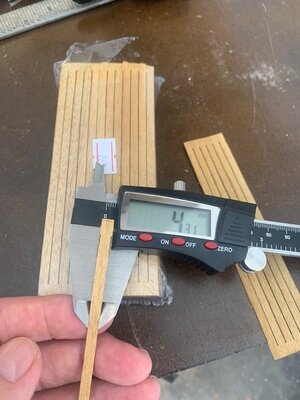
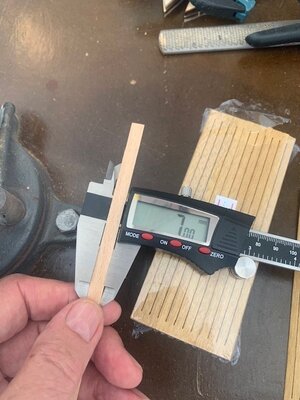
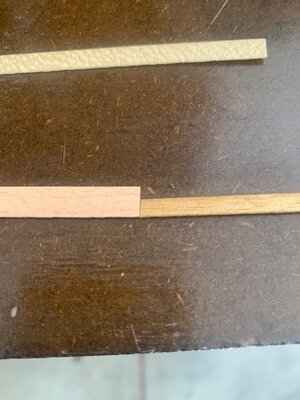
I tried this using a ruler and a blade. Ha ha ha lol. Funny me. Gotta find another way, maybe a paper cutter. I'll figure it out.


Next task is the get these forward frames shaved down to best accept the planks as the come around the front of the boat. As a habit I like to take a test plank and bend it around to get a good visual of the angles. Oh dear. A new problem has presented itself. The second frame back is not wide enough. Looks like about 1.5mm maybe a bit more. At least on the starboard side. I'll check the other side here in a bit.
To build it up I will use a couple of sapele planks from the Montanes. I'll put about 3mm then file that down to produce a nice rounded front.
Is there another way to correct this? If there is let me know as I am going to do the deed tomorrow afternoon.
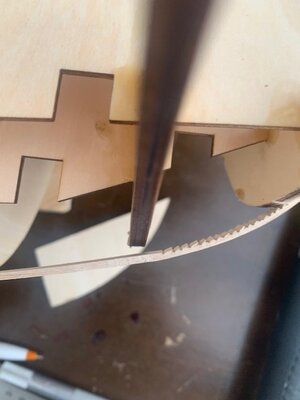
To build it up I will use a couple of sapele planks from the Montanes. I'll put about 3mm then file that down to produce a nice rounded front.
Is there another way to correct this? If there is let me know as I am going to do the deed tomorrow afternoon.

I measured the daylights out of everything here. It went together as per the wobbly instructions. Maybe I am overthinking it a bit. I was thinking about pushing if forward a bit but that just stresses the third frame. I am going to be very careful with this as I am single planking this dude.
No problem. I am expecting a lot of wobbly issues as I move forward.
No problem. I am expecting a lot of wobbly issues as I move forward.
Alert Alert! Instructions are incredibly wobbly. I am also dealing with a whole lotta don't well.
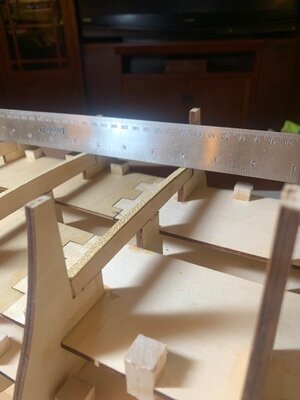
First of all let me bring everyone up to speed with where I am. I glued on the ribs that hold up the third deck. This third deck is the first component that is visible and will require deck planking. So with that I want to make absolutely sure that it was level and now dips. Simply putting a flat edge across them showed plenty of issues. Some of the ridges I sanded down and others I add shims to heighten them. Ok all good as I kind of suspected this anyway.
Getting this third deck installed, nailed and glued was a serious pain in the butt. it fit very very tight and took me quite a lot of time to carefully tap it down into place. All good.


Now comes the bottom plate for the officers quarters. This thing did not fit worth a crap. I did some modifying to get it to fit on the frame. Then once I got that going I realized that it would not go froward enough for the back end to properly fit the back. The hole for the rudder post is about 5 to 8mm too far back. I could have modified the front part of the plate to slide everything more forward. After dry fitting the second plate (just above) it made more sense just to leave this lower plate as is. I'll need to drill a spot for the rudder and cover up the old hole. Sheesh.
see below. If I shaved down B and A I could have moved everything forward. No worries - I'll deal with it .
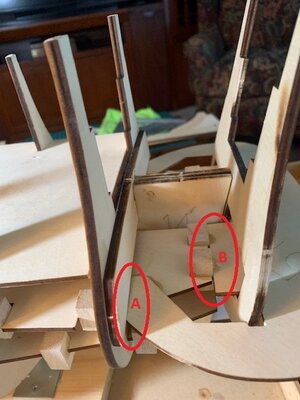
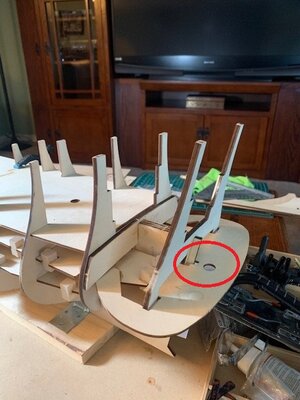
see below. If I shaved down B and A I could have moved everything forward. No worries - I'll deal with it .


Third thing for today is instructions and the need to study them way way forward or you're going to be in trouble.
Looks at this picture. I circled part 7B. I noticed that is was very close the the main mast hole. Hmmmm ok I guess.
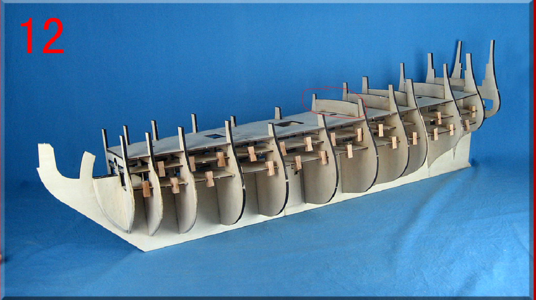
Now comes the spooky part. Because I was so close the hole it just did not seem right. So I kept poking my way through instructions. Then finally in pic
Here it is again in pic 34:
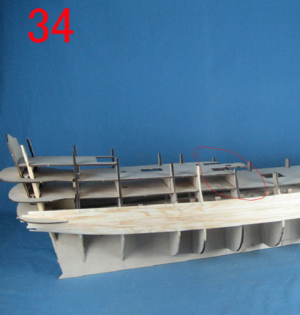
I found it!!! on pic 41 part 7B is gone!!!! Now it makes sense. Glad I did not just glue the thing in place!! That would have been a mess.
GregW sent me these instructions in English (thanks Greg) and there is no mention of this at all. If you are just following instructions step by step you'd be in trouble. I also spotted other items that happen in the future that you need to be aware of as well.
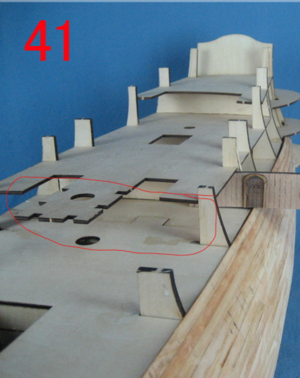
I'll just tack this down (7B) with a couple drops of glue.
Good fun stuff.
Looks at this picture. I circled part 7B. I noticed that is was very close the the main mast hole. Hmmmm ok I guess.

Now comes the spooky part. Because I was so close the hole it just did not seem right. So I kept poking my way through instructions. Then finally in pic
Here it is again in pic 34:

I found it!!! on pic 41 part 7B is gone!!!! Now it makes sense. Glad I did not just glue the thing in place!! That would have been a mess.
GregW sent me these instructions in English (thanks Greg) and there is no mention of this at all. If you are just following instructions step by step you'd be in trouble. I also spotted other items that happen in the future that you need to be aware of as well.

I'll just tack this down (7B) with a couple drops of glue.
Good fun stuff.
Glad you are finding these things before I start it lol It does teach me to look forward through the instructions before I glue anything. You have made a great start!
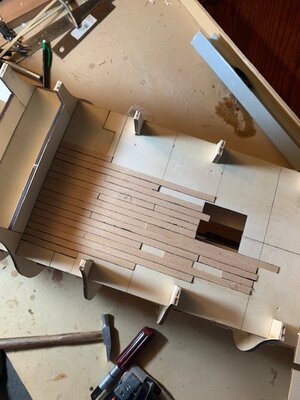
Sunday evening report. The decision to tree nail the decking was IMO a good one. But, it's going to foul up the sequence of things. Primarily because some of the lower decking is underneath an upper deck. I need to put a bunch of decking in way before the instructions say to do so.
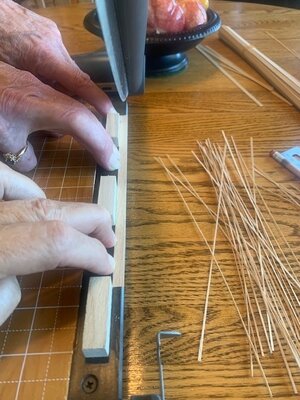
To get started. The supplied decking material is 4mm and not a particularly interesting color. So the decision was to use the pear venire instead. the issue was it was 7mm. So we used a paper cutter to bring it down to 5.5mm wide. The paper cutter idea worked great. we then bunched them together and painted one side black. Next is to start gluing them down to the deck. I only need about 80 to 100 mm to get out from under the next deck.
Tomorrow I'll get this 80mm section done, put in the tree nails then sand it to see how it looks. Should be ok. Then it's on to the next deck.
Hope everyone had a great weekend.
Greg, wait until you hear of the other funky things I ran into.
More tomorrow.


