RCMP St Roch - Build log

Thanks very much for your prompt reply. A couple of questions come to mind. What is the nature of the housing on the upper deck where you started the chain? I was going to bend pieces of brass to create the supports for the rollers/pulleys on the upper deck and the lower deck below it. You seem to have some other method. Are there pieces in the kit or are they your own invention? What is the support mechanism for the third set of rollers? Finally, how did you terminate the chain at the aft end?
In one of your photos I can glimpse the funnel and note that you have the appearance of rows of rivets. I have seen this with some other modellers and have wondered how the effect is achieved. I love such fine details.
Hi Digger,
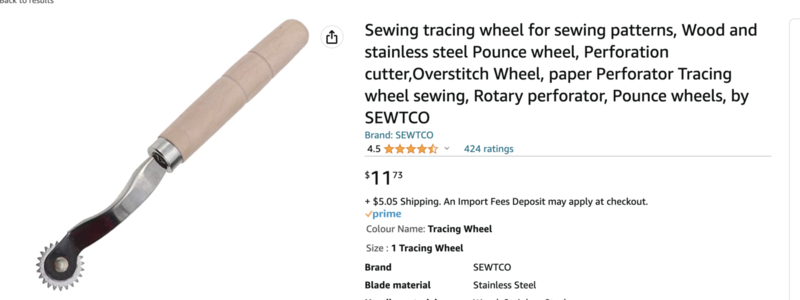
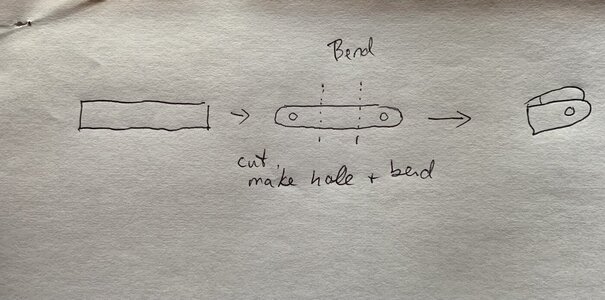
The housing was made by bending a piece of thin brass scrap. As for the rollers just below the housing...to be honest I can't remember whether this came in the kit or if I made it by shaping and bending a piece of thin aluminum, and then inserted a wheel. At the end, I made a small hole in the side of the deck grating and just fed the chain into it. As for the rivets, I had some thin strips of aluminum and using a pounce wheel (see link) I created a line of "rivets". Then I glued this on the funnel.

I hope this helps..Screen Shot 2023-06-02 at 11.25.11 AM.png

 
Your continued assistance is much appreciated. Inspired by your approach I have taken a piece of 2x2mm to run from the wheelhouse wing to the end of the upper deck. I have bored into the end and will glue my cable there. This gives the impression that the cable is contained within the shielded tunnel. Steering cable run detail.jpgCable tunnel.jpg
I will use the supplied thread for the cable, but dyed black. One more question; what are you using to securing the rollers on the main deck? Also, is there a spacer between the roller and the deck? That should provide me with sufficient data for now. I am off to Indonesia next week so the build will have to wait. I am sure to have more questions later on, and I appreciate you taking time to help me.
 
Your continued assistance is much appreciated. Inspired by your approach I have taken a piece of 2x2mm to run from the wheelhouse wing to the end of the upper deck. I have bored into the end and will glue my cable there. This gives the impression that the cable is contained within the shielded tunnel. View attachment 377577View attachment 377576
I will use the supplied thread for the cable, but dyed black. One more question; what are you using to securing the rollers on the main deck? Also, is there a spacer between the roller and the deck? That should provide me with sufficient data for now. I am off to Indonesia next week so the build will have to wait. I am sure to have more questions later on, and I appreciate you taking time to help me.
Yes, that's what I did...also a 2 x2 mm that runs the length- giving the impression that the chain runs along the length. As for the rollers I juts used the small nails to secure them to the deck. As I recall, the rollers were flush to the deck - no spacers. I'm glad to help!!!
 
Greetings All,
I have decided to bravely go where this man has not gone before - I will post my build log. The St Roch is my second model. The first was the newly completed Norfolk sloop. It came with very detailed instructions - the St Roch comes with almost no instructions. I am therefore hoping that those of you with more knowledge then me (just about all of you) will jump in and cast your expert knowledge upon the waters of my ignorance. The kit was a gift and I feel obligated to do my very best.
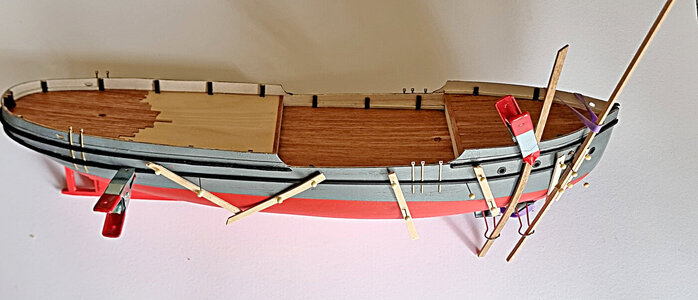
For a start I have inserted balsa blocks to help support the planking. I felt that the very thin bulkheads would offer very little. I am thinking that every second space should provide sufficient support, but am open to suggestions. I will be joining the two sides together before I start planking. I am also going to paint bits and pieces as I go to avoid trying to make a fair job in tight spaces further on. I will be using water-based acrylic paint.View attachment 325741
 
Hi Alex,
There is a build log on the St.Roch somewhere on the SOS site. I found it quite helpful. I also got lots of great advice from other SOS members.
 
Hi Alex,
There is a build log on the St.Roch somewhere on the SOS site. I found it quite helpful. I also got lots of great advice from other SOS members.
I have found several build logs and a few videos. All have been helpful in some way or another. What they all lack is an explanation of just how some things were done. This is the knowledge that I am seeking. I am progressing slowly; looking at a problem from all angles and considering how that will fit into succeeding steps. I am also factoring in discussions previously read on this forum regarding authentic detail as opposed to visual appeal. All has been very valuable. I have learned two major lessons on this build; every ship would come out better if built for a second time, and that one needs the fingers and dexterity of a child. Having said that, I plunge on. I will be back for more assistance before this vessel is launched.
 
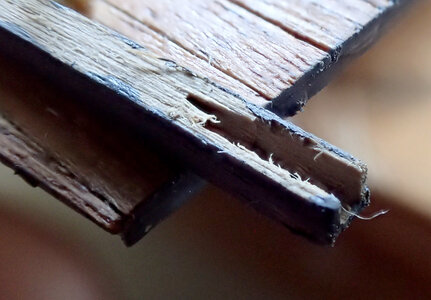
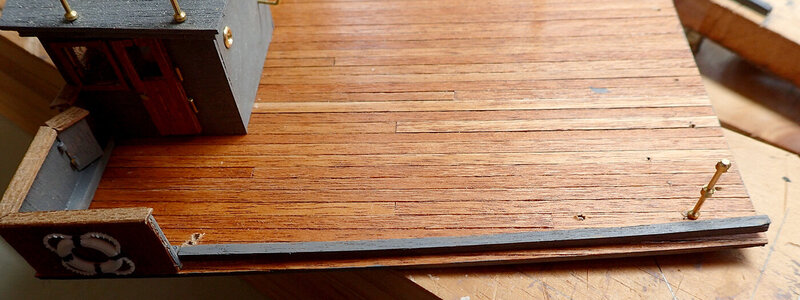
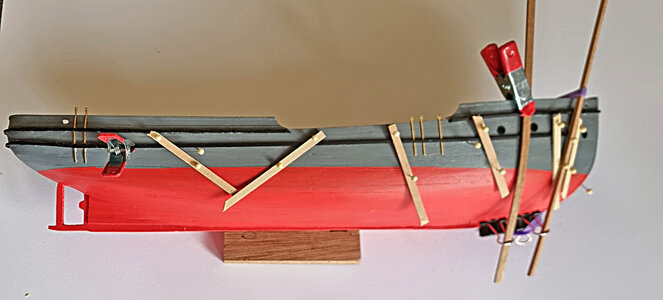
I have often read on this and other fora that you can never have too many clamps. I have quite a few but recently came across a situation where clamps would not work, so I thought laterally and ended up with the setup in the photos while trying to attach a lower rubbing strake. It looks pretty messy but that never stopped McGyver.

20230720_104306.jpg

20230720_104330.jpg
 
I have often read on this and other fora that you can never have too many clamps. I have quite a few but recently came across a situation where clamps would not work, so I thought laterally and ended up with the setup in the photos while trying to attach a lower rubbing strake. It looks pretty messy but that never stopped McGyver.

View attachment 385600

View attachment 385601
McGyvering always works for me
 
It didn't work. Phase 2 will use CA. Same rig. The problem is insufficient bend in the foremost part of the strake. An electric plank bender was immediately put on order.
 
I used CA glue. What I did is apply glue at one end- maybe a few inches, press and hold, then add glue again, hold the strake in place - glue and hold until it is adhering all the way across.
 
If I make another of these vessels I will try that. In t he meantime,I have always been cautious with the use of CA. Probably because I have stuck my fingers together more than once. I do think that using an electric plank bender will give me a more positive shape that will stick a lot easier. Meanwhile, I am becoming more accustomed to Billings idea of instructions and am enjoying the process. I may become an enthusiastic model builder.
 
If I make another of these vessels I will try that. In t he meantime,I have always been cautious with the use of CA. Probably because I have stuck my fingers together more than once. I do think that using an electric plank bender will give me a more positive shape that will stick a lot easier. Meanwhile, I am becoming more accustomed to Billings idea of instructions and am enjoying the process. I may become an enthusiastic model builder.
I use a small iron that's used for sewing projects, very similar to a plank bender. Great investment!
 
Yes, that's what I did...also a 2 x2 mm that runs the length- giving the impression that the chain runs along the length. As for the rollers I juts used the small nails to secure them to the deck. As I recall, the rollers were flush to the deck - no spacers. I'm glad to help!!!
Got all that and about to employ what you have said, but one more question. What supports the pulley wheel as the steering cable drops from the upper deck to the main deck? I have bent a piece of brass wire but you seem to have used another method.
 
I am just about to move on to the sled. It is obviously a very fiddly job with lots of cord work in a tiny space. Do you have any hints for me?
 
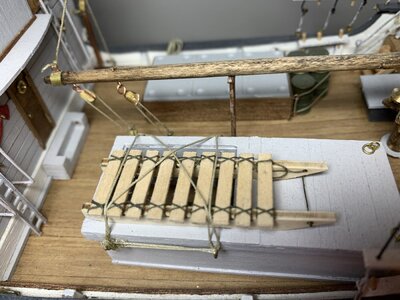
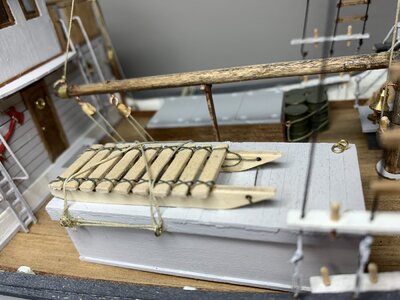
Yes, this was a fiddly bit of work. A good seamstress would have helped! I didn't follow the how-to diagram provided. After all the slats was glued on the frame I used a needle and thread and made cross-stitches just around the slats. I did one cross-stitch at a time before moving to the next slat. If there were holes in the sled, I ignored them. I also think I applied a bit of white glue to hold the threads down as I went along, so that it wouldn't unravel and loosen. I'm sorry I can't totally describe the technique...but I hope this helps!IMG_6072.jpgIMG_6073.jpg
 
Thanks for that. Your explanation has helped a lot. I was not planning on departing much from the instructions, but your approach has me thinking. It would appear that the finished article would give the correct appearance and save an awful lot of work. I have made a jig to help assemble the sled. It will hold everything in place while I glue the slats in place. If I follow your approach I can place the slats by eye and ignore trying to line them up with the holes. The surface near the sled has eyebolts and rings. Did you make the rings as I cannot see them in the kit.
 
Back
Top