"Master" Plank?

Joined
Mar 4, 2023
Messages
33
Points
48

Location
SW Ohio
In the directions for the ship I am building, it says that one of the first planks that I should lay is something called the "master plank". It directs me to install it "at a point some halfway down the hull and let it take up its natural position...". As a newbie to this craft, I'm not familiar with this term or concept.

Is this a thing? What can you tell me about it?

Dan
 
This seems to make sense. I always started first plank at upper deck level and worked bottom down. This results in very curvy lower planks.
 
The directions give what I regard as generally bad advice. Planks have to be tapered to account for the change in perimeter along the edge of the bulkheads. You have to devote some time up front to decide how the planking runs will look if you want your planks to extend from stem to stern without having odd pieces stuck in. There is a lot of advice on line as well as on this web site about planking techniques. I give a brief summary of the method I use in my build log for Dove (https://shipsofscale.com/sosforums/...schooner-in-1-48-scale-completed-build.10696/). Hope this helps.
 
The directions give what I regard as generally bad advice. Planks have to be tapered to account for the change in perimeter along the edge of the bulkheads. You have to devote some time up front to decide how the planking runs will look if you want your planks to extend from stem to stern without having odd pieces stuck in. There is a lot of advice on line as well as on this web site about planking techniques. I give a brief summary of the method I use in my build log for Dove (https://shipsofscale.com/sosforums/...schooner-in-1-48-scale-completed-build.10696/). Hope this helps.
Polydoc - thanks for the thoughts. It took me a few minutes to process your directions, but I believe I understand your method. It makes sense and it seems as though it eliminated patching things in here and there. I'm only on the first hull planking right now - I'm new, this is my first round - so I'm taking time and doing extra stuff to ensure maximum success. I'll spend some time and measure and create sections. Thanks again.
 
As planks curve towards the bow they tend to curve upwards and require tapering. Some kits suggest stating the planking near the top without tapering the first few but the price will be paid lower down with very pointy planks. Other kits suggest starting at the bottom with planks that are kept fairly straight by stopping them short of the bow and shaping them as they hit the keel/stem. Starting with a master plank part way down the hull is a compromise to distribute the tapering between the planks above and the ones below. sometimes a good plan.
 
Polydoc - thanks for the thoughts. It took me a few minutes to process your directions, but I believe I understand your method. It makes sense and it seems as though it eliminated patching things in here and there. I'm only on the first hull planking right now - I'm new, this is my first round - so I'm taking time and doing extra stuff to ensure maximum success. I'll spend some time and measure and create sections. Thanks again.
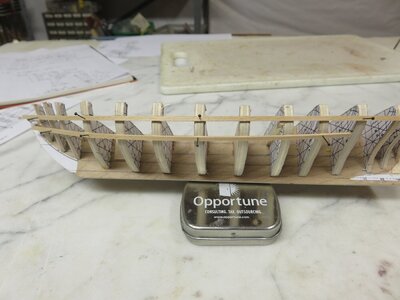
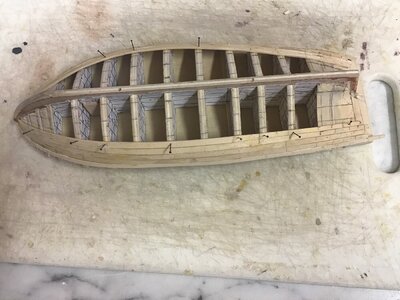
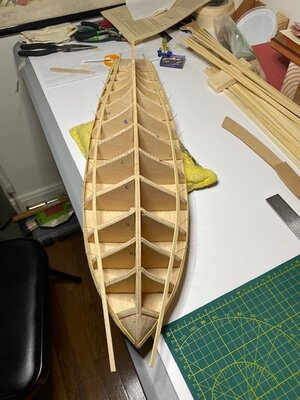
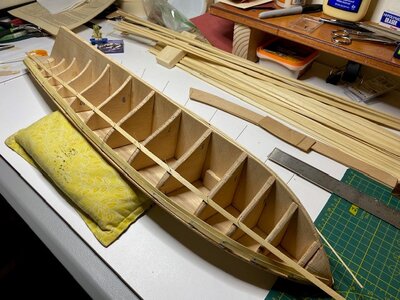
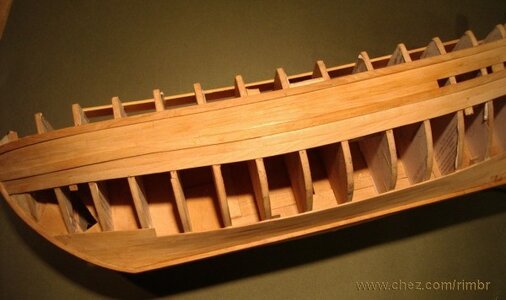
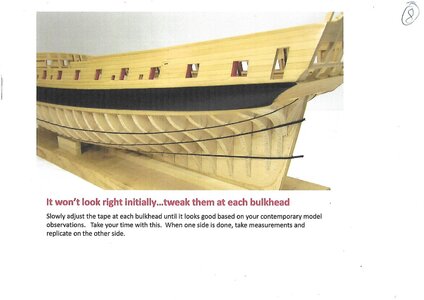
Don't know if these photos help but the first shows starting to lay out planking bands with temporary battens on a small schooner under construction. The second is the planking underway (I usually start at the deck line) and the pencil marks indicating the planking zones can be seen on the bulkheads.
IMG_2297.jpegIMG_1975.jpeg
 
Don't know if these photos help but the first shows starting to lay out planking bands with temporary battens on a small schooner under construction. The second is the planking underway (I usually start at the deck line) and the pencil marks indicating the planking zones can be seen on the bulkheads.
View attachment 368753View attachment 368754
I've spent more time dwelling on this process, and I like it. At the bow end, did you keep the width of the plank zone the same as the width of the plank zone in the middle of the boat? In the picture above, it appears to shrink slightly. Thanks.
 
As planks curve towards the bow they tend to curve upwards and require tapering. Some kits suggest stating the planking near the top without tapering the first few but the price will be paid lower down with very pointy planks. Other kits suggest starting at the bottom with planks that are kept fairly straight by stopping them short of the bow and shaping them as they hit the keel/stem. Starting with a master plank part way down the hull is a compromise to distribute the tapering between the planks above and the ones below. sometimes a good plan.
What is your preference when planking the hull?
 
Hi Dan

What kit is it your building? The hull form very much dictates where is the best place to start

Kind Regards

Nigel
 
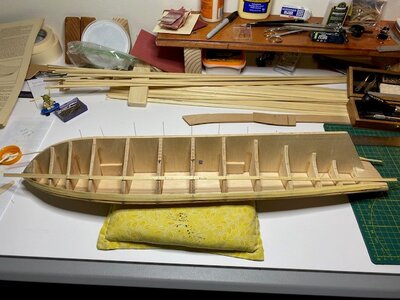
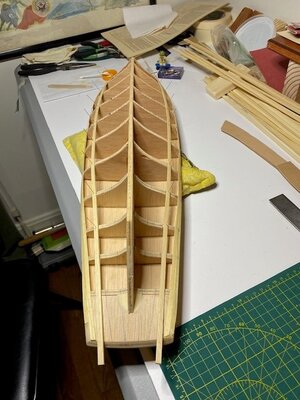
I'm working on the Harvey 1847 (Artesania). In looking at the plans and noting the way that the width of many of the planks at the bow and stern narrows, I'm adopting the method that Polydoc described above. This is my first build; in time, with new builds, I'll get fancy and a bit more historically accurate....

4.12a.jpg

4.12b.jpg

4.12c.jpg

4.12d.jpg
 
What is your preference when planking the hull?
I used to follow the kit instructions - ususally top down with OcCre. I think the Corel Vasa had notches marked just below the lower gun ports for the first plank - I guess this was fairly well down the hull. The Master Korabel Phoenix had pre-shaped and numbered planks. I emulated this in my current build of Revenge by cutting shaped planks from a sheet of 1mm walnut - a whimsey. They were cut with a downward curve at the bow to counter the upturn when applied to the bulkheads.
One learns a lot from the way the first layer planking goes. Any problems generated from the choice of starting plank can be bodged up with filling pieces and filling paste that will be hidden by the second layer. Approach the second layer a wiser person. Looking at the profile of the pictures you posted there will probably not be a lot of upturn at the bow so the planks will probably start meeting the keel/stem early and will not run the full length of the hull.
 
Sorry, my text disappeared.
And sailer, when I still was young and a newbie, told myself THERE ARE 3IMPORT PLANkS
Nº !: A plank running from stern to beam about 2 mm below the main deck
N 3:On the lower edge of the false keel- this will guide you to make the hardboard
Nº 2:to be set approx in the middle of the ship, starting with the main bulkhead. let it run-DO NOT twist it
it is in fact a helping list, which can or will be removed according to your build.
It is very important too, to measure the number of planks needed, for the main deck- see below. As bulkheads are getting smaller and smaller-but the same amount of plank is to be inserted -meaning now you will have to measure each bulkhead. you will soon find out that mainly towards the bov you will have to cut each plank. see below.
Now planking, there are many builders, who do not take too much care about the 1Th planking, as they layer with filler, plastic wood or others and do hard work to sand the hull
In my case, I generally started -after shaping -from the bottom of the false keel going upwards with about 3 4 planks, then the opposite. from the main deck downward. In the end, they will meet somewhere in the middle. To avoid sharp edges of the planks, Iisanded always the underside of the planks a little to avoid this.
in the last images, the builder made to upper part from the main deck and up. then he decided to the lower part into two or 3 helping lines- a 2second plank

why do things easily and correct
when it is much easier to do it bad and wrong

01-DRAWEING 001.jpg

BB-09-01 MESURING BULKH.jpg

BB-09-02 MESURING.jpg

BB-10-01-06-PLANKING.jpg

01-DRAWEING 001.jpg

BB-09-01 MESURING BULKH.jpg

BB-09-02 MESURING.jpg

BB-09-03 MESSURING.jpg

BB-09-05-SCALE.jpg

BB-10-01-13-PLANKING.jpg
 
I'm working on the Harvey 1847 (Artesania). In looking at the plans and noting the way that the width of many of the planks at the bow and stern narrows, I'm adopting the method that Polydoc described above. This is my first build; in time, with new builds, I'll get fancy and a bit more historically accurate....

View attachment 368830

View attachment 368831

View attachment 368832

View attachment 368833

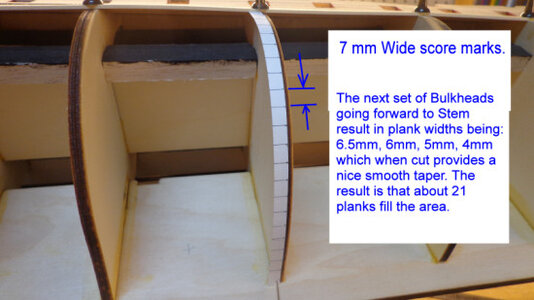
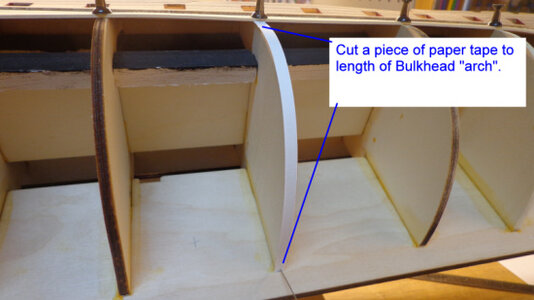
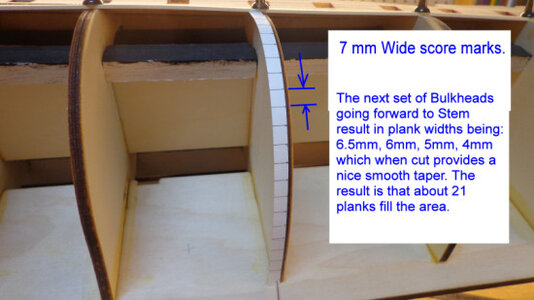
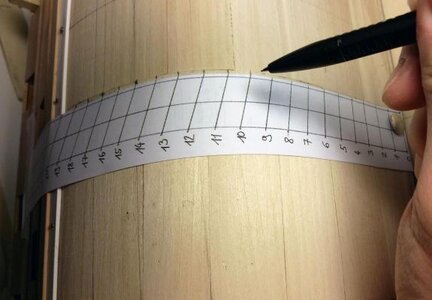
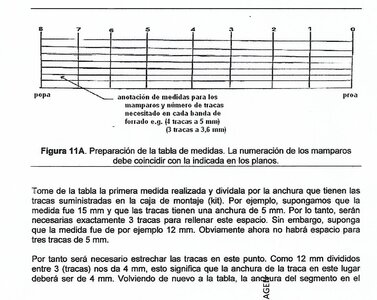
I'll try to outline my procedure as best I can with an example. Say your planks are 5mm wide and there will be 4 planks per band (a convenient amount). Find the widest bulkhead (dead flat) and make a mark where the first plank will go. As I mentioned I like to put it along the line of the deck. Starting at this point make marks at 20 mm intervals along this bulkhead. Tack a thin batten at the first mark then tack it along the hull it to give a fair run of the plank. You may have to pre-bend it to fit around the bow. Mark where the batten crosses each bulkhead. Repeat this procedure at each the the marks on the dead flat. Now comes the tedious part. Measure the distance between marks at each of the bulkheads and divide by 4. This is the required width of plank at that point. So if a measurement is 16 mm, the plank width has to be 4 mm.
When you start planking, mark the bulkhead position on each plank, mark the width at that bulkhead per the measurements, and cut the taper into the plank. You'll find that the marks tend to lie on a straight line which makes it easy to cut the taper with a straight edge. Two cautions: 1. The hull may be wider at the stern than at the dead flat which will require an extra short plant to be added there 2. Planks at the narrowest should be at least 50%of the full width. Be ready to make adjustments along the way. The best laid plans, etc., etc.
This same procedure was the subject of a recent article in the MSBJournal. On their website, modelshipbuilder.com, select the publications tab and look at page 8 of the March issue. Lots of good photos. Good luck. You're off to a good start in your recent post.
I forgot to mention the first part of the MSBJ planking article is in the February issue, page 38.
 
Sorry, my text disappeared.
And sailer, when I still was young and a newbie, told myself THERE ARE 3IMPORT PLANkS
Nº !: A plank running from stern to beam about 2 mm below the main deck
N 3:On the lower edge of the false keel- this will guide you to make the hardboard
Nº 2:to be set approx in the middle of the ship, starting with the main bulkhead. let it run-DO NOT twist it
it is in fact a helping list, which can or will be removed according to your build.
It is very important too, to measure the number of planks needed, for the main deck- see below. As bulkheads are getting smaller and smaller-but the same amount of plank is to be inserted -meaning now you will have to measure each bulkhead. you will soon find out that mainly towards the bov you will have to cut each plank. see below.
Now planking, there are many builders, who do not take too much care about the 1Th planking, as they layer with filler, plastic wood or others and do hard work to sand the hull
In my case, I generally started -after shaping -from the bottom of the false keel going upwards with about 3 4 planks, then the opposite. from the main deck downward. In the end, they will meet somewhere in the middle. To avoid sharp edges of the planks, Iisanded always the underside of the planks a little to avoid this.
in the last images, the builder made to upper part from the main deck and up. then he decided to the lower part into two or 3 helping lines- a 2second plank

why do things easily and correct
when it is much easier to do it bad and wrong

View attachment 368931

View attachment 368932

View attachment 368933

View attachment 368934

View attachment 368935

View attachment 368936

View attachment 368937

View attachment 368938

View attachment 368940

View attachment 368941
El Capi - Muchas gracias por esta información. Coincido estrechamente con lo que ha proporcionado Polydoc. Usaré esto como base para entablar el casco.
 
I'll try to outline my procedure as best I can with an example. Say your planks are 5mm wide and there will be 4 planks per band (a convenient amount). Find the widest bulkhead (dead flat) and make a mark where the first plank will go. As I mentioned I like to put it along the line of the deck. Starting at this point make marks at 20 mm intervals along this bulkhead. Tack a thin batten at the first mark then tack it along the hull it to give a fair run of the plank. You may have to pre-bend it to fit around the bow. Mark where the batten crosses each bulkhead. Repeat this procedure at each the the marks on the dead flat. Now comes the tedious part. Measure the distance between marks at each of the bulkheads and divide by 4. This is the required width of plank at that point. So if a measurement is 16 mm, the plank width has to be 4 mm.
When you start planking, mark the bulkhead position on each plank, mark the width at that bulkhead per the measurements, and cut the taper into the plank. You'll find that the marks tend to lie on a straight line which makes it easy to cut the taper with a straight edge. Two cautions: 1. The hull may be wider at the stern than at the dead flat which will require an extra short plant to be added there 2. Planks at the narrowest should be at least 50%of the full width. Be ready to make adjustments along the way. The best laid plans, etc., etc.
This same procedure was the subject of a recent article in the MSBJournal. On their website, modelshipbuilder.com, select the publications tab and look at page 8 of the March issue. Lots of good photos. Good luck. You're off to a good start in your recent post.
Polydoc - thank you for additional thoughts and comments. Between your notes, and the material that El Capi has provided (approximately the same content) I feel pretty armed to move forward with hull plank planning. I appreciate your thoughts and direction.

Dan
 
En las instrucciones para el barco que estoy construyendo, dice que uno de los primeros tablones que debo colocar es algo llamado "tablon maestro". Me indica que lo instale "en un punto a la mitad del casco y que tome su posición natural...". Como novato en este oficio, no estoy familiarizado con este término o concepto.

¿Es esto una cosa? ¿Qué me puedes decir al respecto?

Dan
En cualquier web de modelísmo naval encontraras ejemplo. Es para asegurar que las cuadernas no se muevan cuando empieces el forro del casco. Saludos
 
Back
Top