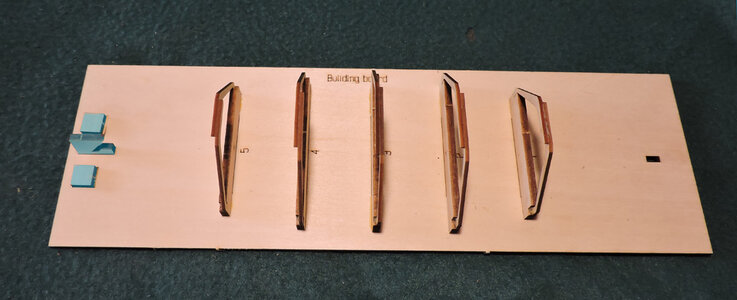
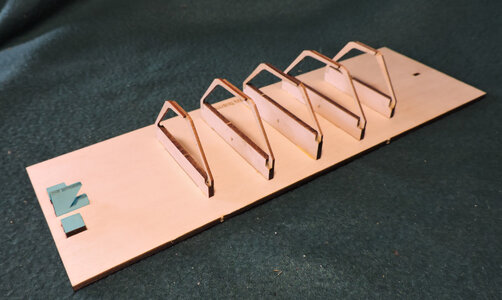
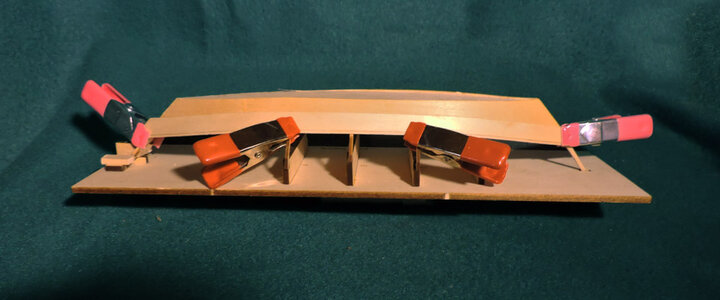
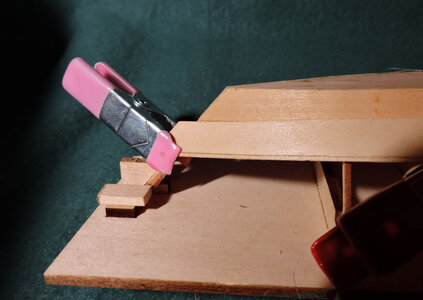
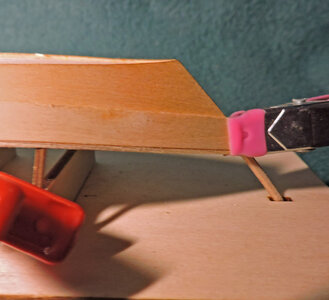
Just started the Grand Banks Dory as my first wooden model, and my plan is to assemble all 3 in the skills development series. When my dad, a retired naval architect, passed away earlier this year I found two wooden models that he had started but never finished. I’d like to develop the skills to possibly finish the projects he began.
You are using an out of date browser. It may not display this or other websites correctly.
You should upgrade or use an alternative browser.
You should upgrade or use an alternative browser.
Lowell Grand Banks Dory [COMPLETED BUILD]
- Thread starter Dave Stevens (Lumberyard)
- Start date
- Watchers 11
Sounds like a great idea and a fine tribute to your dad!Just started the Grand Banks Dory as my first wooden model, and my plan is to assemble all 3 in the skills development series. When my dad, a retired naval architect, passed away earlier this year I found two wooden models that he had started but never finished. I’d like to develop the skills to possibly finish the projects he began.
- Joined
- Dec 1, 2016
- Messages
- 5,136
- Points
- 728

the stem needs to be beveled on both sides. To sand an even bevel i made a couple sanding blocks.
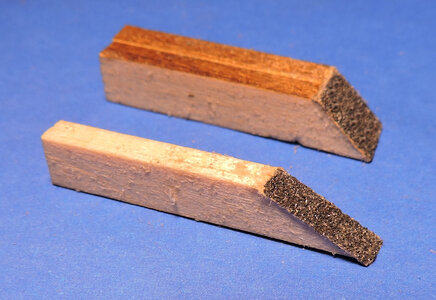
by placing the block on the glass surface i can maintain a constant angle to the bevel first taking a light sand on one side and flipping the stem over take a light sanding. i kept sanding and flipping the stem watching the char to make sure i keep it in the middle of the stem and even.
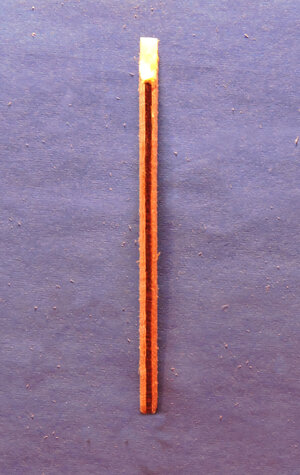
it will not take much sanding the stem is about the size of a tooth pick. So keep the sanding strokes light, it is very easy to over sand the bevels.
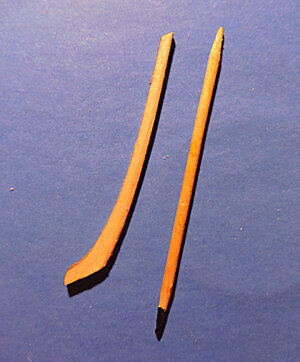
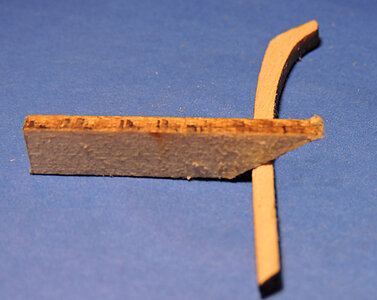

by placing the block on the glass surface i can maintain a constant angle to the bevel first taking a light sand on one side and flipping the stem over take a light sanding. i kept sanding and flipping the stem watching the char to make sure i keep it in the middle of the stem and even.

it will not take much sanding the stem is about the size of a tooth pick. So keep the sanding strokes light, it is very easy to over sand the bevels.


Last edited:
- Joined
- Dec 1, 2016
- Messages
- 5,136
- Points
- 728

- Joined
- Dec 1, 2016
- Messages
- 5,136
- Points
- 728

the two blocks on either side of the center piece are provided in the kit and are suppose to line up the stern piece and hold it in place. I found the joint between the stern piece and the bottom piece is very flexable if you line up the stern piece the bottom looses it centering on frame 5 and if you line up the stern between the blocks the bottom will move on frame 5.
The problem i ran into is the blocks are not tall enough and the stern piece rides over them.
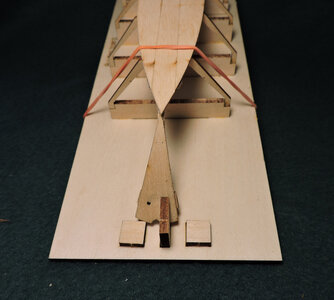
what i did was take a piece of scrap and glue another piece on top of the original blocks. now the blocks are tall enought to hold the stern in place and i can move the bottom planking to center on frame 5.
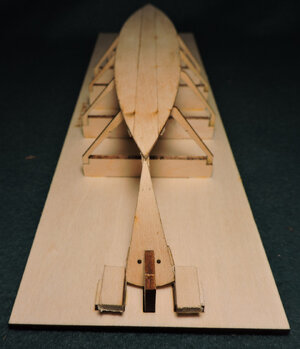
The problem i ran into is the blocks are not tall enough and the stern piece rides over them.

what i did was take a piece of scrap and glue another piece on top of the original blocks. now the blocks are tall enought to hold the stern in place and i can move the bottom planking to center on frame 5.

Last edited:
- Joined
- Dec 1, 2016
- Messages
- 5,136
- Points
- 728

Instructions suggest beveling the bottom of the frames before gluing down the bottom planks. i skipped the beveling because the gap was tiny and glue filled the gap. When the model is painted the gap will disappear (i think). So if you want follow the instructions and sand in a bevel.
Instruction also suggested using rubber bands to hold down the bottom, i used weight.
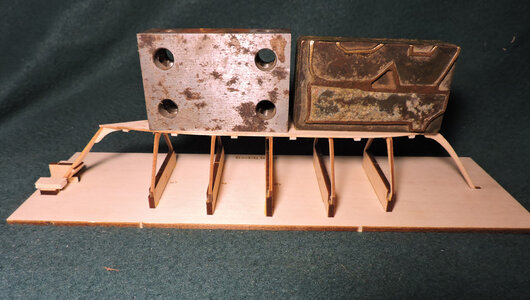
and the model is ready for the planking
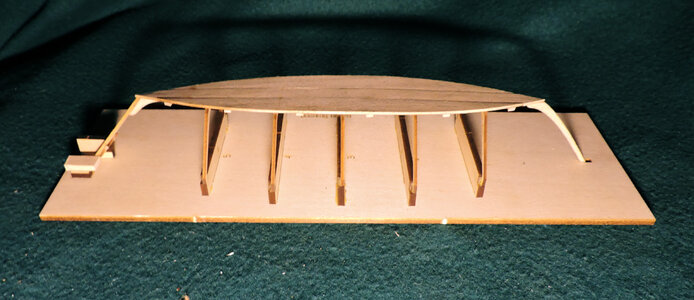
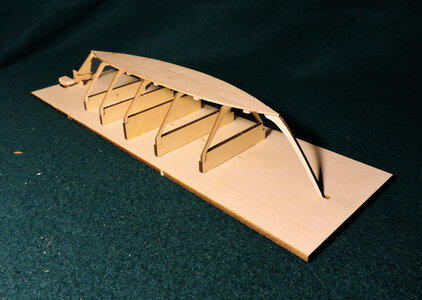
Instruction also suggested using rubber bands to hold down the bottom, i used weight.

and the model is ready for the planking


- Joined
- Dec 1, 2016
- Messages
- 5,136
- Points
- 728

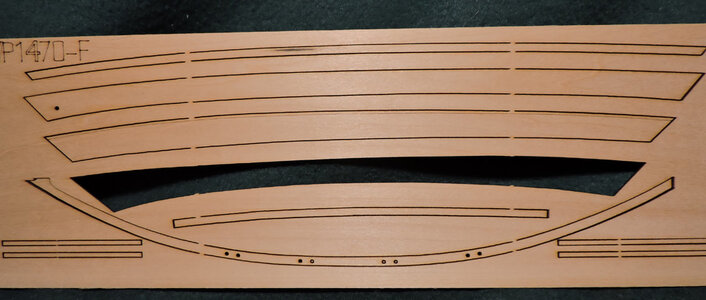
Reading through the instruction for the gardboard plank the first thing i notices is the shape. As you can see the end on the left side is bigger than the end on the right side. These is nothing maked on the sheet as to what is the bow and stern
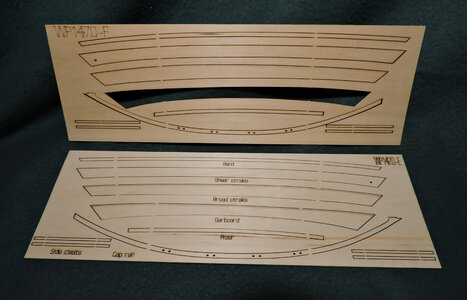
I am taking a guess the left end goes on the stem at the bow. Based on the idea looking at the caprail piece below the planks there is a a hook shape so i will assume all the planks on the sheet are arranges with the bow to the left. The top edges of the planking are beveled and i am a little unsure of what has to be done so we will get to that when i bevel the edge.
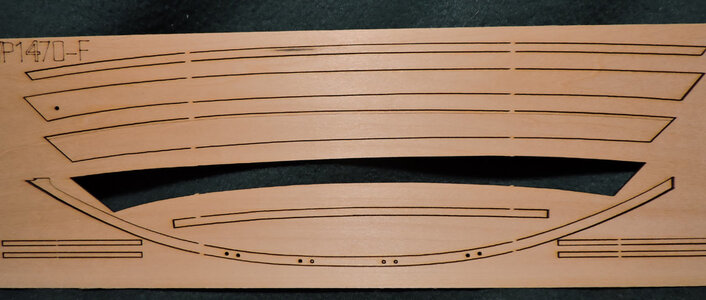

I am taking a guess the left end goes on the stem at the bow. Based on the idea looking at the caprail piece below the planks there is a a hook shape so i will assume all the planks on the sheet are arranges with the bow to the left. The top edges of the planking are beveled and i am a little unsure of what has to be done so we will get to that when i bevel the edge.

Dave, thanks for the build log. I'm watching with much interest. Magic Mike
- Joined
- Dec 1, 2016
- Messages
- 5,136
- Points
- 728

Next step is putting a bevel along the upper edge of the garboard plank. The plank has an etched line and the instructions say to bevel the edge to this line.
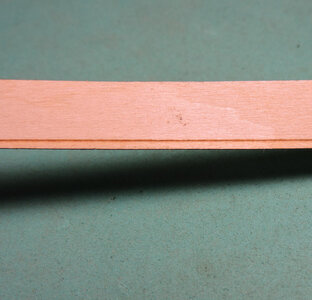
The instructions also say when sanding the bevel take it down to half the plank thickness along the edge. The plank itself is only 1/32 thich so you have to split that thickness
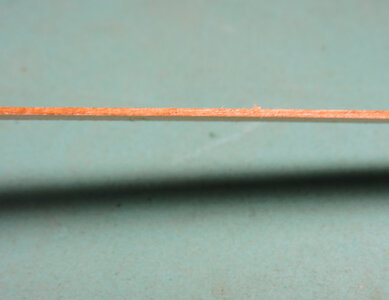
in order to maintain a constant thickness and evenly reaching the etched line i place the gardboard on a scrap piece of wood thus lifting it off the glass surface, then i gently ran an angled sanding stick along the edge watching the thickness and approaching the etched line.
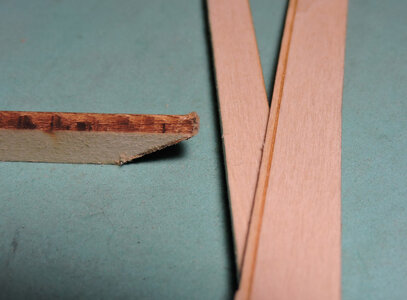
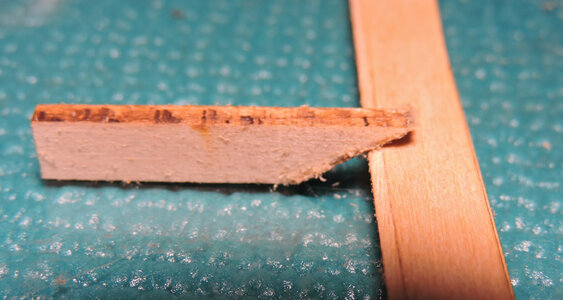
it turned out ok i got an even bevel all along the edge right to the etch line.
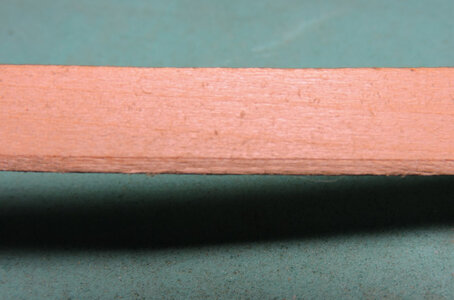
and split the thickness
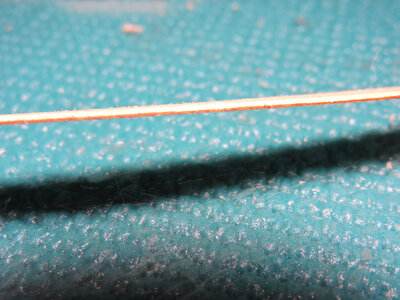

The instructions also say when sanding the bevel take it down to half the plank thickness along the edge. The plank itself is only 1/32 thich so you have to split that thickness

in order to maintain a constant thickness and evenly reaching the etched line i place the gardboard on a scrap piece of wood thus lifting it off the glass surface, then i gently ran an angled sanding stick along the edge watching the thickness and approaching the etched line.


it turned out ok i got an even bevel all along the edge right to the etch line.

and split the thickness

Last edited:
- Joined
- Dec 1, 2016
- Messages
- 5,136
- Points
- 728

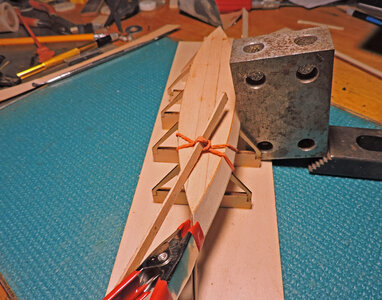
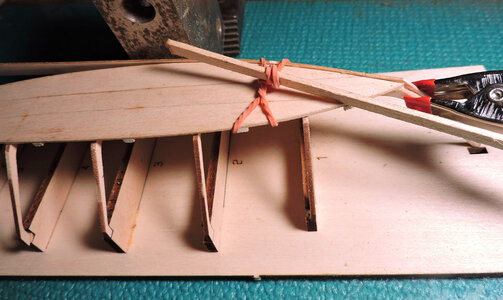
instructions suggested soaking the gardboard plank in hot water then using clamps and rubber bands and place it on the frames. Let it dry and remove the plank, then go ahead and glue it in place. There is material between the planks on the laser sheets so i did a test with a scrap piece and soaked it in hot water. This made the wood soft and it warped out of shape, if i were to apply pressure to the piece with a clamp or rubber band i think it would damage the wood because it is so thin.
So rather than soaking the garboard in water i tried to bend it to the hull dry and it worked just fine. There is no need to soak the planks.
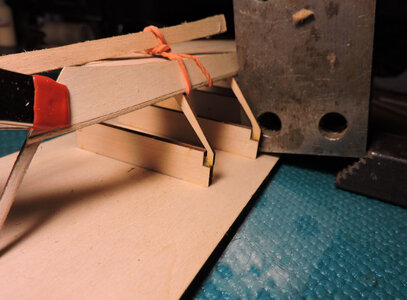
starting at the bow i applied glue to the stem, the first two frames and along the botton edge clamped the end of the garboard to the stem and used a rubber band tourniquet style to hold the plank to the frames. At the end i leaned a weight against the side to hold the plank.


- Joined
- Dec 1, 2016
- Messages
- 5,136
- Points
- 728

once the front section was glued in place i thought i would work my way down the hull doing the same thing. But then i realized to do the other side i would have to twist the rubber band against the fine beveled edge of the gardboards. i was not sure the edges would take the pressure. So i abandoned the wood glue and went with super glue. Doing the same thing i lined up the plank at the stem, applied super glue to the first two frames and along the bottom edge. Held the plank in place for 30 seconds and done. Moving along from frame to frame applied glue held the plank and continued to the stern.
No soaking the planks, no clamping or rubber bands i had the gardboards on in 10 minutes.
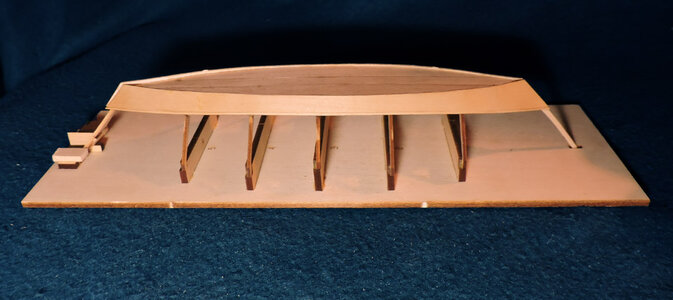
The gardboard planks overlap the bottom and they will be sanded flush with the bottom.
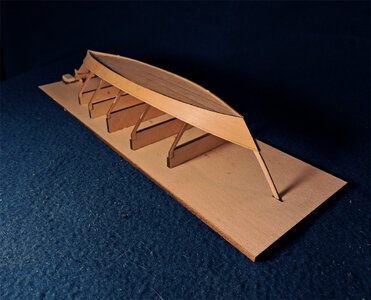
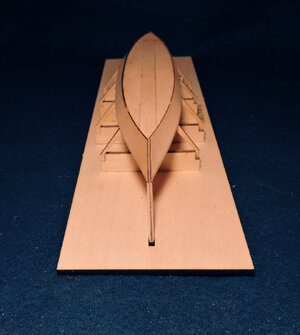
As per the instructions i started at the stem and lined up the ends of the planks and let them run long at the stern. Before i apply the second plank i will trim down the gardboards at the stern.
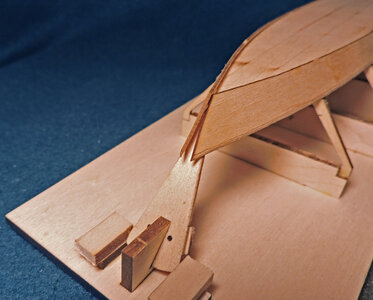
taking a closer look at the stem both gardboards were flush with the stem bevel leaving a small section of the stem at the center.
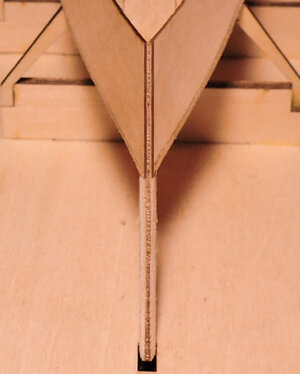
No soaking the planks, no clamping or rubber bands i had the gardboards on in 10 minutes.


The gardboard planks overlap the bottom and they will be sanded flush with the bottom.

As per the instructions i started at the stem and lined up the ends of the planks and let them run long at the stern. Before i apply the second plank i will trim down the gardboards at the stern.

taking a closer look at the stem both gardboards were flush with the stem bevel leaving a small section of the stem at the center.

Last edited:
Nice going Dave! Magic Mike
- Joined
- Dec 1, 2016
- Messages
- 5,136
- Points
- 728

Nice going Dave! Magic Mike
thanks Mike
i was going to follow the instructions step by step doing exactly what the instructions say. But sometimes you just have to veer off and do it your way. isaw no need for the soaking and clamping of the planks.
i must say the material in the kit is very small and thin and it will break easy. so far it requires a delicate touch and keeping an eye on the small details.
- Joined
- Dec 1, 2016
- Messages
- 5,136
- Points
- 728

i know what a clinker planked hull or lap strake hull is. The planks over lap one another like these examples
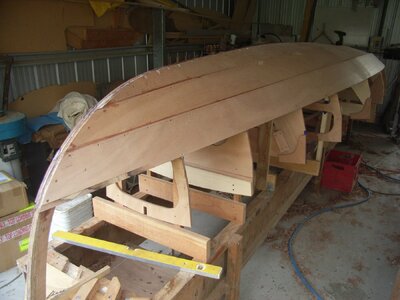
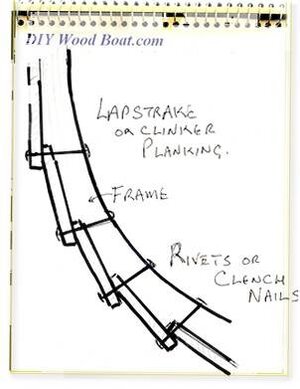
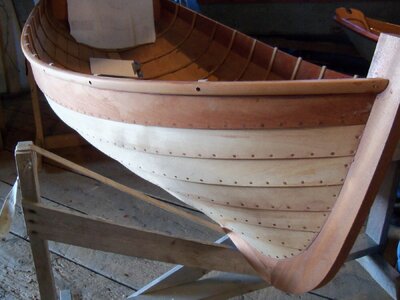
what i am not sure of is the instructions are saying the planks are flush with each other. So they lap all along the hull and the edges butt at the stem and stern? i can not see if the lap over how can they be flush?
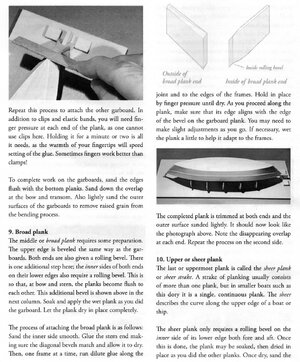


what i am not sure of is the instructions are saying the planks are flush with each other. So they lap all along the hull and the edges butt at the stem and stern? i can not see if the lap over how can they be flush?

- Joined
- Dec 1, 2016
- Messages
- 5,136
- Points
- 728

working on the broad plank i first sanded the bevel and did a test fit on the hull. The line you see running along the edge of the garboard would be the edge of the next plank.
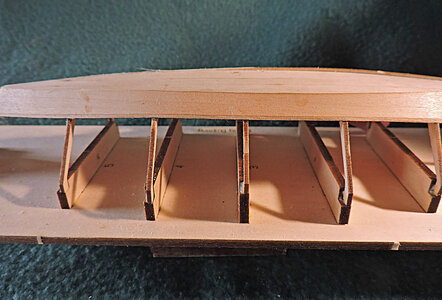
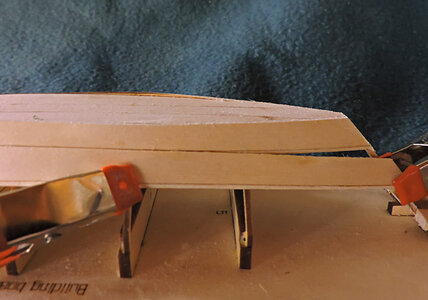
So what i did was to take the broad plank and clamp it to the center frames along the laser line which is the edge of the bevel. Notice between the clamps you do not see the line but to the right it is starting to peek out. Mine you this is a hair line very tiny but watch what happens.
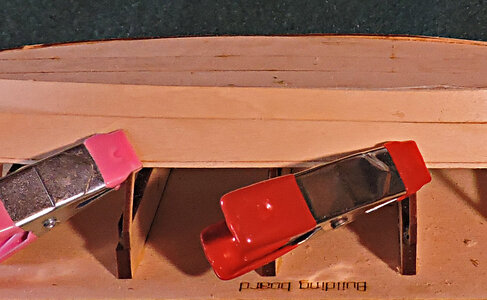
if i bend the plank to its natural run it totally missed the top of the garboard. i can not push it up because the plank will want to kink.
taking a step back and looking at the hull the pink and red clamps are holding the plank right on the bevel line so if i bend the plank to it natural run to the bow lets see what happens.
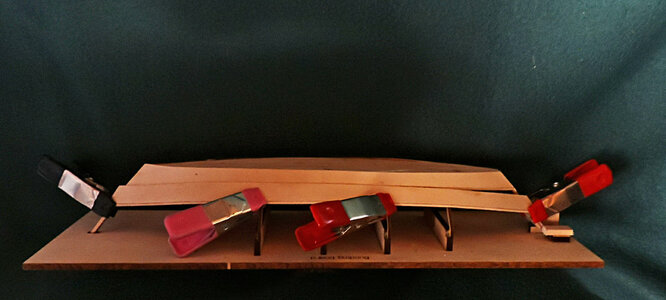
it hits the bevel line dead on
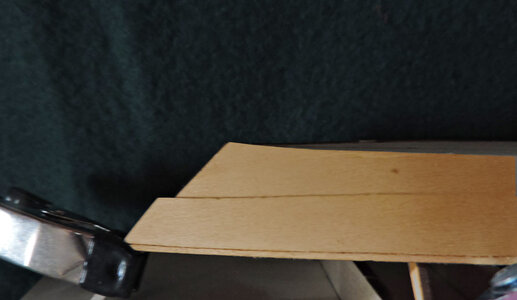
what we have here is the planks natural run from the bow to the red clamp is running along the bevel line. This means if i twist the plank for the stern to hit the line the bow will miss.
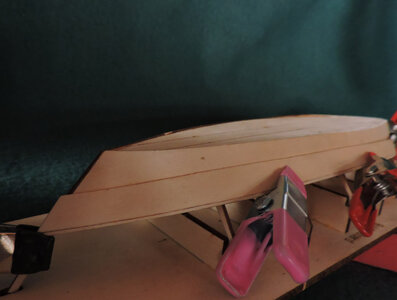

So what i did was to take the broad plank and clamp it to the center frames along the laser line which is the edge of the bevel. Notice between the clamps you do not see the line but to the right it is starting to peek out. Mine you this is a hair line very tiny but watch what happens.

if i bend the plank to its natural run it totally missed the top of the garboard. i can not push it up because the plank will want to kink.

taking a step back and looking at the hull the pink and red clamps are holding the plank right on the bevel line so if i bend the plank to it natural run to the bow lets see what happens.

it hits the bevel line dead on

what we have here is the planks natural run from the bow to the red clamp is running along the bevel line. This means if i twist the plank for the stern to hit the line the bow will miss.

Last edited:
- Joined
- Dec 1, 2016
- Messages
- 5,136
- Points
- 728

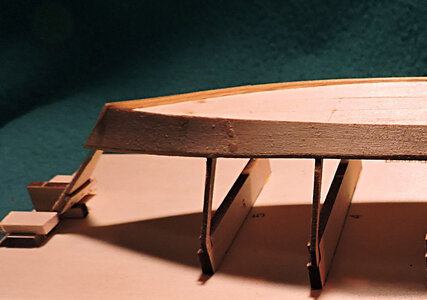
following the instructions it said when installing the garboard "slightly" over lap the bottom of the boat. Well ok how big or small is "slightly"?
the problem with the next plank not overlapping the garboard might of started with placing the gardboard slightly to low at the stern. But the amount of material is small that over lap you see is only about .040 thousanths, there is not much to play with here.
Even if the garboard was place as close to the bottom edge as possible i do not think it would be enough to close the gap to the next plank.
so i need to figure what going on here

Last edited:
- Joined
- Dec 1, 2016
- Messages
- 5,136
- Points
- 728

ok i figure it out remember when i said the bow and stern are not marked on the planks? so i figures because the bow of the cap rail is to the left all the planks would be facing the same way. Nope you have to guess which end is the bow and stern.
either i have the garboard on backwards or bow of the second plank could be either end.
i put the wider end of the gardboard at the stem it migh go at the stern it fit either way.
either i have the garboard on backwards or bow of the second plank could be either end.
i put the wider end of the gardboard at the stem it migh go at the stern it fit either way.

Dave,
I built the Dory a few months back and I think you are correct that the garboard may be on backwards. There is a laser line on the garboard that indicates the area to be beveled. This should go to the top of the boat (When it in it's upright position). As for the plank, I believe if you place it in very hot water (I used a thermos) for a few minutes you can achieve a lot more flexibility and have it fit. What I did is to soak both port and starboard plans in water for about 5 minutes then fit them in place. I found using the modified binder clamps along the frame and rubber bands did the trick. If you are afraid of them marking the wood put a thin piece of wood under the rubber band. I then let the wood dry in place for a few hours.
Then I unclamped the wood, put glue along the edges and reclamped and let the glue set. It seemed to work much easier that way.
Rob
I think Dave, the haws hole on the Sheer Strake, and the caprail plank should be the indication of the bow. But it would be nice if we had an arrow engraved toward the bow,
- Joined
- Dec 1, 2016
- Messages
- 5,136
- Points
- 728


