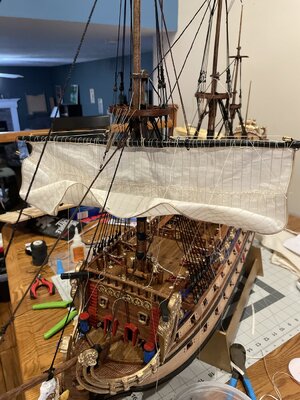
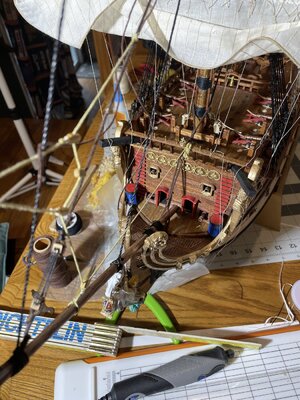
Le Soleil Royal ZHL Build Log [COMPLETED BUILD]

I have not heard of a sail stretching jig, what might one look like?

Home made jigs for stretching sails. The head of the the sail is clamped between the boards at the top using C-clamps. The keeps the head from being stretched out and keeps it straight. The clews are suspended by line tied to the hooks. The hooks can be repositioned to suit the sail size, and they simply screw into the wood. You soak the sail wet with starch, then place the sail in the stretching jig. Using bags of water or sand, you stretch the sail and leave it to dry under the weight of the bags overnight until it is dry. Water bags work best, as long as they don't leak. If you use sand, you have to place and shape the sand bag so that the sail is stretch to the desired shape. Hopefully your bolt rope is strong enough at the clews that it won't be torn off the sail, so check your stitching.
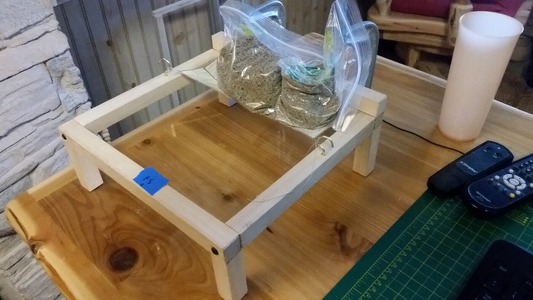
1658250308223.png

1658250331269.png


Here is a jig made by another builder. You can see him applying wet starch.
1658250672997.png


the result is a sail which is stiff like parchment.
1658250846589.png

The bowlines hold the bottom of the sail way from the mast as if wind is pushing the sail.
1658250911890.png
 
Home made jigs for stretching sails. The head of the the sail is clamped between the boards at the top using C-clamps. The keeps the head from being stretched out and keeps it straight. The clews are suspended by line tied to the hooks. The hooks can be repositioned to suit the sail size, and they simply screw into the wood. You soak the sail wet with starch, then place the sail in the stretching jig. Using bags of water or sand, you stretch the sail and leave it to dry under the weight of the bags overnight until it is dry. Water bags work best, as long as they don't leak. If you use sand, you have to place and shape the sand bag so that the sail is stretch to the desired shape. Hopefully your bolt rope is strong enough at the clews that it won't be torn off the sail, so check your stitching.
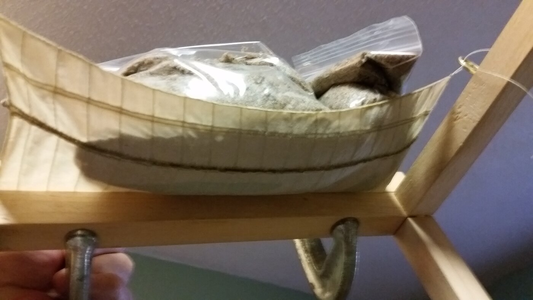
View attachment 319276

View attachment 319277


Here is a jig made by another builder. You can see him applying wet starch.
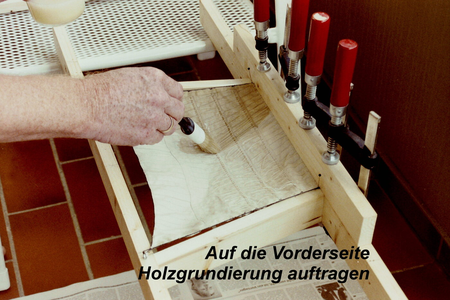
View attachment 319286


the result is a sail which is stiff like parchment.
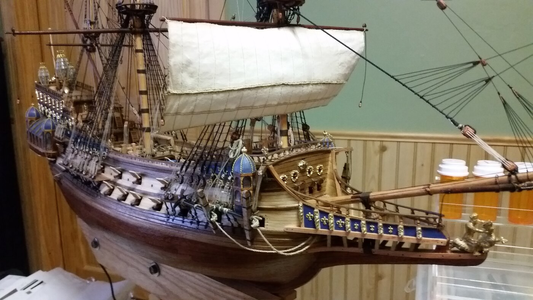
View attachment 319288

The bowlines hold the bottom of the sail way from the mast as if wind is pushing the sail.
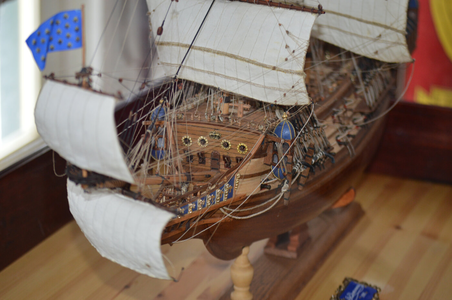
View attachment 319289
This is great info and examples. I can easily build me one when I get to the sail making part. I have almost talked the Admiral into doing the sewing, or let me use her machines.....o_O ROTF
 
I have to buy my wife an expensive embroidery machine just so I can get my mother's sewing machine back from her. Model building isn't cheap. It was worth it just to get the sails done.
Thats so funny but very true indeed. My wife said I should use my mothers treddle Singer sewing machine purchased in Milan 1950.
 
Thats so funny but very true indeed. My wife said I should use my mothers treddle Singer sewing machine purchased in Milan 1950.
Hey, don't knock the old tech sewing machines. They work really well if tuned up. I usually use my grandmother's 1948 Singer portable. It needs cleaning right now, and a tune-up, but that shouldn't take too long.
 
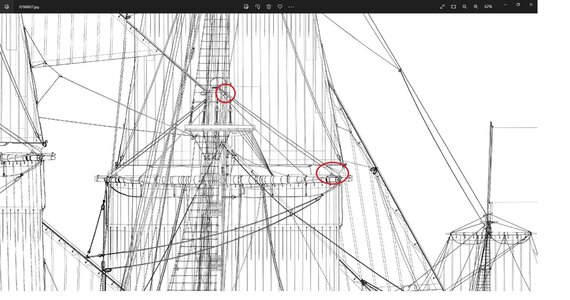
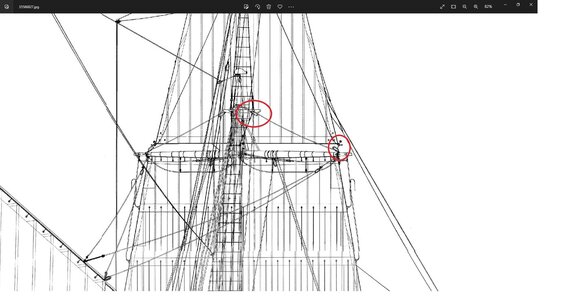
Are you sure this is correct way of making fore yard lift?

This is foremast from Saint Philippe
image1.jpg
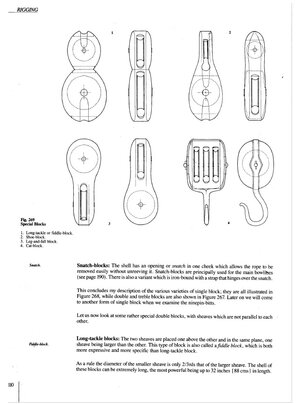
On the end is Shoe-block(your version is ok) but the other block (fiddle-block) is much higher and on mounted on cap

Plate from 74 G.S. Boudriot volume3
Fiddle block+.jpg

Your lift looks like from fore topsail
image 2.jpg

Despite that I like your build very much and I'm really sorry for only making suggesion and not showing it my self, but my riiging of L'Ocean is far far away.
 
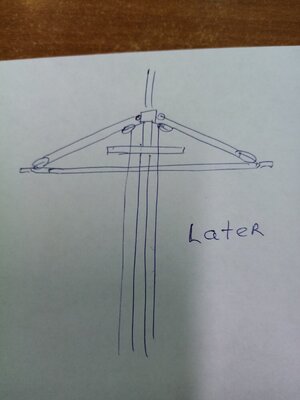
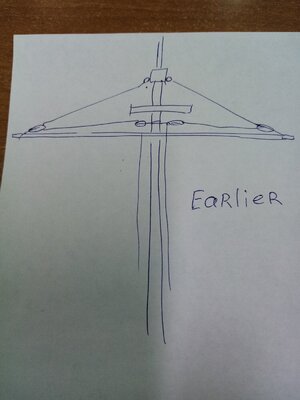
It is my understanding that on earlier continental ships, including the French, the lift blocks on the mast were below the top, not at the cap on the masthead as often fitted on English ships in the early 17th century. R.C Anderson states that this lift block was moved to the cap on continental vessels by 1700, and possibly as early as 1690. He goes on to say:

1658476162872.png

Suffice to say, that for the ship Le Soleil Royal in 1670, the lift blocks located below the top or crosstree is probably correct.
 
L'Ambitieux is from 1692 and has the same way of making yard lift. Does such change was made in twenty years? I'm no expert and it's very curious
 
L'Ambitieux is from 1692 and has the same way of making yard lift. Does such change was made in twenty years? I'm no expert and it's very curious
Some changes are fast, some slow, and they vary between nations. All we can do is use examples of real ships to help guide us as to when changes are made. There will always be exceptions, and coming up with simple rules regarding ship features is difficult because the amount of information left to us from history is quite small, especially for early ships from the 1600's. There is much more information available on how ships were built from 1700-1940.
 
Some changes are fast, some slow, and they vary between nations. All we can do is use examples of real ships to help guide us as to when changes are made. There will always be exceptions, and coming up with simple rules regarding ship features is difficult because the amount of information left to us from history is quite small, especially for early ships from the 1600's. There is much more information available on how ships were built from 1700-1940.
Well, it's not even theoretically possible to raise a sail with a yard. That's a lot of weight. There is no lever, Archimedes would say. To lower it down, yes, it is possible. Under its weight, the yard will sink down. But it will not work to raise it. The root end should be fixed higher.

IMG_20220722_182734.jpg

IMG_20220722_182728.jpg
 
Well, it's not even theoretically possible to raise a sail with a yard. That's a lot of weight. There is no lever, Archimedes would say. To lower it down, yes, it is possible. Under its weight, the yard will sink down. But it will not work to raise it. The root end should be fixed higher.

View attachment 319682

View attachment 319683
I believe the halyard does most of the work for lifting. I did it this way because it agreed with both Anderson and the kit instructions. I feel it’s a bit awkward, but there you have it.
 
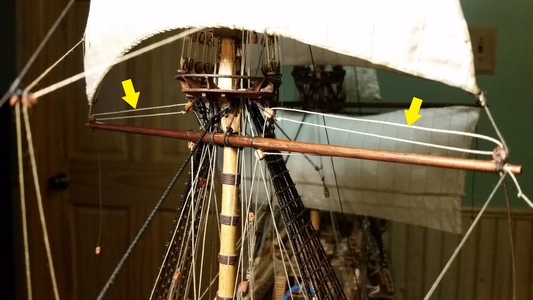
As yardarms became longer and heavier, it became necessary move the lift line block higher up the mast. The inefficiency of the arrangement of the lifts in the early 17th century resulted in the lift blocks being moved from below the top to the masthead cap above the top because of the poor leverage in raising the ends of the yardarm. As you can see from the example below, the lifts indicated by the arrows have very little leverage in lifting the ends of the yardarm. Almost all the weight of the yard was handled by the ties and their halyards. The sheets of the topsail also contributed in holding up the ends of the yardarm. The support of the yardarm was a complicated affair as a result.

1658516688834.png
 
That’s what I said! Kind of.
As yardarms became longer and heavier, it became necessary move the lift line block higher up the mast. The inefficiency of the arrangement of the lifts in the early 17th century resulted in the lift blocks being moved from below the top to the masthead cap above the top because of the poor leverage in raising the ends of the yardarm. As you can see from the example below, the lifts indicated by the arrows have very little leverage in lifting the ends of the yardarm. Almost all the weight of the yard was handled by the ties and their halyards. The sheets of the topsail also contributed in holding up the ends of the yardarm. The support of the yardarm was a complicated affair as a result.

View attachment 319740
 
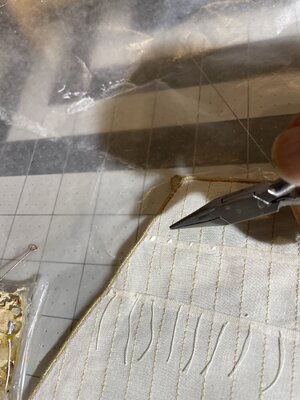
I got tired of sewing the reef points on. It would take me a whole day for one sail, the results didn’t look that great, it was difficult to keep the length the same, and I’ve already broken two needles. So I’m attaching them with some white Elmer’s Glue-All. 2F6C6A9A-BD4C-4F2C-8668-4104A9C7E136.jpeg
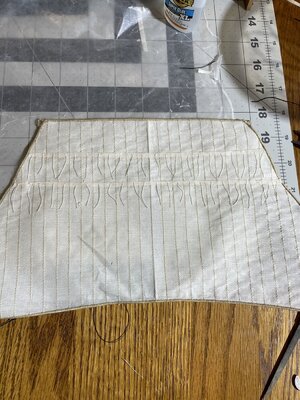
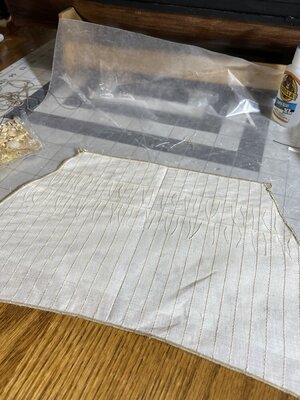
This took me less than an hour and it looks better.
7209A4E0-130C-4F64-8A54-F8DF284BDFE8.jpeg
 
I got tired of sewing the reef points on. It would take me a whole day for one sail, the results didn’t look that great, it was difficult to keep the length the same, and I’ve already broken two needles. So I’m attaching them with some white Elmer’s Glue-All. View attachment 319822
This took me less than an hour and it looks better.
View attachment 319823
That works, and the bonus is that they lay flat.
 
Back
Top