You are using an out of date browser. It may not display this or other websites correctly.
You should upgrade or use an alternative browser.
You should upgrade or use an alternative browser.
Kingfisher 1770 1:48 POF
- Thread starter dockattner
- Start date
- Watchers 109
Nice work Paul. I remember numbering and stacking frames on the BN, it seems a little unrewarding at first, but soon you start to see the resemblance of a hull. Hang in there! 
Thanks, Heinrich. I DO feel good about the progress, but the time investment was impressive for these frames (roughly two frames a day on average - maybe less as I have gotten into a better workflow). Of course, the frames will be featured prominently...Younhave made inroads into those frames, Paul - this is excellent progress. Needless to say, the level of workmanship is superb!
Agreed. I have to keep reminding myself that this IS the build on a POF and not something to be rushed through in favor of something 'more important' in the future.Nice work Paul. I remember numbering and stacking frames on the BN, it seems a little unrewarding at first, but soon you start to see the resemblance of a hull. Hang in there!
- Joined
- Oct 23, 2018
- Messages
- 539
- Points
- 353

Very good progress Paul. It makes a lot of fun to follow your log.
Good morning Paul. Humility is one of your strong points. On many occasion you refer yourself as inexperienced “ when it come to ship building and this is a True Story as this is your first POF ship and only 2nd Model.Gentlemen (and Ladies?),
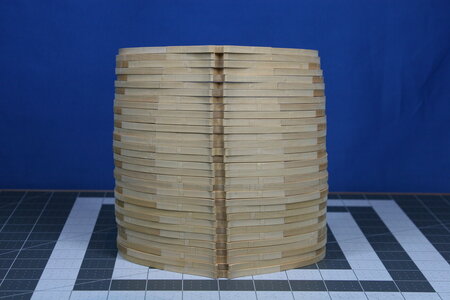
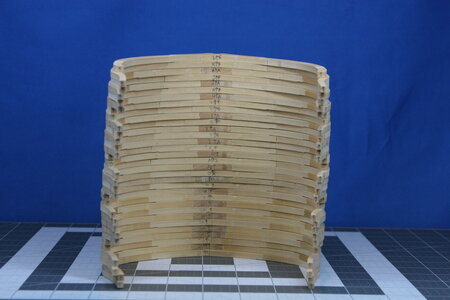
I have had lots (translation: LOTS!) of modeling time since my last posting, during which I have dedicated myself to fabricating square frames (since they are not in fact square, I assume this refers to their orientation to the keel - that is, they mount 90 degrees to the run of the keel). I thought these would be the easiest place to start and I believe this has been borne out.
View attachment 356167
The frames are paired at each station. One frame has a cross chock at the keel and the other frame has floors. The example above shows a frame with floors.
As I mentioned previously, the frame elements get smaller as they move up (away from the keel). I have been careful to preserve this historical element as I have been sanding the fore and aft faces of each of these frames:
View attachment 356168
I won't always have as much hobby time going forward so this is going to take a while...
View attachment 356169
View attachment 356170
I have some stepped up work and teaching responsibilities in the weeks ahead (I'm NOT teaching on how to build a model ship), so when I get back to the shipyard I might just continue making more of these, or try my hand at some of the more difficult frames.
Thanks to everyone who offered tips and advice recently - and thanks for the likes as well!
HOWEVER. Your skill, perfection and approach to this hobby (I think I would be committed and in a straight jacket by now if I attempted this
 ) render a finish product of a seasoned and experienced model builder. It is rather extraordinary what you do.
Cheers Grant
- Joined
- Sep 3, 2021
- Messages
- 4,321
- Points
- 688

On my BN I couldn't get any better than one frame per day and that resulted in non-perfect frames, so two a day is really good in my books.Thanks, Heinrich. I DO feel good about the progress, but the time investment was impressive for these frames (roughly two frames a day on average - maybe less as I have gotten into a better workflow). Of course, the frames will be featured prominently...
Agreed. I have to keep reminding myself that this IS the build on a POF and not something to be rushed through in favor of something 'more important' in the future.
Class progress Paul and very neatly worked
I just got into your log now and I think it's just fantastic. Such a precise and beautiful work. Very impressive.
Thank you Christian. Things will slow for a bit now but I'm having fun so I should be back at it sooner than later.Very good progress Paul. It makes a lot of fun to follow your log.
I'm not even sure how to respond Grant. Blushing...Good morning Paul. Humility is one of your strong points. On many occasion you refer yourself as inexperienced “ when it come to ship building and this is a True Story as this is your first POF ship and only 2nd Model.
HOWEVER. Your skill, perfection and approach to this hobby (I think I would be committed and in a straight jacket by now if I attempted this) render a finish product of a seasoned and experienced model builder. It is rather extraordinary what you do.
Cheers Grant
Not needing to sand off laser char saves me oodles of time compared to you BN guys...On my BN I couldn't get any better than one frame per day and that resulted in non-perfect frames, so two a day is really good in my books.
What a nice thing to say Tobias. It seems you have inspired me with your work.Class progress Paul and very neatly worked
Thank you kindly Adi. This model is quite different from my previous attempts so I spend a lot of time noodling. On the Vasa my thinking was: what did it look like? Now my thinking is: how did they build it?I just got into your log now and I think it's just fantastic. Such a precise and beautiful work. Very impressive.
Sorry to take so long to come back to you!Paul,
I found the reason for the small mistake. LSS did not use a regular chock. The easiest way to avoid this, is to glue a small and thin piece of timber at the side of the chock and don't cut the third futtock.
@tedboat
Your model is looking really good. I love the color of the boxwood. Was the small cutter model also in the kit? Can you share some more pictures with us?
Yes, I love the colour of the boxwood as well. Achieved using a finishing coat of thinned sanding sealer, which gives it just the right 'lift' .
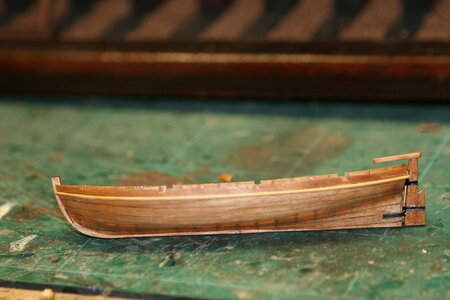
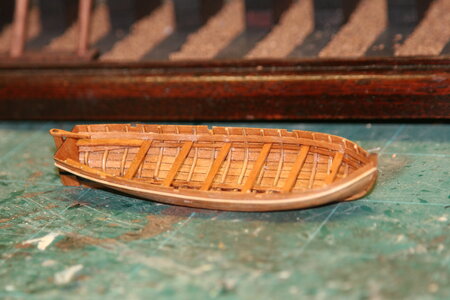
The pinnace with 'Kingfisher' was bought from CAF as a kit. Quite cheap, and the wood quality is not the best, but it does build up into a nice little boat. Five inches long (125mm), and weighs just 6 grammes!
I made a mistake using CA glue, which was instantly sucked in to the timber and darkened it, so I said a selection of rude words and flooded all the timbers with CA. It came out fairly well, if a bit glossy.
Took only a few hours to build, and I didn't take any progress photos, but have included a couple of poor 'finished' shots.
Regards
Ted


Hi Paul. My compliments for the pile of nice tight frames you've made so far. A POF needs patience in the beginning. But once you start putting frames on the keel ....... then you start patting yourself on the back. And the more attention now, the better result later. So the prospects are promising.Gentlemen (and Ladies?),
I have had lots (translation: LOTS!) of modeling time since my last posting, during which I have dedicated myself to fabricating square frames (since they are not in fact square, I assume this refers to their orientation to the keel - that is, they mount 90 degrees to the run of the keel). I thought these would be the easiest place to start and I believe this has been borne out.
View attachment 356167
The frames are paired at each station. One frame has a cross chock at the keel and the other frame has floors. The example above shows a frame with floors.
As I mentioned previously, the frame elements get smaller as they move up (away from the keel). I have been careful to preserve this historical element as I have been sanding the fore and aft faces of each of these frames:
View attachment 356168
I won't always have as much hobby time going forward so this is going to take a while...
View attachment 356169
View attachment 356170
I have some stepped up work and teaching responsibilities in the weeks ahead (I'm NOT teaching how to build a model ship), so when I get back to the shipyard I might just continue making more of these, or try my hand at some of the more difficult frames.
Thanks to everyone who offered tips and advice recently - and thanks for the likes as well!
Regards, Peter
- Joined
- Jul 9, 2019
- Messages
- 495
- Points
- 323

Stoked to see your new project, Paul. Aren't you just loving building her up from the frames? On your next one, you can scratch build those frames--yanno, in another 2 years 
Kurt Konrath
Kurt Konrath
Gee Doc, your at 250+ posts and the frames aren't done yet!
Will this build log exceed Heinrich's current build by the time its done?
Will this build log exceed Heinrich's current build by the time its done?
- Joined
- Oct 23, 2018
- Messages
- 539
- Points
- 353

Skill optimization comes with the rote tedium of this phase, as opined by someone who hasn't yet done this particular thing, himself. I think it says something that all of your frames lay perfectly flat against each other, as though they really like each other.Gentlemen (and Ladies?),
I have had lots (translation: LOTS!) of modeling time since my last posting, during which I have dedicated myself to fabricating square frames (since they are not in fact square, I assume this refers to their orientation to the keel - that is, they mount 90 degrees to the run of the keel). I thought these would be the easiest place to start and I believe this has been borne out.
View attachment 356167
The frames are paired at each station. One frame has a cross chock at the keel and the other frame has floors. The example above shows a frame with floors.
As I mentioned previously, the frame elements get smaller as they move up (away from the keel). I have been careful to preserve this historical element as I have been sanding the fore and aft faces of each of these frames:
View attachment 356168
I won't always have as much hobby time going forward so this is going to take a while...
View attachment 356169
View attachment 356170
I have some stepped up work and teaching responsibilities in the weeks ahead (I'm NOT teaching how to build a model ship), so when I get back to the shipyard I might just continue making more of these, or try my hand at some of the more difficult frames.
Thanks to everyone who offered tips and advice recently - and thanks for the likes as well!
Good progress Paul!
Oh my - you are hired !!!


