Kingfisher 1770 1:48 POF

Ships were in a constant state of re-configuration, and the practicalities of re-arranging the 'tween decks would be among the more malleable aspects of a given ship's service life. If subsequent designs proved to be more efficient, then previous vessels would/could be altered to match. As long as she looks like the Kingfisher from a hull and rig standpoint, I don't see how anyone can reasonably argue otherwise.
Agree with this totally! Ships carpenter could easily reconfigure interior spaces based on many things, from new personnel with new ideas, bribes or relationships, battle damage, etc. It was a living thing, continually morphing and adapting. I don't thing major things like beams would change unless they went into overhaul. Just my thoughts having seen what goes on in the USN ships I've been on...my guess is things weren't so different back then.

Like everyone else, I'm in awe of the quality and also the speed at which you're progressing on this build. Thanks for the awesome pictures!
This just became my storyline for the rare person who knows the difference :).
 
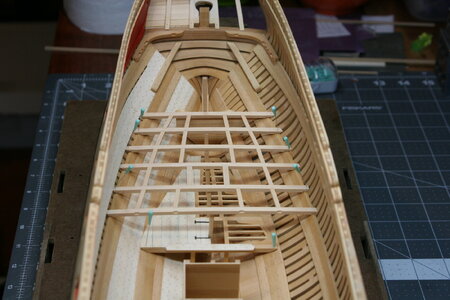
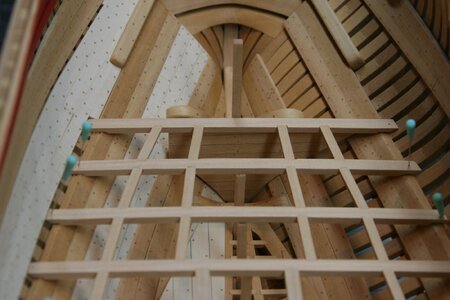
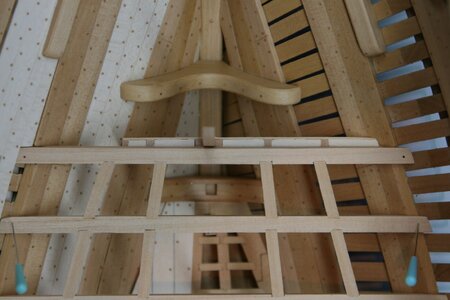
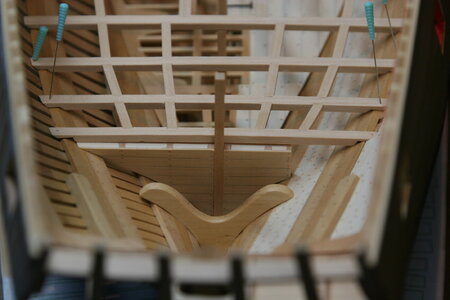
Beams are roughed in...

View attachment 430437

View attachment 430438

View attachment 430439

That was more work than I had anticipated. My respect to all of you scratch builders out there.

Next up: I have been looking at how to build some rooms that sit on the aft platform. The TFFM series has some drawings, but they are for the Pegasus. I have the NMM plans for the Kingfisher but they are difficult to understand and apply (my lack of experience frequently catches up with me) as they are not construction drawings per se...

AND... (THIS IS A REALLY BIG AND)...I just figured out that by following TFFM as closely as I have for this build that I have deviated from the plans for the Kingfisher in ways that cannot be remedied. So the question becomes: still call this the Kingfisher? Build out the interior as the Pegasus (or other swan class ship)? Build a hybrid with some Kingfisher details but some Pegasus stuff mixed in?

Anyway, I have some figuring to do. Still having fun though!
Good evening Paul. Beautiful my friend. She will look the the Kingfisher with a few upgrades…;)
. Still having fun though!
…this is why we all play with little tools, bits of wood, wire etc. Must be the everything…well for me.
Cheers Grant
 
Regarding the plans, I once read that you can build all types with the Swan Class books
Well, this is true. But the drawings in the book (and the plans available from Seawatch) are for the Pegasus and I should have been referencing the Kingfisher plans along the way. I failed in this regard.

But all is well, the model will just sit on a table in my house and no one will be the wiser.
 
Hello Friends!

More than a month ago I set out to add the bulkheads and rooms that sit on the aft platform. But as I studied the work progression, I realized that in order to fabricate bulkheads and rooms I needed to first locate the centerline posts that sit under the lower deck beams. But in order to locate the centerline posts I needed to know where the beams would be positioned for the lower deck (at least what I'm calling the lower deck).

Anyway, that's why (seemingly out of nowhere) I fabricated lower deck beams.

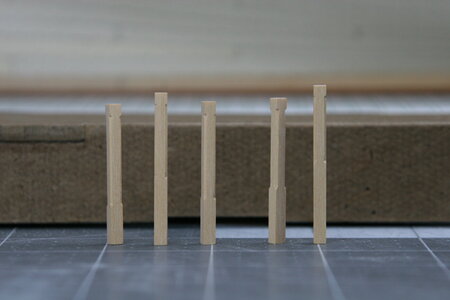
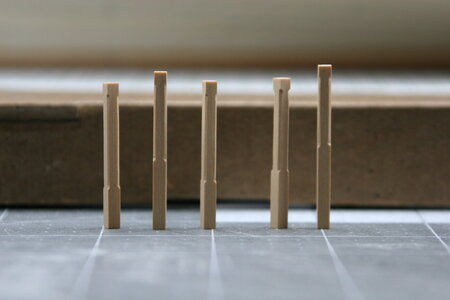
With those roughed out I then started working backwards toward the aft platform bulkheads and rooms. And the first job was making the centerline posts:

IMG_0467.JPG IMG_0466.JPG

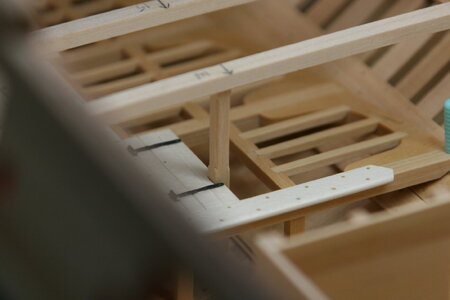
I chose to add a bevel to the corners. Here you can see one in position:

IMG_0474.JPG

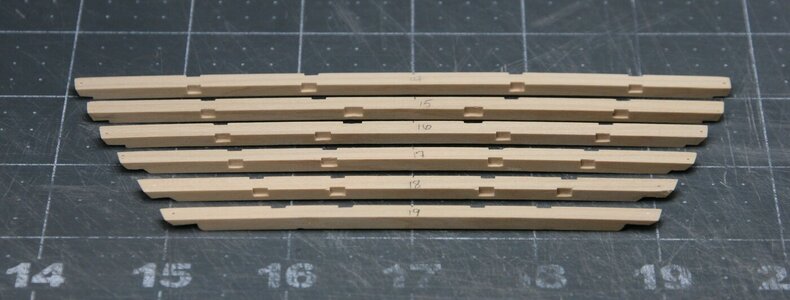
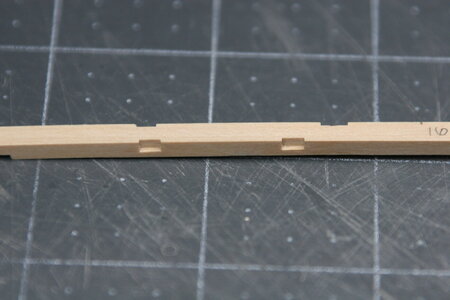
At this point I realized that the beams (which I had pinned into position) were still moving all over the place. In order to add more stability, I decided that I needed to add the carlings. But in order to do that I needed to cut tabled mortices:

IMG_0479.JPG

IMG_0483.JPG

And now with the carlings in place:

IMG_0487.JPG

Which meant I could FINALLY build a bulkhead.

I started at the back where there is a magazine room (gunpowder and cartridges). You can see this (partial) bulkhead under the most aft beam:

IMG_0487.JPG

IMG_0488.JPG

The bulkheads and walls of the magazine are a complicated affair that are oddly thick and then filled with mortar.

IMG_0491.JPG

IMG_0489.JPG

Everything is just sitting there loose so don't be concerned with fit and finish - that will come later.

Question: is it normal to spend an entire day making a single small bulkhead? Asking for a friend... :rolleyes:
 
Question: is it normal to spend an entire day making a single small bulkhead? Asking for a friend...
Perfectly normal, Paul, perfectly normal :)

Great work by the way, and most interesting too. Well done!
 
Paul,

Great work getting "the order of things" right! The magazine wall looks great, as do ALL the mortices and carlings!!

The walls are "oddly" thick and filled with concrete, to protect the content from sparks, flame, etc. Lots of precautions taken going in and out to avoid static and inadvertent sparks!
 
Perfectly normal, Paul, perfectly normal :)

Great work by the way, and most interesting too. Well done!
Thank you kindly, Mark!

Everything depends on everything else :)
I seem to remember that the lightroom window was a challenge. Just to give you something to sleep on;)
Yes, I am quickly learning that things need to align with other things more here than with my first build (at least vertically).

As I am getting closer to the lightroom I am beginning to appreciate just how small and complex that window is...

Paul,

Great work getting "the order of things" right! The magazine wall looks great, as do ALL the mortices and carlings!!

The walls are "oddly" thick and filled with concrete, to protect the content from sparks, flame, etc. Lots of precautions taken going in and out to avoid static and inadvertent sparks!
Good information Brad. I was wondering if the walls were designed to suppress an explosion - but had some serious doubts about how effective a few inches of concrete would be in light of the volume of gunpowder.
 
I agree with Heinrich. It took me months to learn how to make my parts with my CNC and now a lot of time to prepare all the parts.

Take the time you need to build the parts and do not Look permanent to your clock. The fun is the making of the parts and not the final result.
 
Hello Friends!

More than a month ago I set out to add the bulkheads and rooms that sit on the aft platform. But as I studied the work progression, I realized that in order to fabricate bulkheads and rooms I needed to first locate the centerline posts that sit under the lower deck beams. But in order to locate the centerline posts I needed to know where the beams would be positioned for the lower deck (at least what I'm calling the lower deck).

Anyway, that's why (seemingly out of nowhere) I fabricated lower deck beams.

With those roughed out I then started working backwards toward the aft platform bulkheads and rooms. And the first job was making the centerline posts:

View attachment 431387 View attachment 431386

I chose to add a bevel to the corners. Here you can see one in position:

View attachment 431388

At this point I realized that the beams (which I had pinned into position) were still moving all over the place. In order to add more stability, I decided that I needed to add the carlings. But in order to do that I needed to cut tabled mortices:

View attachment 431389

View attachment 431390

And now with the carlings in place:

View attachment 431392

Which meant I could FINALLY build a bulkhead.

I started at the back where there is a magazine room (gunpowder and cartridges). You can see this (partial) bulkhead under the most aft beam:

View attachment 431392

View attachment 431393

The bulkheads and walls of the magazine are a complicated affair that are oddly thick and then filled with mortar.

View attachment 431395

View attachment 431394

Everything is just sitting there loose so don't be concerned with fit and finish - that will come later.

Question: is it normal to spend an entire day making a single small bulkhead? Asking for a friend... :rolleyes:
In terms of the construction qualities that you strive for and achieve, it makes perfect sense. Well done my friend
 
Witaj
Drogi Pawle w naszych pracach nie powinno się liczyć czas lecz jakość wykonania danego elementu . Robisz bardzo piękny model więc czas się w ogóle nie powinien liczyć. Pozdrawiam Mirek
 
Hello Friends!

More than a month ago I set out to add the bulkheads and rooms that sit on the aft platform. But as I studied the work progression, I realized that in order to fabricate bulkheads and rooms I needed to first locate the centerline posts that sit under the lower deck beams. But in order to locate the centerline posts I needed to know where the beams would be positioned for the lower deck (at least what I'm calling the lower deck).

Anyway, that's why (seemingly out of nowhere) I fabricated lower deck beams.

With those roughed out I then started working backwards toward the aft platform bulkheads and rooms. And the first job was making the centerline posts:

View attachment 431387 View attachment 431386

I chose to add a bevel to the corners. Here you can see one in position:

View attachment 431388

At this point I realized that the beams (which I had pinned into position) were still moving all over the place. In order to add more stability, I decided that I needed to add the carlings. But in order to do that I needed to cut tabled mortices:

View attachment 431389

View attachment 431390

And now with the carlings in place:

View attachment 431392

Which meant I could FINALLY build a bulkhead.

I started at the back where there is a magazine room (gunpowder and cartridges). You can see this (partial) bulkhead under the most aft beam:

View attachment 431392

View attachment 431393

The bulkheads and walls of the magazine are a complicated affair that are oddly thick and then filled with mortar.

View attachment 431395

View attachment 431394

Everything is just sitting there loose so don't be concerned with fit and finish - that will come later.

Question: is it normal to spend an entire day making a single small bulkhead? Asking for a friend... :rolleyes:
The outcome looks very nice, Paul. Good to read that you also has to do some steps ahead before you could make the parts that you want.
Regards, Peter
 
Back
Top