Good evening Carl. This is impressive work. The detail and finish is so clean. Awesome. Cheers GrantTime to add the railings to the passenger deck. There are 3 parallel railing, with a separation of 0.25" between them. (This kit's measurements are in Imperial - not metric). I was trying to figure out a way of marking the separations- maybe making the stanchions with pencil, or creating some sort of spacer. Then I realized that I had a roll of masking tape that was the exact width - .25". So, I just taped this on and glued on the horizontal rails just above the line of the tape. Easy! View attachment 392125View attachment 392126
You are using an out of date browser. It may not display this or other websites correctly.
You should upgrade or use an alternative browser.
You should upgrade or use an alternative browser.
Thank you Grant. I appreciate your positive comments. Cheers, CarlGood evening Carl. This is impressive work. The detail and finish is so clean. Awesome. Cheers Grant
Thanks Peter!!She is getting impressive, Carl.
Regard, Peter
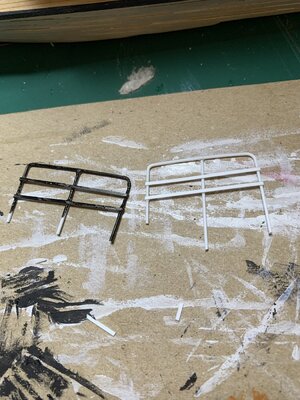
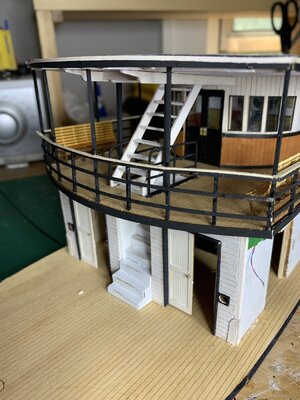
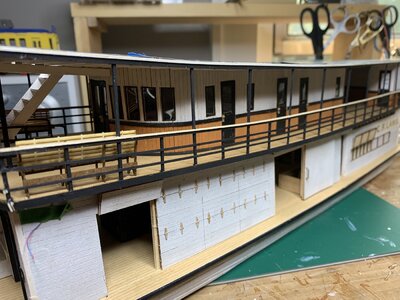
I worked on the passenger deck, installing the railings and the staircase from the passenger deck up to the wheelhouse. The stairs were about a 1/2 mm too wide for the opening on the wheelhouse deck. I could have filed or sanding it down, or made the opening wider, but I opted to fit it in as best as possible. In the end, after all the railings have been added, the half mm was not noticeable. There is a railing, made from styrene, and I used a template to shape it. It was such a pleasure to work with this material. Much more pliable than brass. I also added a top rail to the existing 3 rails. The instructions include this, but I ventured a bit off the instructions by leaving this top rail unpainted. I thought it would give a better contrast to the whole thing. I still have to so some paint touch ups before attacking the next stage - the wheelhouse.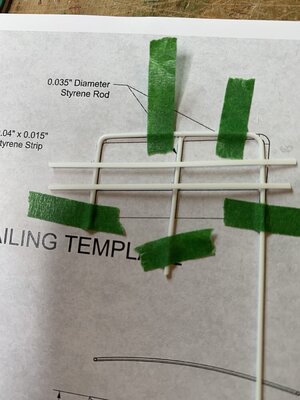


- Joined
- Apr 20, 2020
- Messages
- 5,177
- Points
- 738

Dear CarlI worked on the passenger deck, installing the railings and the staircase from the passenger deck up to the wheelhouse. The stairs were about a 1/2 mm too wide for the opening on the wheelhouse deck. I could have filed or sanding it down, or made the opening wider, but I opted to fit it in as best as possible. In the end, after all the railings have been added, the half mm was not noticeable. There is a railing, made from styrene, and I used a template to shape it. It was such a pleasure to work with this material. Much more pliable than brass. I also added a top rail to the existing 3 rails. The instructions include this, but I ventured a bit off the instructions by leaving this top rail unpainted. I thought it would give a better contrast to the whole thing. I still have to so some paint touch ups before attacking the next stage - the wheelhouse.View attachment 392751View attachment 392752View attachment 392753View attachment 392754
I am enjoying watching your great progress. Thanks for sharing.
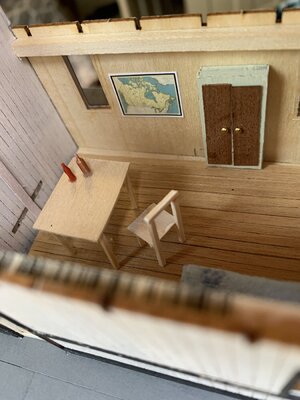
The wheelhouse was not that complicated to assemble. There is an option of having the windows or some of them in an open or closed position. I opted for all of them being closed. I also added some extras, including a clock, a speaking tube, and a pin-up calendar. I even shrunk down Captain Louie's (the original owner and captain) Master's Certificate (which is reproduced in the instruction manual) and placed it on the wall, along with a travel poster. I also panelled the rear wall with wood strips.
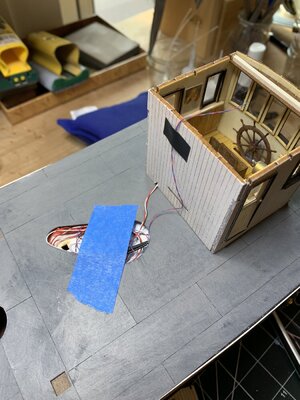
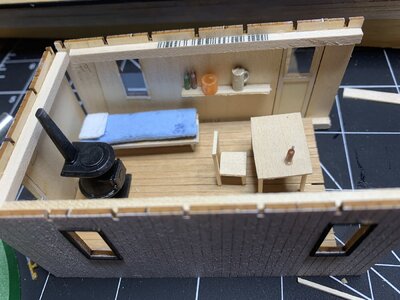
Before gluing the wheelhouse to the deck, I fished through some of the remaining LED wires. There is also the Captain's quarters, a cabin located behind the wheelhouse. This cabin is unadorned and is meant as a place to store the various LED wires. However, since there are a few windows, I decided to turn this room into a proper cabin for the captain. I built a false floor to cover the various wires, and added some furniture - a bed, shelf, table, chair and also a pot-bellied stove left over from another project. So now Captain Louie, the original master of the C.R. Lamb, has a place to hang his hat!
There is still some paint touch ups to do before adding the wheelhouse roof.
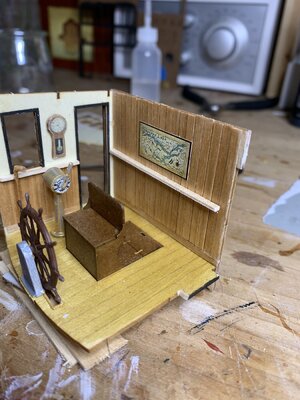
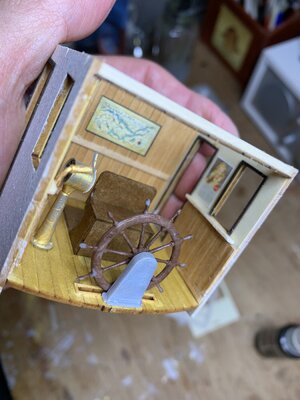
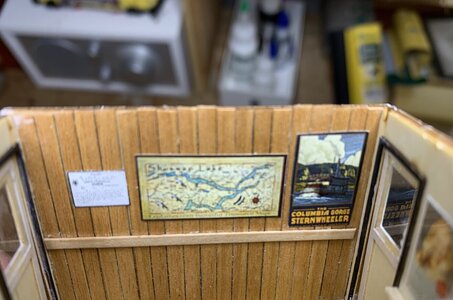
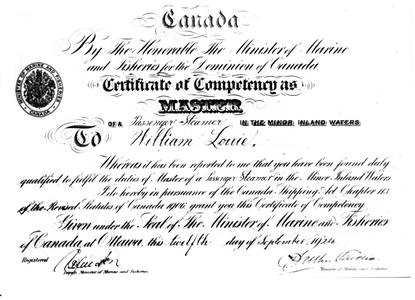


It’s all in the details! And you made some very nice small once.The wheelhouse was not that complicated to assemble. There is an option of having the windows or some of them in an open or closed position. I opted for all of them being closed. I also added some extras, including a clock, a speaking tube, and a pin-up calendar. I even shrunk down Captain Louie's (the original owner and captain) Master's Certificate (which is reproduced in the instruction manual) and placed it on the wall, along with a travel poster. I also panelled the rear wall with wood strips.
Before gluing the wheelhouse to the deck, I fished through some of the remaining LED wires. There is also the Captain's quarters, a cabin located behind the wheelhouse. This cabin is unadorned and is meant as a place to store the various LED wires. However, since there are a few windows, I decided to turn this room into a proper cabin for the captain. I built a false floor to cover the various wires, and added some furniture - a bed, shelf, table, chair and also a pot-bellied stove left over from another project. So now Captain Louie, the original master of the C.R. Lamb, has a place to hang his hat!
There is still some paint touch ups to do before adding the wheelhouse roof.
View attachment 393196View attachment 393197View attachment 393198View attachment 393199View attachment 393200View attachment 393203View attachment 393204
Regards, Peter
Thanks Peter. Not quite everything to scale. The "jug" on the shelf is actually a coffee mug I made for a 1:12 scale project!It’s all in the details! And you made some very nice small once.
Regards, Peter
Love the detail Carl. I hope you have the opportunity to put her on display at public model shows. People are always fascinated to see that models come to life on the inside as well as beautiful projects on the exterior.
Jim
Jim
Good morning Carl. Brilliant detail . The certificate is a really nice touch. Cheers GrantThe wheelhouse was not that complicated to assemble. There is an option of having the windows or some of them in an open or closed position. I opted for all of them being closed. I also added some extras, including a clock, a speaking tube, and a pin-up calendar. I even shrunk down Captain Louie's (the original owner and captain) Master's Certificate (which is reproduced in the instruction manual) and placed it on the wall, along with a travel poster. I also panelled the rear wall with wood strips.
Before gluing the wheelhouse to the deck, I fished through some of the remaining LED wires. There is also the Captain's quarters, a cabin located behind the wheelhouse. This cabin is unadorned and is meant as a place to store the various LED wires. However, since there are a few windows, I decided to turn this room into a proper cabin for the captain. I built a false floor to cover the various wires, and added some furniture - a bed, shelf, table, chair and also a pot-bellied stove left over from another project. So now Captain Louie, the original master of the C.R. Lamb, has a place to hang his hat!
There is still some paint touch ups to do before adding the wheelhouse roof.
View attachment 393196View attachment 393197View attachment 393198View attachment 393199View attachment 393200View attachment 393203View attachment 393204
Thanks for your kind comments. I do love working on the details. Even though the master's certificate is tiny and illegible, it does, I think, add a degree of authenticity.Good morning Carl. Brilliant detail . The certificate is a really nice touch. Cheers Grant
Hi Jim,Love the detail Carl. I hope you have the opportunity to put her on display at public model shows. People are always fascinated to see that models come to life on the inside as well as beautiful projects on the exterior.
Jim
Thanks!!! I would love to display this, as well as some of my other models. I see you are in Ontario...are you failiar with model shows here (I'm in Toronto).
I have attended some of the model shows in Toronto. Most of my ships are RC so I tend to go where the water is
I just have one RC boat - the Ulisses, a kit from Occre. It was a very satisfying build - first time using epoxy/fibreglass and first time installing RC. And, it hasn't sunk or capsized yet!!I have attended some of the model shows in Toronto. Most of my ships are RC so I tend to go where the water is
How do I find out about Model Shows in Toronto? is there a particular site?
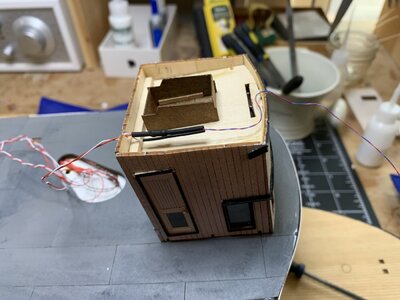
Completed the wheelhouse and the Captain's cabin. There is an option to have the wheelhouse roof removable, which I did. Since I furnished the captain's cabin with posters, furniture, etc.. I decided to also make this rood removable. The procedure was the same as the wheelhouse roof, but this was a bit trickier. There were more rafters to contend with and I spent a lot of time, adjusting the fit - sanding, filing, repositioning some of the rafters. The roof also had a slight bow, so I decided to add some thicker pieces (4mm x 4mm) of wood to the inside to even it out. In the end these weren't necessary since the distortion was eliminated once all the rafters had been glued on. For those building this kit, be aware that the funnel will eventually fit very close to the rear wall of the Captain's cabin. Yet, as per the instructions, the roof of this cabin is meant to extend a bit towards the rear. It may be that I didn't fit things exactly as they should, but, I had to trim off a bit of the roof at the rear to make sure that there would be adequate clearance for the funnel (see photo and arrow). Even with my trimming, the clearance is very tight. Also, if you make the roof removable, be aware that there are 2 funnel stays that are attached to this roof. I will likely have to move these and attach them laterally onto the deck.
I also decided to add an LED light to the newly-furnished Captain's cabin (this space is normally unadorned - mainly a place to store the excess wiring). I managed to weave a wire through the engine room and up through the funnel opening. I made a v-shaped gap in the opening to accommodate the wire. Then fed the wire through the back wall of the cabin.
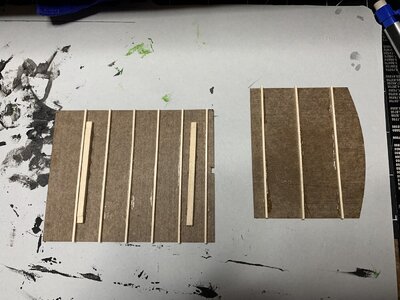
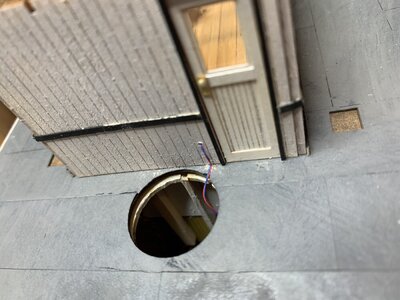
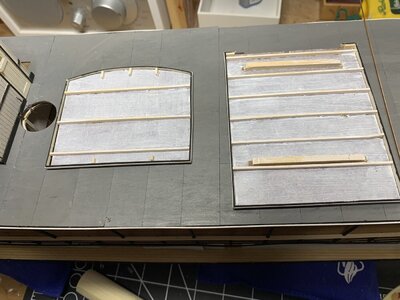
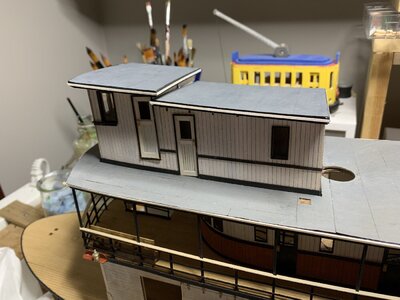
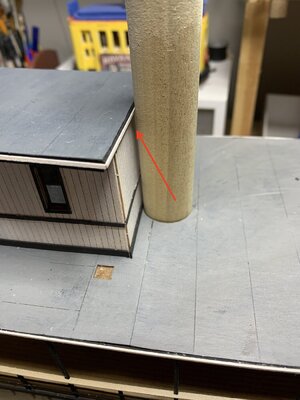
I also decided to add an LED light to the newly-furnished Captain's cabin (this space is normally unadorned - mainly a place to store the excess wiring). I managed to weave a wire through the engine room and up through the funnel opening. I made a v-shaped gap in the opening to accommodate the wire. Then fed the wire through the back wall of the cabin.


Carl, do a web search on Metro Marine Modelers. You will find the model boat club in Toronto which seems to be involved in all types of ship models and display events. If I was closer I would join that group, but I am over three hours away in the South West part of the province.
Jim
Jim
Yes, I actually found them online and have connected with them about sailing my RC boat. I just met a few of them last week, so I will also inquire into shows and display events. Thanks!Carl, do a web search on Metro Marine Modelers. You will find the model boat club in Toronto which seems to be involved in all types of ship models and display events. If I wasmy closer I would join that group, but I am over three hours away in the South West part of the province.
Jim
With the upper deck wheelhouse and captain's quarters attached, it was time to add the various funnels and stays. The instructions include some very fine wires as the stays. However with my shaky hands and the fact that these wires are very, very thin I decided instead to assemble the stays with some narrow black thread. I used small eyelets to fix these in place. The funnel also has some stays attached to the cabin roof. But since I made the roof removable it wasn't feasible to use this to anchor the stays. So I attached them instead to the deck just aft of the cabin. I know this departs from the norm, but I don't anticipate that my static model will ever face a strong wind to destabilize the funnel, so my approach should be fine.
The funnel is a wood dowel clad in thin black paper. There is also a conical structure formed from paper. Getting this into the correct conical shape was a real b***ch. Every time I tried it turned out misshapen. It took about 25 minutes before I could get it right and hold it long enough in the correct shape to glue it. I decided not to apply the paper to surround the funnel. The funnel was so tight against the removable roof that I didn't want to add any additional diameter to the funnel. A few coats of black paint seemed to work well.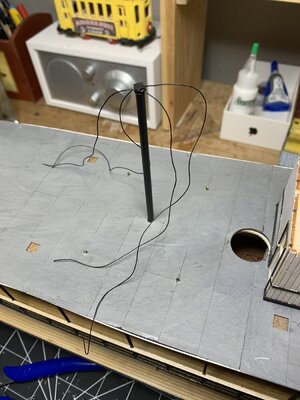
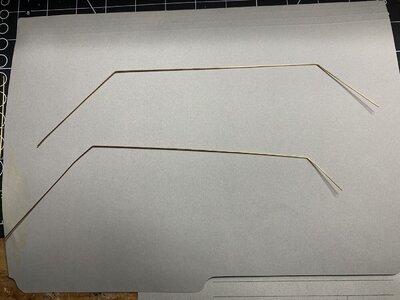
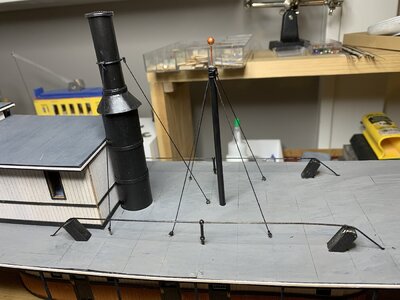
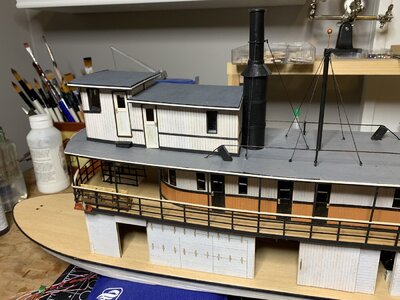
I also assembled the Queen posts and hog chains. The kit includes some wire for this, but it would have had to be assembled in sections. Instead I opted to use some 0.8 mm brass wire which I could insert in one long piece. This has to pass through the deck through 2 holes. I thought it would be easier if the wire was one piece - easier to push through the holes, maintain he correct angle, etc..
The funnel is a wood dowel clad in thin black paper. There is also a conical structure formed from paper. Getting this into the correct conical shape was a real b***ch. Every time I tried it turned out misshapen. It took about 25 minutes before I could get it right and hold it long enough in the correct shape to glue it. I decided not to apply the paper to surround the funnel. The funnel was so tight against the removable roof that I didn't want to add any additional diameter to the funnel. A few coats of black paint seemed to work well.


I also assembled the Queen posts and hog chains. The kit includes some wire for this, but it would have had to be assembled in sections. Instead I opted to use some 0.8 mm brass wire which I could insert in one long piece. This has to pass through the deck through 2 holes. I thought it would be easier if the wire was one piece - easier to push through the holes, maintain he correct angle, etc..
I worked on the paddle wheel. This was quite an involved set of steps. Assembling a form for the spokes, cutting out, painting and inserting the nuts and bolts. These were minuscule - 0.3 mm in diameter and 2.5 mm long. You will need a very fine set of tweezers to hold these things. It took an extra dose of my anti-shake meds to get through this! The set of instructions are very good with lots of illustrations for guidance. 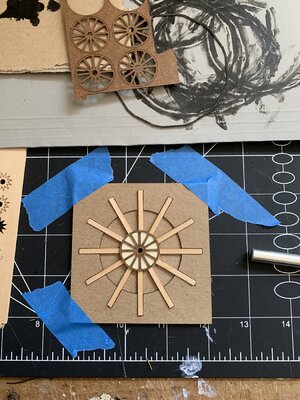
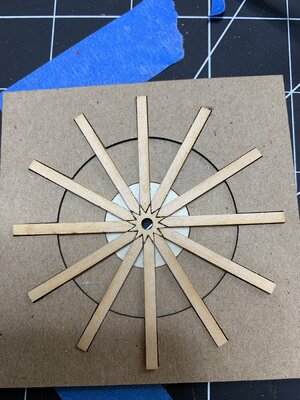
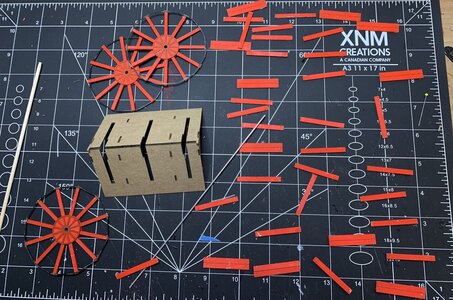
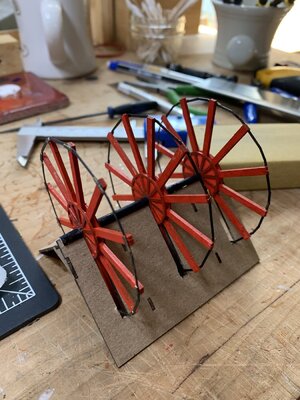
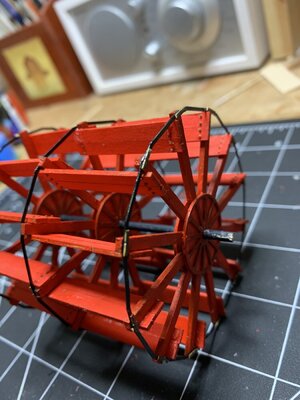
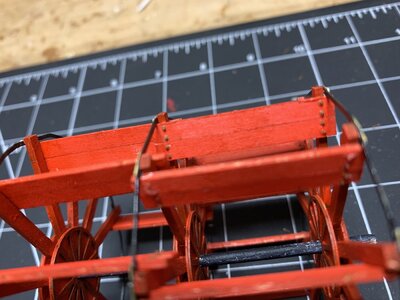


This really is a nice kit. Love the jigs that help you you keep everything in line on the paddle wheels.

