You are using an out of date browser. It may not display this or other websites correctly.
You should upgrade or use an alternative browser.
You should upgrade or use an alternative browser.
HMS Royal Caroline kit ZHL 1/30
- Thread starter Maarten
- Start date
- Watchers 111
-
- Tags
- royal caroline zhl
These "fake" joints are looking very good - nobody will recognize, that they are not "real"
- I made mine on the waterways of the Granado in the same way
- I made mine on the waterways of the Granado in the same way
Last edited:
- Joined
- Aug 8, 2019
- Messages
- 4,139
- Points
- 688

I did this in the keel of the HZ model. Those in the middle where fake too. you can't see the difference.These "fake" joints are looking very good - nobody will recognize, that they are not "real"
- I made mine on the waterways of the Granado in the same way
Thx gents for your comments and likes.
Cutting the joints works fine, the only thing is that the wood fibre pattern is continueing which is ofcourse different in reality.
Cutting the joints works fine, the only thing is that the wood fibre pattern is continueing which is ofcourse different in reality.
Maarten, what a beautiful crafted model. Amazed you could put it aside.
I couldn't resist to saw an Alert in two, that was the reason to put it aside but now again fully dedicated to my RC.Maarten, what a beautiful crafted model. Amazed you could put it aside.
The work currently is preparing the supports for the chain wales.
These are made of copper strip, no pewter castings in this kit but a lot of copper wire and strip that needs hammering and bending for these kind of details, that is what this kit makes such a lot of fun.
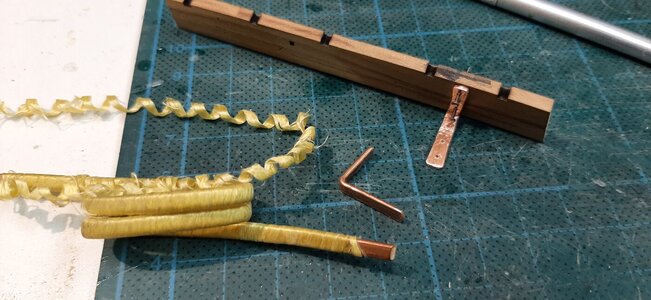
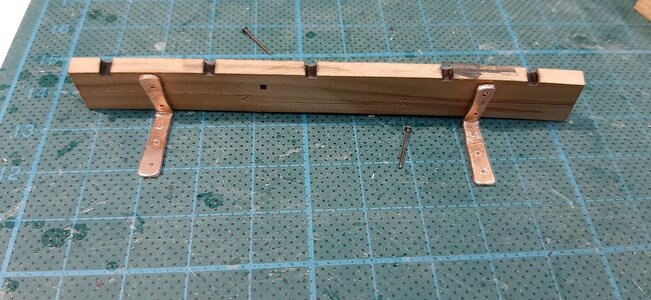
excellent work. 
Dear Maarten, do you still have an address of this local specialist? I feel we need more veneer as well...Last weekend I received my bag with a selection of small pieces of veneer. These I will use to veneer the wall panels of the large meeting room.
View attachment 47954
The packages are supplied by a local veneer specialist with pieces which are to small to use for furniture etc. Perfect for shipmodelling. On the picture you see just 10% of the veneers supplied.
The veneer I cut with an exacto knife. See the first start below.
View attachment 47955
View attachment 47956
The zebrano wood at the bottom will be part of the bench and partly covered with cloth.
Hi Alex,Dear Maarten, do you still have an address of this local specialist? I feel we need more veneer as well...
Thought I bought these from Arnhemse fijn houthandel
Continuation on the chain wales.
Additional support to the chain wale is done with some copper pins.
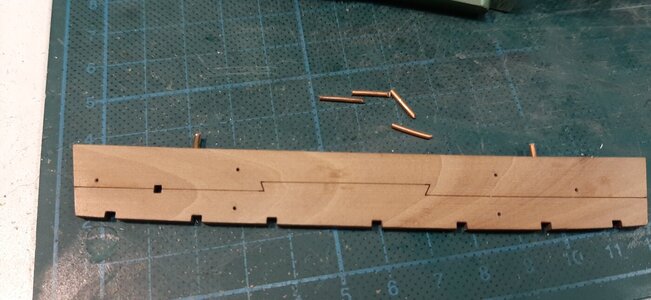
Dry fitting the fwd chain wale with copper pins.
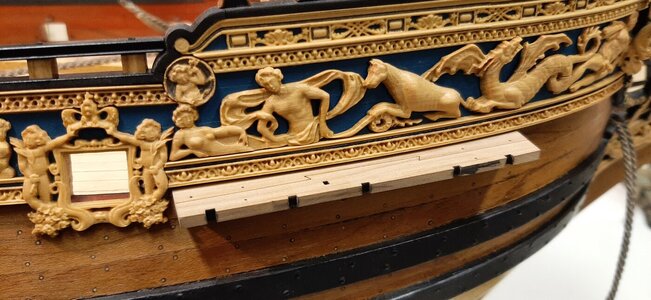
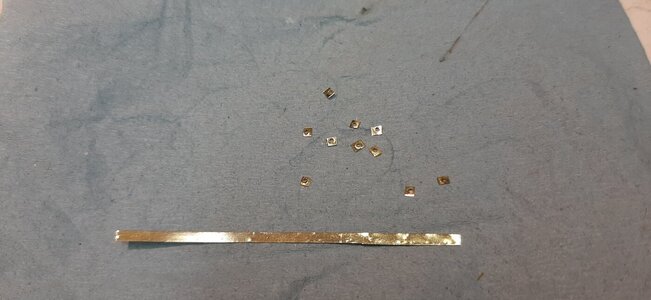
The chain wale supports I don t glue to the chain wale but I clench these. For this I make some washers in brass
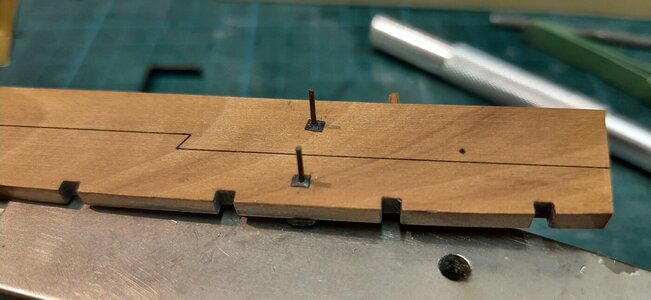
Nails are put through the support bracket, the chain wale and the washers.
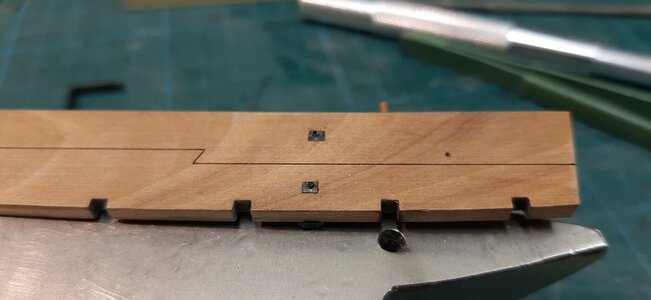
Then cut of at some 0,5 mm and hammered onto the washer. Now you have a sturdy clenched connection.
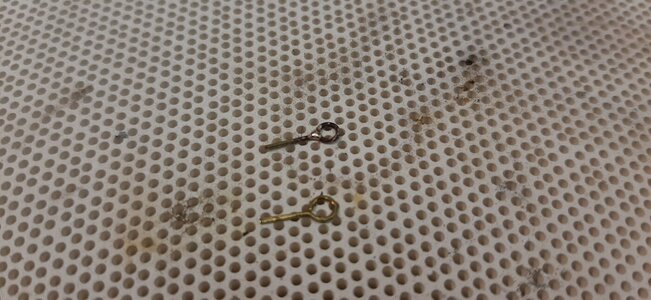
Additionally the ring bolts are made.
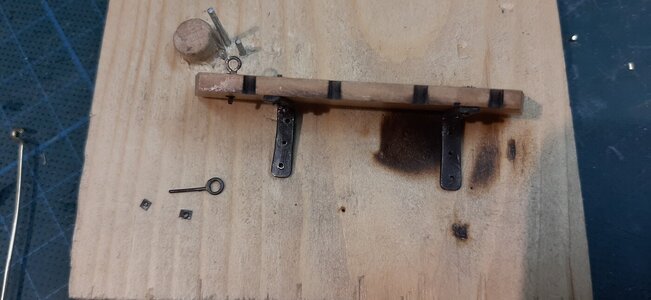
Finall dry fitting.
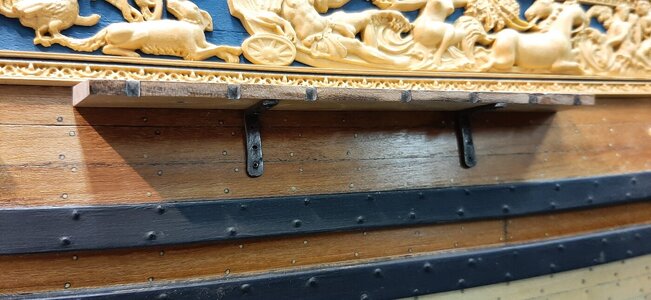
And glued in place.
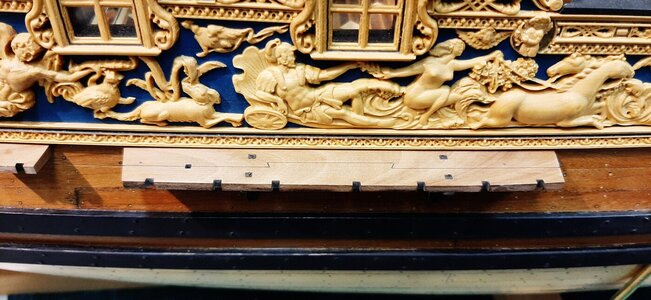
At last the bolts are fitted into the hull.
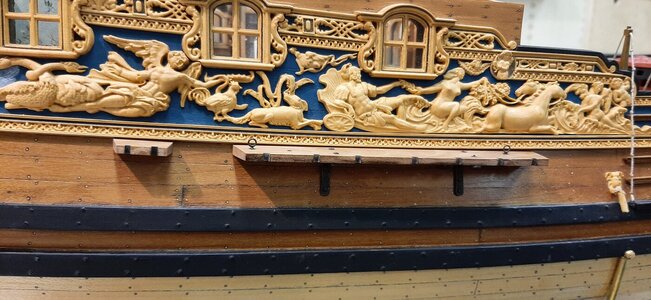
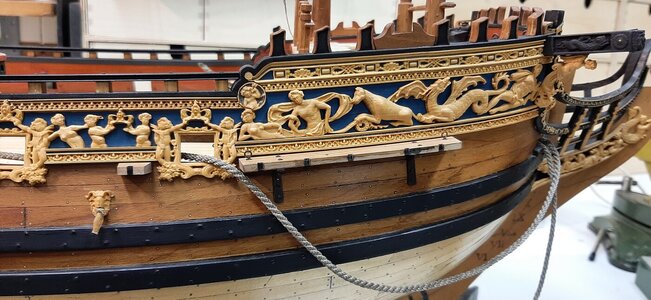
And all chain wales fitted.
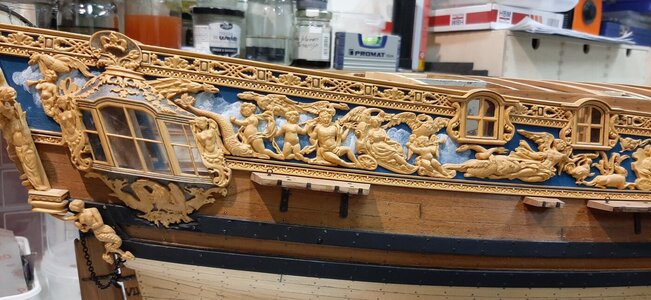
Next time deadeyes.
Additional support to the chain wale is done with some copper pins.

Dry fitting the fwd chain wale with copper pins.

The chain wale supports I don t glue to the chain wale but I clench these. For this I make some washers in brass

Nails are put through the support bracket, the chain wale and the washers.

Then cut of at some 0,5 mm and hammered onto the washer. Now you have a sturdy clenched connection.

Additionally the ring bolts are made.


Finall dry fitting.

And glued in place.

At last the bolts are fitted into the hull.
And all chain wales fitted.


Next time deadeyes.
I can't wait until I get to that point on my build. Looking goodContinuation on the chain wales.
Additional support to the chain wale is done with some copper pins.
View attachment 362958
Dry fitting the fwd chain wale with copper pins.
View attachment 362959
The chain wale supports I don t glue to the chain wale but I clench these. For this I make some washers in brass
View attachment 362957
Nails are put through the support bracket, the chain wale and the washers.
View attachment 362960
Then cut of at some 0,5 mm and hammered onto the washer. Now you have a sturdy clenched connection.
View attachment 362961
Additionally the ring bolts are made.
View attachment 362966
View attachment 362967
Finall dry fitting.
View attachment 362964
And glued in place.
View attachment 362963
At last the bolts are fitted into the hull.
And all chain wales fitted.
View attachment 362968
View attachment 362969
View attachment 362970
Next time deadeyes.
The bolts with washer are looking extremely good - I love this big scale, especially executed by you
It’s all about the details. And you know how to make them, Maarten. It looks very nice.Continuation on the chain wales.
Additional support to the chain wale is done with some copper pins.
View attachment 362958
Dry fitting the fwd chain wale with copper pins.
View attachment 362959
The chain wale supports I don t glue to the chain wale but I clench these. For this I make some washers in brass
View attachment 362957
Nails are put through the support bracket, the chain wale and the washers.
View attachment 362960
Then cut of at some 0,5 mm and hammered onto the washer. Now you have a sturdy clenched connection.
View attachment 362961
Additionally the ring bolts are made.
View attachment 362966
View attachment 362967
Finall dry fitting.
View attachment 362964
And glued in place.
View attachment 362963
At last the bolts are fitted into the hull.
And all chain wales fitted.
View attachment 362968
View attachment 362969
View attachment 362970
Next time deadeyes.
Regards, Peter
Thx gents for all your comments and likes.
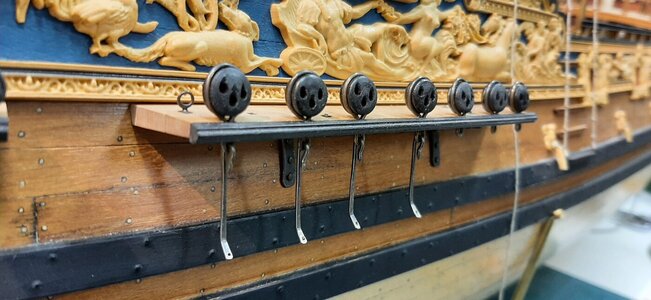
The work continues with the deadeyes.
First of all the dead eyes are sanded, shaped and coloured with black ecoline before adding a layer of Clou.
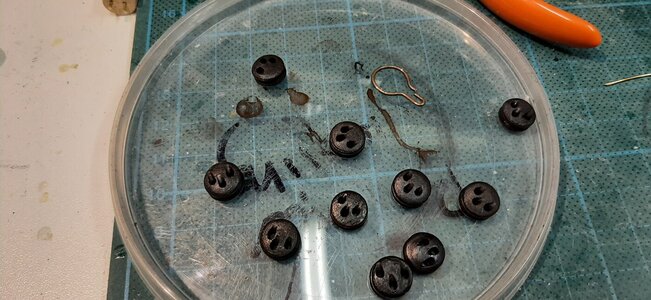
The deadeye is fitted to the chainwale with an iron strap, in this case made of 1 mm brass wire.
To shape the brass easily I first heat it up till it glows red, cool it down at ambient temperature and the brass becomes soft.
Then it can be shaped easily.
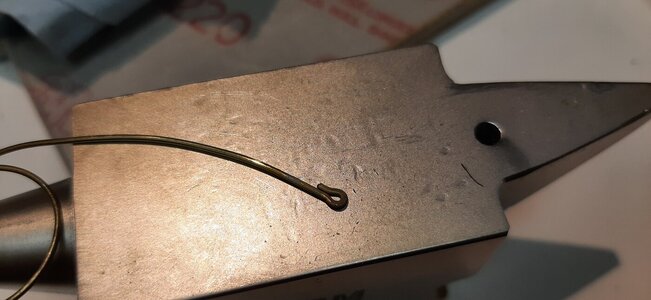
Bent it around a template.
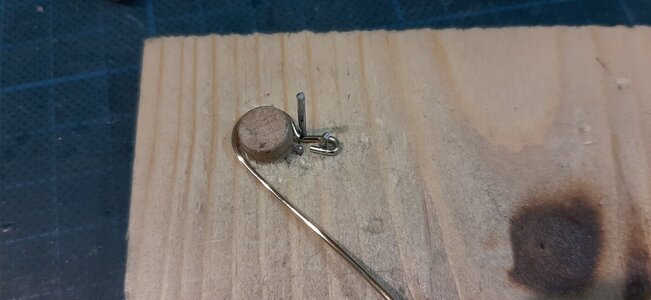
And voila.
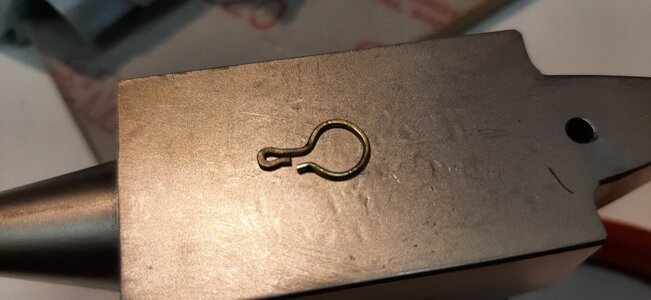
This strap is burnished before pressing it around the deadeye and fit it in place.
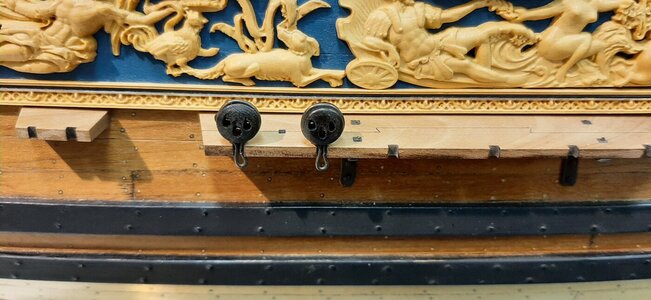
All dead eyes of the main chainwale fitted.
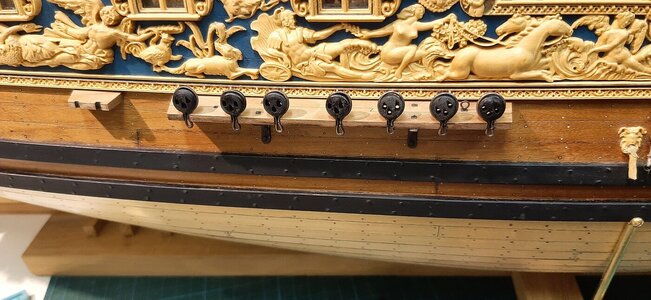
The same process is followed for the deadeye chain link to attach it to the hull.
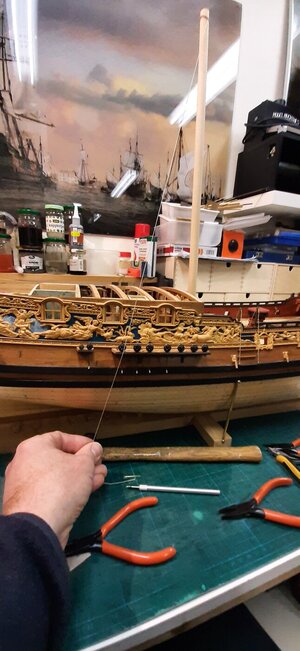
The angle of the chain link I determine with a rope from the top of the mast along the chainwale.
And fit it in place with a bolt.
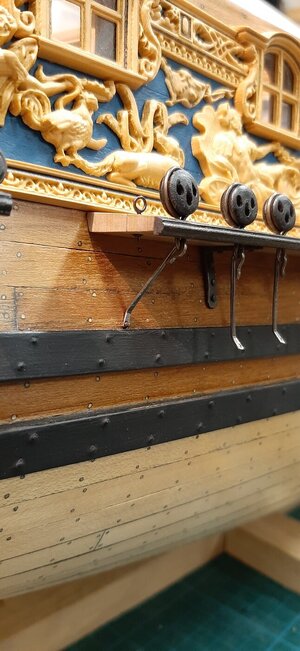
All at slightly different angles.
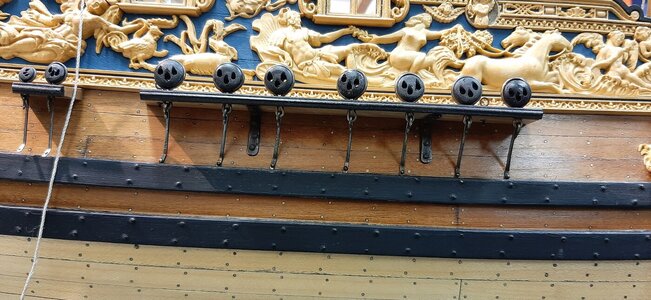
For the stayes there are separate deadeyes with a single chain link.
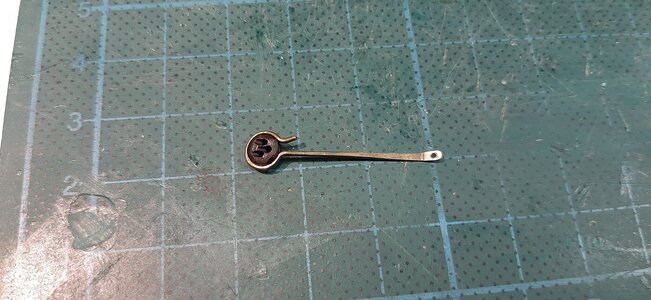
The are fitted through the chainwale and at a different angle as these support ropes higher up the mast.
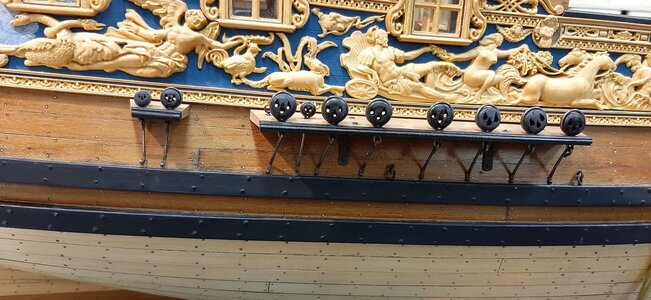
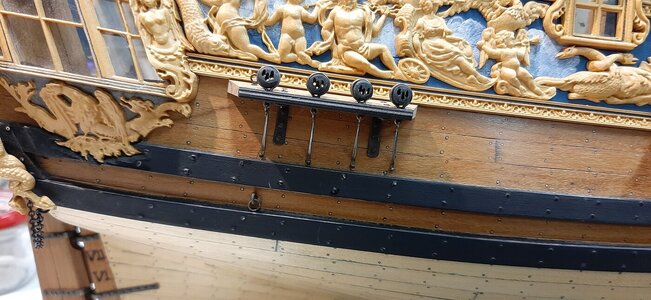
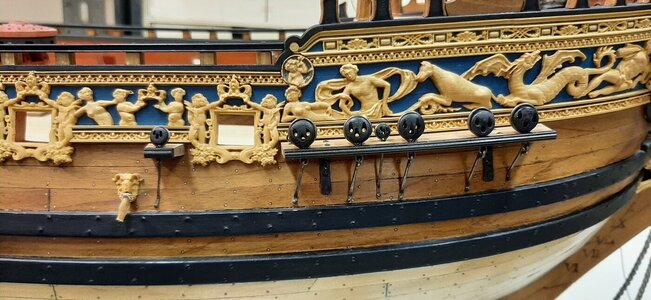
All chainwales are now finished.
The work continues with the deadeyes.
First of all the dead eyes are sanded, shaped and coloured with black ecoline before adding a layer of Clou.

The deadeye is fitted to the chainwale with an iron strap, in this case made of 1 mm brass wire.
To shape the brass easily I first heat it up till it glows red, cool it down at ambient temperature and the brass becomes soft.
Then it can be shaped easily.

Bent it around a template.

And voila.

This strap is burnished before pressing it around the deadeye and fit it in place.

All dead eyes of the main chainwale fitted.

The same process is followed for the deadeye chain link to attach it to the hull.

The angle of the chain link I determine with a rope from the top of the mast along the chainwale.

And fit it in place with a bolt.

All at slightly different angles.

For the stayes there are separate deadeyes with a single chain link.

The are fitted through the chainwale and at a different angle as these support ropes higher up the mast.

All chainwales are now finished.


I guess that will be fine if you’re willing to accept perfection.Thx gents for all your comments and likes.
The work continues with the deadeyes.
First of all the dead eyes are sanded, shaped and coloured with black ecoline before adding a layer of Clou.
View attachment 363138
The deadeye is fitted to the chainwale with an iron strap, in this case made of 1 mm brass wire.
To shape the brass easily I first heat it up till it glows red, cool it down at ambient temperature and the brass becomes soft.
Then it can be shaped easily.
View attachment 363140
Bent it around a template.
View attachment 363139
And voila.
View attachment 363141
This strap is burnished before pressing it around the deadeye and fit it in place.
View attachment 363142
All dead eyes of the main chainwale fitted.
View attachment 363143
The same process is followed for the deadeye chain link to attach it to the hull.
View attachment 363144
The angle of the chain link I determine with a rope from the top of the mast along the chainwale.
View attachment 363145
And fit it in place with a bolt.
View attachment 363146
All at slightly different angles.
View attachment 363147
For the stayes there are separate deadeyes with a single chain link.
View attachment 363148
The are fitted through the chainwale and at a different angle as these support ropes higher up the mast.
View attachment 363149
All chainwales are now finished.
View attachment 363150
View attachment 363151
Hi Paul, guess you are talking about your own workI guess that will be fine if you’re willing to accept perfection.
Fantastic work Maarten, looks like a million dollars,
Best regards John,
Best regards John,


 Great to see you back on the RC, Maarten!


